-
Notifications
You must be signed in to change notification settings - Fork 3
Expand file tree
/
Copy path_history
More file actions
1 lines (1 loc) · 252 KB
/
Copy path_history
File metadata and controls
1 lines (1 loc) · 252 KB
1
{"entries":[],"snapshots":[{"timestamp":1695912068577,"editorVersion":"1.7.13","text":{"Lesson1/1.1/1.1.9.md":"# Expert Coding using JavaScript - Lesson 1.1.9\n### @explicitHints true\n\n\n## Step 1 @unplugged\n\nThere are times when we might not know the value we want to set a variable to until the game is being played or change the value of a variable during the game. For example, you might want to change your score or your name during the game.\n\nWhen responding to a chat command event we can add **arguments** to pass variable values in when running the command.\n\nWhen we talk about arguments in JavaScript, we're talking about **values that we pass into a function.** A function is like a set of instructions that we can reuse over and over again. **We pass in arguments to a function to give it different inputs,** and then the function can do something with those inputs and give us an output.\n\n## Step 2\n\nTo practice this, we are going to use an on chat command to run the code. We will add a chat command which allows us to jump a number of blocks on the Y axis - the number of blocks to be jumped can be provided during the game.\n\nTo code a chat command, type the following code. \n\n player.onChat(\"\", function () {\n })\nIn the space below, type an on chat command with the word jump inside the quotation marks. \n\n#### ~ tutorialhint\n\n```javascript\nplayer.onChat(\"jump\", function () {\n\n})\n\n```\n\n## Step 3\n\nTo add an argument the on chat command, type the variable name in the parentheses next to the word function. We are going to use a variable called Y. Type Y in the parentheses following the word function. \n#### ~ tutorialhint\n\n```javascript\nplayer.onChat(\"jump\", function (Y) {\n\n})\n\n```\n\n## Step 4\n\nNext, we want to add to the code what we want to happen when the code runs. We want the player to jump to the Y position that the argument will set. First, add the player teleport code into the chat command (between the curly brackets). Then change the Y coordinate to the variable Y. \n\nThe player teleport code is \n\n player.teleport(pos(0, 0, 0))\n \n#### ~ tutorialhint\n\n```javascript\nplayer.onChat(\"jump\", function (Y) {\n\nplayer.teleport(pos(0, Y, 0))\n\n})\n```\n\n## Step 5\n\nIn this activity, we chose a variable that we have not yet declared. \nIf we would have chosen an existing variable the value of that variable would have been set to the value provided in the chat command. However, because we chose a new variable, we will need to add the value in the chat command when we run the code. Follow the instructions on the next step to test the code. \n\n## Step 6 @unplugged\n\nTo test your code:\nOnce you have fully read this step click the Green Ok button below to close this window to return to the tutorial to perform the below steps to test your code.\n\n1. Click on the **Green Start button** below to return to the game.\n\n \n\n\n\n2. Move down the stairs into the jump area. \n1. Open the chat by pressing the letter T on your keyboard. \n2. Type jump 10. \n3. Your player should jump 10 blocks into the air and return to the ground. \n4. You can try other arguments by trying different numbers after the word jump in the chat. (Don't go more than 29 or you will leave the jump zone.)\n5. Return to the tutorial by pressing the C key on your keyboard or tapping the Agent icon on your screen when finished.\n\n## Step 7\n\nFollow the instructions in the previous step to test your code.\n\nWhen your code works as expected mark yourself complete and move on to the Next NPC.\n\nIf it does not work as expected, try to fix and test again.\n\n","Lesson1/1.2/1.2.2.md":"\n\n\n**Converting Variables Activity 1**\n### @explicitHints true\n\n \n\n## Step 1\n\n \n\nIn this activity, you are going to practice converting variables explicitly. Using the template below, convert the number 18 to a string by filling in the empty spaces.\n```template\nlet str = ()\nplayer.say(str)\n\n\n\n```\n#### ~ tutorialhint\n\n```javascript\n\n \n\nlet str=String(18)\nplayer.say(str)\n\n \n\n```\n\n \n\n## Step 2 @unplugged\nNext, continue on to test your code, then come back to complete another conversion\n\n \n\n \n\n## Step 3 @unplugged\n\n \n\nTo test your code:\n\n \n\nOnce you have fully read this step click the Green Ok button below to close this window to return to the tutorial to perform the below steps to test your code.\n\n \n\n1. Click on the **Green Start button** below to return to the game.\n\n \n\n\n\n \n\n2. You should see your player say \"18\", to show the number has been converted to a string\n\n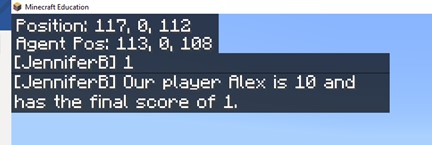\n\n3. Return to the tutorial by pressing the C key on your keyboard or tapping the Agent icon on your screen when finished.\n\n \n\n## Step 4\n\n \n\nFollow the instructions in the previous step to test your code.\n\nIf it does not work as expected, try to fix and test again, then come back to the tutorial by pressing \"C\" on your keyboard.\n\n## Step 5\nNow we will see how JavaScript automatically converts many variables using implicit type conversions. Remember, these conversions happen automatically when the variables being converted fit the right types for implicit conversion. Let's practice the concatenation of a string and a number, which are two different variables. \n\n## Step 6\n\nIn the space below, create a variable called \"result\", followed by an \"=\" sign. \n\n#### ~ tutorialhint\n\n```javascript\n\n \nlet result =\n\n\n```\n\n## Step 7\n\nAfter the equal sign, add together a string named 'Hello' and the number 18. Next, add a new line with a player.say command, to let the player.say (result).\n#### ~ tutorialhint\n\n```javascript\n\n \n\nlet result = \"Hello \" + 42\nplayer.say(result)\n\n\n```\n\n## Step 8 @unplugged\n\n \n\nTo test your code:\n\n \n\nOnce you have fully read this step click the Green Ok button below to close this window to return to the tutorial to perform the below steps to test your code.\n\n \n\n1. Click on the **Green Start button** below to return to the game.\n\n \n\n\n\n \n\n2. You should see your player say \"Hello 18\" to show the number is automatically converted to a string using implicit type conversions.\n\n\n\n3. If your code is correct, return to the NPC to mark yourself as complete. \n","Lesson1/1.1/1.1.8.md":"# Expert Coding using JavaScript - Lesson 1.1.8\n### @explicitHints true\n\n## Step 1\n\nIn this activity, you are going to practice creating variables for your code. First, create 3 variables. The first will be for playerAge and have a number value of 10. The second will be for score and the value equals 0. The third will be playerName and set to the string Alex. \n#### ~ tutorialhint\n```javascript\n\nlet playerAge = 10\nlet score = 0\nlet playerName = \"Alex\"\n\n```\n\n## Step 2\n\nNext, add to the code by creating a variable called extraPoint and assign it the value of 1. Then use the athematic operator to create a variable called finalScore that adds the score and the extraPoint. And have the player say the finalScore. \n\n#### ~ tutorialhint\n```javascript\nlet playerAge = 10\nlet score = 0\nlet playerName = \"Alex\"\nlet extraPoint = 1\nlet finalScore = score + extraPoint\nplayer.say(finalScore)\n```\n\n## Step 3\n\nAdd to your previous code and create a variable message that uses the format string method to say this sentence when it is run \"Our playerAlex is 10 and has the final score of 1.\" Then have the player say the message. \n\n#### ~ tutorialhint\n```javascript\nlet playerAge = 10\nlet score = 0\nlet playerName = \"Alex\"\nlet extraPoint = 1\nlet finalScore = score + extraPoint\nplayer.say(finalScore)\nlet message = `Our player ${playerName} is ${playerAge} and has the final score of ${finalScore}.` \nplayer.say(message)\n```\n\n## Step 4\n\nRun the code by following the instructions in the next step. \n\n## Step 5 @unplugged\n\nTo test your code:\n\nOnce you have fully read this step click the Green Ok button below to close this window to return to the tutorial to perform the below steps to test your code. \n\n1. Click on the **Green Start button** below to return to the game.\n\n\n\n2. You should see your player say \"1\" and then \"Alex is 10 and has the final score of 1.\" \n\n3. Return to the tutorial by pressing the C key on your keyboard or tapping the Agent icon on your screen when finished.\n\n## Step 6\n\nFollow the instructions in the previous step to test your code.\nWhen your code works as expected mark yourself complete and do the next activity. \n\nIf it does not work as expected, try to fix and test again.","Lesson1/1.1/1.1.7.md":"# Expert Coding using JavaScript - Lesson 1.1.7\n### @explicitHints true\n\n## Step 1 @unplugged\nA Boolean variable in JavaScript is a variable that can only hold one of two values: **'True' or 'False'.** These values are used to represent the logical concepts of true and false, respectively. Boolean Variables are often used in control statements such as 'if' statements, 'while' loops, and 'for' loops to **make decisions based on whether a condition is true or false.** \n\nFor example, the following code used a Boolean variable 'is_raining' to decide whether or not to bring an umbrella. \n\n let is_raining = true\n if (is_raining) {\n\t player.say(\"It's raining. You should bring an umbrella.\")\n\t} else {\n\t\tplayer.say(\"It's not raining. You don't need an umbrella.\")\n\t\t}\n\nThe code above would result in the player saying \"It's raining. You should bring an umbrella.\" This is because the variable is_raining is set to true. \n\nBoolean variables can also be combined using logical operator such as 'and', 'or;, and 'not' to create more complex conditions. We will look at these down the line.\n\n## Step 2\n\nIn the space below, we have started the code for you to create a Boolean variable that tests for sunlight. Complete the code to say If sunny weather is true, the player will say 'What a nice day' else the player will say 'Let's stay inside today.'\n```template\n let is_sunny = \n if () {\n\t player.say(\"\")\n\t} else {\n\t\tplayer.say(\"\")\n\t\t}\n```\n\n#### ~ tutorialhint\n\n```javascript\n let is_sunny = true\n if (is_sunny) {\n\t player.say(\"What a nice day\")\n\t} else {\n\t\tplayer.say(\"Let's stay inside today\")\n\t\t}\n```\n\n## Step 3 @unplugged\nNow run the code by clicking the **green start button** in the bottom right of the MakeCode screen. \n\n\n\nYou will know your code is correct when you see the text \"What a nice day\" appear on your screen. \n\nWhen your code works as expected move on to the next activity. \n\n## Step 4\n\nIf it does not work as expected, try to fix and test again.\n\nNow that you have learned about variables, continue to the next NPC to practice using them in code. \n","Lesson1/1.1/1.1.6.md":"# Expert Coding using JavaScript - Lesson 1.1.6\n### @explicitHints true\n\n## Step 1 @unplugged\n\nFormatting strings in JavaScript means **creating a new string that includes variables, constants or expressions in a specific format.** This is often used to display information to the user in a more readable way, or to construct complex strings by combining different pieces of information.\n\nIn JavaScript, we can format strings using template literals. A template literal is a **string enclosed in backticks ( `` ) that can contain placeholders for variables, constants or expressions using the '${}' syntax.**\nLook at the code below and predict what the player will say then run the code to check to see if your prediction was correct. \n\n\n let name = \"John\"\n let age = 16 \n let message = `My name is ${name} and I am ${age} years old.` \n player.say(message)\n\n\n## Step 2\n\nYou should have predicted that the player would say 'My name is John and I am 16 years old.'\nNow you write code enclosed in backticks (this can often be found on the key on the keyboard above the tab key) that uses the '${}' syntax and it formats a string that combines the variables of playerName and playerScore and has the player say the string you created. \nFirst, declare a variable called playerName and assign it the value of Jennifer. Then declare a variable with the name playerScore with the value of 10. \n\n #### ~ tutorialhint\n```javascript\n let playerName = \"Jennifer\"\n let playerScore = 10\n \n \n```\n\n## Step 3\nNext, declare a variable named message and give it the value of the sentence \"My name is playerName and my score is playerScore\" where the variable names are in the ${} syntax. \n\n #### ~ tutorialhint\n```javascript\n let playerName = \"Jennifer\"\n let playerScore = 10\n let message = `My name is ${playerName} and my score is ${playerScore}.` \n \n \n```\n\n## Step 4\nLastly, have the player say the message. \n\n #### ~ tutorialhint\n```javascript\n let playerName = \"Jennifer\"\n let playerScore = 10\n let message = `My name is ${playerName} and my score is ${playerScore}.` \n player.say(message)\n \n```\n\n## Step 5 @unplugged\nNow run the code by clicking the **green start button** in the bottom right of the MakeCode screen. \n\n\n\nYou will know your code is correct when you see the sentence 'My name is Jennifer and my score is 10.' \n\n\n## Step 6\n\nWhen your code works as expected move on to the next activity. \n\nIf it does not work as expected, try to fix and test again.\n\n\n\n","Lesson1/1.1/1.1.5.md":"# Expert Coding using JavaScript - Lesson 1.1.5\n### @explicitHints true\n\n## Step 1\n\nYou can perform various operations on string variables, such as concatenation, slicing, and formatting. **Concatenation is the process of combining two or more strings into a single string.** In JavaScript, you can use the \"+\" operator to concatenate strings. Let's create a code that uses concatenation to combine 2 variables. \nFirst, create a variable with the name firstName and assign it the value of your first name. \n\n #### ~ tutorialhint\n\n```javascript\n let firstName = \"Jennifer\"\n\n```\n\n## Step 2\nNext, create a variable with the name lastName and assign it the value of your last name. \n\n #### ~ tutorialhint\n\n```javascript\n let firstName = \"Jennifer\"\n let lastName = \"Brown\"\n \n```\n\n\n## Step 3\n\nCreate a variable called fullName and use a concatenation string to concantenate your first name and your last name with a space in the middle. (Note... for the space, use \" \" as the string. \n\n #### ~ tutorialhint\n\n```javascript\n let firstName = \"Jennifer\"\n let lastName = \"Brown\"\n let fullName = firstName + \" \" + lastName \n \n```\n\n## Step 4\n\nLastly, have the player say your first and last name by saying the variable fullName. \n\n #### ~ tutorialhint\n\n```javascript\n let firstName = \"Jennifer\"\n let lastName = \"Brown\"\n let fullName = firstName + \" \" + lastName \n player.say(fullName)\n```\n\n## Step 5 @ unplugged\n\nNow run the code by clicking the **green start button** in the bottom right of the MakeCode screen. \n\n\n\nYou will know your code is correct when you see your full name appear on your screen. \n\n## Step 6\n\nWhen your code works as expected move on to the next activity. \n\nIf it does not work as expected, try to fix and test again.","Lesson1/1.1/1.1.4.md":"# Expert Coding using JavaScript - Lesson 1.1.4\n### @explicitHints true\n\n## Step 1 @unplugged\nIn JavaScript, a string is a **sequence of characters enclosed in quotes** (either single or double quotes). Strings are a common type of data used in programming, especially for text-based applications.\n String Variables are a fundamental part of JavaScript programming, and understanding how to work with them is essential for many applications. \n To create a string variable in JavaScript, you simply **assign a string value to a variable name.**\n For example:\n\n let playerName = \"Steve\"\n player.say(playerName)\n\n## Step 2\n\nLet's practice creating string variables. \nDeclare a variable for playerName with your name as the string. \n\n#### ~ tutorialhint\n\n```javascript\nlet playerName = \"Jennifer\"\n\n```\n\n## Step 3\n\nNext, Have the player say the playerName.\n\n#### ~ tutorialhint\n\n```javascript\nlet playerName = \"Jennifer\"\nplayer.say(playerName)\n\n```\n\n## Step 4 @unplugged\nNow run the code by clicking the **green start button** in the bottom right of the MakeCode screen. \n\n\n\nYou will know your code is correct when you see your name appear on your screen. \n\n## Step 5\n\nWhen your code works as expected move on to the next activity. \n\nIf it does not work as expected, try to fix and test again.","Lesson1/1.1/1.1.md":"# Expert Coding using JavaScript - Lesson 1 Activity 1.1\n### @explicitHints true\n\n## Step 1 @unplugged\n\nIn JavaScript, a variable is a name that represents a **value**. You can think of it as a container that holds a specific piece of data. Variables can hold many types of data, such as: numbers, strings (text), booleans, and more. To create variables in JavaScript, first you need to **declare the variable.** In MakeCode, we use the the word **let** to declare the variable. Then you need to **give the variable a name.** \n\nWhen naming variables, you need to keep the following in mind.\n\n - Variables can only start with a **letter, a dollar sign ($) or an underscore (_).** \n - Variables are **case sensitive** (ex: if you capitalize a letter, you must capitalize it every time you use that variable)\n - Variables can only have **numbers, letters, the dollar sign, and the underscore character.**\n - Your variable should be named something that **reflects what your variable represents.** \n - JavaScript keywords **cannot** be used as a variable name. \n\nAfter giving the variable a name you must **assign a value to it using the \"=\" operator.**\nFor example:\n\n let playerage = 13\n\n## Step 2\nFor our variable activities, we will have use the code **say(message)** to make the player say the message and it will appear on your screen. The code to make your player say the message is below. \n\n\n player.say(message)\n\n\n\n## Step 3\nLet's create a **number variable** for the number of lives a player starts with in and have the player say the number of lives. \nA number variable is used to represent numeric values such as integers, decimals, and fractions. Number variables are a common type of data used in programming, especially for calculating numbers. To create an number variable in JavaScript, you assign a number to a variable name using the = sign.\n\nBelow, declare the variable gameLives and assign it the value of 5. \n\n#### ~ tutorialhint\n\n```javascript\n\nlet gameLives = 5\n\n```\n\n\n## Step 4\nNext, add the code to have the player say the variable gameLives. \n \n#### ~ tutorialhint\n\n```javascript\n\nlet gameLives = 5\nplayer.say(gameLives)\n\n```\n\n## Step 5 @unplugged\nNow run the code by clicking the **green start button** in the bottom right of the MakeCode screen. \n\n\n\nYou will know your code is correct when you see the text 5 appear on your screen. \n\n\n\n## Step 6\nIf your code worked as expected move on to the next activity. \n\nIf it does not work as expected, try to fix and test again.","Lesson1/1.1/1.1.2.md":"# Expert Coding using JavaScript - Lesson 1 Activity 1.1.2\n### @explicitHints true\n\n## Step 1\n\nYou can perform various operations with number variables such as arithmetic operations, comparison operations, and more. **Arithmetic operations include addition (+), subtraction (-), multiplication (*), division (/), and modulus (/) (remainder).**\nLet's build a code using the addition operator. \nFirst, declare a variable named score and assign it the value of 0. \n\n#### ~ tutorialhint\n\n```javascript\n let score = 0\n\n```\n\n## Step 2\nNow create a variable called playerScore and assign it the value of 1. \n\n#### ~ tutorialhint\n\n```javascript\n let score = 0\n let playerScore = 1\n\n```\n\n## Step 3\nNext create a variable called finalScore that adds the gamePoint variable and extraPoint variable. Have the player say the finalScore.\n\n#### ~ tutorialhint\n\n```javascript\n let score = 0\n let playerScore = 1\n let finalScore = score + playerScore\n \n```\n\n## Step 4\nFinally have the player say the finalScore. \n\n#### ~ tutorialhint\n\n```javascript\n let score = 0\n let playerScore = 1\n let finalScore = score + playerScore\n player.say(finalScore)\n```\n\n## Step 5 @unplugged\nNow run the code by clicking the **green start button** in the bottom right of the MakeCode screen. \n\n\n\nYou will know your code is correct when you see the text 1 appear on your screen. \n\n\n\n## Step 6\nIf your code worked as expected move on to the next activity. \n\nIf it does not work as expected, try to fix and test again.","Lesson1/1.1/1.1.3.md":"# Expert Coding using JavaScript - Lesson 1 Activity 1.1.3\n### @explicitHints true\n\n## Step 1 @unplugged\nComparison operations include checking if one integer is **equal to** (==), **greater than** (>), **less than** (<), **greater than or equal to** (>=), or **less than or equal to** (<=) another integer. \nIn JavaScript you can use comparison operators to perform these operations with your variables. \nMany times you use comparison operators in If statements to compare variables. (You will learn more about If statements in the next lesson.)\n Here is an example of a comparison operator inside an if statement below. \n\n let gameAge = 13\n let playerAge = 14\n if (playerAge >= gameAge) {\n\t player.say(\"You can play\")\n\t }\n\n\n## Step 2\nBelow, we have provided you with the start of a code. Fill in the code to create a variable using the comparison operators of greater than or equal to that compares the scores of player1 (score of 7) and player2 (score of 5). Have the player say \"Player 1 wins!\" if the conditional is true. \n\n```template\n let = \n let = \n if () {\n\t player.say()\n\t }\n```\n\n#### ~ tutorialhint\n\n```javascript\n let player1 = 7\n let player2 = 5\n if (player1 >= player2) {\n\t player.say(\"Player 1 wins!\")\n\t }\n```\n\n## Step 3 @ unplugged\n\nNow run the code by clicking the **green start button** in the bottom right of the MakeCode screen. \n\n\n\nYou will know your code is correct when you see the text \"Player 1 wins!\" appear on your screen. \n\n\n## Step 4\nWhen your code works as expected move on to the next NPC to continue learning about variables. \n\nIf it does not work as expected, try to fix and test again.\n\n","Lesson1/1.2/1.2.md":"## Variable Conversions\n \n **Step 1** \nIn JavaScript, you can convert a variable from one type to another using **type conversion functions**. The most commonly used conversion functions are: \n- `parseInt()`: Converts a string to an integer.\n- `parseFloat()`: Converts a string to a floating-point number.\n- `Number()`: Converts a value to a number.\n- `String()`: Converts a value to a string.\n- `Boolean()`: Converts a value to a boolean.\n\n**Step 2**\nJavaScript uses two types of type conversions: **implicit and explicit**. \nImplicit types conversions(coercion) is where JavaScript automatically converts a value from one data type to another, without the need for someone to make the change themselves. For example, we learned in the last lesson that the \"+\" operator can be used in both string concatenation, and addition of numbers, so when you use the \"+\" operator with both a string and a number, JavaScript will convert the number to a string. \n\nFor Example:\n\n**Concatenation of string and number**\nEnter the code below and take note of the output. \n\n let result= \"Hello\" + 35\n player.say(result)\n \n **Step 3** \n \n **Addition of a string and number**\n Enter the code below and take note of the output. \n \n let sum = \"3\" + 5\n player.say(sum)\n //output 35\n\n**Step 4**\n\nExplicit Type Conversion (type casting) is where you explicitly convert one data type to another using functions or operators, so you can ensure a specific data type before using that value.\n\nFor Example:\n\n**Convert a string to a number**\n\n ```javascript \n let num= parseInt(\"35\")\n player.say(num)\n\n**Convert a number to a string**\n\n let str= String(35)\n player.say(str)\n\n**Convert a Boolean to a string**\n\n let bool= true;\n player.say(str)\n\n**Convert a string to a Boolean**\n\n let bool2= Boolean(\"Hello\")\n player.say(bool2)\n\n**Step 5**\nIn the space below, practice converting a number of your choice to a string, and say the answer in the chat.\n\n\n\n\n","README.md":"\n> Open this page at [https://codinginminecraft.github.io/coding-in-minecraft-expert-javascript/](https://codinginminecraft.github.io/coding-in-minecraft-expert-javascript/)\n\n## Use as Extension\n\nThis repository can be added as an **extension** in MakeCode.\n\n* open [https://minecraft.makecode.com/](https://minecraft.makecode.com/)\n* click on **New Project**\n* click on **Extensions** under the gearwheel menu\n* search for **https://github.com/codinginminecraft/coding-in-minecraft-expert-javascript** and import\n\n## Edit this project \n\nTo edit this repository in MakeCode.\n\n* open [https://minecraft.makecode.com/](https://minecraft.makecode.com/)\n* click on **Import** then click on **Import URL**\n* paste **https://github.com/codinginminecraft/coding-in-minecraft-expert-javascript** and click import\n\n## Blocks preview\n\nThis image shows the blocks code from the last commit in master.\nThis image may take a few minutes to refresh.\n\n\n\n#### Metadata (used for search, rendering)\n\n* for PXT/minecraft\n<script src=\"https://makecode.com/gh-pages-embed.js\"></script><script>makeCodeRender(\"{{ site.makecode.home_url }}\", \"{{ site.github.owner_name }}/{{ site.github.repository_name }}\");</script>\n","main.blocks":"<xml xmlns=\"https://developers.google.com/blockly/xml\"><block type=\"minecraftOnChat\" id=\"j@KSt9^6l,G6f)[{4xh0\" x=\"0\" y=\"0\"><mutation xmlns=\"http://www.w3.org/1999/xhtml\" numargs=\"0\"></mutation><value name=\"command\"><shadow type=\"text\" id=\"(/R{DJ@Q*;G[`1ceN0@Q\"><field name=\"TEXT\">run</field></shadow></value></block></xml>","main.ts":"player.onChat(\"run\", function () {\n\t\n})\n","Lesson2/2.1/2.1.md":"## Step 1 @unplugged\n\nIn JavaScript, operators are keywords or symbols that are used to perform various operations on values. These operations include performing arithmetic operations, assigning values, comparing values, and more!\nThe most common operations in JavaScript are:\n1. Arithmetic Operators\n2. Comparison Operators\n3. Logical Operators\n4. Assignment Operators\n5. and Conditional(ternary) Operators\n\nInteract with the buttons below to learn more.\n\n## Step 2 @unplugged\nArithmetic Operators are used to perform mathematical operations on number values. The operations are:\n(+) Addition\n(-) Subtraction\n(*)Multiplication\n(/) Division\n(%)Modulus\n\nHere's an example of what these may look like:\n\n\n```javascript\n let x=13;\n let y=7;\n let z= x+y; // z will equal 20\n let a= x*y; // a will equal 91\n let b= x-y // b will equal 6\n\n## Step 3\nIn the space below, let's use an arithmetic operator to string together our full name. Create a variable called fullName.\n#### ~ tutorialhint\n```javascript\n let fullName =\n```\n\n\n## Step 3\n\nUsing an addition operator, add together the string \"your first name\" and \"your last name\" so that the player will say your first and last name in one command. Make sure to add a space after your first name, so that there is a space when the code is ran. \n#### ~ tutorialhint\n```javascript\n let fullName= \"Melanie \" + \"Drown\"\n```\n\n\n## Step 4\n\nAdd a player.say command to the second line of your code, and have the player say the variable \"fullName\"\n\n#### ~ tutorialhint\n```javascript\n let fullName= \"Melanie \" + \"Drown\"\n player.say(fullName)\n```\n\n\n## Step 5 @unplugged\n\nNow run the code by clicking the **green start button** in the bottom right of the MakeCode screen.\n\n \n\n\n\n \n\nYou will know your code is correct when you see the text \"What a nice day\" appear on your screen.\n\n \n\nWhen your code works as expected move on to the next activity.\n\n \n\n## Step 5\n\n \n\nIf it does not work as expected, try to fix and test again.\n\n \n\nNow that you have learned about arithmetic operators, continue to the next activity to learn about comparison operators. \n\n\n","Lesson2/2.1/2.01.md":"# Expert Coding using JavaScript - Lesson 2 Activity 2.01\n### @explicitHints true\n\n## Step 1 @unplugged\n\nLet's learn a little more about how the Internet works. \n\nThe Internet is a **computer network consisting of interconnected networks that use standardized, open (nonproprietary) communication protocols.**\nTo access the internet, you need a device like a computer, smartphone, or tablet. These devices connect to the internet through an Internet Service Provider (ISP) using technologies like Wi-Fi, Ethernet cables, or cellular networks.\n\n## Step 2 @unplugged\n\nWhen you send or receive information over the internet, it is passed through a data stream which contains chunks of data. This data is in packets. **Each packet contains a piece of the information you want to share, along with the necessary instructions to reach its destination.** These packets travel through the internet separately. They may arrive in order, out of order, or not at all. When they arrive, they are reassembled. \n\n## Step 3 @unplugged\n\n**The protocols used in the Internet are open, which allows users to easily connect additional computing devices to the Internet.** IP, TCP, and UDP are common protocols used on the Internet.\n\n**Every device connected to the internet has a unique identifier called an IP (Internet Protocol) address.** It is similar to a phone number or an address that helps computers find and communicate with each other. IP addresses are like digital labels that allow data to be sent and received between devices\n\n## Step 4 @unplugged\n\n**Routers are special devices that help direct data packets across the internet.** Think of them as traffic cops that decide the most efficient path for the packets to reach their destination. They examine the IP addresses on the packets and forward them to the next router until they reach their intended destination. Routing on the Internet is usually dynamic; it is not specified in advance.\n\n## Step 5 @unplugged\n\nNow that you've learned more about the Internet, go to the next NPC to help our Programming team with operators. ","Lesson2/2.1/2.2.md":"## Comparison Operators\n\n## Step 1 @unplugged\n\nIn JavaScript, comparison operators are used to compare values, and return a Boolean value(true or false). Here are some examples of the different comparison operators in JavaScript:\n\n1. **equal to(==)** : The equality operator will check if two values are equal.\n2. **not equal to (!=)** : the inequality operator checks if two values are NOT equal.\n3. **strict equal to (===)** : the strict equality operator checks if two values are equal by comparing both the value and the data type.\n4. **strict not equal to (!==)**: the strict inequality operator checks if two values are not equal by comparing both the value and the data type.\n5. **greater than (>)** : the greater than operator check if the left operand is greater than the right operand\n6. **less than (<)** : the less than operator checks if the left operand is less than the right operand\n\nTypically, comparison operators are used in conditional statement and comparisons to make decisions based on certain conditions. The goal of comparison operators is to return a Boolean value of true or false, to make decisions. \n\n## Step 2\n\nLet's use a few different comparison operators and see what happens. For this activity, we will use the player.say command. First, have the player say (3>5) to test out the greater than operator. \n\n#### ~ tutorialhint\n```javascript\n player.say(3>5)\n```\n\n## Step 3\nTest your code by pressing the green button. You should see a Boolean response in the chat. Return to this coding screen once you have successfully ran your code. \n\n\n## Step 4\n\nGreat job. Your player should have said \"false\" when testing if three was great than 5. \nNext, let's test a less than operator with the same numbers, in the same order, and repeat the process of checking for a Boolean response after you write your code.\n\n#### ~ tutorialhint\n```javascript\n player.say(3<5)\n```\n\n\n## Step 5 \n\n\nAwesome! You should have seen that the player gave back a 'true' Boolean response, showing that 3 in less than 5. \n\nLastly, check an equal to operator with numbers of your choice. Once tested, you should see a Boolean response in the chat depending on the numbers that you put!\n\n\n## Step 6 @unplugged\n\nNow run the code by clicking the **green start button** in the bottom right of the MakeCode screen.\n\n\n\n \n\nYou will know your code is correct when you see the text \"What a nice day\" appear on your screen.\n \n\nWhen your code works as expected move on to the next activity. \n\n## Step 7\n\n \n\nIf it does not work as expected, try to fix and test again.\n\n \n\nNow that you have learned about arithmetic operators, continue to the next activity to learn about comparison operators. \n\n","Lesson2/2.1/2.3.md":"**Logical Operators**\n### @explicitHints true\n\n \n\n## Step 1- Learn More\n\n \n\n**Logical Operators** are used to manipulate or combine Boolean (true or false) values. In JavaScript, we mostly use three logical operators:\n\n1. AND(&&)\n\n2. OR(||) *This key is the \"pipe\" symbol that shares with the back slash above the enter key on your keyboard*\n\n3. NOT(!)\n\nThese logical operators perform operations on expressions, and will return Boolean values as a result. Continue on to see some of these operators in action.\n\n## Step 2\n\nThe AND (&&) Operator will return true **only if both operands are true**, otherwise it will return false. Using the temple below, let's test an AND operator by comparing two values from the variables below. Write in a player.say command, then use the logical operators to test. \n\n```template\nlet x=5\nlet y=7\nlet z=10\n\n\n\n\n\n\n\n```\n#### ~ tutorialhint\n\n```javascript\n\n let x=5\n let y=7\n let z=10\n player.say(x>y&&z>x)\n```\n\n\n## Step 3\n\nPress the green start button to test your code, then come back to this screen.\n\n\n## Step 4\n\nYou should have seen your player return \"true or false\" in the chat window. The AND operator needed both comparisons to be correct to return \"true\" to the console. The OR (||) Operator needs one operand or the other to be correct in order to do the same. Let's use the same variables as before, and test the OR operator. Enter the same variables as before in the space below, then continue on.\n\nRemember, the (||) key is (Pipe symbol) is located in the same key as the backslash key, above the enter key on the keyboard. \n\n#### ~ tutorialhint\n\n```javascript\n\n let x=5\n let y=7\n let z=10\n ```\n\n\n## Step 5\n\nAfter the variables, let's add in an OR operator after a player.say command to test the Boolean response. Add a player.say followed by (operand1 || operand2) and choose how you would like to compare.\n\n#### ~ tutorialhint\n```javascript\n\n let x=5\n let y=7\n let z=10\n player.say(x <y || z>x)\n ```\n\n## Step 6\n\nNow run your code by pressing the green start button, and return to this screen.\n\n## Step 7\nYou should have gotten back a Boolean in the chat of True or False, depending on the comparisons you chose. \n\nFinally, the NOT(!) operator negates a Boolean value. This means that if a comparison would return false, adding the NOT operator would return True, and vice versa. \n\nContinue on to the next NPC.\n\n","Lesson2/2.1/2.4.md":"# Expert Coding using JavaScript - Lesson 2.4\n\n### @explicitHints true\n\n \n\n## Step 1 @unplugged\n\n \n\nAssignment Operators are an imperative aspect of writing lines of code in JavaScript. You will continue to learn and use assignment operators throughout the entire course. Assignment Operators are used to assign values to variables. They combine the task of assigning a value with an arithmetic or logical operation. Assignment operators allow you to update the value of a variable based on its previous value. \n\nContinue on to learn about different assignment operators.\n\n## Step 2 @unplugged\nThe most commonly used assignment operators in JavaScript are:\n\n1. Assignment (=) operator: This assignment operator is used to assign a value to a variable.\n\nSyntax: variable=value\n\n2. Addition assignment (+=) operator: This operator adds the value on the right side to the existing value of the variable, and assigns the results back to the variable.\n\nSyntax: variable += value\n\n3. Subtraction assignment (-=) operator: This operator subtracts the value on the right side from the existing value of the variable and assigns results back to the variable.\n\nSyntax: variable -= value\n\nThere are more assignment operators that mimic the above pattern and result including multiplication assignment operator (*=) and Division assignment operator (/=). \n\nContinue on to the next NPC.","Lesson2/2.1/2.5.md":"# Expert Coding using JavaScript - Lesson 2.5\n\n### @explicitHints true\n\n \n\n## Step 1 @unplugged\n\n \n\nLet's use what we have learned about arithmetic operators to solve the math problem : \n(2+5) / 3 x 7\n\nMake sure to display the result using a player.say command.\n\n#### ~ tutorialhint\n\n \n\n```javascript\n\nlet result = (2/5) / 3 * 7;\nplayer.say(\"Result: \" + result);\n\n```\n\n\n## Step 2 @unplugged\n\nNow run the code by clicking the **green start button** in the bottom right of the MakeCode screen.\n\n \n\n\n\n \n\nYou will know your code is correct when you see the text 1 appear on your screen.\n\n \n \n \n\n## Step 3\n\nIf your code worked as expected move on to the next activity.\n\n \n\nIf it does not work as expected, try to fix and test again.\n\n","Lesson3/3.1/3.1.md":"# Expert Coding using JavaScript - Lesson 3 Activity 3.1\n### @explicitHints true\n\n## Step 1 @unplugged\n\nIn coding, logic refers to the process of **developing a set of instructions or statements that govern how a computer program should operate**. It involves creating a series of rules, conditions, and actions that dictate what a program should do when it is executed.\n\nThe logic of a program typically involves the use of conditional statements. **Conditional statements**, also known as \"if-statements,\" are used in coding to **make decisions based on certain conditions**. These statements work by checking if a specific condition is true or false, which is represented by a Boolean expression. Depending on whether the condition is true or false, different statements are executed in a specific order. \n\n## Step 2 @unplugged\n\nIn JavaScript you have a variety of conditional statements. One of which is the **If Statement**. \nIf Statements check to see if a condition is true or false and execute code if the condition is true. If Statements check to see if a condition is true or false and execute code if the condition is true. If Statements check to see if a condition is true or false and execute code if the condition is true. \nBelow is an example of an If statement that checks to see if the variable for playerAge is greater than or equal to 13. If the condition is true, the player will say \"You can play.\" \n\n let playerAge = 13\n if (playerAge >= 13) {\n\t player.say(\"You can play!\")\n\t }\n\nNotice the indentation in the code above. In JavaScript, indentation is not required, however, we will be using it to indicate the structure and hierarchy of our code. In the example above, we have indented the player.say portion of the if-statement so the we can better understand that portion of the code is what will run if the conditional is true. \n\n## Step 3 @unplugged\n\nWe use **logic conditions** in JavaScript conditional statements. Here are some examples of these conditions. \n- Equals: a == b\n- Not Equals: a != b\n- Less than: a < b\n- Less than or equal to: a <= b\n- Greater than: a > b\n- Greater than or equal to: a >= b\n\nIn our example below, you will see again that we used the condition of greater than or equal to. \n\n let playerAge = 13\n if (playerAge >= 13) {\n\t player.say(\"You can play!\")\n\t }\n\n## Step 4\n\nNow it is your turn to write an if statement. Let's begin by declaring a variable score and assign it the value of 12. \n\n#### ~ tutorialhint\n\n```javascript\nlet score = 5\n\n```\n\n## Step 5\n\nNext, create an if statement that checks to see if the score is greater than or equal to 10. \n#### ~ tutorialhint\n\n```javascript\nlet score = 12\nif (score >= 10) {\n\t \n\t }\n```\n\n## Step 6\n\nAdd to the if statement that the player will say, \"You win!\" if the conditional is true. \n#### ~ tutorialhint\n\n```javascript\nlet score = 10\nif (score >= 12) {\n\t player.say(\"You win!\")\n\t }\n```\n\n## Step 7\n\nRun the code by following the instructions in the next step.\n\n## Step 8 @ unplugged\n\nTo test your code:\nOnce you have fully read this step click the Green Ok button below to close this window to return to the tutorial to perform the below steps to test your code.\n\n1. Click on the **Green Start button** below to return to the game.\n\n\n\n2. You will know your code is correct when you see the text \"You win!\" appear on your screen.\n \n\n## Step 9\nWhen your code works as expected move on to the next activity.\nIf it does not work as expected, try to fix and test again.\n\n","Lesson3/3.1/3.01.md":"# Expert Coding using JavaScript - Lesson 3 Activity 3.01\n### @explicitHints true\n\n## Step 1 @unplugged\n\nThe Internet is designed to be able to handle problems and keep working even if something goes wrong. It uses special methods for deciding how information should travel and be sent, which helps ensure that data gets to where it needs to go.\n\nWhen a system can keep working even if some parts fail, we call it **fault-tolerant.** This is important because in complex systems, things can unexpectedly stop working, sometimes many at once. Fault tolerance is what allows us to keep using the network even when these failures happen.\n\n## Step 2 @unplugged\n\n**Redundancy:** The Internet has been designed with redundancy, which means there are **multiple paths for data to travel from one point to another.** This redundancy helps ensure that if one path or connection fails, data can still be routed through alternative paths. Think of it like having multiple roads to reach your destination, so if one road is blocked, you can still take a different route.\n\n## Step 3 @unplugged\n\n**Packet Switching:** Data sent over the Internet is divided into small packets. Each packet carries a piece of the information being sent. These packets are then individually routed across the network. This method is called packet switching. **It allows for efficient and reliable data transmission because if one packet encounters an issue or gets lost, it can be retransmitted separately without affecting the other packets.**\nHaving multiple ways to route data between two points makes the Internet more dependable and helps it work properly even if some routes encounter issues.\n\n\n## Step 4 @unplugged\nNow that you have learned more about the Internet, head back to the Programming Team and learn about logic. \n\n","Lesson3/3.2/3.2.md":"# Expert Coding using JavaScript - Lesson 3 Activity 3.2\n### @explicitHints true\n\n## Step 1 @unplugged\n\nWe used If Statements to check to see if a condition is true or false and execute code if the condition is true. If we want to **execute a code if that same condition is false**, you can extend the If Statement to include Else. This is referred to an **If Else Statement.** \n\nBelow is an example of an if else statement that checks to see if the variable for playerAge is greater than or equal to 13. If the condition is true, the player will say \"You can play.\" If the condition is false, the player will say, \"Sorry. You aren't old enough to play.\"\n\n let playerAge = 10\n if (playerAge >= 13) {\n\t player.say(\"You can play!\")\n\t} else {\n\t\tplayer.say(\"Sorry. You aren't old enough to play.\")\n\t}\n\n## Step 2\n\nLet's build an if statement that checks to see if a player has won the game by checking to see if the score is greater than or equal to 20. \nStart by declaring the variable score and assign it the value of 15. \n\n#### ~ tutorialhint\n\n```javascript\nlet score = 15\n\n```\n\n## Step 3\n\nNext, create the if else statement. Let the If statement use the logic condition of greater than or equal to compare the variable score to the value of 20. \n#### ~ tutorialhint\n\n```javascript\nlet score = 15\nif (score >= 20) {\n\t \n\t }\n```\n\n## Step 4\n\nNext, have the player say \"You win!\" if the condition is true. \n#### ~ tutorialhint\n```javascript\nlet score = 15\nif (score >= 20) {\n\t player.say(\"You win!\")\n\t }\n```\n\n## Step 5\n\nAdd the else portion of the statement that will have the player say \"Keep playing.\" if the condition is false. \n#### ~ tutorialhint\n```javascript\nlet score = 15\nif (score >= 20) {\n\tplayer.say(\"You win!\")\n} else {\n\tplayer.say(\"Keep playing.\")\n}\n\n```\n\n## Step 6\n\nRun the code by following the instructions in the next step.\n\n## Step 7 @ unplugged\n\nTo test your code:\nOnce you have fully read this step click the Green Ok button below to close this window to return to the tutorial to perform the below steps to test your code.\n\n1. Click on the **Green Start button** below to return to the game.\n\n \n\n\n\n2. You will know your code is correct when you see the text \"Keep Playing.\" appear on your screen.\n \n\n## Step 8\nWhen your code works as expected move on to the next activity.\nIf it does not work as expected, try to fix and test again.","Lesson3/3.2/3.2.1.md":"# Expert Coding using JavaScript - Lesson 3 Activity 3.2.1\n\n### @explicitHints true\n## Step 1\n\nLet's continue our practice with If Else Statements by adding to our code that had the agent check for grass blocks. We have put that code on the screen for you. \nRun the code to remind yourself of what happens when it runs. \n\n```template\nagent.setItem(CORNFLOWER, 64, 1)\nagent.move(FORWARD, 1)\nIf (agent.inspect(AgentInspection.Block, DOWN) == GRASS) {\n\t agent.place(DOWN)\n\n}\n\n```\n\n## Step 2\n\nLet's add the ELSE to the IF statement. Make the agent turn left if the condition is false. \n\n#### ~ tutorialhint\n```javascript\nagent.setItem(CORNFLOWER, 64, 1)\nagent.move(FORWARD, 1)\nif (agent.inspect(AgentInspection.Block, DOWN) == GRASS) {\n\tagent.place(DOWN)\n} else {\n\tagent.turn(LEFT_TURN)\n}\n```\n\n## Step 3\n\nRun the code by following the instructions in the next step.\n\n## Step 4 @unplugged\n\nTo test your code:\nOnce you have fully read this step click the Green Ok button below to close this window to return to the tutorial to perform the below steps to test your code.\n\n1. Click on the **Green Start button** below to return to the game.\n\n \n\n\n\n2. You will know your code is correct when the agent moves forward, places flowers down on the grass blocks and turns left when there isn't a grass block. \n\n## Step 5\n\nWhen your code works as expected move on to the next activity.\nIf it does not work as expected, try to fix and test again.","Lesson3/3.1/3.1.2.md":"# Expert Coding using JavaScript - Lesson 3 Activity 3.1.2\n### @explicitHints true\n\n\n## Step 1\n\nIn this activity, we will use an if statement to write \"Happy Halloween\" in the sky after we decorate with 4 Jack-o-lanterns. \nStart by declaring the variable decorate and assigning it the value of 0. \n\n#### ~ tutorialhint\n``` javascript\n\nlet decorate = 0\n\n```\n\n## Step 2\n\nIn this activity, we will use the event handler of on Block Placed. Below is the code for that event. \n\nblocks.onBlockPlaced(GRASS, function () {\n\n})\n\nAdd the on Blocks Placed code and change the block from Grass to Jack_O_Lantern. \n\n#### ~ tutorialhint\n```javascript\nlet decorate = 0\nblocks.onBlockPlaced(JACK_O_LANTERN, function () {\n\n})\n```\n\n## Step 3\n\nNext, create a code that increases the variable by 1 each time a Jack_O_Lantern block down. \n\n#### ~ tutorialhint\n```javascript\n\nlet decorate = 0\nblocks.onBlockPlaced(JACK_O_LANTERN, function () {\n\tdecorate += 1\n})\n\n```\n\n## Step 4\n\nWrite an If Statement with the condition that the decorate variable's modulus of 4 is equal to 0. \n\n\n#### ~ tutorialhint\n```javascript\nlet decorate = 0\n\n#### ~ tutorialhint\n```javascript\n\nlet decorate = 0\nblocks.onBlockPlaced(JACK_O_LANTERN, function () {\n\tdecorate += 1\n\tif (decorate % 4 == 0) {\n\t}\n})\n\n```\n\n## Step 5\n\nNow we want to add to the If statement the code we want to run if the conditional is true. We want to have the words \"Happy Halloween\" printed in the sky. \nWe want Happy to be above Halloween so we will do this in 2 steps. \nThe code for printing with blocks is below. \n\nblocks.print(\"text\", BLOCK, pos(0,0,0), DIRECTION)\n\nAdd the code above with the text of \"Happy\", the Block of GLOWSTONE, the position of (-7,10,-15), and the direction of East. \n\n#### ~ tutorialhint\n```javascript\n\nblocks.onBlockPlaced(JACK_O_LANTERN, function () {\n decorate += 1\n if (decorate % 4 == 0) {\n blocks.print(\"Happy\", GLOWSTONE, pos(-7, 10, -15),EAST)\n }\n})\n```\n\n\n## Step 6\n\nLastly add let's add the word Halloween with the same blocks.print code we did with Happy but with the position of (-15, 5, -15).\n\n#### ~ tutorialhint\n```javascript\n\nblocks.onBlockPlaced(JACK_O_LANTERN, function () {\n decorate += 1\n if (decorate % 4 == 0) {\n blocks.print(\"Happy\", GLOWSTONE, pos(-7, 10, -15),EAST)\n blocks.print(\"Halloween\", GLOWSTONE, pos(-15, 5, -15), EAST)\n }\n})\n```\n\n## Step 7\n\nRun the code by following the instructions in the next step.\n\n\n## Step 8 @unplugged\n\nTo test your code:\nOnce you have fully read this step click the Green Ok button below to close this window to return to the tutorial to perform the below steps to test your code.\n\n1. Click on the **Green Start button** below to return to the game.\n\n \n\n\n\n2. Place down 4 Jack-O-Lantern. \n3. You know your code works correctly when you see \"Happy Halloween\" printed in the sky. \n\n## Step 9\n\nWhen your code works as expected move on to the next NPC. \nIf it does not work as expected, try to fix and test again.","Lesson3/3.3/3.3.md":"# Expert Coding using JavaScript - Lesson 3 Activity 3.3\n### @explicitHints true\n\n## Step 1\n\nWe are going to continue practicing with logic in our code by building an aquarium. \nThe first step to building the aquarium is clearing the land. \n\nStart by creating an on chat command called clear. \n#### ~ tutorialhint\n```javascript\nplayer.onChat(\"clear\", function () {\n\t\n})\n\n```\n\n## Step 2\n\nNext, inside the chat command, create an if / else statement. \nIn the if section, have the agent inspect forward to see if there is a grass block in front of it. \n\n#### ~ tutorialhint\n```javascript\nplayer.onChat(\"clear\", function () {\n\tif (agent.inspect(AgentInspection.Block, FORWARD) == GRASS) {\n\n\t} else {\n\n\t}\n})\n\n```\n\n\n## Step 3\n\nNext add the code that if the agent does inspect a grass block, it will destroy forward and move forward by 1. If it does not inspect a grass block, it will just move forward by 1. \n\n#### ~ tutorialhint\n```javascript\nplayer.onChat(\"clear\", function () {\n\tif (agent.inspect(AgentInspection.Block, FORWARD) == GRASS) {\n\t\tagent.destroy(FORWARD)\n\t\tagent.move(FORWARD, 1)\n\t} else {\n\t\tagent.move(FORWARD, 1)\n\t}\n})\n\n```\n\n## Step 4\n\nRun the code by following the instructions in the next step.\n\n## Step 5 @unplugged\n\nTo test your code:\nOnce you have fully read this step click the Green Ok button below to close this window to return to the tutorial to perform the below steps to test your code.\n\n1. Click on the **Green Start button** below to return to the game.\n\n \n\n\n\n2. Open the chat and type clear. \n3. You will know your code is correct when the agent destroys the grass block in front of it and moves forward by 1. \n\n## Step 6\n\nIf your code works as expected, click next to go on to step 7. If not, go back and fix your code. \n\n## Step 7\n\nWe have only cleared 1 block. If we want to check the entire area, we need to either run the code multiple times or add to the code. \nIn Lesson 4 we will learn how to use loops to repeat actions but for now, we will just reuse code we have created. (We will be building a very large piece of code!)\n\nWe need to clear a 5 x 5 area which means we need to run this if / else statement 5 times to clear one row. Copy and paste the code to repeat it 5 times. \n\n#### ~ tutorialhint\n```javascript\nplayer.onChat(\"clear\", function () {\n\tif (agent.inspect(AgentInspection.Block, FORWARD) == GRASS) {\n\t\tagent.destroy(FORWARD)\n\t\tagent.move(FORWARD, 1)\n\t} else {\n\t\tagent.move(FORWARD, 1)\n\t}\n})\nplayer.onChat(\"clear\", function () {\n\tif (agent.inspect(AgentInspection.Block, FORWARD) == GRASS) {\n\t\tagent.destroy(FORWARD)\n\t\tagent.move(FORWARD, 1)\n\t} else {\n\t\tagent.move(FORWARD, 1)\n\t}\n})\nplayer.onChat(\"clear\", function () {\n\tif (agent.inspect(AgentInspection.Block, FORWARD) == GRASS) {\n\t\tagent.destroy(FORWARD)\n\t\tagent.move(FORWARD, 1)\n\t} else {\n\t\tagent.move(FORWARD, 1)\n\t}\n})\nplayer.onChat(\"clear\", function () {\n\tif (agent.inspect(AgentInspection.Block, FORWARD) == GRASS) {\n\t\tagent.destroy(FORWARD)\n\t\tagent.move(FORWARD, 1)\n\t} else {\n\t\tagent.move(FORWARD, 1)\n\t}\n})\nplayer.onChat(\"clear\", function () {\n\tif (agent.inspect(AgentInspection.Block, FORWARD) == GRASS) {\n\t\tagent.destroy(FORWARD)\n\t\tagent.move(FORWARD, 1)\n\t} else {\n\t\tagent.move(FORWARD, 1)\n\t}\n})\n```\n\n## Step 8\n\nRun the code by following the instructions in the next step.\n\n## Step 9 @unplugged\n\nTo test your code:\nOnce you have fully read this step click the Green Ok button below to close this window to return to the tutorial to perform the below steps to test your code.\n\n1. Click on the **Green Start button** below to return to the game.\n\n \n\n\n\n2. Use your agent device to reset the area. \n3. Open the chat and type clear. \n4. You will know your code is correct when the agent destroys the entire row in front of it and moves forward 5 times. \n\n## Step 10\n\nIf your code worked as expected, click next to go to step 11. If not, go back and fix your code. \n\n## Step 11\n\nNow we will need to have our agent turn left, inspect the block in front, destroy if it is there and move forward by 1. Then he needs to turn left again to go back down the second row. \nDo this by adding the code to have your agent turn left. Then add the if /else statement again from before (you can copy and paste. Then, after the if else statement, add the code to have the agent turn left again. \n\n#### ~ tutorialhint\n```javascript\nplayer.onChat(\"clear\", function () {\n\tif (agent.inspect(AgentInspection.Block, FORWARD) == GRASS) {\n\t\tagent.destroy(FORWARD)\n\t\tagent.move(FORWARD, 1)\n\t} else {\n\t\tagent.move(FORWARD, 1)\n\t}\n})\nplayer.onChat(\"clear\", function () {\n\tif (agent.inspect(AgentInspection.Block, FORWARD) == GRASS) {\n\t\tagent.destroy(FORWARD)\n\t\tagent.move(FORWARD, 1)\n\t} else {\n\t\tagent.move(FORWARD, 1)\n\t}\n})\nplayer.onChat(\"clear\", function () {\n\tif (agent.inspect(AgentInspection.Block, FORWARD) == GRASS) {\n\t\tagent.destroy(FORWARD)\n\t\tagent.move(FORWARD, 1)\n\t} else {\n\t\tagent.move(FORWARD, 1)\n\t}\n})\nplayer.onChat(\"clear\", function () {\n\tif (agent.inspect(AgentInspection.Block, FORWARD) == GRASS) {\n\t\tagent.destroy(FORWARD)\n\t\tagent.move(FORWARD, 1)\n\t} else {\n\t\tagent.move(FORWARD, 1)\n\t}\n})\nplayer.onChat(\"clear\", function () {\n\tif (agent.inspect(AgentInspection.Block, FORWARD) == GRASS) {\n\t\tagent.destroy(FORWARD)\n\t\tagent.move(FORWARD, 1)\n\t} else {\n\t\tagent.move(FORWARD, 1)\n\t}\n\tagent.turn(LEFT_TURN)\n\tif (agent.inspect(AgentInspection.Block, FORWARD) == GRASS) {\n\t\tagent.destroy(FORWARD)\n\t\tagent.move(FORWARD, 1)\n\t} else {\n\t\tagent.move(FORWARD, 1)\n\t}\n\tagent.turn(LEFT_TURN)\n})\n```\n\n## Step 12\n\nTo go back down the row, the agent only needs to move forward by 4. You will need to copy and paste the if / else statement 4 more times after the agent turn left code. \n\n#### ~ tutorialhint\n```javascript\nplayer.onChat(\"clear\", function () {\n\tif (agent.inspect(AgentInspection.Block, FORWARD) == GRASS) {\n\t\tagent.destroy(FORWARD)\n\t\tagent.move(FORWARD, 1)\n\t} else {\n\t\tagent.move(FORWARD, 1)\n\t}\n})\nplayer.onChat(\"clear\", function () {\n\tif (agent.inspect(AgentInspection.Block, FORWARD) == GRASS) {\n\t\tagent.destroy(FORWARD)\n\t\tagent.move(FORWARD, 1)\n\t} else {\n\t\tagent.move(FORWARD, 1)\n\t}\n})\nplayer.onChat(\"clear\", function () {\n\tif (agent.inspect(AgentInspection.Block, FORWARD) == GRASS) {\n\t\tagent.destroy(FORWARD)\n\t\tagent.move(FORWARD, 1)\n\t} else {\n\t\tagent.move(FORWARD, 1)\n\t}\n})\nplayer.onChat(\"clear\", function () {\n\tif (agent.inspect(AgentInspection.Block, FORWARD) == GRASS) {\n\t\tagent.destroy(FORWARD)\n\t\tagent.move(FORWARD, 1)\n\t} else {\n\t\tagent.move(FORWARD, 1)\n\t}\n})\nplayer.onChat(\"clear\", function () {\n\tif (agent.inspect(AgentInspection.Block, FORWARD) == GRASS) {\n\t\tagent.destroy(FORWARD)\n\t\tagent.move(FORWARD, 1)\n\t} else {\n\t\tagent.move(FORWARD, 1)\n\t}\n\tagent.turn(LEFT_TURN)\n\tif (agent.inspect(AgentInspection.Block, FORWARD) == GRASS) {\n\t\tagent.destroy(FORWARD)\n\t\tagent.move(FORWARD, 1)\n\t} else {\n\t\tagent.move(FORWARD, 1)\n\t}\n\tagent.turn(LEFT_TURN)\n\tplayer.onChat(\"clear\", function () {\n\tif (agent.inspect(AgentInspection.Block, FORWARD) == GRASS) {\n\t\tagent.destroy(FORWARD)\n\t\tagent.move(FORWARD, 1)\n\t} else {\n\t\tagent.move(FORWARD, 1)\n\t}\n})\nplayer.onChat(\"clear\", function () {\n\tif (agent.inspect(AgentInspection.Block, FORWARD) == GRASS) {\n\t\tagent.destroy(FORWARD)\n\t\tagent.move(FORWARD, 1)\n\t} else {\n\t\tagent.move(FORWARD, 1)\n\t}\n})\nplayer.onChat(\"clear\", function () {\n\tif (agent.inspect(AgentInspection.Block, FORWARD) == GRASS) {\n\t\tagent.destroy(FORWARD)\n\t\tagent.move(FORWARD, 1)\n\t} else {\n\t\tagent.move(FORWARD, 1)\n\t}\n})\nplayer.onChat(\"clear\", function () {\n\tif (agent.inspect(AgentInspection.Block, FORWARD) == GRASS) {\n\t\tagent.destroy(FORWARD)\n\t\tagent.move(FORWARD, 1)\n\t} else {\n\t\tagent.move(FORWARD, 1)\n\t}\n})\n```\n\n## Step 13\n\nRun the code by following the instructions in the next step.\n\n## Step 14 @unplugged\n\nTo test your code:\nOnce you have fully read this step click the Green Ok button below to close this window to return to the tutorial to perform the below steps to test your code.\n\n1. Click on the **Green Start button** below to return to the game.\n\n \n\n\n\n2. Use your agent device to reset the area. \n3. Open the chat and type clear. \n4. You will know your code is correct when the agent destroys the entire row in front of it and moves forward 5 times, then turns and destroys the 2nd row. \n\n## Step 15\n\nIf your code worked as expected, click next to go to step 16. If not, go back and fix your code. \n\n## Step 16\n\nNow we will need to have the agent turn right, inspect the block in front, destroy if it is there and move forward by 1. Then he needs to turn right again to go back down the third row. \nYou can do this easily by copying your code from the end of row one and change both Left directions to Right. Then you can copy everything else below it as well to have the agent go back down row 3. \n\n#### ~ tutorialhint\n```javascript\nplayer.onChat(\"clear\", function () {\n\tif (agent.inspect(AgentInspection.Block, FORWARD) == GRASS) {\n\t\tagent.destroy(FORWARD)\n\t\tagent.move(FORWARD, 1)\n\t} else {\n\t\tagent.move(FORWARD, 1)\n\t}\n})\nplayer.onChat(\"clear\", function () {\n\tif (agent.inspect(AgentInspection.Block, FORWARD) == GRASS) {\n\t\tagent.destroy(FORWARD)\n\t\tagent.move(FORWARD, 1)\n\t} else {\n\t\tagent.move(FORWARD, 1)\n\t}\n})\nplayer.onChat(\"clear\", function () {\n\tif (agent.inspect(AgentInspection.Block, FORWARD) == GRASS) {\n\t\tagent.destroy(FORWARD)\n\t\tagent.move(FORWARD, 1)\n\t} else {\n\t\tagent.move(FORWARD, 1)\n\t}\n})\nplayer.onChat(\"clear\", function () {\n\tif (agent.inspect(AgentInspection.Block, FORWARD) == GRASS) {\n\t\tagent.destroy(FORWARD)\n\t\tagent.move(FORWARD, 1)\n\t} else {\n\t\tagent.move(FORWARD, 1)\n\t}\n})\nplayer.onChat(\"clear\", function () {\n\tif (agent.inspect(AgentInspection.Block, FORWARD) == GRASS) {\n\t\tagent.destroy(FORWARD)\n\t\tagent.move(FORWARD, 1)\n\t} else {\n\t\tagent.move(FORWARD, 1)\n\t}\n\tagent.turn(LEFT_TURN)\n\tif (agent.inspect(AgentInspection.Block, FORWARD) == GRASS) {\n\t\tagent.destroy(FORWARD)\n\t\tagent.move(FORWARD, 1)\n\t} else {\n\t\tagent.move(FORWARD, 1)\n\t}\n\tagent.turn(LEFT_TURN)\n\tplayer.onChat(\"clear\", function () {\n\tif (agent.inspect(AgentInspection.Block, FORWARD) == GRASS) {\n\t\tagent.destroy(FORWARD)\n\t\tagent.move(FORWARD, 1)\n\t} else {\n\t\tagent.move(FORWARD, 1)\n\t}\n})\nplayer.onChat(\"clear\", function () {\n\tif (agent.inspect(AgentInspection.Block, FORWARD) == GRASS) {\n\t\tagent.destroy(FORWARD)\n\t\tagent.move(FORWARD, 1)\n\t} else {\n\t\tagent.move(FORWARD, 1)\n\t}\n})\nplayer.onChat(\"clear\", function () {\n\tif (agent.inspect(AgentInspection.Block, FORWARD) == GRASS) {\n\t\tagent.destroy(FORWARD)\n\t\tagent.move(FORWARD, 1)\n\t} else {\n\t\tagent.move(FORWARD, 1)\n\t}\n})\nplayer.onChat(\"clear\", function () {\n\tif (agent.inspect(AgentInspection.Block, FORWARD) == GRASS) {\n\t\tagent.destroy(FORWARD)\n\t\tagent.move(FORWARD, 1)\n\t} else {\n\t\tagent.move(FORWARD, 1)\n\t}\n\tagent.turn(RIGHT_TURN)\n\tif (agent.inspect(AgentInspection.Block, FORWARD) == GRASS) {\n\t\tagent.destroy(FORWARD)\n\t\tagent.move(FORWARD, 1)\n\t} else {\n\t\tagent.move(FORWARD, 1)\n\t}\n\tagent.turn(RIGHT_TURN)\n\tplayer.onChat(\"clear\", function () {\n\tif (agent.inspect(AgentInspection.Block, FORWARD) == GRASS) {\n\t\tagent.destroy(FORWARD)\n\t\tagent.move(FORWARD, 1)\n\t} else {\n\t\tagent.move(FORWARD, 1)\n\t}\n})\nplayer.onChat(\"clear\", function () {\n\tif (agent.inspect(AgentInspection.Block, FORWARD) == GRASS) {\n\t\tagent.destroy(FORWARD)\n\t\tagent.move(FORWARD, 1)\n\t} else {\n\t\tagent.move(FORWARD, 1)\n\t}\n})\nplayer.onChat(\"clear\", function () {\n\tif (agent.inspect(AgentInspection.Block, FORWARD) == GRASS) {\n\t\tagent.destroy(FORWARD)\n\t\tagent.move(FORWARD, 1)\n\t} else {\n\t\tagent.move(FORWARD, 1)\n\t}\n})\nplayer.onChat(\"clear\", function () {\n\tif (agent.inspect(AgentInspection.Block, FORWARD) == GRASS) {\n\t\tagent.destroy(FORWARD)\n\t\tagent.move(FORWARD, 1)\n\t} else {\n\t\tagent.move(FORWARD, 1)\n\t}\n})\n```\n\n## Step 17\n\nRun the code by following the instructions in the next step.\n\n## Step 18 @unplugged\n\nTo test your code:\nOnce you have fully read this step click the Green Ok button below to close this window to return to the tutorial to perform the below steps to test your code.\n\n1. Click on the **Green Start button** below to return to the game.\n\n \n\n\n\n2. Use your agent device to reset the area. \n3. Open the chat and type clear. \n4. You will know your code is correct when the agent destroys the 3 rows of grass blocks. \n\n## Step 19\n\nIf your code worked as expected, click next to go to step 20. If not, go back and fix your code. \n\n## Step 20\n\nNow, you will be able to copy and paste some of your code to do the last 2 rows. Can you figure out what code that is? \n\n*Hint... the agent will need to turn left and right 1 more time each. \n\n\n#### ~ tutorialhint\n```javascript\nplayer.onChat(\"clear\", function () {\n\tif (agent.inspect(AgentInspection.Block, FORWARD) == GRASS) {\n\t\tagent.destroy(FORWARD)\n\t\tagent.move(FORWARD, 1)\n\t} else {\n\t\tagent.move(FORWARD, 1)\n\t}\n})\nplayer.onChat(\"clear\", function () {\n\tif (agent.inspect(AgentInspection.Block, FORWARD) == GRASS) {\n\t\tagent.destroy(FORWARD)\n\t\tagent.move(FORWARD, 1)\n\t} else {\n\t\tagent.move(FORWARD, 1)\n\t}\n})\nplayer.onChat(\"clear\", function () {\n\tif (agent.inspect(AgentInspection.Block, FORWARD) == GRASS) {\n\t\tagent.destroy(FORWARD)\n\t\tagent.move(FORWARD, 1)\n\t} else {\n\t\tagent.move(FORWARD, 1)\n\t}\n})\nplayer.onChat(\"clear\", function () {\n\tif (agent.inspect(AgentInspection.Block, FORWARD) == GRASS) {\n\t\tagent.destroy(FORWARD)\n\t\tagent.move(FORWARD, 1)\n\t} else {\n\t\tagent.move(FORWARD, 1)\n\t}\n})\nplayer.onChat(\"clear\", function () {\n\tif (agent.inspect(AgentInspection.Block, FORWARD) == GRASS) {\n\t\tagent.destroy(FORWARD)\n\t\tagent.move(FORWARD, 1)\n\t} else {\n\t\tagent.move(FORWARD, 1)\n\t}\n\tagent.turn(LEFT_TURN)\n\tif (agent.inspect(AgentInspection.Block, FORWARD) == GRASS) {\n\t\tagent.destroy(FORWARD)\n\t\tagent.move(FORWARD, 1)\n\t} else {\n\t\tagent.move(FORWARD, 1)\n\t}\n\tagent.turn(LEFT_TURN)\n\tplayer.onChat(\"clear\", function () {\n\tif (agent.inspect(AgentInspection.Block, FORWARD) == GRASS) {\n\t\tagent.destroy(FORWARD)\n\t\tagent.move(FORWARD, 1)\n\t} else {\n\t\tagent.move(FORWARD, 1)\n\t}\n})\nplayer.onChat(\"clear\", function () {\n\tif (agent.inspect(AgentInspection.Block, FORWARD) == GRASS) {\n\t\tagent.destroy(FORWARD)\n\t\tagent.move(FORWARD, 1)\n\t} else {\n\t\tagent.move(FORWARD, 1)\n\t}\n})\nplayer.onChat(\"clear\", function () {\n\tif (agent.inspect(AgentInspection.Block, FORWARD) == GRASS) {\n\t\tagent.destroy(FORWARD)\n\t\tagent.move(FORWARD, 1)\n\t} else {\n\t\tagent.move(FORWARD, 1)\n\t}\n})\nplayer.onChat(\"clear\", function () {\n\tif (agent.inspect(AgentInspection.Block, FORWARD) == GRASS) {\n\t\tagent.destroy(FORWARD)\n\t\tagent.move(FORWARD, 1)\n\t} else {\n\t\tagent.move(FORWARD, 1)\n\t}\n\tagent.turn(RIGHT_TURN)\n\tif (agent.inspect(AgentInspection.Block, FORWARD) == GRASS) {\n\t\tagent.destroy(FORWARD)\n\t\tagent.move(FORWARD, 1)\n\t} else {\n\t\tagent.move(FORWARD, 1)\n\t}\n\tagent.turn(RIGHT_TURN)\n\tplayer.onChat(\"clear\", function () {\n\tif (agent.inspect(AgentInspection.Block, FORWARD) == GRASS) {\n\t\tagent.destroy(FORWARD)\n\t\tagent.move(FORWARD, 1)\n\t} else {\n\t\tagent.move(FORWARD, 1)\n\t}\n})\nplayer.onChat(\"clear\", function () {\n\tif (agent.inspect(AgentInspection.Block, FORWARD) == GRASS) {\n\t\tagent.destroy(FORWARD)\n\t\tagent.move(FORWARD, 1)\n\t} else {\n\t\tagent.move(FORWARD, 1)\n\t}\n})\nplayer.onChat(\"clear\", function () {\n\tif (agent.inspect(AgentInspection.Block, FORWARD) == GRASS) {\n\t\tagent.destroy(FORWARD)\n\t\tagent.move(FORWARD, 1)\n\t} else {\n\t\tagent.move(FORWARD, 1)\n\t}\n})\nplayer.onChat(\"clear\", function () {\n\tif (agent.inspect(AgentInspection.Block, FORWARD) == GRASS) {\n\t\tagent.destroy(FORWARD)\n\t\tagent.move(FORWARD, 1)\n\t} else {\n\t\tagent.move(FORWARD, 1)\n\t}\n\tagent.turn(LEFT_TURN)\n\tif (agent.inspect(AgentInspection.Block, FORWARD) == GRASS) {\n\t\tagent.destroy(FORWARD)\n\t\tagent.move(FORWARD, 1)\n\t} else {\n\t\tagent.move(FORWARD, 1)\n\t}\n\tagent.turn(LEFT_TURN)\n\tplayer.onChat(\"clear\", function () {\n\tif (agent.inspect(AgentInspection.Block, FORWARD) == GRASS) {\n\t\tagent.destroy(FORWARD)\n\t\tagent.move(FORWARD, 1)\n\t} else {\n\t\tagent.move(FORWARD, 1)\n\t}\n})\nplayer.onChat(\"clear\", function () {\n\tif (agent.inspect(AgentInspection.Block, FORWARD) == GRASS) {\n\t\tagent.destroy(FORWARD)\n\t\tagent.move(FORWARD, 1)\n\t} else {\n\t\tagent.move(FORWARD, 1)\n\t}\n})\nplayer.onChat(\"clear\", function () {\n\tif (agent.inspect(AgentInspection.Block, FORWARD) == GRASS) {\n\t\tagent.destroy(FORWARD)\n\t\tagent.move(FORWARD, 1)\n\t} else {\n\t\tagent.move(FORWARD, 1)\n\t}\n})\nplayer.onChat(\"clear\", function () {\n\tif (agent.inspect(AgentInspection.Block, FORWARD) == GRASS) {\n\t\tagent.destroy(FORWARD)\n\t\tagent.move(FORWARD, 1)\n\t} else {\n\t\tagent.move(FORWARD, 1)\n\t}\n\tagent.turn(RIGHT_TURN)\n\tif (agent.inspect(AgentInspection.Block, FORWARD) == GRASS) {\n\t\tagent.destroy(FORWARD)\n\t\tagent.move(FORWARD, 1)\n\t} else {\n\t\tagent.move(FORWARD, 1)\n\t}\n\tagent.turn(RIGHT_TURN)\n\tplayer.onChat(\"clear\", function () {\n\tif (agent.inspect(AgentInspection.Block, FORWARD) == GRASS) {\n\t\tagent.destroy(FORWARD)\n\t\tagent.move(FORWARD, 1)\n\t} else {\n\t\tagent.move(FORWARD, 1)\n\t}\n})\nplayer.onChat(\"clear\", function () {\n\tif (agent.inspect(AgentInspection.Block, FORWARD) == GRASS) {\n\t\tagent.destroy(FORWARD)\n\t\tagent.move(FORWARD, 1)\n\t} else {\n\t\tagent.move(FORWARD, 1)\n\t}\n})\nplayer.onChat(\"clear\", function () {\n\tif (agent.inspect(AgentInspection.Block, FORWARD) == GRASS) {\n\t\tagent.destroy(FORWARD)\n\t\tagent.move(FORWARD, 1)\n\t} else {\n\t\tagent.move(FORWARD, 1)\n\t}\n})\nplayer.onChat(\"clear\", function () {\n\tif (agent.inspect(AgentInspection.Block, FORWARD) == GRASS) {\n\t\tagent.destroy(FORWARD)\n\t\tagent.move(FORWARD, 1)\n\t} else {\n\t\tagent.move(FORWARD, 1)\n\t}\n})\n```\n\n## Step 21\n\nRun the code by following the instructions in the next step.\n\n## Step 22 @unplugged\n\nTo test your code:\nOnce you have fully read this step click the Green Ok button below to close this window to return to the tutorial to perform the below steps to test your code.\n\n1. Click on the **Green Start button** below to return to the game.\n\n \n\n\n\n2. Use your agent device to reset the area. \n3. Open the chat and type clear. \n4. You will know your code is correct when the agent clears the entire 5x5 area. \n\n## Step 23\n\nIf your code worked as expected, go to the next activity. If not, go back and fix your code. ","Lesson3/3.3/3.3.1.md":"# Expert Coding using JavaScript - Lesson 3 Activity 3.3.1\n### @explicitHints true\n\n## Step 1\n\nWe are going to continue with our code. (We have placed the clear chat command code on the workspace for you. We have shortened it for you so it is not so long.)\n\n```template\nplayer.onChat(\"clear\", function () {\n\tfor (let index = 0; index < 5; index++) {\n\t\tif (agent.inspect(AgentInspection.Block, FORWARD) == GRASS) {\n\t\t\tagent.destroy(FORWARD)\n\t\t\tagent.move(FORWARD, 1)\n\t\t} else {\n\t\t\tagent.move(FORWARD, 1)\n\t\t}\n}\n\tagent.turn(LEFT_TURN)\n\tif (agent.inspect(AgentInspection.Block, FORWARD) == GRASS) {\n\t\tagent.destroy(FORWARD)\n\t\tagent.move(FORWARD, 1)\n\t} else {\n\t\tagent.move(FORWARD, 1)\n\t}\n\tagent.turn(LEFT_TURN)\n\tfor (let index = 0; index < 4; index++) {\n\t\tif (agent.inspect(AgentInspection.Block, FORWARD) == GRASS) {\n\t\t\tagent.destroy(FORWARD)\n\t\t\tagent.move(FORWARD, 1)\n\t\t} else {\n\t\t\tagent.move(FORWARD, 1)\n\t\t}\n\t}\n\tagent.turn(RIGHT_TURN)\n\tif (agent.inspect(AgentInspection.Block, FORWARD) == GRASS) {\n\t\tagent.destroy(FORWARD)\n\t\tagent.move(FORWARD, 1)\n\t} else {\n\t\tagent.move(FORWARD, 1)\n\t}\n\tagent.turn(RIGHT_TURN)\n\tfor (let index = 0; index < 4; index++) {\n\t\tif (agent.inspect(AgentInspection.Block, FORWARD) == GRASS) {\n\t\t\tagent.destroy(FORWARD)\n\t\t\tagent.move(FORWARD, 1)\n\t\t} else {\n\t\t\tagent.move(FORWARD, 1)\n\t\t}\n\t}\n\tagent.turn(LEFT_TURN)\n\tif (agent.inspect(AgentInspection.Block, FORWARD) == GRASS) {\n\t\tagent.destroy(FORWARD)\n\t\tagent.move(FORWARD, 1)\n\t} else {\n\t\tagent.move(FORWARD, 1)\n\t}\n\tagent.turn(LEFT_TURN)\n\tfor (let index = 0; index < 4; index++) {\n\t\tif (agent.inspect(AgentInspection.Block, FORWARD) == GRASS) {\n\t\t\tagent.destroy(FORWARD)\n\t\t\tagent.move(FORWARD, 1)\n\t\t} else {\n\t\t\tagent.move(FORWARD, 1)\n\t\t}\n\t}\n\tagent.turn(RIGHT_TURN)\n\tif (agent.inspect(AgentInspection.Block, FORWARD) == GRASS) {\n\t\tagent.destroy(FORWARD)\n\t\tagent.move(FORWARD, 1)\n\t} else {\n\t\tagent.move(FORWARD, 1)\n\t}\n\tagent.turn(RIGHT_TURN)\n\tfor (let index = 0; index < 4; index++) {\n\t\tif (agent.inspect(AgentInspection.Block, FORWARD) == GRASS) {\n\t\t\tagent.destroy(FORWARD)\n\t\t\tagent.move(FORWARD, 1)\n\t\t} else {\n\t\t\tagent.move(FORWARD, 1)\n\t\t}\n\t}\n})\n```\n\n## Step 2\n\nNow that we have cleared the area, we want to create the outside of the aquarium. We want our aquarium to be in the middle of the 5x5 area we cleared, but we only want it to be 3x3. \n\nWe will need to move the agent into the correct spot to start building. He will need to turn right move forward by 1, and then turn right again, and then forward by 1 again. \n\nCreate a new chat command called move and add this code in that chat command. \n\n#### ~ tutorialhint\n```javascript\nplayer.onChat(\"move\", function () {\n\tagent.turn(RIGHT_TURN)\n\tagent.move(FORWARD, 1)\n\tagent.turn(RIGHT_TURN)\n\tagent.move(FORWARD, 1)\n})\n```\n\n## Step 3\n\nNext, we want to build the base of the aquarium. Create a new chat command named base. Inside the chat command, we will add an if / else statement that has the agent check his inventory in slot 1.\n\nIn Minecraft, you can code the agent to test for certain items in their inventory. The code for this is below. \n\n agent.getItemDetail(1) == GLASS\n\n#### ~ tutorialhint\n```javascript\nplayer.onChat(\"base\", function () {\n\tif (agent.getItemDetail(1) == GLASS) {\n\n\t} else {\n\n\t}\n})\n```\n\n## Step 4\n\nContinue building the if / else statement. If it does have glass in it's inventory, the agent will then build the base of the aquarium. Have the agent first destroy down, then place down and move forward by 1. It will need to do these steps 3 times, except on the last run, do not have him move forward again. \n\n#### ~ tutorialhint\n```javascript\nplayer.onChat(\"base\", function () {\n\tif (agent.getItemDetail(1) == GLASS) {\n\t\tagent.destroy(DOWN)\n\t\tagent.place(DOWN)\n\t\tagent.move(FORWARD, 1)\n\t\tagent.destroy(DOWN)\n\t\tagent.place(DOWN)\n\t\tagent.move(FORWARD, 1)\n\t\tagent.destroy(DOWN)\n\t\tagent.place(DOWN)\n\t} else {\n\n\t}\n})\n```\n\n## Step 5\n\nThe steps you created will build one row of 3. You need to have the agent build the other 2 rows as well. \nFirst, have the agent turn left, move forward by 1, and then turn left again. Then repeat the code you created for row 1. \nFor row 3, have the agent turn right, move forward by 1, and then turn right again. Then repeat the row 1 code again. \n\n#### ~ tutorialhint\n```javascript\nplayer.onChat(\"base\", function () {\n\tif (agent.getItemDetail(1) == GLASS) {\n\t\tagent.destroy(DOWN)\n\t\tagent.place(DOWN)\n\t\tagent.move(FORWARD, 1)\n\t\tagent.destroy(DOWN)\n\t\tagent.place(DOWN)\n\t\tagent.move(FORWARD, 1)\n\t\tagent.destroy(DOWN)\n\t\tagent.place(DOWN)\n\t\tagent.turn(LEFT_TURN)\n\t\tagent.move(FORWARD, 1)\n\t\tagent.turn(LEFT_TURN)\n\t\tagent.destroy(DOWN)\n\t\tagent.place(DOWN)\n\t\tagent.move(FORWARD, 1)\n\t\tagent.destroy(DOWN)\n\t\tagent.place(DOWN)\n\t\tagent.move(FORWARD, 1)\n\t\tagent.destroy(DOWN)\n\t\tagent.place(DOWN)\n\t\tagent.turn(RIGHT_TURN)\n\t\tagent.move(FORWARD, 1)\n\t\tagent.turn(RIGHT_TURN)\n\t\tagent.destroy(DOWN)\n\t\tagent.place(DOWN)\n\t\tagent.move(FORWARD, 1)\n\t\tagent.destroy(DOWN)\n\t\tagent.place(DOWN)\n\t\tagent.move(FORWARD, 1)\n\t\tagent.destroy(DOWN)\n\t\tagent.place(DOWN)\n\t} else {\n\n\t}\n})\n```\n\n## Step 6\n\nNow we need to add the else section of the if statement. If the agent does not have glass blocks in it's inventory, set 64 glass blocks in slot 1. \n\nThe code for that looks like this:\n\n`agent.setItem(GLASS, 64, 1)`\n\nAfter the agent has the inventory, it will need run the same base code as in the if section. \n\n\n#### ~ tutorialhint\n```javascript\nplayer.onChat(\"base\", function () {\n\tif (agent.getItemDetail(1) == GLASS) {\n\t\tagent.destroy(DOWN)\n\t\tagent.place(DOWN)\n\t\tagent.move(FORWARD, 1)\n\t\tagent.destroy(DOWN)\n\t\tagent.place(DOWN)\n\t\tagent.move(FORWARD, 1)\n\t\tagent.destroy(DOWN)\n\t\tagent.place(DOWN)\n\t\tagent.turn(LEFT_TURN)\n\t\tagent.move(FORWARD, 1)\n\t\tagent.turn(LEFT_TURN)\n\t\tagent.destroy(DOWN)\n\t\tagent.place(DOWN)\n\t\tagent.move(FORWARD, 1)\n\t\tagent.destroy(DOWN)\n\t\tagent.place(DOWN)\n\t\tagent.move(FORWARD, 1)\n\t\tagent.destroy(DOWN)\n\t\tagent.place(DOWN)\n\t\tagent.turn(RIGHT_TURN)\n\t\tagent.move(FORWARD, 1)\n\t\tagent.turn(RIGHT_TURN)\n\t\tagent.destroy(DOWN)\n\t\tagent.place(DOWN)\n\t\tagent.move(FORWARD, 1)\n\t\tagent.destroy(DOWN)\n\t\tagent.place(DOWN)\n\t\tagent.move(FORWARD, 1)\n\t\tagent.destroy(DOWN)\n\t\tagent.place(DOWN)\n\t} else {\n\t\tagent.setItem(GLASS, 64, 1)\n\t\t\t\tagent.destroy(DOWN)\n\t\tagent.place(DOWN)\n\t\tagent.move(FORWARD, 1)\n\t\tagent.destroy(DOWN)\n\t\tagent.place(DOWN)\n\t\tagent.move(FORWARD, 1)\n\t\tagent.destroy(DOWN)\n\t\tagent.place(DOWN)\n\t\tagent.turn(LEFT_TURN)\n\t\tagent.move(FORWARD, 1)\n\t\tagent.turn(LEFT_TURN)\n\t\tagent.destroy(DOWN)\n\t\tagent.place(DOWN)\n\t\tagent.move(FORWARD, 1)\n\t\tagent.destroy(DOWN)\n\t\tagent.place(DOWN)\n\t\tagent.move(FORWARD, 1)\n\t\tagent.destroy(DOWN)\n\t\tagent.place(DOWN)\n\t\tagent.turn(RIGHT_TURN)\n\t\tagent.move(FORWARD, 1)\n\t\tagent.turn(RIGHT_TURN)\n\t\tagent.destroy(DOWN)\n\t\tagent.place(DOWN)\n\t\tagent.move(FORWARD, 1)\n\t\tagent.destroy(DOWN)\n\t\tagent.place(DOWN)\n\t\tagent.move(FORWARD, 1)\n\t\tagent.destroy(DOWN)\n\t\tagent.place(DOWN)\n\t}\n})\n```\n\n\n## Step 7\n\nRun the code by following the instructions in the next step.\n\n## Step 8 @unplugged\n\nTo test your code:\nOnce you have fully read this step click the Green Ok button below to close this window to return to the tutorial to perform the below steps to test your code.\n\n1. Click on the **Green Start button** below to return to the game.\n\n \n\n\n\n2. Reset the area. \n3. Open the chat and type clear. \n4. After the area is clear, type move to move the agent into the correct position. \n5. Once the agent is in the correct spot, type base. \n6. You will know your code is correct when the agent clears the area, moves into position, and builds a 3x3 base for the aquarium. \n\n## Step 9\n\nIf your code works as expected, click next to go on to step 10. If not, go back and fix your code. \n\n## Step 10\n\nNow let's build the outside of the aquarium around the base. First Create a new on chat command called outside. In the chat command, move the agent forward by 1. Then add the code to have the agent place on move. Then have the agent build around the base by the following steps: \n\n - Turn Right\n - Move Forward by 3\n - Turn Right\n - Move Forward by 4\n - Turn Right\n - Move Forward by 4\n - Turn Right\n - Move Forward by 4\n - Move up by 1\n\n\n#### ~ tutorialhint\n```javascript\n\nplayer.onChat(\"outside\", function () {\n\tagent.move(FORWARD, 1)\n\tagent.setAssist(PLACE_ON_MOVE, true)\n\tagent.turn(RIGHT_TURN)\n\tagent.move(FORWARD, 3)\n\tagent.turn(RIGHT_TURN)\n\tagent.move(FORWARD, 4)\n\tagent.turn(RIGHT_TURN)\n\tagent.move(FORWARD, 4)\n\tagent.turn(RIGHT_TURN)\n\tagent.move(FORWARD, 4)\n\tagent.move(UP, 1)\n})\n```\n\n## Step 11\n\nRun the code by following the instructions in the next step.\n\n## Step 12 @unplugged\n\nTo test your code:\nOnce you have fully read this step click the Green Ok button below to close this window to return to the tutorial to perform the below steps to test your code.\n\n1. Click on the **Green Start button** below to return to the game.\n\n \n\n\n\n2. Reset the area. \n3. Open the chat and type clear. \n4. After the area is clear, type move to move the agent into the correct position. \n5. Once the agent is in the correct spot, type base. \n6. Once the base is built, type outside. \n7. You will know your code is correct when the agent clears the area, moves into position, and builds a 3x3 base for the aquarium, and builds 1 level of the outside of the aquarium. \n\n## Step 13\n\nIf your code works as expected, click next to go on to step 14. If not, go back and fix your code. \n\n\n## Step 14\n\nNow it is time to build the aquarium taller. You can reuse the code from the first level, starting with the right turn. However, the first forward should change from 3 - 4. We want to do 3 levels. After you have copied the code for level 2, add a move forward by 1, then copy the level 2 code and paste for the rest of level 3. \n\n#### ~ tutorialhint\n```javascript\n\nplayer.onChat(\"outside\", function () {\n\tagent.move(FORWARD, 1)\n\tagent.setAssist(PLACE_ON_MOVE, true)\n\tagent.turn(RIGHT_TURN)\n\tagent.move(FORWARD, 3)\n\tagent.turn(RIGHT_TURN)\n\tagent.move(FORWARD, 4)\n\tagent.turn(RIGHT_TURN)\n\tagent.move(FORWARD, 4)\n\tagent.turn(RIGHT_TURN)\n\tagent.move(FORWARD, 4)\n\tagent.move(UP, 1)\n\tagent.turn(RIGHT_TURN)\n\tagent.move(FORWARD, 4)\n\tagent.turn(RIGHT_TURN)\n\tagent.move(FORWARD, 4)\n\tagent.turn(RIGHT_TURN)\n\tagent.move(FORWARD, 4)\n\tagent.turn(RIGHT_TURN)\n\tagent.move(FORWARD, 4)\n\tagent.move(UP, 1)\n\tagent.move(FORWARD, 1)\n\tagent.turn(RIGHT_TURN)\n\tagent.move(FORWARD, 4)\n\tagent.turn(RIGHT_TURN)\n\tagent.move(FORWARD, 4)\n\tagent.turn(RIGHT_TURN)\n\tagent.move(FORWARD, 4)\n\tagent.turn(RIGHT_TURN)\n\tagent.move(FORWARD, 4)\n\tagent.move(UP, 1)\n})\n```\n\n## Step 15\n\nRun the code by following the instructions in the next step.\n\n## Step 16 @unplugged\n\nTo test your code:\nOnce you have fully read this step click the Green Ok button below to close this window to return to the tutorial to perform the below steps to test your code.\n\n1. Click on the **Green Start button** below to return to the game.\n\n \n\n\n\n2. Reset the area. \n3. Open the chat and type clear. \n4. After the area is clear, type move to move the agent into the correct position. \n5. Once the agent is in the correct spot, type base. \n6. Once the base is built, type outside. \n7. You will know your code is correct when the agent clears the area, moves into position, and builds a 3x3 base for the aquarium, and builds 3 levels of the outside of the aquarium. \n\n## Step 13\n\nIf your code works as expected, click next to go on to the next activity. If not, go back and fix your code. ","Lesson3/3.3/3.3.2.md":"# Expert Coding using JavaScript - Lesson 3 Activity 3.3.2\n### @explicitHints true\n\n## Step 1\n\nYou have now built the aquarium and we need to fill it with water and fish. \n\nWe have placed the code for clearing and building the aquarium on your workspace. *We have shortened it somewhat for you to make it easier to work.*\n\n```template\nplayer.onChat(\"clear\", function () {\n\tfor (let index = 0; index < 5; index++) {\n\t\tif (agent.inspect(AgentInspection.Block, FORWARD) == GRASS) {\n\t\t\tagent.destroy(FORWARD)\n\t\t\tagent.move(FORWARD, 1)\n\t\t} else {\n\t\t\tagent.move(FORWARD, 1)\n\t\t}\n}\n\tagent.turn(LEFT_TURN)\n\tif (agent.inspect(AgentInspection.Block, FORWARD) == GRASS) {\n\t\tagent.destroy(FORWARD)\n\t\tagent.move(FORWARD, 1)\n\t} else {\n\t\tagent.move(FORWARD, 1)\n\t}\n\tagent.turn(LEFT_TURN)\n\tfor (let index = 0; index < 4; index++) {\n\t\tif (agent.inspect(AgentInspection.Block, FORWARD) == GRASS) {\n\t\t\tagent.destroy(FORWARD)\n\t\t\tagent.move(FORWARD, 1)\n\t\t} else {\n\t\t\tagent.move(FORWARD, 1)\n\t\t}\n\t}\n\tagent.turn(RIGHT_TURN)\n\tif (agent.inspect(AgentInspection.Block, FORWARD) == GRASS) {\n\t\tagent.destroy(FORWARD)\n\t\tagent.move(FORWARD, 1)\n\t} else {\n\t\tagent.move(FORWARD, 1)\n\t}\n\tagent.turn(RIGHT_TURN)\n\tfor (let index = 0; index < 4; index++) {\n\t\tif (agent.inspect(AgentInspection.Block, FORWARD) == GRASS) {\n\t\t\tagent.destroy(FORWARD)\n\t\t\tagent.move(FORWARD, 1)\n\t\t} else {\n\t\t\tagent.move(FORWARD, 1)\n\t\t}\n\t}\n\tagent.turn(LEFT_TURN)\n\tif (agent.inspect(AgentInspection.Block, FORWARD) == GRASS) {\n\t\tagent.destroy(FORWARD)\n\t\tagent.move(FORWARD, 1)\n\t} else {\n\t\tagent.move(FORWARD, 1)\n\t}\n\tagent.turn(LEFT_TURN)\n\tfor (let index = 0; index < 4; index++) {\n\t\tif (agent.inspect(AgentInspection.Block, FORWARD) == GRASS) {\n\t\t\tagent.destroy(FORWARD)\n\t\t\tagent.move(FORWARD, 1)\n\t\t} else {\n\t\t\tagent.move(FORWARD, 1)\n\t\t}\n\t}\n\tagent.turn(RIGHT_TURN)\n\tif (agent.inspect(AgentInspection.Block, FORWARD) == GRASS) {\n\t\tagent.destroy(FORWARD)\n\t\tagent.move(FORWARD, 1)\n\t} else {\n\t\tagent.move(FORWARD, 1)\n\t}\n\tagent.turn(RIGHT_TURN)\n\tfor (let index = 0; index < 4; index++) {\n\t\tif (agent.inspect(AgentInspection.Block, FORWARD) == GRASS) {\n\t\t\tagent.destroy(FORWARD)\n\t\t\tagent.move(FORWARD, 1)\n\t\t} else {\n\t\t\tagent.move(FORWARD, 1)\n\t\t}\n\t}\n})\nplayer.onChat(\"base\", function () {\n\tif (agent.getItemDetail(1) == GLASS) {\n\t\tfor (let index = 0; index < 2; index++) {\n\t\t\tagent.destroy(DOWN)\n\t\t\tagent.place(DOWN)\n\t\t\tagent.move(FORWARD, 1)\n\t\t}\n\t\tagent.destroy(DOWN)\n\t\tagent.place(DOWN)\n\t\tagent.turn(LEFT_TURN)\n\t\tagent.move(FORWARD, 1)\n\t\tagent.turn(LEFT_TURN)\n\t\tfor (let index = 0; index < 2; index++) {\n\t\t\tagent.destroy(DOWN)\n\t\t\tagent.place(DOWN)\n\t\t\tagent.move(FORWARD, 1)\n\t\t}\n\t\tagent.destroy(DOWN)\n\t\tagent.place(DOWN)\n\t\tagent.turn(RIGHT_TURN)\n\t\tagent.move(FORWARD, 1)\n\t\tagent.turn(RIGHT_TURN)\n\t\tfor (let index = 0; index < 2; index++) {\n\t\t\tagent.destroy(DOWN)\n\t\t\tagent.place(DOWN)\n\t\t\tagent.move(FORWARD, 1)\n\t\t}\n\t\tagent.destroy(DOWN)\n\t\tagent.place(DOWN)\n\t} else {\n\t\tagent.setItem(GLASS, 64, 1)\n\t\tfor (let index = 0; index < 2; index++) {\n\t\t\tagent.destroy(DOWN)\n\t\t\tagent.place(DOWN)\n\t\t\tagent.move(FORWARD, 1)\n\t\t}\n\t\tagent.destroy(DOWN)\n\t\tagent.place(DOWN)\n\t\tagent.turn(LEFT_TURN)\n\t\tagent.move(FORWARD, 1)\n\t\tagent.turn(LEFT_TURN)\n\t\tfor (let index = 0; index < 2; index++) {\n\t\t\tagent.destroy(DOWN)\n\t\t\tagent.place(DOWN)\n\t\t\tagent.move(FORWARD, 1)\n\t\t}\n\t\tagent.destroy(DOWN)\n\t\tagent.place(DOWN)\n\t\tagent.turn(RIGHT_TURN)\n\t\tagent.move(FORWARD, 1)\n\t\tagent.turn(RIGHT_TURN)\n\t\tfor (let index = 0; index < 2; index++) {\n\t\t\tagent.destroy(DOWN)\n\t\t\tagent.place(DOWN)\n\t\t\tagent.move(FORWARD, 1)\n\t\t}\n\t\tagent.destroy(DOWN)\n\t\tagent.place(DOWN)\n\t}\n})\nplayer.onChat(\"outside\", function () {\n\tagent.move(FORWARD, 1)\n\tagent.setAssist(PLACE_ON_MOVE, true)\n\tagent.turn(RIGHT_TURN)\n\tagent.move(FORWARD, 3)\n\tfor (let index = 0; index < 3; index++) {\n\t\tagent.turn(RIGHT_TURN)\n\t\tagent.move(FORWARD, 4)\n\t}\n\tagent.move(UP, 1)\n\tfor (let index = 0; index < 4; index++) {\n\t\tagent.turn(RIGHT_TURN)\n\t\tagent.move(FORWARD, 4)\n\t}\n\tagent.move(UP, 1)\n\tagent.move(FORWARD, 1)\n\tfor (let index = 0; index < 4; index++) {\n\t\tagent.turn(RIGHT_TURN)\n\t\tagent.move(FORWARD, 4)\n\t}\n\tagent.move(UP, 1)\n})\n```\n\n\n## Step 2\n\nOur first step is to create an on chat command called water. Inside the chat command, turn off agent place on move so the agent doesn't place down glass blocks inside the aquarium. Then turn the agent right and move forward by 1. Then move the agent down 3 to get to the bottom of the aquarium. \n\nAfter that code, change the active slot of the agent to slot 2, which contains the water bucket. The code for that looks like this:\n\n agent.setSlot(2)\n\n\n\n#### ~ tutorialhint\n```javascript\n\nplayer.onChat(\"water\", function () {\n\tagent.setAssist(PLACE_ON_MOVE, false)\n\tagent.turn(RIGHT_TURN)\n\tagent.move(FORWARD, 1)\n\tagent.move(DOWN, 3)\n\tagent.setSlot(2)\n\n})\n\n```\n\n## Step 3\n\nAfter the slot has been changed to slot 2, add an agent place on move and set it to true. Then move the agent around the aquarium to fill with water. Use the following directions to fill it to the top evenly. \n\n - Move right 2 times\n - Move forward 2 times\n - Move up 1 time\n - Move left 2 times\n - Move back 2 times\n - Move up 1 time\n - Move right 2 times\n - Move forward 2 times\n\n#### ~ tutorialhint\n```javascript\n\nplayer.onChat(\"water\", function () {\n\tagent.setAssist(PLACE_ON_MOVE, false)\n\tagent.turn(RIGHT_TURN)\n\tagent.move(FORWARD, 1)\n\tagent.move(DOWN, 3)\n\tagent.setSlot(2)\n\tagent.setAssist(PLACE_ON_MOVE, true)\n\tagent.move(RIGHT, 2)\n\tagent.move(FORWARD, 2)\n\tagent.move(UP, 1)\n\tagent.move(LEFT, 2)\n\tagent.move(BACK, 2)\n\tagent.move(UP, 1)\n\tagent.move(RIGHT, 2)\n\tagent.move(FORWARD, 2)\n})\n\n```\n\n## Step 4\n\nRun the code by following the instructions in the next step.\n\n## Step 5 @unplugged\n\nTo test your code:\nOnce you have fully read this step click the Green Ok button below to close this window to return to the tutorial to perform the below steps to test your code.\n\n1. Click on the **Green Start button** below to return to the game.\n\n \n\n\n\n2. Reset the area. \n3. Open the chat and type clear. \n4. After the area is clear, type move to move the agent into the correct position. \n5. Once the agent is in the correct spot, type base. \n6. Once the agent builds base, type outside to build the outside of the aquarium. \n7. After the outside is built, type water to fill the aquarium. \n8. You will know your code is correct when the aquarium is built and filled with water. \n\n## Step 6\n\nIf your code works as expected, click next to go on to step 7. If not, go back and fix your code. \n\n## Step 7\n\nNow it is time to fill the the aquarium with fish. We are going to write the code using a chat command and use an if statement to check how many fish we have added to the aquarium as well. \nFirst, declare a variable named fish and assign it the value of 0. \nThen add a chat command named fish. \n\n#### ~ tutorialhint\n```javascript\n\nlet fish = 0\nplayer.onChat(\"fish\", function () {\n\t\n})\n```\n\n## Step 8\n\nNext, inside the chat command, set the agent's active slot to slot 3 (which contains the tropical fish). \nAfter you set the active slot, have the agent place forward. Then we want to have the variable fish increase by 1. \n\n\n#### ~ tutorialhint\n```javascript\n\nlet fish = 0\nplayer.onChat(\"fish\", function () {\n\tagent.setSlot(3)\n\tagent.place(FORWARD)\n\tfish += 1\n\t\n})\n```\n\n## Step 9\n\nNow, we want to add an if /else statement in the chat command. Have the if statement check to see if the variable fish equals to or is greater than 5. \nIf it is equal to or greater than 5, have the player say \"Your aquarium is full.\" If it is not equal to or greater than 5, have the player say, \"You only have (the variable fish) fish.\"\n\n#### ~ tutorialhint\n```javascript\n\nlet fish = 0\nplayer.onChat(\"fish\", function () {\n\tagent.setSlot(3)\n\tagent.place(FORWARD)\n\tfish += 1\n\tif (fish >= 5) {\n\t\tplayer.say(\"Your Aquarium is full!\")\n\t} else {\n\t\tplayer.say(\"You only have \" + fish + \" fish\")\n\t}\n})\n```\n\n## Step 10\n\nRun the code by following the instructions in the next step.\n\n## Step 11 @unplugged\n\nTo test your code:\nOnce you have fully read this step click the Green Ok button below to close this window to return to the tutorial to perform the below steps to test your code.\n\n1. Click on the **Green Start button** below to return to the game.\n\n \n\n\n\n2. Reset the area. \n3. Open the chat and type clear. \n4. After the area is clear, type move to move the agent into the correct position. \n5. Once the agent is in the correct spot, type base. \n6. Once the agent builds base, type outside to build the outside of the aquarium. \n7. After the outside is built, type water to fill the aquarium. \n8. After the water fills the aquarium, type fish. \n9. You should see the player say You only have 1 fish.\n10. Type fish 4 more times. \n11. At the 5th time, you should see you player say Your aquarium is full!\n12. You will know your code is correct when the aquarium is built and filled with water and 5 fish and your player says Your aquarium is full. \n\n## Step 12\n\nIf your code works as expected, click next to go on to the assessment. If not, go back and fix your code. ","Lesson4/4.1/4.1.md":"# Expert Coding using JavaScript - Lesson 4 Activity 4.1\n### @explicitHints true\n\n\n\n## Step 1 @unplugged\n\nAs we continue to create more complex conditional statements in code, we can use **flowcharts** to help us map out the code. \nFlowcharts use certain shaped blocks to represent certain parts of the code. Read through the chart below to learn about these blocks. \n\n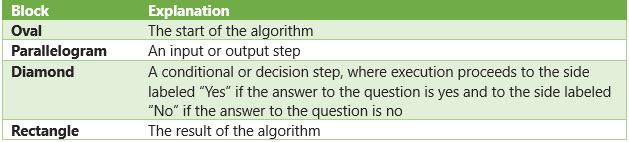\n\n## Step 2 @unplugged\n\nLet's look at a flowchart for one of the codes you built in the last lesson. \nRead through the flowchart to determine what is happening in the code and what conditional is being used. \n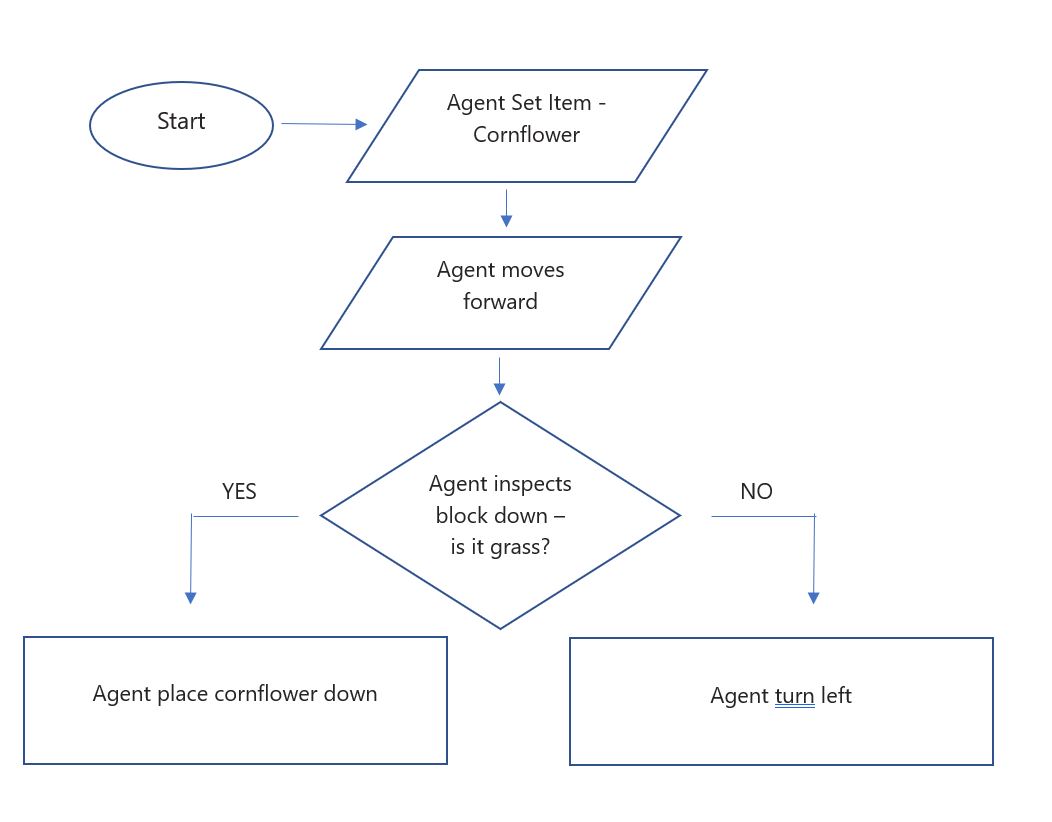\n\nYou should have read that the conditional is that if the agent detects a grass block below him, he will place down a cornflower and if he does not, he will turn left. \n\n## Step 3 @unplugged\nRead through the flowchart below and think about what is happening in the code. \n\n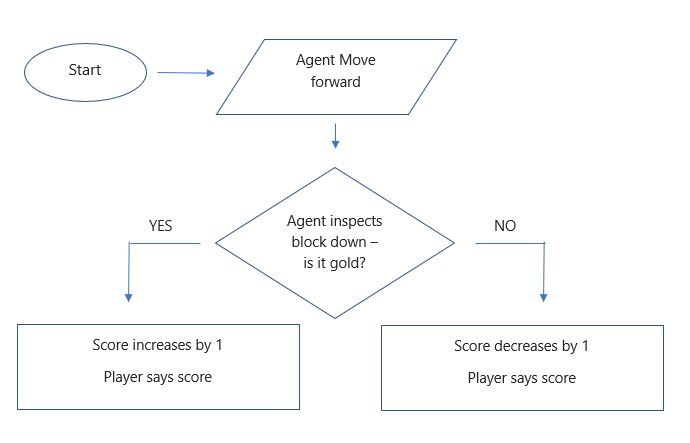\n\nThis code would include an if/else statement. Think about what that if / else statement would look like. Click next to build the answer. \n\n## Step 4 \n\nLet's build the code from the flowchart (the image is below if you need to see it again.) We will start with the first step. We are going to need to create the variable for score. Declare it and assign it the value of 0. \n\n\n#### ~ tutorialhint\n\n```javascript\nlet score = 0\n\n```\n\n## Step 5\n\nNext step (refer to the image below for reference) is to create the code for the agent to move forward by 1. \nWrite the code in the coding editor. \n\n\n \n#### ~ tutorialhint\n\n```javascript\nlet score = 0\nagent.move(FORWARD, 1)\n\n```\n\n## Step 6\nNext, we need the If/Else Statement (see image below for reference). \nAdd an If/Else Statement where the conditional is that if the agent inspects the block down and it is equal to gold, then the variable score goes up by 1 else it goes down by 1. \n\n\n#### ~ tutorialhint\n\n```javascript\nlet score = 0\nagent.move(FORWARD, 1)\nif (agent.inspect(AgentInspection.Block, DOWN) == GOLD_BLOCK) {\n\tscore += 1\n} else {\n\tscore += -1\n}\n\t\n```\n\n## Step 7\nLastly, we need to have the player say the score in both parts of the If/Else Statement. \n\n\n#### ~ tutorialhint\n\n```javascript\nlet score = 0\nagent.move(FORWARD, 1)\nif (agent.inspect(AgentInspection.Block, DOWN) == GOLD_BLOCK) {\n\tscore += 1\n\tplayer.say(score)\n} else {\n\tscore += -1\n\tplayer.say(score)\n}\n```\n\n## Step 8\nRun the code by following the instructions in the next step.\n\n\n## Step 9 @unplugged\nTo test your code:\nOnce you have fully read this step click the Green Ok button below to close this window to return to the tutorial to perform the below steps to test your code.\n\n1. Click on the **Green Start button** below to return to the game.\n\n \n\n\n\n2. You will know your code is correct when you see the agent move forward and the player say the score. \n\n## Step 10\n\nWhen your code works as expected move on to the next activity.\nIf it does not work as expected, try to fix and test again.","Lesson4/4.1/4.01.md":"# Expert Coding using JavaScript - Lesson 4 Activity 4.01\n### @explicitHints true\n\n## Step 1 @unplugged\n\nParallel and distributed computing make use of multiple computers working together to solve difficult problems or handle huge amounts of data in a faster way.\n\n**Sequential computing** is the traditional way of processing information using a single processor or core. Think of it like following a recipe step by step. Each instruction is completed before moving on to the next one.\n\n**In sequential computing, a computer executes instructions in a specific order, one after the other.** It starts with the first instruction, then moves to the second, and so on. It's similar to reading a book from the first page to the last page, without skipping or jumping ahead.\n\nA sequential solution takes as long as the sum of all of its steps.\n\n## Step 2 @unplugged\n\n**Parallel computing** is a method of processing information using multiple processors or computers simultaneously to solve complex problems or handle large amounts of data more quickly.\n\nThink of it like teamwork. Instead of one person doing all the work, **parallel computing allows multiple processors or computers to work together, dividing the task into smaller parts and solving them simultaneously.**\n\nEach processor or computer in parallel computing can handle a portion of the problem independently. They work together on different pieces of the task at the same time, like a team working on different parts of a project simultaneously.\n\nParallel computing can help speed up the processing time because multiple processors or computers are working in parallel, tackling different parts of the problem simultaneously. It can be especially useful for tasks that involve complex calculations or analyzing large sets of data. \n\nHowever, it's important to note that **not all problems can be easily parallelized.** Some tasks may have dependencies or require coordination between different parts, which makes parallel computing more challenging. Additionally, the effectiveness of parallel computing depends on factors such as the number of processors or computers available, the nature of the problem, and the efficiency of the parallel algorithms used.\n\n## Step 3 @unplugged\nIn parallel computing, the time it takes to complete a task depends on two things: the time it takes for sequential tasks and the time it takes for the longest parallel task.\n\nTo measure the effectiveness of a parallel solution, we use something called \"speedup.\" **Speedup tells us how much faster a parallel solution is compared to doing the same task sequentially.**\n\nTo calculate speedup, **we divide the time it took to complete the task sequentially by the time it took to complete the task in parallel.** The result gives us an idea of how much time we saved by using parallel computing.\n\nIn simpler terms, speedup measures how much faster we can finish a task by working together in parallel instead of doing it all by ourselves one step at a time.\n\n## Step 4 @unplugged\n\n**Distributed computing** is a method of processing information that involves multiple computers or devices working together as a team. It allows for collaboration and sharing of resources to solve complex problems or handle large amounts of data.\n\nThink of it like a group project. In distributed computing, each computer or device is like a team member with its own set of skills and capabilities. They communicate and work together to complete a task.\n\nInstead of having a single powerful computer doing all the work, **distributed computing divides the task into smaller parts and assigns them to different computers or devices.** Each computer or device works on its assigned part independently and shares the results with the other members of the team.\n\n## Step 5 @unplugged\n\nDistributed computing allows for **efficient use of resources** because each computer can contribute its processing power, memory, and storage to the overall task. This approach can **handle large amounts of data** and perform complex calculations faster than a single computer.\n\nMoreover, distributed computing is often used for **tasks that require a high level of reliability and fault-tolerance.** If one computer in the network fails or experiences a problem, the other computers can continue the work and maintain the overall functionality of the system.\n\nDistributed computing helps us solve problems that would be too big or take too long to handle on a single computer. It allows us to work with larger problems and solve them faster than we could with just one computer. By working together, we can solve bigger problems faster than if we tried to do it all on one computer.\n\n## Step 6 @unplugged\n\nNow that you know a little about these different types of computing, go to the next NPC to help the QA team with Advanced Logic. ","Lesson4/4.1/4.1.1.md":"# Expert Coding using JavaScript - Lesson 4 Activity 4.1.1\n### @explicitHints true\n\n## Step 1 @unplugged\n\nLet's continue practicing with Flowcharts. On your student worksheet, create your own flowchart for the following code. \n\n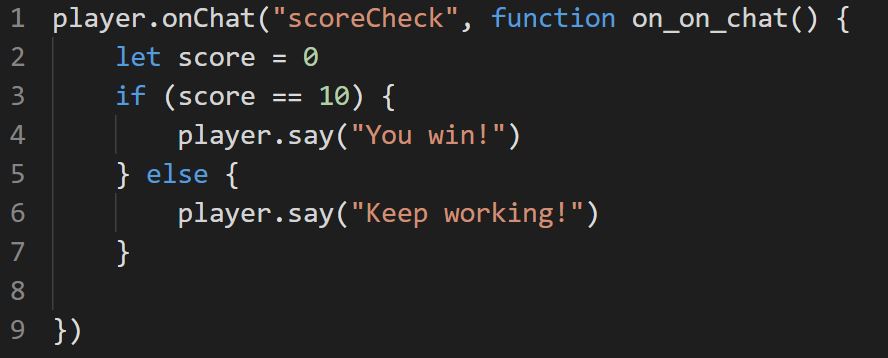\n\nBe sure to use the write shapes when creating the flowchart. Use the chart below as a reference. \n\n\n\nAfter creating the flowchart, click next to check your work. \n\n## Step 2 @unplugged\n\nThis is how the flowchart should look. \n\n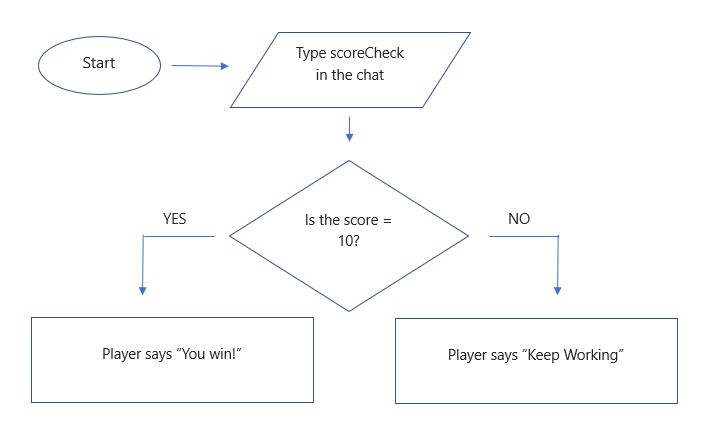\n\nIf your flowchart is correct, move on to the next NPC. If it is incorrect, fix your mistakes before you move on to the next NPC. \n","Lesson4/4.2/4.2.md":"# Expert Coding using JavaScript - Lesson 4 Activity 4.2\n### @explicitHints true\n\n## Step 1 @unplugged\n\nIn the last activity, you learned that when you use an If / else statement, the If section provides a condition that evaluates to true or false. If it is true, the code in the corresponding section will be executed. If it is false, the code in the else section will be executed. \n\nIf you need more than 2 options, you can use an **If / else if / else statement.** \nIn an If / else if/ else statement, the If section works the same way it does in an if / else statement. It provides the condition that evaluates to be true or false. If it is true, the code in the corresponding section will run. \nIf it is false, it will go to the else if section. In the else if section, **there is another condition to evaluate to true or false.** If it evaluates to true, the code in the corresponding section will run. If it is false, the code in the else section will run. \nView the diagram below to see a visual representation of this statement. \n\n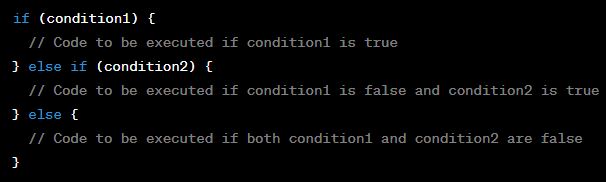\n\n## Step 2 @unplugged\n\nLet's practice by expanding one of the codes we did in the last lesson. \nIn Lesson 3 we used the code below to have the agent check for grass blocks under him and if there is, he will plant a flower. If not, he will turn left. \n\n agent.setItem(CORNFLOWER, 64, 1)\n agent.move(FORWARD, 1)\n if (agent.inspect(AgentInspection.Block, DOWN) == GRASS) {\n\t agent.place(DOWN)\n\t} else {\n\t\tagent.turn(LEFT_TURN)\n}\n\nWe are going to expand this code in the next step. \n\nS\n\n## Step 3\n\n```template\n agent.setItem(CORNFLOWER, 64, 1)\n agent.move(FORWARD, 1)\n if (agent.inspect(AgentInspection.Block, DOWN) == GRASS) {\n\t agent.place(DOWN)\n\t} else {\n\t\tagent.turn(LEFT_TURN)\n}\n```\nUsing the code, below, first add in an else if section after the if section by adding in the following code. \n\n } else if (false) {\n\n#### ~ tutorialhint\n\n```javascript\nagent.setItem(CORNFLOWER, 64, 1)\nagent.move(FORWARD, 1)\nif (agent.inspect(AgentInspection.Block, DOWN) == GRASS) {\n\tagent.place(DOWN)\n} else if (false) {\n\n} else {\n\tagent.turn(LEFT_TURN)\n}\n```\n\n## Step 4\n\nNext, lets add a new conditional in the else if section that tests if the agent detects stone under him if he does not detect grass. \nYou will add in the conditional in the else if section, the same way you did in the if section of the code. \n\n#### ~ tutorialhint\n\n```javascript \nagent.setItem(CORNFLOWER, 64, 1)\nagent.move(FORWARD, 1)\nif (agent.inspect(AgentInspection.Block, DOWN) == GRASS) {\n\tagent.place(DOWN)\n} else if (agent.inspect(AgentInspection.Block, DOWN) == STONE) {\n\tagent.move(FORWARD, 1)\n} else {\n\tagent.turn(LEFT_TURN)\n}\n```\n\n## Step 5\n\nLastly, add that if the else if section evaluates to true, the agent will move forward. \n\n#### ~ tutorialhint\n\n```javascript \nagent.setItem(CORNFLOWER, 64, 1)\nagent.move(FORWARD, 1)\nif (agent.inspect(AgentInspection.Block, DOWN) == GRASS) {\n\tagent.place(DOWN)\n} else if (agent.inspect(AgentInspection.Block, DOWN) == STONE) {\n\tagent.move(FORWARD, 1)\n} else {\n\tagent.turn(LEFT_TURN)\n}\n```\n\n## Step 6\n\nRun the code by following the instructions in the next step.\n\n## Step 7 @unplugged\n\nTo test your code:\nOnce you have fully read this step click the Green Ok button below to close this window to return to the tutorial to perform the below steps to test your code.\n\n1. Click on the **Green Start button** below to return to the game.\n\n \n\n\n\n2. You will know your code is correct when the agent moves forward, places flowers down on the grass blocks or moves forward when on a stone block, or \n3. turns left when there isn't either a grass block or a stone block. \n4. You can run the code again to try and see if you get a different reaction from the agent, depending on where he is standing. \n\n## Step 8\n\nWhen your code works as expected move on to the next activity.\nIf it does not work as expected, try to fix and test again.\n","Lesson4/4.2/4.2.1.md":"# Expert Coding using JavaScript - Lesson 4 Activity 4.2.1\n### @explicitHints true\n\n## Step 1\n\nLet's continue working with If / else if/ else statements by building a code that counts the steps the player takes and responds based on the number. \nFirst declare the variable of walk and assign it the value of 0. \n\n#### ~ tutorialhint\n\n```javascript \nlet steps = 0\n```\n\n## Step 2\n\nIn Minecraft, we can use an On Player Walked code. It is below. Replicate it in your code. \n\n player.onTravelled(WALK, function () {\n })\n\n#### ~ tutorialhint\n\n```javascript \nlet steps = 0\nplayer.onTravelled(WALK, function () {\n})\n```\n\n## Step 3\n\nAdd into the On Player Walked code the code to increase the variable walk by 1.\n\n#### ~ tutorialhint\n\n```javascript \nlet steps = 0\nplayer.onTravelled(WALK, function () {\n\tsteps += 1\n})\n```\n\n## Step 4\n\nNow, we will create the If/else if/ else statement by first adding the if section with the conditional of if the variable steps are less than or equal to 5 the player will say \"Keep Going.\"\n#### ~ tutorialhint\n\n```javascript \nlet steps = 0\nplayer.onTravelled(WALK, function () {\n\tsteps += 1\n\tif (steps <= 5) {\n\t\tplayer.say(\"Keep Going\")\n})\n\t\n```\n\n## Step 5\n\nNext, add the else if section of the code with the conditional if the variable steps is less than or equal to 10 the player will say \"Almost there!\"\n\n#### ~ tutorialhint\n\n```javascript \nlet steps = 0\nplayer.onTravelled(WALK, function () {\n\tsteps += 1\n\tif (steps <= 5) {\n\t\tplayer.say(\"Keep Going\")\n\t} else if (steps <= 10) {\n\t\tplayer.say(\"Almost there!\")\n})\n\t\n```\n\n## Step 6\n\nLast, add the else section of the code that will have the player say \"Great work!\"\n\n#### ~ tutorialhint\n\n```javascript \nlet steps = 0\nplayer.onTravelled(WALK, function () {\n\tsteps += 1\n\tif (steps <= 5) {\n\t\tplayer.say(\"Keep Going\")\n\t} else if (steps <= 10) {\n\t\tplayer.say(\"Almost there!\")\n\t} else {\n\t\tplayer.say(\"Great work!\")\n\t}\n})\n\t\n```\n\n## Step 7\n\nRun the code by following the instructions in the next step.\n\n\n## Step 8 @unplugged\n\nTo test your code:\nOnce you have fully read this step click the Green Ok button below to close this window to return to the tutorial to perform the below steps to test your code.\n\n1. Click on the **Green Start button** below to return to the game.\n\n \n\n\n\n2. Walk your player around in the game and see what happens. \n3. You will know your code is correct when your player says something with each step and it changes when it hits 5 steps and then again when it hits 10 steps. \n\n\n## Step 9\n\nWhen your code works as expected move on to the next activity.\nIf it does not work as expected, try to fix and test again.","Lesson4/4.2/4.2.2.md":"# Expert Coding using JavaScript - Lesson 4 Activity 4.2.2\n### @explicitHints true\n\n\n\n## Step 1\n\nLet's create code that will increase the score of the game with every gold block broken and the player can check the score by using a chat command. \nStart by declaring the variable score and assigning it the value of 0. \n\n#### ~ tutorialhint\n\n```javascript \nlet score = 0\n```\n\n## Step 2\n\nIn Minecraft we can use an on blocks broken code. The code is below. \n\n blocks.onBlockBroken(GOLD_BLOCK, function () {\n })\n\nAdd the code that says on the gold block broken, the score will increase by 1. \n\n#### ~ tutorialhint\n\n```javascript \n\nlet score = 0\nblocks.onBlockBroken(GOLD_BLOCK, function () {\n\tscore += 1\n\n```\n\n## Step 3\n\nNext, create an On Chat command called scoreCheck. \n\n#### ~ tutorialhint\n\n```javascript \n\nlet score = 0\nblocks.onBlockBroken(GOLD_BLOCK, function () {\n\tscore += 1\n})\nplayer.onChat(\"scoreCheck\", function () {\n\n})\n```\n\n\n## Step 4\n\nAdd an If / Else If/ Else Statement. In the If section of the code, create a conditional that says if the variable score is equal to 0 the player will say \"You don't have any points.\"\n\n#### ~ tutorialhint\n\n```javascript \n\nlet score = 0\nblocks.onBlockBroken(GOLD_BLOCK, function () {\n\tscore += 1\n})\nplayer.onChat(\"scoreCheck\", function () {\n\tif (score == 0) {\n\t\tplayer.say(\"You don't have any points.\")\n\t}\n})\n```\n\n## Step 5\n\nAdd to the else if section of the code the conditional if the score is less than or equal to 10 the player will say \"Your score is *the variable score*.\" (The variable score is calling the actual variable, not using the words the variable score.)\n\n\n#### ~ tutorialhint\n\n```javascript \n\nlet score = 0\nblocks.onBlockBroken(GOLD_BLOCK, function () {\n\tscore += 1\n})\nplayer.onChat(\"scoreCheck\", function () {\n\tif (score == 0) {\n\t\tplayer.say(\"You don't have any points.\")\n\t} else if (score <= 10) {\n\t\tplayer.say(\"Your score is \" + score)\n\t} else {\n\t\tplayer.say(\"You win with a score of \" + score)\n\t}\n})\n```\n\n## Step 6\n\nLast, add the else section of the code that will have the player say \"You win the game with a score of *the variable score*.\" (The variable score is calling the actual variable, not using the words the variable score.)\n\n\n#### ~ tutorialhint\n\n```javascript \n\nlet score = 0\nblocks.onBlockBroken(GOLD_BLOCK, function () {\n\tscore += 1\n})\nplayer.onChat(\"scoreCheck\", function () {\n\tif (score == 0) {\n\t\tplayer.say(\"You don't have any points.\")\n\t} else if (score <= 10) {\n\t\tplayer.say(\"Your score is \" + score)\n\t} else {\n\t\tplayer.say(\"You win with a score of \" + score)\n\t}\n})\n```\n\n## Step 7\n\nRun the code by following the instructions in the next step.\n\n\n## Step 8 @unplugged\n\nTo test your code:\nOnce you have fully read this step click the Green Ok button below to close this window to return to the tutorial to perform the below steps to test your code.\n\n1. Click on the **Green Start button** below to return to the game.\n\n \n\n\n\n2. Open the chat and type scoreCheck. Your player should say \"You don't have any points.\"\n3. Walk your player around in the game and break gold blocks. \n4. After breaking 5, type scoreCheck in the chat again. You should see your player say \"Your score is 5.\"\n5. Walk your player around the game and break 6 more gold blocks. You should see your player say \"You win with a score of 11.\"\n\n\n## Step 9\n\nWhen your code works as expected move on to the next NPC. \nIf it does not work as expected, try to fix and test again.","Lesson4/4.3/4.3.1.md":"# Expert Coding using JavaScript - Lesson 4 Activity 4.3.1\n### @explicitHints true\n\n## Step 1\n\nLet's continue practicing with nested loops by building a more complex code that nests the conditionals in both the if section and the else if section. \nStart by creating a chat command called build. \n\n#### ~ tutorialhint\n```javascript \nplayer.onChat(\"build\", function () {\n\t\n})\n```\n\n## Step 2\n\nIn Minecraft, you can code the agent to test for certain items in their inventory. The code for this is below. \n\n agent.getItemDetail(1) == GRASS\n\n\nNext, add an if statement that has the agent test if there is a grass block in its slot 1 inventory.\n\n\n\n#### ~ tutorialhint\n```javascript \nplayer.onChat(\"build\", function () {\n\tif (agent.getItemDetail(1) == GRASS) {\n\n})\n```\n\n## Step 3\n\nIn Minecraft, you can also have the agent check to see how many items are in their inventory. The code is below. \n\n agent.getItemCount(1) >= 10\n\nLet's add to our If that if the player tests that there is grass blocks in slot one, it will then test to see if there are 10 or more of those grass blocks. \n\n#### ~ tutorialhint\n```javascript \nplayer.onChat(\"build\", function () {\n\tif (agent.getItemDetail(1) == GRASS) {\n\t\tif (agent.getItemCount(1) >= 10) {\n\n})\n```\n\n## Step 4\n\nNow add if the agent does detect at least 10 grass blocks in slot one, it will place on move and move forward 9 steps. \n\n#### ~ tutorialhint\n```javascript \nplayer.onChat(\"build\", function () {\n\tif (agent.getItemDetail(1) == GRASS) {\n\t\tif (agent.getItemCount(1) >= 10) {\n\t\t\tagent.setAssist(PLACE_ON_MOVE, true)\n\t\t\tagent.move(FORWARD, 9)\n\t\t}\n\n})\n```\n\n## Step 5\n\nLet's expand this If Statement and add an Else If section. In the Else If section, have the agent check to see if it has stone blocks in it's slot 2. \n\n#### ~ tutorialhint\n```javascript \nplayer.onChat(\"build\", function () {\n\tif (agent.getItemDetail(1) == GRASS) {\n\t\tif (agent.getItemCount(1) >= 10) {\n\t\t\tagent.setAssist(PLACE_ON_MOVE, true)\n\t\t\tagent.move(FORWARD, 9)\n\t\t}\n\t} else if (agent.getItemDetail(2) == STONE) {\n\n```\n\n## Step 6\n\nIn the Else If code, add the code that if the agent does have stone blocks in slot 2, it will check to see if it has 10 or more of those blocks. \n\n#### ~ tutorialhint\n```javascript \nplayer.onChat(\"build\", function () {\n\tif (agent.getItemDetail(1) == GRASS) {\n\t\tif (agent.getItemCount(1) >= 10) {\n\t\t\tagent.setAssist(PLACE_ON_MOVE, true)\n\t\t\tagent.move(FORWARD, 9)\n\t\t}\n\t} else if (agent.getItemDetail(2) == STONE) {\n\t\tif (agent.getItemCount(2) >= 10) {\n\n})\n```\n\n## Step 7\n\nIn Minecraft, the agent has multiple slots to hold inventory. The active slot is defaulted to 1 but you can have him change that with code. The code on how to do that is below. \n\n agent.setSlot(2)\n\nLet's add to our Else If section that if the agent does have at least 10 stone blocks in slot 2, we want the agent to first change it's active slot to slot 2. Then we want the agent to place on move and then move forward by 9. \n\n#### ~ tutorialhint\n```javascript \nplayer.onChat(\"build\", function () {\n\tif (agent.getItemDetail(1) == GRASS) {\n\t\tif (agent.getItemCount(1) >= 10) {\n\t\t\tagent.setAssist(PLACE_ON_MOVE, true)\n\t\t\tagent.move(FORWARD, 9)\n\t\t}\n\t} else if (agent.getItemDetail(2) == STONE) {\n\t\tif (agent.getItemCount(2) >= 10) {\n\t\t\tagent.setSlot(2)\n\t\t\tagent.setAssist(PLACE_ON_MOVE, true)\n\t\t\tagent.move(FORWARD, 9)\n\t\t}\n})\n```\n\n## Step 8\n\nLastly, let's add the else section that will run if both the If and the Else If sections return false. \nIn the else section, have the agent give themselves 10 blocks of grass in slot 1 and 10 blocks of stone in slot 2. \n\n\n#### ~ tutorialhint\n```javascript \nplayer.onChat(\"build\", function () {\n\tif (agent.getItemDetail(1) == GRASS) {\n\t\tif (agent.getItemCount(1) >= 10) {\n\t\t\tagent.setAssist(PLACE_ON_MOVE, true)\n\t\t\tagent.move(FORWARD, 9)\n\t\t}\n\t} else if (agent.getItemDetail(2) == STONE) {\n\t\tif (agent.getItemCount(2) >= 10) {\n\t\t\tagent.setSlot(2)\n\t\t\tagent.setAssist(PLACE_ON_MOVE, true)\n\t\t\tagent.move(FORWARD, 9)\n\t\t}\n\t} else {\n\t\tagent.setItem(GRASS, 10, 1)\n\t\tagent.setItem(STONE, 10, 2)\n\t}\n})\n```\n\n## Step 9\nRun the code by following the instructions in the next step.\n\n\n## Step 10 @unplugged\n\nTo test your code:\nOnce you have fully read this step click the Green Ok button below to close this window to return to the tutorial to perform the below steps to test your code.\n\n1. Click on the **Green Start button** below to return to the game.\n\n \n\n\n\n2. Open the chat by pressing T. \n3. Type Build and press enter. \n4. You shouldn't see anything happen, but if you right click on the agent, you will see it now has 10 grass blocks in slot 1 and 10 stone blocks in slot 2. \n5. Open chat and type build again. \n6. This time you should see the agent move forward by 9 and place down grass blocks. \n7. Open chat and type build one more time. \n8. Now you should see the agent move forward by 9 and place down stone blocks. \n\n\n## Step 11\n\nWhen your code works as expected move on to the next activity.\nIf it does not work as expected, try to fix and test again.","Lesson4/4.3/4.3.md":"# Expert Coding using JavaScript - Lesson 4 Activity 4.3\n### @explicitHints true\n\n\n## Step 1\n\n**Nested conditional statements consist of conditional statements within conditional statements**. This allows you to create more complex logic and execute different blocks of code based on multiple conditions.\n\nView the flowchart below and determine how it nests its conditionals. \n\n\n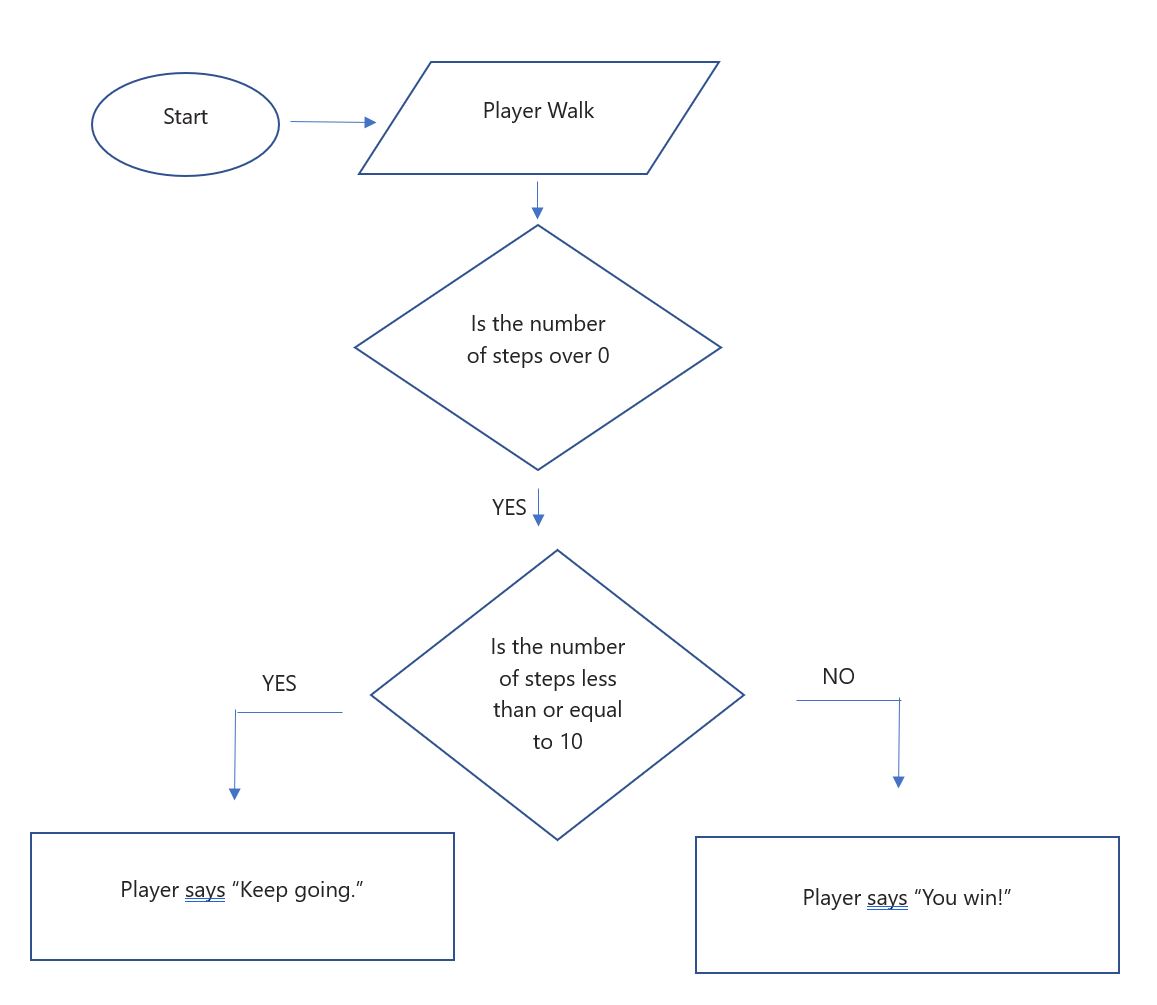\n\nNow, click next to begin building this code. \n\n## Step 2\n\nLet's start building this code, by first declaring the variable steps and assigning it the value of 0. \n\n#### ~ tutorialhint\n```javascript \n\nlet step = 0;\n\n```\n\n## Step 3\n\nNext, create the on player walked code. \n\n#### ~ tutorialhint\n```javascript \n\nlet step = 0;\nplayer.onTravelled(WALK, function () {\n\n});\n```\n\n## Step 4\n\nAdd the code that increases the variable steps by 1 inside the on player walked code. \n#### ~ tutorialhint\n```javascript \n\nlet step = 0;\nplayer.onTravelled(WALK, function () {\n\tstep += 1;\n\n});\n```\n\n## Step 5\n\nAdd the first If/Else statement inside the on player walked code that has the conditional that tests if the variable step is greater than 0. \n\n#### ~ tutorialhint\n```javascript \n\nlet step = 0;\nplayer.onTravelled(WALK, function () {\n\tstep += 1;\n\tif (step > 0) {\n\n\t}\n});\n```\n\n## Step 6\n\nInside the If Statement, add another If Statement that has the condition that tests if the variable steps is less than or equal to 10 and if it evaluates to true, the player will say \"Keep going.\"\n\n#### ~ tutorialhint\n```javascript \n\nlet step = 0;\nplayer.onTravelled(WALK, function () {\n\tstep += 1;\n\tif (step > 0) {\n\t\tif (step <= 10) {\n\t\t\tplayer.say(\"Keep going!\");\n\n\t\t}\n\t}\n});\n```\n\n## Step 7\n\nAdd the else section where the player will say \"You can stop.\"\n\n#### ~ tutorialhint\n```javascript \n\nlet step = 0;\nplayer.onTravelled(WALK, function () {\n\tstep += 1;\n\tif (step > 0) {\n\t\tif (step <= 10) {\n\t\t\tplayer.say(\"Keep going!\");\n\t\t} else {\n\t\t\tplayer.say(\"You can stop.\");\n\t\t}\n\t}\n});\n```\n## Step 8\nRun the code by following the instructions in the next step.\n\n\n## Step 9 @unplugged\n\nTo test your code:\nOnce you have fully read this step click the Green Ok button below to close this window to return to the tutorial to perform the below steps to test your code.\n\n1. Click on the **Green Start button** below to return to the game.\n\n \n\n\n\n2. Walk your player around in the game and see what happens. \n3. You will know your code is correct when your player says Keep Going until you get to 10 steps and then the player will say \"You can stop.\"\n\n\n## Step 10\n\nWhen your code works as expected move on to the next activity.\nIf it does not work as expected, try to fix and test again.","Lesson5/5.1/5.1.md":"<<<<<<< HEAD\n\n\n\n# Expert Coding using JavaScript - Lesson 5 Activity 5.1\n\n### @explicitHints true\n\n \n\n## Step 1 @unplugged\n\n \n\nLoops are an important part of writing in JavaScript. Loops are used to execute a block of code repeatedly until a specific condition is met. JavaScript supports multiple different kinds of loops including:\n1. for\n2. for/in\n3. for/of\n4. while\n5. do/while\n\nLet's take a look at at the common 'for' loop first. We can use a 'for' loop with a 'let' function to run a block of code repeatedly. \n\nIn JavaScript, in order to run a 'for' loop, there are three things that need to be defined. Let's called them \"conditions\".\n1: Condition 1 will set a variable before the loop begins\n\t\tex. let i=0\n2: Condition 2 defines the condition for the loop to be run\n\t\tex. i<5\n3. Condition 3 is increases a value (i++) each time the code block in the loop has been executed.\n\nThis results in the the final code looking like this:\n\n```javascript\n for (let i = 0; i < 5; i++)\n\n```\n\n## Step 2\n\nNow create a loop using the player.say command to count up to the number 10 in the chat. Start by letting i=0 inside of the 'for' loop. Finish the variable with a semicolon symbol.\n\n \n\n#### ~ tutorialhint\n\n \n\n```javascript\n\nfor (let i=0;\n\n \n\n```\n\n \n\n## Step 3\n\nNext we want to define a loop repeat amount. Using a less than operator, define condition 2 to be less than 10. Add a semicolon after condition 2.\n\n \n\n#### ~ tutorialhint\n\n \n\n```javascript\n\nfor(let i=0; i<10;\n\n```\n\n \n\n## Step 4\n\nNext, we need to define condition 3 by addition in an increasing expression (i++), and ending our loop with a parentheses.\n\n \n\n#### ~ tutorialhint\n\n \n\n```javascript\n\nfor(let i=0;i<10;1++)\n\nplayer.say(i)\n\n```\n\n \n\n## Step 5 @unplugged\n\nNow run the code by clicking the **green start button** in the bottom right of the MakeCode screen.\n\n \n\n\n\n \n\nYou will know your code is correct when you see the text 1 appear on your screen.\n\n \n \n \n\n## Step 6\n\nIf your code worked as expected move on to the next activity.\n\n \n\nIf it does not work as expected, try to fix and test again.\n=======\n# Expert Coding using JavaScript - Lesson 5 Activity 5.1\n### @explicitHints true\n>>>>>>> de943f3b7014299b6d8c9d16278e0cb81356dfbc\n","Lesson5/5.1/5.01.md":"# Expert Coding using JavaScript - Lesson 5 Activity 5.01\n### @explicitHints true\n\n\n## Step 1 @unplugged\n \nWhen new computer technologies are created, they are usually intended to serve a particular purpose. However, these innovations can sometimes lead to unexpected outcomes. It is important to remember that people are the ones behind these computing advancements. As new technologies emerge, the way we perform tasks often evolves to incorporate them.\n\nHowever, not all the consequences of these innovations can be predicted beforehand. In fact, a single effect can be seen as both positive and negative, depending on the perspective of different individuals, or even the same person.\n\nThe progress in computing has not only impacted the field itself but has also sparked creativity in other areas such as medicine, engineering, communications, and the arts. These advancements have brought about new possibilities and opportunities for innovation in these fields.\n\n## Step 2 @unplugged\n\nSometimes, the ways we use computing innovations can go beyond what their creators originally planned. Take the World Wide Web, for example. It was initially created for scientists to easily share information, but now it's used by everyone for various purposes. Another example is targeted advertising, which was designed to help businesses reach potential customers, but it can also be misused and invade individuals' privacy.\n\nMachine learning and data mining have revolutionized fields like medicine, business, and science, enabling important discoveries. However, the same technology has been used to discriminate against certain groups of people based on their personal information. This shows that computing innovations can have both positive and negative impacts on society, the economy, and culture.\n\n## Step 3 @unplugged\nResponsible programmers strive to think about the unintended ways their innovations can be used and the potential consequences of these uses. However, it's impossible for them to anticipate every possible scenario. Despite this, computing innovations have often led to unexpected benefits by driving advancements in other fields.\n\nIt's important to note that when a program is widely shared or used by many people, it can have significant effects beyond what the programmer intended or can control. This highlights the far-reaching impact of computing innovations and the need for careful consideration of their potential effects.\n\n## Step 4 @unplugged\n\nGo back into the lesson and move to the next NPC. ","Lesson6/6.1/6.1.md":"\n\n\n\n\n\n\n# Expert Coding using JavaScript - Lesson 5 Activity 5.3\n\n### @explicitHints true\n\n \n\n## Step 1 @unplugged\n\n \n\nWithin JavaScript, there are multiple forms of 'for' loops to perform different loop functions. The `for...in` loop in JavaScript is used to iterate over the properties of an object. It allows you to loop through the keys or property names of an object, giving you access to each key in each iteration. Here's how it works:\n\n```javascript\n for (variable in object) { // code to be executed }\n```\nLet's break down the parts of the `for...in` loop:\n\n- `variable`: A variable that represents the key or property name in each iteration.\n- `object`: The object whose properties you want to iterate over.\n\n```javascript\n const person = { \n name: \"John\", \n age: 25, \n occupation: \"Engineer\" \n }; \n\nfor (let key in person) { \nconsole.log(key + \": \" + person[key]); \n}\n```\nIn this example, we have an object `person` with properties like `name`, `age`, and `occupation`. The `for...in` loop allows us to iterate over the properties of `person` and access their values. In each iteration, the `key` variable represents the property name.\n`\n\n\n## Step 2\n\nTest the code to see how the code will output using the player.say command.\n\n ```template\n \n\n const person = { name: \"John\", age: 25, occupation: \"Engineer\" }; for (let key in person) { console.log(key + \": \" + person[key]); }\n\n```\n\n \n\n## Step 3\n\n\nNote that the order in which the properties are iterated is not guaranteed in JavaScript. If the order of iteration is important, consider using an array or a Map instead.\n\nIt's important to keep in mind that the `for...in` loop is specifically designed for objects. If you want to iterate over the elements of an array or a collection, the `for...in` loop is not recommended. Instead, you should use the `for` loop or other iteration methods like `forEach` or `for...of` loop.\n\n\n\n \n\n## Step 4\n\nReturn to the game and move to the next NPC.","Lesson6/6.1/6.01.md":"# Expert Coding using JavaScript - Lesson 6 Activity 6.01\n### @explicitHints true\n\n\n\n## Step 1 @unplugged\n\nWhen you create something on a computer, like a document, image, or video, it becomes your intellectual property or belongs to the organization you work for. However, with the ease of accessing and sharing digital information, there are concerns about who owns it, how valuable it is, and how it can be used. It's important to take steps to protect intellectual property.\n\n\n## Step 2 @unplugged\nUsing someone else's material without permission and presenting it as your own is called plagiarism, and it can have legal consequences. However, there are legal ways to use materials created by others. For example, Creative Commons is a public copyright license that allows creators to share their work and let others use and build upon it. Open-source programs are freely available and can be redistributed and modified. Open access refers to research output that is freely accessible and has fewer restrictions on use, such as copyright or license restrictions. Whenever you use someone else's work, it's essential to cite the source.\n\n## Step 3 @unplugged\nCreative Commons, open source, and open access have made it easier for people to access digital information. However, just like any other technology or medium, the use of computing to harm individuals or groups raises legal and ethical concerns. Computing can also be involved in social and political issues, which often bring up legal and ethical considerations.\n\n## Step 4 @unplugged\nComputing innovations can raise legal and ethical concerns in various ways. For example, the development of software that enables illegal downloading or streaming of digital media raises legal issues. Algorithms that incorporate bias can lead to unfair outcomes and ethical concerns. The existence of computing devices that continuously monitor and analyze our activities raises privacy and ethical concerns.\n\n## Step 5 @unplugged\nIn conclusion, it's important to respect intellectual property rights, be aware of legal and ethical considerations when using computing technology, and understand the implications of innovations that raise concerns about privacy, bias, and access to digital information.","Lesson7/7.1/7.01.md":"# Expert Coding using JavaScript - Lesson 7 Activity 7.01\n### @explicitHints true\n\n## Step 1 @unplugged\n\nThe purpose of computing innovations is to solve problems or to pursue interests through creative expression.\nComputing innovations, which include software, hardware, and various technologies, are created with the intention of addressing real-world problems or fulfilling particular interests. For instance, applications like communication tools, social media platforms, productivity software, and video games are all examples of computing innovations designed to solve problems or cater to interests. Creative expression also plays a role, as developers often have the freedom to explore and create new technologies that can inspire, entertain, and inform.\n\n## Step 2 @unplugged\nAn understanding of the purpose of a computing innovation provides developers with an improved ability to develop that computing innovation.\nWhen developers have a clear understanding of the problem they're trying to solve or the goal they're pursuing, they can make informed decisions about design, features, and functionality. This understanding enables them to create innovations that align more closely with the intended purpose, leading to more successful and user-friendly solutions.\n\n## Step 3 @ unplugged\n\nYou will continue to learn about program function and purpose in each lesson as well as learning important programming information. \nGo to the next NPC to begin learning about Functions. ","Lesson7/7.1/7.1.md":"# Expert Coding using JavaScript - Lesson 7 Activity 7.1\n### @explicitHints true\n\n## Step 1 @unplugged\n\nAs code becomes more complex, programmers will need to break it down into smaller and more manageable pieces. So, programmers create **procedures,** also known as **functions or methods**, to generalize processes that can be reused. \n\nHere are some reasons we use functions. \n\n1. **Reusability:** Functions allow you to define a block of code that can be **executed multiple times throughout your program**. Instead of writing the same code repeatedly, you can encapsulate it within a function and call that function whenever you need to perform a specific task.\n \n2. **Modularity:** Functions promote modular programming by **breaking down complex tasks into smaller, more manageable parts.** By dividing your code into functions, you can focus on solving individual problems and then combine these functions to create more significant functionality.\n \n3. **Abstraction:** Functions provide a way to abstract away the implementation details of a particular operation. This means that **you can use a function without knowing or understanding how it works internally**. By encapsulating complex logic within a function, you can simplify the code and make it easier to work with.\n \n4. **Code Organization:** Functions help in organizing and structuring your code. By grouping related pieces of code into functions, **you can improve code readability, maintainability, and reusability.** Functions allow you to separate different concerns and make your codebase more modular and easier to understand.\n \n\n## Step 2 \n\nTo define a function in Javascript, **you start with the word function followed by a name and then parentheses.** Then the code to be executed, by the function, is placed inside curly brackets: **{}**\n\nEx: function name () {}\n\nWhen you name functions, follow the same rule as variables. \nFunction names can only contain:\n\n - letters\n - digits\n - underscores\n - dollar signs\n\nLet's practice using functions by first defining a function named buildWall in the space below. \n\n#### ~ tutorialhint\n\n```javascript\nfunction buildWall () {\n\n}\n\n```\n\n\n## Step 3\n\nNext, inside the function, let's have the agent build a 4x4 wall by first having the agent place on move. Then, add a loop that runs 2 times. Inside the loop, have the agent move forward by 3, up by 1, back by 3, and up by 1. \n\n#### ~ tutorialhint\n\n```javascript\n\nfunction buildWall () {\n\tagent.setAssist(PLACE_ON_MOVE, true)\n\tfor (let index = 0; index < 2; index++) {\n\t\tagent.move(FORWARD, 3)\n\t\tagent.move(UP, 1)\n\t\tagent.move(BACK, 3)\n\t\tagent.move(UP, 1)\n\t}\n}\n\n```\n\n## Step 4\n\nNow we have defined the function by creating the reusable block of code. To run that code, we need to **call** or **invoke** the function. When you invoke a function, you're telling the computer to execute the instructions inside that function. When we make a function call, **it temporarily pauses the regular order of executing statements in a program**. Instead, it jumps to the statements within the function and runs them first. After the last statement in the procedure, or if there is a return statement, the program goes back to the exact point where the function was called and continues executing from there.\n\nTo call a function in JavaScript, you simply **write the function name followed by parentheses.** \n\nLet's create an on chat command named wall and call the function buildWall in the chat command. \n\n#### ~ tutorialhint\n\n```javascript\n\nplayer.onChat(\"wall\", function () {\n\tbuildWall()\n})\n\n```\n\n## Step 5\n\nRun the code by following the instructions in the next step.\n\n\n## Step 6 @unplugged\nTo test your code:\nOnce you have fully read this step click the Green Ok button below to close this window to return to the tutorial to perform the below steps to test your code.\n\n1. Click on the **Green Start button** below to return to the game.\n\n \n\n\n\n2. Be sure to give your agent inventory in slot 1. \n3. Open the chat by pressing T. \n4. Type wall and hit enter. \n5. You know your code is correct when your agent builds a 4 x 4 wall. \n\n## Step 7\n\nWhen your code works as expected move on to the next activity.\nIf it does not work as expected, try to fix and test again.\n","Lesson7/7.1/7.1.1.md":"# Expert Coding using JavaScript - Lesson 7 Activity 7.1.1\n### @explicitHints true\n\n\n## Step 1 @unplugged\n\n\nFunctions in programming can be customized to work with different sets of data. We can do this by using something called \"**parameters\" or \"arguments\"**.\n\n**Parameters are like input variables that we can give to a function.** They allow us to pass data into the function, and the function can use that data to do its job. It's like giving instructions to the function on what data to work with.\n\n**Arguments are the actual values we provide for the parameters when we call or use the function.** We use arguments to specify the specific data that we want the function to process.\n\nIn addition to accepting inputs, functions can also give us outputs or results. We can get these results by using something called a \"return value\". When a function finishes running, it can send back a value to us. This can be something like a calculated value or any other result that we need.\n\nSo, by using parameters and arguments, we can make functions work with different data, and by using return values, we can get useful results from the function's execution. It's like giving instructions and receiving answers from a function.\n\n## Step 2 @unplugged\n\nIn JavaScript, the parameter name or names go in the parentheses after the function name like in the example below. \n\n function name (parameter) {\n \n }\n\nIn Microsoft MakeCode, we can use something called **\"type annotations\"** when adding parameters to functions in JavaScript. \n\nType annotations help the MakeCode editor understand the type of data that should be used for a parameter. They provide important information to the editor, which can then give us better suggestions while writing code and help us catch mistakes related to data types.\n\nTherefore, in Microsoft MakeCode after the parameter name you need to add a colon and then the data type as in the example below. \n\n function name (parameter: dataType) {\n \n }\n\nThe parameters can be the following data types. \n\n - Number\n - String\n - Boolean\n - Array\n - Object\n - Function\n - Undefined\n - Null\n - Symbol\n\n\n\n## Step 3 \n\nLet's practice declaring functions with parameters to see how they work. Once again we are going to define a function with the name buildwall. Do so in the space below. \n\n#### ~ tutorialhint\n\n```javascript\nfunction buildWall () {\n\n}\n\n```\n\n\n## Step 4\n\nWe are going to add the parameter of length. This will allow us to set the length to any number we want when we call the function. The data type of length should be number. \n\n#### ~ tutorialhint\n\n```javascript\nfunction buildWall (length: number) {\n\n}\n\n```\n\n\n## Step 5\n\nNext, inside the function, let's have the agent build a wall where the parameter will have decided the height. First have the agent place on move. Then, add a loop that runs length times. Inside the loop, have the agent move forward by 3, up by 1, back by 3, and up by 1. \n\n#### ~ tutorialhint\n\n```javascript\nfunction buildWall (length: number) {\n\tagent.setAssist(PLACE_ON_MOVE, true)\n\tfor (let index = 0; index < length; index++) {\n\t\tagent.move(FORWARD, 3)\n\t\tagent.move(UP, 1)\n\t\tagent.move(BACK, 3)\n\t\tagent.move(UP, 1)\n\t}\n\t}\n\n```\n\n## Step 6\n\nWhen you call a function that has a parameter, you need to add the **argument** you want the parameter to be in parentheses. \nThese arguments are the **values that the function will work with to perform its task.**\n\nFor example:\n\t\n\t\n functionName(value)\n\nNow, create an on chat command named wall that calls the function with the argument value of 2. \n\n#### ~ tutorialhint\n\n```javascript\nplayer.onChat(\"wall\", function () {\n\tbuildWall(2)\n})\n\n```\n\n## Step 7\n\nRun the code by following the instructions in the next step.\n\n\n## Step 8 @unplugged\nTo test your code:\nOnce you have fully read this step click the Green Ok button below to close this window to return to the tutorial to perform the below steps to test your code.\n\n1. Click on the **Green Start button** below to return to the game.\n\n \n\n\n\n2. Be sure to give your agent inventory in slot 1. \n3. Open the chat by pressing T. \n4. Type wall and hit enter. \n5. You know your code is correct when your agent builds a 4 x 4 wall. \n\n## Step 9\n\nWhen your code works as expected move on to the next activity.\nIf it does not work as expected, try to fix and test again.","Lesson7/7.1/7.1.2.md":"# Expert Coding using JavaScript - Lesson 7 Activity 7.1.2\n### @explicitHints true\n\n\n## Step 1\n\nLet's continue to practice using functions in our code. We are going to create code that uses multiple functions to plant a garden. \n\nFirst, define a function with the name of sunflower. \n\n#### ~ tutorialhint\n\n```javascript\nfunction sunflower () {\n\n}\n\n```\n\n## Step 2\n\nNext, inside the function have the agent first set the item of a sunflower, count of 1, in slot 1. Then have the agent place down and then move forward by 1. \n\n#### ~ tutorialhint\n\n```javascript\nfunction sunflower() {\n\tagent.setItem(SUNFLOWER, 1, 1)\n\tagent.place(DOWN)\t\n\tagent.move(FORWARD, 1)\n}\n\n```\n\n## Step 3\n\nNow create 2 other functions named cornflower and tulip with the same code inside the function as the sunflower function. (For the tulip, use the red tulip item.)\n\n#### ~ tutorialhint\n\n```javascript\nfunction sunflower() {\n\tagent.setItem(SUNFLOWER, 1, 1)\n\tagent.place(DOWN)\t\n\tagent.move(FORWARD, 1)\n}\n\nfunction cornflower () {\n\tagent.setItem(CORNFLOWER, 1, 1)\n\tagent.place(DOWN)\n\tagent.move(FORWARD, 1)\n}\n\nfunction tulip () {\n\tagent.setItem(RED_TULIP, 1, 1)\n\tagent.place(DOWN)\n\tagent.move(FORWARD, 1)\n}\n\n```\n\n## Step 4\n\nNext, create a function named garden with a parameter named flowers with the data type of number. Inside the function, call the functions of sunflower, cornflower, and tulip. \n\n#### ~ tutorialhint\n\n```javascript\nfunction garden(flowers: number) {\n\tsunflower()\n\tcornflower()\n\ttulip()\n}\n\n```\n\n## Step 5\n\nLastly, create an on chat command named plant that calls the function named garden with the argument value of 1. \n\n#### ~ tutorialhint\n\n```javascript\nplayer.onChat(\"plant\", function () {\n\tgarden(1)\n})\n\n```\n\n## Step 6\n\nRun the code by following the instructions in the next step.\n\n\n## Step 7 @unplugged\nTo test your code:\nOnce you have fully read this step click the Green Ok button below to close this window to return to the tutorial to perform the below steps to test your code.\n\n1. Click on the **Green Start button** below to return to the game.\n\n \n\n\n\n2. Open the chat by pressing T. \n3. Type plant and hit enter. \n4. You know your code is correct when your agent plants a sunflower, cornflower, and tulip. \n\n\n## Step 8\n\nNow, let's update the on chat command to plant a bigger garden. \nFirst change the argument value to 2. Then, add to the on chat command to have the agent turn left, move forward by 1, then turn left again. Then call the function garden with the value of 2 again. \n\n#### ~ tutorialhint\n\n```javascript\nfunction sunflower() {\n\tagent.setItem(SUNFLOWER, 1, 1)\n\tagent.place(DOWN)\t\n\tagent.move(FORWARD, 1)\n}\n\nfunction cornflower () {\n\tagent.setItem(CORNFLOWER, 1, 1)\n\tagent.place(DOWN)\n\tagent.move(FORWARD, 1)\n}\n\nfunction tulip () {\n\tagent.setItem(RED_TULIP, 1, 1)\n\tagent.place(DOWN)\n\tagent.move(FORWARD, 1)\n}\n\nplayer.onChat(\"plant\", function () {\n\tgarden(2)\n\tagent.turn(LEFT_TURN)\n\tagent.move(FORWARD, 1)\n\tagent.turn(LEFT_TURN)\n\tgarden(2)\n})\n\n```\n\n\n## Step 9\n\nRun the code by following the instructions in the next step.\n\n\n## Step 10 @unplugged\nTo test your code:\nOnce you have fully read this step click the Green Ok button below to close this window to return to the tutorial to perform the below steps to test your code.\n\n1. Click on the **Green Start button** below to return to the game.\n\n \n\n\n\n2. Open the chat by pressing T. \n3. Type plant and hit enter. \n4. You know your code is correct when your agent plants 2 rows of flowers. \n\n## Step 11\n\nWhen your code works as expected move on to the next activity.\nIf it does not work as expected, try to fix and test again.","Lesson7/7.2/7.2.md":"# Expert Coding using JavaScript - Lesson 7 Activity 7.2\n### @explicitHints true\n\n## Step 1\n\nSome functions produce an output or a result. When a function has finished executing its instructions, **it can return a value back to the code that called it.**\n\nThe code to return a value is return followed by what value you want to return. \n\nLet's build a code that returns a full name of the player. \n\nBegin by declaring 2 variables. One named firstName and the other lastName. Assign them the value of your first and last name. \n\n#### ~ tutorialhint\n\n```javascript\nlet firstName = \"Jennifer\"\nlet lastName = \"Brown\"\n\n```\n\n## Step 2\n\nNext, define a function with the name getFullName and the function returns the variable firstName plus the variable last name with a space between the 2 variables. \n\n#### ~ tutorialhint\n\n```javascript\nlet firstName = \"Jennifer\"\nlet lastName = \"Brown\"\n\nfunction getFullName2 () {\n\treturn \"\" + firstName + \" \" + lastName\n}\n\n```\n\n## Step 3\n\nLastly, create an on chat command called name that calls the function getFullName and has the player say the getFullName return. \n\n#### ~ tutorialhint\n\n```javascript\nlet firstName = \"Jennifer\"\nlet lastName = \"Brown\"\n\nfunction getFullName2 () {\n\treturn \"\" + firstName + \" \" + lastName\n}\n\nplayer.onChat(\"name\", function () {\n\tgetFullName()\n\tplayer.say(getFullName())\n})\n\n```\n\n## Step 4\n\nRun the code by following the instructions in the next step.\n\n\n## Step 5 @unplugged\nTo test your code:\nOnce you have fully read this step click the Green Ok button below to close this window to return to the tutorial to perform the below steps to test your code.\n\n1. Click on the **Green Start button** below to return to the game.\n\n \n\n\n\n2. Open the chat by pressing T. \n3. Type name and hit enter. \n4. You know your code is correct when your player says your first and last name. \n\n## Step 7\n\nWhen your code works as expected move on to the next activity.\nIf it does not work as expected, try to fix and test again.","Lesson7/7.2/7.2.1.md":"# Expert Coding using JavaScript - Lesson 7 Activity 7.2.1\n### @explicitHints true\n\n## Step 1\n\nLet's continue our work with functions that return values by building code to check a score. \n\nStart by declaring the variables of pointsEarned, pointsLost, and totalScore and assigning them all the value of 0. \n\n#### ~ tutorialhint\n\n```javascript\nlet pointsEarned = 0\nlet pointsLost = 0\nlet totalScore = 0\n\n```\n\n## Step 2\n\nNext, create code that has when a grass block is placed, pointsEarned increases by 1. And when a grass block is broken, pointsLost increases by 1. \n\n\n#### ~ tutorialhint\n\n```javascript\nlet pointsEarned = 0\nlet pointsLost = 0\nlet totalScore = 0\n\nblocks.onBlockPlaced(GRASS, function () {\n\tpointsEarned += 1\n})\n\nblocks.onBlockBroken(GRASS, function () {\n\tpointsLost += 1\n})\n\n```\n\n## Step 3\nNow, define a function named checkScore. In the function, have the variable totalScore equal to pointsEarned minus pointsLost. Then have it return the variable totalScore. \n\n#### ~ tutorialhint\n\n```javascript\nlet pointsEarned = 0\nlet pointsLost = 0\nlet totalScore = 0\n\nblocks.onBlockPlaced(GRASS, function () {\n\tpointsEarned += 1\n})\n\nblocks.onBlockBroken(GRASS, function () {\n\tpointsLost += 1\n})\n \nfunction checkScore () {\n\ttotalScore = pointsEarned - pointsLost\n\treturn totalScore\n}\n\n```\n\n## Step 4\nLastly, create an on chat command named score that calls the function checkScore and has the player say the variable totalScore.\n\n#### ~ tutorialhint\n\n```javascript\nlet pointsEarned = 0\nlet pointsLost = 0\nlet totalScore = 0\n\nblocks.onBlockPlaced(GRASS, function () {\n\tpointsEarned += 1\n})\n\nblocks.onBlockBroken(GRASS, function () {\n\tpointsLost += 1\n})\n \nfunction checkScore () {\n\ttotalScore = pointsEarned - pointsLost\n\treturn totalScore\n}\n\nplayer.onChat(\"score\", function () {\n\tcheckScore()\n\tplayer.say(totalScore)\n})\n\n```\n\n## Step 5\n\nRun the code by following the instructions in the next step.\n\n\n## Step 6 @unplugged\nTo test your code:\nOnce you have fully read this step click the Green Ok button below to close this window to return to the tutorial to perform the below steps to test your code.\n\n1. Click on the **Green Start button** below to return to the game.\n\n \n\n\n\n2. Place 5 grass blocks and then break 2. \n3. Open the chat by pressing T. \n4. Type score and hit enter. \n5. You know your code is correct when your player says 3. \n6. Place more blocks and break them and then type score in the chat to keep trying out the code. \n\n\n## Step 7\n\nWhen your code works as expected move on to the next NPC. \nIf it does not work as expected, try to fix and test again.","Lesson7/7.3/7.3.md":"# Expert Coding using JavaScript - Lesson 7 Activity 7.3\n### @explicitHints true\n\n## Step 1 @unplugged\n\nAs you learned earlier in this lesson, Functions provide a way to abstract away the implementation details of a particular operation. This means that **you can use a function without knowing or understanding how it works internally**. By encapsulating complex logic within a function, you can simplify the code and make it easier to work with.\nThis is called **procedural abstraction.** \nProcedural abstraction allows a solution to a large problem to be based on the solutions of smaller subproblems. This is accomplished by creating procedures, or functions, to solve each of the subproblems.\nThe subdivision of a computer program into separate subprograms can also be called **modularity**.\n\n## Step 2\n\nUsing **procedural abstraction** allows you to avoid repeating the same code in different parts of your program. Instead, you group common instructions together and use them as a single, reusable set of instructions. This makes your code more organized, easier to read, and helps you deal with the complexity of larger programs.\n\nOn the workspace, you will see the code to build the carpet, walls, and roof of a house. It is now very long and difficult to read. We will use functions to make it more organized and easier to read. \n\n```template\nagent.setItem(YELLOW_WOOL, 64, 1)\nfor (let index = 0; index < 2; index++) {\n\tagent.destroy(DOWN)\n\tagent.place(DOWN)\n\tagent.move(FORWARD, 1)\n}\nagent.destroy(DOWN)\nagent.place(DOWN)\nagent.turn(LEFT_TURN)\nagent.move(FORWARD, 1)\nagent.turn(LEFT_TURN)\nfor (let index = 0; index < 2; index++) {\n\tagent.destroy(DOWN)\n\tagent.place(DOWN)\n\tagent.move(FORWARD, 1)\n}\nagent.destroy(DOWN)\nagent.place(DOWN)\nagent.turn(RIGHT_TURN)\nagent.move(FORWARD, 1)\nagent.turn(RIGHT_TURN)\nfor (let index = 0; index < 3; index++) {\n\tagent.destroy(DOWN)\n\tagent.place(DOWN)\n\tagent.move(FORWARD, 1)\n}\nagent.setItem(PLANKS_OAK, 1, 1)\nagent.setAssist(PLACE_ON_MOVE, true)\nagent.turn(RIGHT_TURN)\nagent.move(FORWARD, 3)\nfor (let index = 0; index < 3; index++) {\n\tagent.turn(RIGHT_TURN)\n\tagent.move(FORWARD, 4)\n}\nagent.move(UP, 1)\nagent.turn(RIGHT_TURN)\nfor (let index = 0; index < 3; index++) {\n\tagent.move(FORWARD, 4)\n\tagent.turn(RIGHT_TURN)\n}\nagent.move(FORWARD, 4)\nagent.move(UP, 1)\nagent.move(FORWARD, 1)\nfor (let index = 0; index < 4; index++) {\n\tagent.turn(RIGHT_TURN)\n\tagent.move(FORWARD, 4)\n}\nagent.move(UP, 1)\nagent.setAssist(PLACE_ON_MOVE, false)\nagent.move(FORWARD, 1)\nagent.turn(RIGHT_TURN)\nagent.setAssist(PLACE_ON_MOVE, true)\nagent.move(FORWARD, 4)\nagent.turn(RIGHT_TURN)\nagent.move(FORWARD, 1)\nagent.turn(RIGHT_TURN)\nagent.move(FORWARD, 4)\nagent.turn(LEFT_TURN)\nagent.move(FORWARD, 1)\nagent.turn(LEFT_TURN)\nagent.move(FORWARD, 4)\nagent.turn(RIGHT_TURN)\nagent.move(FORWARD, 1)\nagent.turn(RIGHT_TURN)\nagent.turn(RIGHT_TURN)\nagent.setItem(OAK_WOOD_STAIRS, 64, 1)\nagent.setAssist(PLACE_ON_MOVE, true)\nagent.move(LEFT, 5)\nagent.setAssist(PLACE_ON_MOVE, false)\nagent.move(FORWARD, 4)\nagent.move(RIGHT, 1)\nagent.turn(LEFT_TURN)\nagent.turn(LEFT_TURN)\nagent.setAssist(PLACE_ON_MOVE, true)\nagent.move(LEFT, 5)\nagent.setAssist(PLACE_ON_MOVE, false)\nagent.move(FORWARD, 1)\nagent.move(UP, 1)\nagent.move(RIGHT, 1)\nagent.setAssist(PLACE_ON_MOVE, true)\nagent.move(RIGHT, 5)\nagent.setAssist(PLACE_ON_MOVE, false)\nagent.move(FORWARD, 2)\nagent.move(LEFT, 1)\nagent.turn(LEFT_TURN)\nagent.turn(LEFT_TURN)\nagent.setAssist(PLACE_ON_MOVE, true)\nagent.move(RIGHT, 5)\nagent.setAssist(PLACE_ON_MOVE, false)\nagent.setItem(PLANKS_OAK, 1, 1)\nagent.move(FORWARD, 1)\nagent.move(LEFT, 1)\nagent.setAssist(PLACE_ON_MOVE, true)\nagent.move(LEFT, 5)\n```\n\n## Step 3\n\nThe house has 3 main parts: carpet, walls, and roof. Create 3 functions. One named carpet, one named walls, and one named roof. \n\n#### ~ tutorialhint\n\n```javascript\nfunction carpet () {\n\t\n}\nfunction walls () {\n\t\n}\nfunction roof () {\n\t\n}\n\n```\n\n## Step 4\n\nMove the parts of the code that lay down the carpet, into the carpet function. \n#### ~ tutorialhint\n\n```javascript\nfunction carpet () {\n\tagent.setItem(YELLOW_WOOL, 64, 1)\n\tfor (let index = 0; index < 2; index++) {\n\t\tagent.destroy(DOWN)\n\t\tagent.place(DOWN)\n\t\tagent.move(FORWARD, 1)\n\t}\n\tagent.destroy(DOWN)\n\tagent.place(DOWN)\n\tagent.turn(LEFT_TURN)\n\tagent.move(FORWARD, 1)\n\tagent.turn(LEFT_TURN)\n\tfor (let index = 0; index < 2; index++) {\n\t\tagent.destroy(DOWN)\n\t\tagent.place(DOWN)\n\t\tagent.move(FORWARD, 1)\n\t}\n\tagent.destroy(DOWN)\n\tagent.place(DOWN)\n\tagent.turn(RIGHT_TURN)\n\tagent.move(FORWARD, 1)\n\tagent.turn(RIGHT_TURN)\n\tfor (let index = 0; index < 3; index++) {\n\t\tagent.destroy(DOWN)\n\t\tagent.place(DOWN)\n\t\tagent.move(FORWARD, 1)\n\t}\n}\nfunction walls () {\n\t\n}\nfunction roof () {\n\t\n}\n\n```\n\n## Step 5\n\nAdd the parts of the code into the walls function that builds the walls. \n#### ~ tutorialhint\n\n```javascript\nfunction carpet () {\n\tagent.setItem(YELLOW_WOOL, 64, 1)\n\tfor (let index = 0; index < 2; index++) {\n\t\tagent.destroy(DOWN)\n\t\tagent.place(DOWN)\n\t\tagent.move(FORWARD, 1)\n\t}\n\tagent.destroy(DOWN)\n\tagent.place(DOWN)\n\tagent.turn(LEFT_TURN)\n\tagent.move(FORWARD, 1)\n\tagent.turn(LEFT_TURN)\n\tfor (let index = 0; index < 2; index++) {\n\t\tagent.destroy(DOWN)\n\t\tagent.place(DOWN)\n\t\tagent.move(FORWARD, 1)\n\t}\n\tagent.destroy(DOWN)\n\tagent.place(DOWN)\n\tagent.turn(RIGHT_TURN)\n\tagent.move(FORWARD, 1)\n\tagent.turn(RIGHT_TURN)\n\tfor (let index = 0; index < 3; index++) {\n\t\tagent.destroy(DOWN)\n\t\tagent.place(DOWN)\n\t\tagent.move(FORWARD, 1)\n\t}\n}\nfunction walls () {\n\tagent.setItem(PLANKS_OAK, 1, 1)\n\tagent.setAssist(PLACE_ON_MOVE, true)\n\tagent.turn(RIGHT_TURN)\n\tagent.move(FORWARD, 3)\n\tfor (let index = 0; index < 3; index++) {\n\t\tagent.turn(RIGHT_TURN)\n\t\tagent.move(FORWARD, 4)\n\t}\n\tagent.move(UP, 1)\n\tagent.turn(RIGHT_TURN)\n\tfor (let index = 0; index < 3; index++) {\n\t\tagent.move(FORWARD, 4)\n\t\tagent.turn(RIGHT_TURN)\n\t}\n\tagent.move(FORWARD, 4)\n\tagent.move(UP, 1)\n\tagent.move(FORWARD, 1)\n\tfor (let index = 0; index < 4; index++) {\n\t\tagent.turn(RIGHT_TURN)\n\t\tagent.move(FORWARD, 4)\n\t}\n\tagent.move(UP, 1)\n}\nfunction roof () {\n\t\n}\n\n```\n\n## Step 6\n\nAdd the part of the code that builds the roof into the function named roof. \n\n#### ~ tutorialhint\n\n```javascript\nfunction carpet () {\n\tagent.setItem(YELLOW_WOOL, 64, 1)\n\tfor (let index = 0; index < 2; index++) {\n\t\tagent.destroy(DOWN)\n\t\tagent.place(DOWN)\n\t\tagent.move(FORWARD, 1)\n\t}\n\tagent.destroy(DOWN)\n\tagent.place(DOWN)\n\tagent.turn(LEFT_TURN)\n\tagent.move(FORWARD, 1)\n\tagent.turn(LEFT_TURN)\n\tfor (let index = 0; index < 2; index++) {\n\t\tagent.destroy(DOWN)\n\t\tagent.place(DOWN)\n\t\tagent.move(FORWARD, 1)\n\t}\n\tagent.destroy(DOWN)\n\tagent.place(DOWN)\n\tagent.turn(RIGHT_TURN)\n\tagent.move(FORWARD, 1)\n\tagent.turn(RIGHT_TURN)\n\tfor (let index = 0; index < 3; index++) {\n\t\tagent.destroy(DOWN)\n\t\tagent.place(DOWN)\n\t\tagent.move(FORWARD, 1)\n\t}\n}\nfunction walls () {\n\tagent.setItem(PLANKS_OAK, 1, 1)\n\tagent.setAssist(PLACE_ON_MOVE, true)\n\tagent.turn(RIGHT_TURN)\n\tagent.move(FORWARD, 3)\n\tfor (let index = 0; index < 3; index++) {\n\t\tagent.turn(RIGHT_TURN)\n\t\tagent.move(FORWARD, 4)\n\t}\n\tagent.move(UP, 1)\n\tagent.turn(RIGHT_TURN)\n\tfor (let index = 0; index < 3; index++) {\n\t\tagent.move(FORWARD, 4)\n\t\tagent.turn(RIGHT_TURN)\n\t}\n\tagent.move(FORWARD, 4)\n\tagent.move(UP, 1)\n\tagent.move(FORWARD, 1)\n\tfor (let index = 0; index < 4; index++) {\n\t\tagent.turn(RIGHT_TURN)\n\t\tagent.move(FORWARD, 4)\n\t}\n\tagent.move(UP, 1)\n}\nfunction roof () {\n\tagent.setAssist(PLACE_ON_MOVE, false)\n\tagent.move(FORWARD, 1)\n\tagent.turn(RIGHT_TURN)\n\tagent.setAssist(PLACE_ON_MOVE, true)\n\tagent.move(FORWARD, 4)\n\tagent.turn(RIGHT_TURN)\n\tagent.move(FORWARD, 1)\n\tagent.turn(RIGHT_TURN)\n\tagent.move(FORWARD, 4)\n\tagent.turn(LEFT_TURN)\n\tagent.move(FORWARD, 1)\n\tagent.turn(LEFT_TURN)\n\tagent.move(FORWARD, 4)\n\tagent.turn(RIGHT_TURN)\n\tagent.move(FORWARD, 1)\n\tagent.turn(RIGHT_TURN)\n\tagent.turn(RIGHT_TURN)\n\tagent.setItem(OAK_WOOD_STAIRS, 64, 1)\n\tagent.setAssist(PLACE_ON_MOVE, true)\n\tagent.move(LEFT, 5)\n\tagent.setAssist(PLACE_ON_MOVE, false)\n\tagent.move(FORWARD, 4)\n\tagent.move(RIGHT, 1)\n\tagent.turn(LEFT_TURN)\n\tagent.turn(LEFT_TURN)\n\tagent.setAssist(PLACE_ON_MOVE, true)\n\tagent.move(LEFT, 5)\n\tagent.setAssist(PLACE_ON_MOVE, false)\n\tagent.move(FORWARD, 1)\n\tagent.move(UP, 1)\n\tagent.move(RIGHT, 1)\n\tagent.setAssist(PLACE_ON_MOVE, true)\n\tagent.move(RIGHT, 5)\n\tagent.setAssist(PLACE_ON_MOVE, false)\n\tagent.move(FORWARD, 2)\n\tagent.move(LEFT, 1)\n\tagent.turn(LEFT_TURN)\n\tagent.turn(LEFT_TURN)\n\tagent.setAssist(PLACE_ON_MOVE, true)\n\tagent.move(RIGHT, 5)\n\tagent.setAssist(PLACE_ON_MOVE, false)\n\tagent.setItem(PLANKS_OAK, 1, 1)\n\tagent.move(FORWARD, 1)\n\tagent.move(LEFT, 1)\n\tagent.setAssist(PLACE_ON_MOVE, true)\n\tagent.move(LEFT, 5)\n}\nplayer.onChat(\"house\", function () {\n\tcarpet()\n\twalls()\n\troof()\n})\n```\n\n## Step 7\n\nNow we need to call the functions to build the house. Create a on chat command and name it house. Inside the chat command, call the function carpet, walls, and roof. \n\n#### ~ tutorialhint\n\n```javascript\nfunction carpet () {\n\tagent.setItem(YELLOW_WOOL, 64, 1)\n\tfor (let index = 0; index < 2; index++) {\n\t\tagent.destroy(DOWN)\n\t\tagent.place(DOWN)\n\t\tagent.move(FORWARD, 1)\n\t}\n\tagent.destroy(DOWN)\n\tagent.place(DOWN)\n\tagent.turn(LEFT_TURN)\n\tagent.move(FORWARD, 1)\n\tagent.turn(LEFT_TURN)\n\tfor (let index = 0; index < 2; index++) {\n\t\tagent.destroy(DOWN)\n\t\tagent.place(DOWN)\n\t\tagent.move(FORWARD, 1)\n\t}\n\tagent.destroy(DOWN)\n\tagent.place(DOWN)\n\tagent.turn(RIGHT_TURN)\n\tagent.move(FORWARD, 1)\n\tagent.turn(RIGHT_TURN)\n\tfor (let index = 0; index < 3; index++) {\n\t\tagent.destroy(DOWN)\n\t\tagent.place(DOWN)\n\t\tagent.move(FORWARD, 1)\n\t}\n}\nfunction walls () {\n\tagent.setItem(PLANKS_OAK, 1, 1)\n\tagent.setAssist(PLACE_ON_MOVE, true)\n\tagent.turn(RIGHT_TURN)\n\tagent.move(FORWARD, 3)\n\tfor (let index = 0; index < 3; index++) {\n\t\tagent.turn(RIGHT_TURN)\n\t\tagent.move(FORWARD, 4)\n\t}\n\tagent.move(UP, 1)\n\tagent.turn(RIGHT_TURN)\n\tfor (let index = 0; index < 3; index++) {\n\t\tagent.move(FORWARD, 4)\n\t\tagent.turn(RIGHT_TURN)\n\t}\n\tagent.move(FORWARD, 4)\n\tagent.move(UP, 1)\n\tagent.move(FORWARD, 1)\n\tfor (let index = 0; index < 4; index++) {\n\t\tagent.turn(RIGHT_TURN)\n\t\tagent.move(FORWARD, 4)\n\t}\n\tagent.move(UP, 1)\n}\nfunction roof () {\n\tagent.setAssist(PLACE_ON_MOVE, false)\n\tagent.move(FORWARD, 1)\n\tagent.turn(RIGHT_TURN)\n\tagent.setAssist(PLACE_ON_MOVE, true)\n\tagent.move(FORWARD, 4)\n\tagent.turn(RIGHT_TURN)\n\tagent.move(FORWARD, 1)\n\tagent.turn(RIGHT_TURN)\n\tagent.move(FORWARD, 4)\n\tagent.turn(LEFT_TURN)\n\tagent.move(FORWARD, 1)\n\tagent.turn(LEFT_TURN)\n\tagent.move(FORWARD, 4)\n\tagent.turn(RIGHT_TURN)\n\tagent.move(FORWARD, 1)\n\tagent.turn(RIGHT_TURN)\n\tagent.turn(RIGHT_TURN)\n\tagent.setItem(OAK_WOOD_STAIRS, 64, 1)\n\tagent.setAssist(PLACE_ON_MOVE, true)\n\tagent.move(LEFT, 5)\n\tagent.setAssist(PLACE_ON_MOVE, false)\n\tagent.move(FORWARD, 4)\n\tagent.move(RIGHT, 1)\n\tagent.turn(LEFT_TURN)\n\tagent.turn(LEFT_TURN)\n\tagent.setAssist(PLACE_ON_MOVE, true)\n\tagent.move(LEFT, 5)\n\tagent.setAssist(PLACE_ON_MOVE, false)\n\tagent.move(FORWARD, 1)\n\tagent.move(UP, 1)\n\tagent.move(RIGHT, 1)\n\tagent.setAssist(PLACE_ON_MOVE, true)\n\tagent.move(RIGHT, 5)\n\tagent.setAssist(PLACE_ON_MOVE, false)\n\tagent.move(FORWARD, 2)\n\tagent.move(LEFT, 1)\n\tagent.turn(LEFT_TURN)\n\tagent.turn(LEFT_TURN)\n\tagent.setAssist(PLACE_ON_MOVE, true)\n\tagent.move(RIGHT, 5)\n\tagent.setAssist(PLACE_ON_MOVE, false)\n\tagent.setItem(PLANKS_OAK, 1, 1)\n\tagent.move(FORWARD, 1)\n\tagent.move(LEFT, 1)\n\tagent.setAssist(PLACE_ON_MOVE, true)\n\tagent.move(LEFT, 5)\n}\nplayer.onChat(\"house\", function () {\n\tcarpet()\n\twalls()\n\troof()\n})\n```\n\n## Step 8\n\nRun the code by following the instructions in the next step.\n\n\n## Step 9 @unplugged\nTo test your code:\nOnce you have fully read this step click the Green Ok button below to close this window to return to the tutorial to perform the below steps to test your code.\n\n1. Click on the **Green Start button** below to return to the game.\n\n \n\n\n\n2. Open the chat and type house. \n3. You will know your code is correct when your agent builds the entire house. \n\n\n## Step 10\n\nWhen your code works as expected move on to the next activity.\nIf it does not work as expected, try to fix and test again.","Lesson7/7.3/7.3.1.md":"# Expert Coding using JavaScript - Lesson 7 Activity 7.3.1\n### @explicitHints true\n\n\n## Step 1\n\nAnother reason to use procedural abstraction in a program is because it **allows programmers to change the internals of the procedure** (to make it faster, more efficient, use less storage, etc.) **without needing to notify users of the change as long as what the procedure does is preserved**. \n\nTo practice this concept, we are going to modify our code from the previous activity. \n\n```template\nfunction carpet () {\n\tagent.setItem(YELLOW_WOOL, 64, 1)\n\tfor (let index = 0; index < 2; index++) {\n\t\tagent.destroy(DOWN)\n\t\tagent.place(DOWN)\n\t\tagent.move(FORWARD, 1)\n\t}\n\tagent.destroy(DOWN)\n\tagent.place(DOWN)\n\tagent.turn(LEFT_TURN)\n\tagent.move(FORWARD, 1)\n\tagent.turn(LEFT_TURN)\n\tfor (let index = 0; index < 2; index++) {\n\t\tagent.destroy(DOWN)\n\t\tagent.place(DOWN)\n\t\tagent.move(FORWARD, 1)\n\t}\n\tagent.destroy(DOWN)\n\tagent.place(DOWN)\n\tagent.turn(RIGHT_TURN)\n\tagent.move(FORWARD, 1)\n\tagent.turn(RIGHT_TURN)\n\tfor (let index = 0; index < 3; index++) {\n\t\tagent.destroy(DOWN)\n\t\tagent.place(DOWN)\n\t\tagent.move(FORWARD, 1)\n\t}\n}\nfunction walls () {\n\tagent.setItem(PLANKS_OAK, 1, 1)\n\tagent.setAssist(PLACE_ON_MOVE, true)\n\tagent.turn(RIGHT_TURN)\n\tagent.move(FORWARD, 3)\n\tfor (let index = 0; index < 3; index++) {\n\t\tagent.turn(RIGHT_TURN)\n\t\tagent.move(FORWARD, 4)\n\t}\n\tagent.move(UP, 1)\n\tagent.turn(RIGHT_TURN)\n\tfor (let index = 0; index < 3; index++) {\n\t\tagent.move(FORWARD, 4)\n\t\tagent.turn(RIGHT_TURN)\n\t}\n\tagent.move(FORWARD, 4)\n\tagent.move(UP, 1)\n\tagent.move(FORWARD, 1)\n\tfor (let index = 0; index < 4; index++) {\n\t\tagent.turn(RIGHT_TURN)\n\t\tagent.move(FORWARD, 4)\n\t}\n\tagent.move(UP, 1)\n}\nfunction roof () {\n\tagent.setAssist(PLACE_ON_MOVE, false)\n\tagent.move(FORWARD, 1)\n\tagent.turn(RIGHT_TURN)\n\tagent.setAssist(PLACE_ON_MOVE, true)\n\tagent.move(FORWARD, 4)\n\tagent.turn(RIGHT_TURN)\n\tagent.move(FORWARD, 1)\n\tagent.turn(RIGHT_TURN)\n\tagent.move(FORWARD, 4)\n\tagent.turn(LEFT_TURN)\n\tagent.move(FORWARD, 1)\n\tagent.turn(LEFT_TURN)\n\tagent.move(FORWARD, 4)\n\tagent.turn(RIGHT_TURN)\n\tagent.move(FORWARD, 1)\n\tagent.turn(RIGHT_TURN)\n\tagent.turn(RIGHT_TURN)\n\tagent.setItem(OAK_WOOD_STAIRS, 64, 1)\n\tagent.setAssist(PLACE_ON_MOVE, true)\n\tagent.move(LEFT, 5)\n\tagent.setAssist(PLACE_ON_MOVE, false)\n\tagent.move(FORWARD, 4)\n\tagent.move(RIGHT, 1)\n\tagent.turn(LEFT_TURN)\n\tagent.turn(LEFT_TURN)\n\tagent.setAssist(PLACE_ON_MOVE, true)\n\tagent.move(LEFT, 5)\n\tagent.setAssist(PLACE_ON_MOVE, false)\n\tagent.move(FORWARD, 1)\n\tagent.move(UP, 1)\n\tagent.move(RIGHT, 1)\n\tagent.setAssist(PLACE_ON_MOVE, true)\n\tagent.move(RIGHT, 5)\n\tagent.setAssist(PLACE_ON_MOVE, false)\n\tagent.move(FORWARD, 2)\n\tagent.move(LEFT, 1)\n\tagent.turn(LEFT_TURN)\n\tagent.turn(LEFT_TURN)\n\tagent.setAssist(PLACE_ON_MOVE, true)\n\tagent.move(RIGHT, 5)\n\tagent.setAssist(PLACE_ON_MOVE, false)\n\tagent.setItem(PLANKS_OAK, 1, 1)\n\tagent.move(FORWARD, 1)\n\tagent.move(LEFT, 1)\n\tagent.setAssist(PLACE_ON_MOVE, true)\n\tagent.move(LEFT, 5)\n}\nplayer.onChat(\"house\", function () {\n\tcarpet()\n\twalls()\n\troof()\n})\n```\n\n## Step 2\n\nRight now, our house is pretty basic. Let's change it up. \nFirst, let's make a change to the carpet. In the function called carpet, change to a different material. It could be another color of wool or it could be wood (if you want wood floors), or maybe even concrete or terracotta. You choose what you'd like for your house. \n\n#### ~ tutorialhint\n\n```javascript\nfunction carpet () {\n\tagent.setItem(CYAN_GLAZED_TERRACOTTA, 64, 1)\n\tfor (let index = 0; index < 2; index++) {\n\t\tagent.destroy(DOWN)\n\t\tagent.place(DOWN)\n\t\tagent.move(FORWARD, 1)\n\t}\n```\n\n## Step 3\n\nNow change the material of the walls of the house. Again, you can choose any material you want to use. \n\n#### ~ tutorialhint\n\n```javascript\nfunction walls () {\n\tagent.setItem(BRICKS, 1, 1)\n\tagent.setAssist(PLACE_ON_MOVE, true)\n\tagent.turn(RIGHT_TURN)\n\tagent.move(FORWARD, 3)\n\tfor (let index = 0; index < 3; index++) {\n\t\tagent.turn(RIGHT_TURN)\n\t\tagent.move(FORWARD, 4)\n\t}\n\tagent.move(UP, 1)\n\tagent.turn(RIGHT_TURN)\n\tfor (let index = 0; index < 3; index++) {\n\t\tagent.move(FORWARD, 4)\n\t\tagent.turn(RIGHT_TURN)\n\t}\n\tagent.move(FORWARD, 4)\n\tagent.move(UP, 1)\n\tagent.move(FORWARD, 1)\n\tfor (let index = 0; index < 4; index++) {\n\t\tagent.turn(RIGHT_TURN)\n\t\tagent.move(FORWARD, 4)\n\t}\n\tagent.move(UP, 1)\n}\n```\n\n## Step 4\n\nBecause you changed the walls, you will need to add a set Item code after the place on move true code in the roof function. You can choose any material that has matching stairs (as they are part of the roof build too). If you choose anything other than oak wood, you will also need to update the stairs material and the other agent set item in the code as well.\n\n#### ~ tutorialhint\n\n```javascript\nfunction roof () {\n\tagent.setAssist(PLACE_ON_MOVE, false)\n\tagent.move(FORWARD, 1)\n\tagent.turn(RIGHT_TURN)\n\tagent.setAssist(PLACE_ON_MOVE, true)\n\tagent.setItem(BLACKSTONE, 64, 1)\n\tagent.move(FORWARD, 4)\n\tagent.turn(RIGHT_TURN)\n\tagent.move(FORWARD, 1)\n\tagent.turn(RIGHT_TURN)\n\tagent.move(FORWARD, 4)\n\tagent.turn(LEFT_TURN)\n\tagent.move(FORWARD, 1)\n\tagent.turn(LEFT_TURN)\n\tagent.move(FORWARD, 4)\n\tagent.turn(RIGHT_TURN)\n\tagent.move(FORWARD, 1)\n\tagent.turn(RIGHT_TURN)\n\tagent.turn(RIGHT_TURN)\n\tagent.setItem(BLACKSTONE_STAIRS, 64, 1)\n\tagent.setAssist(PLACE_ON_MOVE, true)\n\tagent.move(LEFT, 5)\n\tagent.setAssist(PLACE_ON_MOVE, false)\n\tagent.move(FORWARD, 4)\n\tagent.move(RIGHT, 1)\n\tagent.turn(LEFT_TURN)\n\tagent.turn(LEFT_TURN)\n\tagent.setAssist(PLACE_ON_MOVE, true)\n\tagent.move(LEFT, 5)\n\tagent.setAssist(PLACE_ON_MOVE, false)\n\tagent.move(FORWARD, 1)\n\tagent.move(UP, 1)\n\tagent.move(RIGHT, 1)\n\tagent.setAssist(PLACE_ON_MOVE, true)\n\tagent.move(RIGHT, 5)\n\tagent.setAssist(PLACE_ON_MOVE, false)\n\tagent.move(FORWARD, 2)\n\tagent.move(LEFT, 1)\n\tagent.turn(LEFT_TURN)\n\tagent.turn(LEFT_TURN)\n\tagent.setAssist(PLACE_ON_MOVE, true)\n\tagent.move(RIGHT, 5)\n\tagent.setAssist(PLACE_ON_MOVE, false)\n\tagent.setItem(BLACKSTONE, 1, 1)\n\tagent.move(FORWARD, 1)\n\tagent.move(LEFT, 1)\n\tagent.setAssist(PLACE_ON_MOVE, true)\n\tagent.move(LEFT, 5)\n}\n```\n\n## Step 5\nBecause we only changed the code in the functions, we will still call the functions in the same way. \nRun the code by following the instructions in the next step.\n\n\n## Step 6 @unplugged\nTo test your code:\nOnce you have fully read this step click the Green Ok button below to close this window to return to the tutorial to perform the below steps to test your code.\n\n1. Click on the **Green Start button** below to return to the game.\n\n \n\n\n\n2. Open the chat and type house. \n3. You will know your code is correct when your agent builds the entire house. \n\n\n## Step 7\n\nWhen your code works as expected move on to the next NPC.\nIf it does not work as expected, try to fix and test again.","Lesson7/7.3/7.3.2.md":"# Expert Coding using JavaScript - Lesson 7 Activity 7.3.2\n### @explicitHints true\n\n## Step 1\n\nIn JavaScript, a library is a collection of code that someone else has already written.\n\nHere's how libraries work in JavaScript:\n\n1. **Ready-to-Use Code**: Libraries are ready-to-use pieces of code that you can use in your own projects.\n \n2. **Saves Time**: Libraries save you a lot of time. Instead of writing every single line of code for a specific task, you can use a library that already has that code written. \n \n3. **Specific Functions**: Libraries often focus on doing specific things really well. For example, you might use a library that's excellent at creating animations, or another one that's great at managing dates and time. These libraries give you special tools for different parts of your project.\n \n4. **Sharing with Others**: Programmers share their libraries with others. It's like a big community where people help each other by offering their pre-made code for everyone to use.\n \n5. **Working Together**: Libraries also help different parts of your program work together smoothly. When you're building something complex, like a website, you can use libraries to handle different tasks, like making things look nice or handling user interactions.\n\n## Step 2\n\nApplication program interfaces (APIs) are specifications for how the procedures in a library behave and can be used.\nDocumentation for an API/library is necessary in understanding the behaviors provided by the API/library and how to use them.\nLet's break down these concepts. \n\n1. **Application Programming Interfaces (APIs)**: APIs are like rules and instructions that help different software components communicate and work together. It specifies what functions (procedures) are available, what kind of information they need, and what they will give back. Developers follow the API to use the library's functions in their programs.\n \n2. **Documentation Importance**: When you're using a library or an API, you need documentation to understand what each function does, what data it expects, and what it returns. It's like your manual to making the most of the library.\nWithout API documentation, developers would struggle to use a library effectively because they wouldn't know how its functions behave and fit together. API documentation guides developers on how to call functions correctly, what arguments to provide, and what results to expect. This ensures they're using the library in the right way.\n\n## Step 3\n\nMakeCode itself provides a range of built-in libraries and extensions however you will not be able to directly use external libraries that are typically used in languages like Python or JavaScript. Instead, you would usually rely on the libraries and extensions provided within the MakeCode environment.\n\n## Step 4\n\nGo to the next activity to practice using one of the built-in libraries in MakeCode. ","Lesson7/7.3/7.3.3.md":"# Expert Coding using JavaScript - Lesson 7 Activity 7.3.3\n### @explicitHints true\n\n## Step 1\n\nOne of the built in libraries in MakeCode is the Math library. \nWe are going to do an activity using this library. First declare a variable named gold and assign it the value of 0. \n\n \n#### ~ tutorialhint\n\n```javascript\nlet gold = 0\n```\n\n## Step 2\n\nNext, create an on blocks placed code for a gold block. In that code have the variable gold increase by 0.3 \n\n#### ~ tutorialhint\n\n```javascript\nlet gold = 0\nblocks.onBlockPlaced(GOLD_BLOCK, function () {\n\tgold += 0.3\n})\n```\n\n## Step 3\n\nNow we will use the math library inside an if / else statement. We are going to use the round function from the math library. The code is math.round. \nCreate an if /else statement that checks if the math.round for the variable gold is equal to 10. \n\n#### ~ tutorialhint\n\n```javascript\nlet gold = 0\nblocks.onBlockPlaced(GOLD_BLOCK, function () {\n\tscore += 0.3\n\tif (Math.round(gold) == 10) {\n\t\t\n\t} else {\n\t\t\n\t}\n})\n```\n\n## Step 4\n\nIn the If section of the code, have the player say \"You win!\" and in the else section have the player say \"Keep Going!\"\n\n#### ~ tutorialhint\n\n```javascript\nlet gold = 0\nblocks.onBlockPlaced(GOLD_BLOCK, function () {\n\tscore += 0.3\n\tif (Math.round(gold) == 10) {\n\t\tplayer.say(\"You win\")\n\t} else {\n\t\tplayer.say(\"Keep Going!\")\n\t}\n})\n```\n\nStep 5\nRun the code by following the instructions in the next step.\n\n\n## Step 6 @unplugged\nTo test your code:\nOnce you have fully read this step click the Green Ok button below to close this window to return to the tutorial to perform the below steps to test your code.\n\n1. Click on the **Green Start button** below to return to the game.\n\n \n\n\n\n2. Have your player place down gold blocks. \n3. You will know you code is correct when your player says \"Keep Going!\" many times and finally says \"You win!\"\n\n\n## Step 7\n\nWhen your code works as expected move on to the assessment.\nIf it does not work as expected, try to fix and test again.","Lesson8/8.1/8.01.md":"# Expert Coding using JavaScript - Lesson 8 Activity 8.01\n### @explicitHints true\n\n## Step 1 @unplugged\n\n**A program needs to work for a variety of inputs and situations.** A well-designed program should be able to handle a range of inputs and scenarios without breaking or producing unexpected results. This ability to accommodate diverse inputs and situations is crucial to ensure that the program remains reliable and useful to a wide range of users. It involves thorough testing, error handling, and consideration of various use cases during the development process.\n\n## Step 2 @unplugged\n\n**The behavior of a program is how a program functions during execution and is often described by how a user interacts with it.**\nIt includes all the actions and responses that the program produces in response to user input or other triggers. The way the program responds to your actions and the outcomes it produces collectively define its behavior.\nMoreover, **a program can be described broadly by what it does, or in more detail by both what the program does and how the program statements accomplish this function.**\n\n## Step 3 @unplugged\n\nProgram inputs are data sent to a computer for processing by a program. Input can come in a variety of forms, such as tactile, audio, visual, or text.\n\n- **Tactile:** Physical actions like pressing keys on a keyboard, clicking a mouse button, or tapping on a touch screen.\n- **Audio:** Spoken commands, voice recognition, or sound signals.\n- **Visual:** Images, videos, graphics, or visual cues from a camera.\n- **Text:** Typing text, entering commands, or providing textual information.\n\nProgram inputs vary based on the nature of the program and the ways users interact with it. \nInputs usually affect the output produced by a program.\n\n## Step 4 @unplugged\n\n**Input can come from various sources.** Users can provide input by interacting with a program using devices like keyboards, mice, touch screens, and microphones. \nAdditionally, input can come from other programs. For example, one program might send data to another program for processing. \nThis interaction between programs allows for more complex and interconnected systems.","Lesson8/8.1/8.1.md":"# Expert Coding using JavaScript - Lesson 8 Activity 8.1\n\n### @explicitHints true\n\n \n\n## Step 1 @unplugged\nIn JavaScript, collections are data structures that allow you to store and organize multiple values or elements. JavaScript provides several built-in collection types, such as arrays, sets, and maps. Let's explore each of them in detail:\n\n\n1. **Arrays:** Arrays are the most commonly used collection type in JavaScript. They are ordered, indexed collections of values, where each value is associated with a numeric index. Arrays can store values of different types, including numbers, strings, objects, and even other arrays. Here's an example of an array:\n\n\n```javascript\n const fruits = [\"apple\", \"banana\", \"orange\"];\n```\n\n\nArrays have a variety of built-in methods that you can use to manipulate and access their elements, such as `push()`, `pop()`, `slice()`, `forEach()`, and more.\n\n\n## Step 2 @unplugged\n\n2. **Sets:** Sets are collection types that store unique values, meaning that each value can occur only once within the set. Unlike arrays, sets are unordered, and the order of elements is not guaranteed. Here's an example of a set:\n\n\n```javascript\n const colors = new Set([\"red\", \"green\", \"blue\"]);\n```\n\nSets have methods for adding, deleting, and checking the presence of elements, such as `add()`, `delete()`, and `has()`.\n\n\n \n\n## Step 3 @unplugged\n\n\n3. **Maps:** Maps are collections that store key-value pairs, where each value is associated with a unique key. Maps allow you to store and retrieve values based on their keys, providing a more flexible alternative to arrays. Here's an example of a map:\n\n\n\n```javascript\n const user = new Map();\nuser.set(\"name\", \"John\");\nuser.set(\"age\", 25);\n```\n\nMaps have methods for adding, deleting, and retrieving values based on keys, such as `set()`, `delete()`, and `get()`.\n\n \n\n## Step 4 @unplugged\n\n4. **WeakSet and WeakMap:** WeakSet and WeakMap are special collection types in JavaScript that have limited use cases. They are similar to sets and maps, respectively, but with some important differences. WeakSets and WeakMaps allow you to store only objects as keys, and they do not prevent the objects from being garbage collected by JavaScript's memory management system.\n\nThese are the basic collection types in JavaScript. Each collection type has its own characteristics and methods for manipulation and retrieval of data. Choosing the right collection type depends on your specific use case and requirements.\n\nIt's important to note that in addition to these built-in collections, JavaScript also provides various methods and functionalities for working with collections, such as iterating over elements using loops (`for...of`), using array methods like `filter()`, `map()`, and more.\n\nUnderstanding collections is fundamental for organizing and managing data in JavaScript, and they are widely used in many programming tasks.\n\n\n \n\n\n\n\n","Lesson9/9.1/9.01.md":"# Expert Coding using JavaScript - Lesson 9 Activity 9.01\n### @explicitHints true\n\n## Step 1 @unplugged\n\nLet's continue learning about program function. \n**A program is a collection of program statements that performs a specific task when run by a computer.** \nA program is essentially a set of instructions written in a programming language that tells a computer what tasks to perform. These tasks can range from simple calculations to complex operations. When a program is executed (run) by a computer, it follows the sequence of instructions provided and performs the specified task. The term \"**software\"** is commonly used interchangeably with \"program\" to **refer to any set of instructions that can be run on a computer to accomplish a task.**\n\n## Step 2 @unplugged\n\n**A code segment is a collection of program statements that is part of a program.**\nA code segment is a group of program statements that are grouped together to perform a specific subtask within the larger program. It's a way of organizing code to improve readability, maintainability, and reusability. In complex programs, **breaking down the functionality into smaller, manageable code segments makes the overall program structure more modular and easier to work with.**\n\n## Step 3 @unplugged\n\nContinue on to the next NPC to begin learning about algorithms. ","Lesson9/9.1/9.1.md":"# Expert Coding using JavaScript - Lesson 9 Activity 9.1\n### @explicitHints true\n\n\n## Step 1 @unplugged\n\nAn **algorithm is a set of instructions that a computer program follows to accomplish a task or solve a problem.** Whenever you write code, you are writing an algorithm. \nThe order of the algorithm will determine the outcome. **Algorithms that appear similar can yield different side effects or results.** For example, the two algorithms below have the same steps but in different orders. What do you think will happen in each algorithm.?\n\n**Algorithm 1:**\n\n player.onChat(\"run\", function () {\n\t agent.setItem(STONE, 64, 1)\n\t agent.setAssist(PLACE_ON_MOVE, true)\n\t for (let index = 0; index < 4; index++) {\n\t\t agent.move(FORWARD, 4)\n\t\t agent.turn(LEFT_TURN)\n\t\t}\n\t\tagent.move(UP, 1)\n\t})\n\n**Algorithm 2:**\n\n player.onChat(\"run\", function () {\n\t agent.setItem(STONE, 64, 1)\n\t agent.move(UP, 1)\n\t agent.setAssist(PLACE_ON_MOVE, true)\n\t for (let index = 0; index < 4; index++) {\n\t\t agent.turn(LEFT_TURN)\n\t\t agent.move(FORWARD, 4)\n\t\t}\n\t})\n\n\n\n## Step 2 @unplugged\n\nYou would have been correct if you said Algorithm 1 will have the agent build a 5x5 square. Algorithm 2 will have the agent build a 5x5 square missing one block, one block in the air. \n\nWhile the steps of an algorithm determine the outcome, **algorithms can be written in different ways and still accomplish the same tasks**. \n\nFor example, both algorithms below will do the same thing (make a 5x5 square), even though they are written differently. \n\n**Algorithm 1:**\n\n player.onChat(\"run\", function () {\n\t agent.setItem(STONE, 64, 1)\n\t agent.setAssist(PLACE_ON_MOVE, true)\n\t for (let index = 0; index < 4; index++) {\n\t\t agent.move(FORWARD, 4)\n\t\t agent.turn(LEFT_TURN)\n\t\t}\n\t\tagent.move(UP, 1)\n\t})\n\n**Algorithm 2:**\n\n player.onChat(\"run\", function () {\n\t agent.setItem(STONE, 64, 1)\n\t agent.setAssist(PLACE_ON_MOVE, true)\n\t agent.move(FORWARD, 4)\n\t agent.turn(LEFT_TURN)\n\t agent.move(FORWARD, 4)\n\t agent.turn(LEFT_TURN)\n\t agent.move(FORWARD, 4)\n\t agent.turn(LEFT_TURN)\n\t agent.move(FORWARD, 4)\n\t agent.turn(LEFT_TURN)\n\t agent.move(UP, 1)\n\t})\n\n\n## Step 3\n\nAlgorithms are created in different ways. One way is by **sequencing**, which is **putting steps in order**. \n\n\n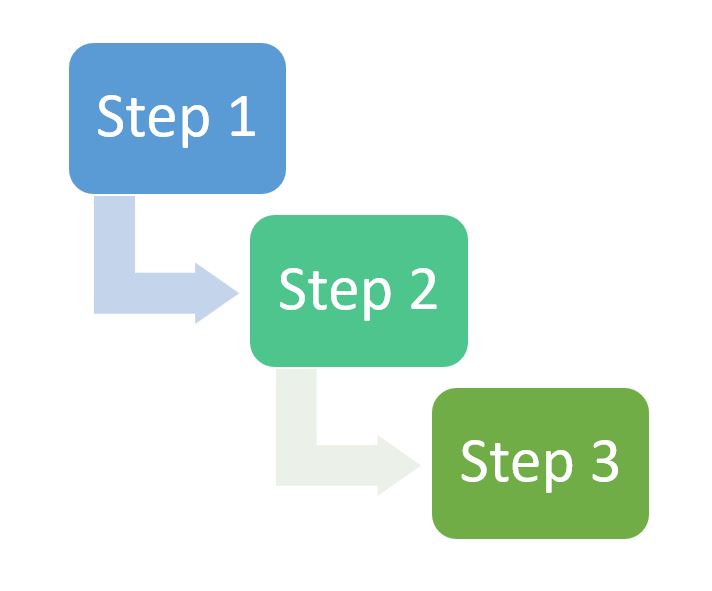\n\nLet's write a code that uses an algorithm that is developed by sequencing. \n\nFirst, create an on chat command called wall. \n\n#### ~ tutorialhint\n\n```javascript \nplayer.onChat(\"wall\", function () {\n\n})\n\n```\n\n## Step 4\n\nNext, add the code in the chat command that has the agent set the item of stone at the count of 64 in the slot of 1 in his inventory. And then have the agent have place on move set to true. \n#### ~ tutorialhint\n\n```javascript \nplayer.onChat(\"wall\", function () {\n\tagent.setItem(STONE, 64, 1)\n\tagent.setAssist(PLACE_ON_MOVE, true)\t\n})\n\n```\n\n## Step 5\n\nNow, have the agent move forward by 3, up by 1, and back by 3. \n\n\n#### ~ tutorialhint\n\n```javascript \nplayer.onChat(\"wall\", function () {\n\tagent.setItem(STONE, 64, 1)\n\tagent.setAssist(PLACE_ON_MOVE, true)\t\n\tagent.move(FORWARD, 3)\n\tagent.move(UP, 1)\n\tagent.move(BACK, 3)\n})\n\n```\n\n## Step 6\n\nNow, add the code to have the agent move up by 1, forward by 3, and then up by 1. \n\n#### ~ tutorialhint\n\n```javascript \nplayer.onChat(\"wall\", function () {\n\tagent.setItem(STONE, 64, 1)\n\tagent.setAssist(PLACE_ON_MOVE, true)\t\n\tagent.move(FORWARD, 3)\n\tagent.move(UP, 1)\n\tagent.move(BACK, 3)\n\tagent.move(UP, 1)\n\tagent.move(FORWARD, 3)\n\tagent.move(UP, 1)\n\tagent.move(BACK, 3)\n\tagent.move(UP, 1)\n})\n\n```\n\n## Step 7\n\nRun the code by following the instructions in the next step.\n\n\n## Step 8 @unplugged\nTo test your code:\nOnce you have fully read this step click the Green Ok button below to close this window to return to the tutorial to perform the below steps to test your code.\n\n1. Click on the **Green Start button** below to return to the game.\n\n \n\n\n\n2. Open the chat by pressing T. \n3. Type wall and hit enter. \n4. You know your code is correct when the agent builds a 4x4 wall. \n\n## Step 9\n\nWhen your code works as expected move on to the next activity.\nIf it does not work as expected, try to fix and test again.\n","Lesson9/9.1/9.1.1.md":"# Expert Coding using JavaScript - Lesson 9 Activity 9.1.1\n### @explicitHints true\n\n## Step 1\n\nIn the last activity, you learned about sequencing, one way to create an algorithm. Another way to create an algorithm is through **iteration,** which is **when you do some steps over and over again.** \n\n\n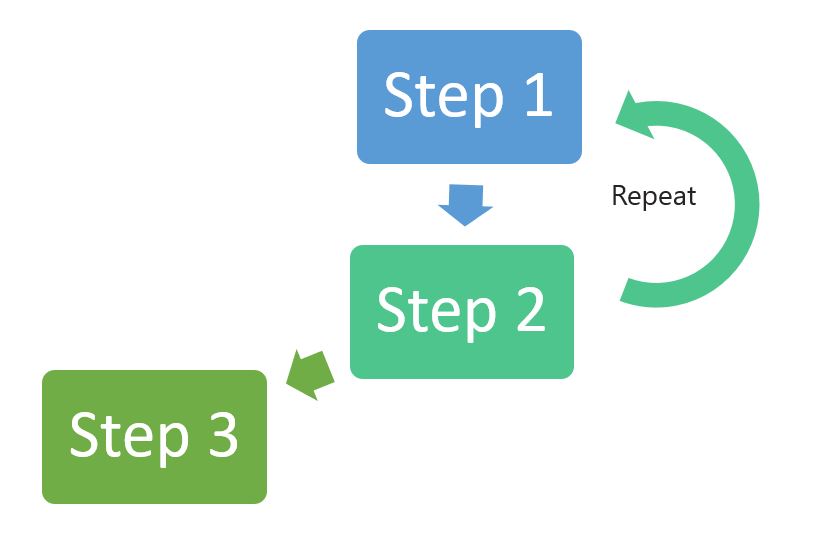\n\n\n## Step 2\n\nYou learned about iteration when you learned about **loops**. Below is the code you created for sequencing. Change it to include iteration by deleting some of the steps and placing others in a loop. \n\n```template\nplayer.onChat(\"wall\", function () {\n\tagent.setItem(STONE, 64, 1)\n\tagent.setAssist(PLACE_ON_MOVE, true)\t\n\tagent.move(FORWARD, 3)\n\tagent.move(UP, 1)\n\tagent.move(BACK, 3)\n\tagent.move(UP, 1)\n\tagent.move(FORWARD, 3)\n\tagent.move(UP, 1)\n\tagent.move(BACK, 3)\n\tagent.move(UP, 1)\n})\n\n```\n\n#### ~ tutorialhint\n\n```javascript \nplayer.onChat(\"wall\", function () {\n\tagent.setItem(STONE, 64, 1)\n\tagent.setAssist(PLACE_ON_MOVE, true)\n\tfor (let index = 0; index < 2; index++) {\n\t\tagent.move(FORWARD, 3)\n\t\tagent.move(UP, 1)\n\t\tagent.move(BACK, 3)\n\t\tagent.move(UP, 1)\n\t}\n})\n\n```\n\n\n## Step 3\n\nRun the code by following the instructions in the next step.\n\n\n## Step 4 @unplugged\nTo test your code:\nOnce you have fully read this step click the Green Ok button below to close this window to return to the tutorial to perform the below steps to test your code.\n\n1. Click on the **Green Start button** below to return to the game.\n\n \n\n\n\n2. Open the chat by pressing T. \n3. Type wall and hit enter. \n4. You know your code is correct when the agent builds a 4x4 wall. \n\n## Step 5\n\nWhen your code works as expected move on to the next activity.\nIf it does not work as expected, try to fix and test again.\n","Lesson9/9.1/9.1.2.md":"# Expert Coding using JavaScript - Lesson 9 Activity 9.1.2\n### @explicitHints true\n\n\n\n## Step 1\n\nIn the previous activity, you changed an algorithm that was created by sequencing to one that is created by iteration. Another way algorithms are created by **selection**. Selection is when there is **a decision to be made** in the algorithm. \n\n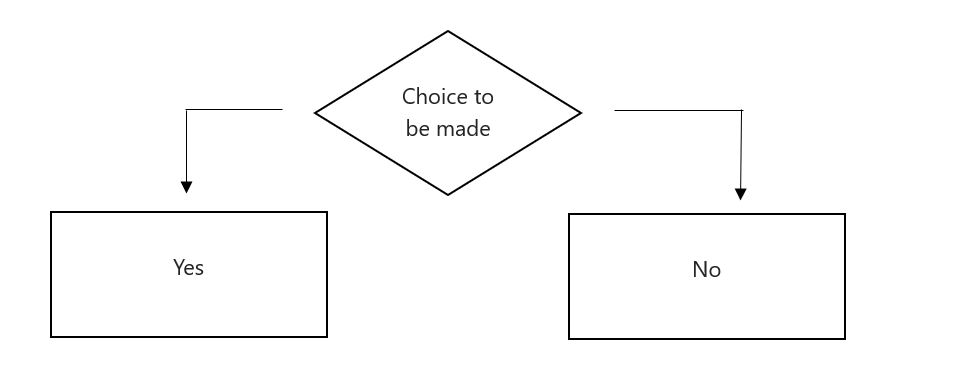\n\nYou learned about selection when you learned about conditionals. \nLet's convert your code from the last activity into one that makes a decision. The code from the last activity is below. \n\n\n\n```template\nplayer.onChat(\"wall\", function () {\n\tagent.setItem(STONE, 64, 1)\n\tagent.setAssist(PLACE_ON_MOVE, true)\n\tfor (let index = 0; index < 2; index++) {\n\t\tagent.move(FORWARD, 3)\n\t\tagent.move(UP, 1)\n\t\tagent.move(BACK, 3)\n\t\tagent.move(UP, 1)\n\t}\n})\n\n```\n\n## Step 2\n\nLet's add a conditional that first checks to see if the there is anything in front of the agent before he begins to build the wall. If it does not have anything in front of it, have the agent build the wall. If it does have something in front of it, have the agent destroy forward. \n\n\n#### ~ tutorialhint\n\n```javascript \n\nplayer.onChat(\"wall\", function () {\n\tagent.setItem(STONE, 64, 1)\n\tagent.setAssist(PLACE_ON_MOVE, true)\n\tif (agent.detect(AgentDetection.Block, FORWARD)) {\n\t\tfor (let index = 0; index < 2; index++) {\n\t\t\tagent.move(FORWARD, 3)\n\t\t\tagent.move(UP, 1)\n\t\t\tagent.move(BACK, 3)\n\t\t\tagent.move(UP, 1)\n\t\t}\n\t} else {\n\t\tagent.destroy(FORWARD)\n\t}\n})\n\n```\n\n## Step 3\n\nRun the code by following the instructions in the next step.\n\n\n## Step 4 @unplugged\nTo test your code:\nOnce you have fully read this step click the Green Ok button below to close this window to return to the tutorial to perform the below steps to test your code.\n\n1. Click on the **Green Start button** below to return to the game.\n\n \n\n\n\n2. Open the chat by pressing T. \n3. Type wall and hit enter. \n4. You know your code is correct when the agent builds a 4x4 wall. \n\n## Step 5\n\nWhen your code works as expected move on to the next NPC. \nIf it does not work as expected, try to fix and test again.\n\n","Lesson9/9.2/9.2.md":"# Expert Coding using JavaScript - Lesson 9 Activity 9.2\n### @explicitHints true\n\n## Step 1\n\nWhen writing algorithms, you may use conditionals or booleans, and sometimes both. However, some conditional statements can be written as equivalent Boolean expressions and some Boolean expressions can be written as equivalent conditional statements.\nLet's explore this by first building a code that uses a conditional statement. \n\nFirst, declare 2 variables. One named score with the value of 0 and the other named endGame the value of an empty string (\" \"). \n\n#### ~ tutorialhint\n```javascript\n\nlet score = 0\nlet endGame = \"\"\n\n```\n\n## Step 2\n\nNext, create a code that when a grass blocks is placed, the variable score increases by 1. \n\n#### ~ tutorialhint\n```javascript\n\nlet score = 0\nlet endGame = \"\"\nblocks.onBlockPlaced(GRASS, function () {\n\tscore += 1\n})\n\n```\n\n## Step 3\n\nNow, create an on chat command named scoreCheck. \n\n#### ~ tutorialhint\n```javascript\n\nlet score = 0\nlet endGame = \"\"\nblocks.onBlockPlaced(GRASS, function () {\n\tscore += 1\n})\nplayer.onChat(\"scoreCheck\", function () {\n)\n})\n\n```\n\n## Step 4\n\nInside the On Chat command, add an if / else statement that checks the condition if the variable score is greater than 5. If it is true, the player will say true. If it is false, the player will say false. \n\n\n#### ~ tutorialhint\n```javascript\n\nlet score = 0\nlet endGame = \"\"\nblocks.onBlockPlaced(GRASS, function () {\n\tscore += 1\n})\nplayer.onChat(\"scoreCheck\", function () {\n\tif (score > 5) {\n\t\tendGame = \"True!\"\n\t} else {\n\t\tendGame = \"False\"\n\t}\n\tplayer.say(endGame)\n})\n\n```\n\n## Step 5\n\nRun the code by following the instructions in the next step.\n\n\n## Step 6 @unplugged\nTo test your code:\nOnce you have fully read this step click the Green Ok button below to close this window to return to the tutorial to perform the below steps to test your code.\n\n1. Click on the **Green Start button** below to return to the game.\n\n \n\n\n\n2. Place down some grass blocks. \n3. Open the chat by pressing T and enter scoreCheck. \n4. You will know your code is correct if your players says True if you placed more than 5 blocks down or False if you placed 5 or less. \n\n## Step 7\nWhen your code works as expected move on to the next activity.\nIf it does not work as expected, try to fix and test again.","Lesson9/9.3/9.3.md":"# Expert Coding using JavaScript - Lesson 9 Activity 9.3\n### @explicitHints true\n\n## Step 1 @unplugged\n\nThere are certain problems that computers are unable to solve, and even when they can solve a problem, it might take them an unreasonable amount of time to do so. \n**A problem is a general description of a task that can (or cannot) be solved algorithmically.** An instance of a problem also includes specific input. For example, sorting is a problem; sorting the list (2,3,1,7) is an instance of the problem. \n\n## Step 2 @unplugged\n\nThere are two main types of problems: decision problems and optimization problems. **A decision problem is one that can be answered with a simple yes or no** (e.g., determining if there is a path from point A to point B). \nOn the other hand, an **optimization problem involves finding the \"best\" solution among many possibilities** (e.g., identifying the shortest path from point A to point B).\n\n## Step 3 @unplugged\n\n**Algorithmic efficiency refers to how well an algorithm performs in terms of time and resources required to solve a problem.** It measures how quickly an algorithm can find a solution and how much space or memory it needs to do so.\n\nImagine you have a task to complete, such as sorting a list of numbers. There are different ways to solve this task, and each way is like a different algorithm. Now, algorithmic efficiency is like comparing how fast and efficient these different algorithms are at sorting the list.\n\n## Step 4 @unplugged\n\nWhen we talk about algorithmic efficiency, we usually consider two main factors: time complexity and space complexity.\n\n**Time complexity is about how much time it takes for an algorithm to run**. It measures how the running time of an algorithm increases as the size of the input grows. For example, if we have a list with 10 numbers, how long does the algorithm take to sort it? If we have a list with 100 numbers, does the algorithm take longer? **Algorithms with better time complexity are faster and more efficient.**\n\n**Space complexity refers to how much memory or space an algorithm needs to solve a problem.** It measures the amount of memory an algorithm uses as the input size increases. **Efficient algorithms use minimal space or memory,** which is important when dealing with large amounts of data.\n\n## Step 5 @unplugged\n\nTo understand algorithmic efficiency, think of it like choosing the best way to solve a problem. **You want to find an algorithm that can solve the problem quickly and with minimal resources.** It's like finding the fastest route to school or the most efficient way to complete a task, but in the context of algorithms and computer science.\n\n**By analyzing and comparing the efficiency of different algorithms, we can choose the most suitable one for a given problem.** This helps us optimize the performance of our programs, saving time and resources in the process.\n\n## Step 6 @unplugged\nGo to the next Activity to continue learning about algorithmic efficiency. ","Lesson9/9.3/9.3.1.md":"# Expert Coding using JavaScript - Lesson 9 Activity 9.3.1\n### @explicitHints true\n\n## Step 1\n\n**An algorithm’s efficiency can be informally measured by determining the number of times a statement or group of statements executes**.\n\nLet's try this out in the game. \nFirst, create a variable called currentNumber and assign it the value of 0. Then create an array of numbers 1,2,3,4,5. (You will learn more about arrays in the next lesson. For now, the code is below.)\n\n let numbers = [1, 2, 3, 4, 5]\n\n#### ~ tutorialhint\n\n```javascript\nlet currentNumber = 0\nlet numbers = [1, 2, 3, 4, 5]\n```\n\n## Step 2\n\nNext, create a for loop. In the for loop, initialize a variable `i` with the value `0`. Then, check whether the value of `i` is less than or equal to the length of the `numbers` array minus 1.\nAnd add 1 to the value of `i` after each iteration of the loop.\n\n#### ~ tutorialhint\n\n```javascript\nlet currentNumber = 0\nlet numbers = [1, 2, 3, 4, 5]\nfor (let i = 0; i <= numbers.length - 1; i++) {\n\n}\n```\n\n## Step 3\nInside the loop assign currentNumber the value of numbers[i] and have the player say the current number. \n\n#### ~ tutorialhint\n\n```javascript\nlet currentNumber = 0\nlet numbers = [1, 2, 3, 4, 5]\nfor (let i = 0; i <= numbers.length - 1; i++) {\n\tcurrentNumber = numbers[i]\n\tplayer.say(currentNumber)\n}\n```\n\n## Step 4\n\nRun the code by following the instructions in the next step.\n\n\n## Step 5 @unplugged\nTo test your code:\nOnce you have fully read this step click the Green Ok button below to close this window to return to the tutorial to perform the below steps to test your code.\n\n1. Click on the **Green Start button** below to return to the game.\n\n \n\n\n\n4. You will know your code is correct when your player says 5 things 1, 2, 3, 4, and then 5. \n\n## Step 6 @unplugged\n\nWe can now see that the algorithmic efficiency was 5. \n**By counting the number of times a statement or group of statements executes, we can get an idea of how the algorithm's efficiency scales with the input size.** In this case, the efficiency is directly related to the number of elements in the list.\nMove on to the next activity. ","Lesson9/9.3/9.3.2.md":"# Expert Coding using JavaScript - Lesson 9 Activity 9.3.2\n### @explicitHints true\n\n## Step 1 @unplugged\nThere are other ways to measure algorithmic efficiency. \n\n Different correct algorithms for the same problem can have different efficiencies. \n **Polynomial efficiency is a way to measure how well an algorithm performs in terms of time as the size of the problem increases**. It tells us how the running time of an algorithm grows with the input size.\n\nImagine you have a problem to solve, like sorting a list of numbers. There are different algorithms to solve this problem, and we want to know how fast they are. Polynomial efficiency helps us understand that.\n\nWhen we talk about polynomial efficiency, we look at the time complexity of an algorithm. **Time complexity tells us how the running time of an algorithm grows as the input size increases**. We use mathematical expressions called polynomials to describe this growth.\n\n## Step 2 @unplugged\n\nAlgorithms with **exponential or factorial efficiencies** are examples of algorithms that run in an **unreasonable amount of time.**\n\n Some problems cannot be solved in a reasonable amount of time because there is no efficient algorithm for solving them. In these cases, approximate solutions are sought. \n \n A **heuristic** is an approach to a problem that produces a solution that is **not guaranteed to be optimal but may be used when techniques that are guaranteed to always find an optimal solution are impractical.**\n ","Lesson9/9.2/9.2.1.md":"# Expert Coding using JavaScript - Lesson 9 Activity 9.2.1\n### @explicitHints true\n\n\n## Step 1\n\nIn the last activity, you built a code that used a conditional statement. We are now going to build a code that instead uses a Boolean expression to do the same thing. \nSome of the code will be the same. Let's build that first. \n\nFirst, declare 2 variables. One named score with the value of 0 and the other named endGame the value of an empty string (\" \"). \n\n#### ~ tutorialhint\n```javascript\n\nlet score = 0\nlet endGame = \"\"\n\n``` \n\n## Step 2\n\nNext, create a code that when a grass blocks is placed, the variable score increases by 1. \n\n#### ~ tutorialhint\n```javascript\n\nlet score = 0\nlet endGame = \"\"\nblocks.onBlockPlaced(GRASS, function () {\n\tscore += 1\n})\n\n```\n\n## Step 3\n\nNow, create an on chat command named scoreCheck. \n\n#### ~ tutorialhint\n```javascript\n\nlet score = 0\nlet endGame = \"\"\nblocks.onBlockPlaced(GRASS, function () {\n\tscore += 1\n})\nplayer.onChat(\"scoreCheck\", function () {\n)\n})\n\n```\n\n## Step 4\n\nNow, this is where the code will be different as you will use a Boolean expression. \nCreate the if /else statement and check is the variable score is greater than 5. If it is, set the variable endgame to equal to true. If it is not, set the variable endgame to false. \n\n#### ~ tutorialhint\n```javascript\n\nlet score = 0\nlet endGame = \"\"\nblocks.onBlockPlaced(GRASS, function () {\n\tscore += 1\n})\nplayer.onChat(\"scoreCheck\", function () {\n\tif (score > 5) {\n\t\tendGame = \"True\"\n\t} else {\n\t\tendGame = \"False\"\n\t}\n})\n\n```\n\n## Step 5\n\nNow, after the if / else statement inside the on chat command, add the code that has the player say the variable endGame. \n\n\n#### ~ tutorialhint\n```javascript\n\nlet score = 0\nlet endGame = \"\"\nblocks.onBlockPlaced(GRASS, function () {\n\tscore += 1\n})\nplayer.onChat(\"scoreCheck\", function () {\n\tif (score > 5) {\n\t\tendGame = \"True\"\n\t} else {\n\t\tendGame = \"False\"\n\t}\n\tplayer.say(endGame)\n})\n\n```\n\n## Step 6\n\nRun the code by following the instructions in the next step.\n\n\n## Step 7 @unplugged\nTo test your code:\nOnce you have fully read this step click the Green Ok button below to close this window to return to the tutorial to perform the below steps to test your code.\n\n1. Click on the **Green Start button** below to return to the game.\n\n \n\n\n\n2. Place down some grass blocks. \n3. Open the chat by pressing T and enter scoreCheck. \n4. You will know your code is correct if your players says True if you placed more than 5 blocks down or False if you placed 5 or less. \n\n## Step 8\nWhen your code works as expected move on to the next activity.\nIf it does not work as expected, try to fix and test again.\n","Lesson9/9.2/9.2.2.md":"## Step 1\n\nAlgorithms can be created from an idea, by combining existing algorithms, or by modifying existing algorithms. Knowledge of existing algorithms can help in constructing new ones. Using existing correct algorithms as building blocks for constructing another algorithm \nhas benefits such as reducing development time, reducing testing, and simplifying the identification of errors.\n\nWe are going to practice this by first reviewing an algorithm that builds a 5x5 square. \nRun the code below to see how it works. \n\n```template\n player.onChat(\"run\", function () {\n\t agent.setItem(STONE, 64, 1)\n\t agent.setAssist(PLACE_ON_MOVE, true)\n\t for (let index = 0; index < 4; index++) {\n\t\t agent.move(FORWARD, 4)\n\t\t agent.turn(LEFT_TURN)\n\t\t}\n\t\tagent.move(UP, 1)\n\t})\n\t\n```\n\n## Step 2\n\nNow that you understand how that algorithm works, let's use that knowledge to create a new algorithm that builds a pyramid with 3 levels, the middle level, being a 5 x 5 square. \n\nWe know the code to build a 5x5 square and already have it below. We will now need to use it and our knowledge of how it works to build a pyramid. If the middle layer is 5x5, we want the bottom layer to be 2 blocks larger. Change the agent move forward from 4 to 6. \n\n#### ~ tutorialhint\n\n```javascript \n\nplayer.onChat(\"run\", function () {\n\tagent.setItem(STONE, 64, 1)\n\tagent.setAssist(PLACE_ON_MOVE, true)\n\tfor (let index = 0; index < 4; index++) {\n\t\t\tagent.move(FORWARD, 6)\n\t\t\tagent.turn(LEFT_TURN)\n\t}\n\tagent.move(UP, 1)\n})\n```\n\n## Step 3\n\nNow, we want the agent to move forward before building the next square so we need to set the place on move to false and have the agent move forward by 1. \n\n#### ~ tutorialhint\n\n```javascript \n\nplayer.onChat(\"run\", function () {\n\tagent.setItem(STONE, 64, 1)\n\tagent.setAssist(PLACE_ON_MOVE, true)\n\tfor (let index = 0; index < 4; index++) {\n\t\t\tagent.move(FORWARD, 6)\n\t\t\tagent.turn(LEFT_TURN)\n\t}\n\tagent.move(UP, 1)\n\tagent.setAssist(PLACE_ON_MOVE, false)\n\tagent.move(FORWARD, 1)\n})\n```\n\n\n## Step 4\n\nNext, you can repeat the steps to build the square but for a 5x5 instead of 7x7, starting with setting the place on move to true. Then add the set assist to false and agent move forward by 1 after you build the 5x5 square. \n\n#### ~ tutorialhint\n\n```javascript \n\nplayer.onChat(\"run\", function () {\n\tagent.setItem(STONE, 64, 1)\n\tagent.setAssist(PLACE_ON_MOVE, true)\n\tfor (let index = 0; index < 4; index++) {\n\t\t\tagent.move(FORWARD, 6)\n\t\t\tagent.turn(LEFT_TURN)\n\t}\n\tagent.move(UP, 1)\n\tagent.setAssist(PLACE_ON_MOVE, false)\n\tagent.move(FORWARD, 1)\n\tagent.setAssist(PLACE_ON_MOVE, true)\n\tfor (let index = 0; index < 4; index++) {\n\t\t\tagent.move(FORWARD, 4)\n\t\t\tagent.turn(LEFT_TURN)\n\t}\n\tagent.move(UP, 1)\n\tagent.setAssist(PLACE_ON_MOVE, false)\n\tagent.move(FORWARD, 1)\n})\n```\n\n\n## Step 5\n\nNext, you want to repeat the steps to move the agent forward without placing down a block and then the steps to have the agent build a 3x3 square. \n\n\n#### ~ tutorialhint\n\n```javascript \n\nplayer.onChat(\"run\", function () {\n\tagent.setItem(STONE, 64, 1)\n\tagent.setAssist(PLACE_ON_MOVE, true)\n\tfor (let index = 0; index < 4; index++) {\n\t\t\tagent.move(FORWARD, 6)\n\t\t\tagent.turn(LEFT_TURN)\n\t}\n\tagent.move(UP, 1)\n\tagent.setAssist(PLACE_ON_MOVE, false)\n\tagent.move(FORWARD, 1)\n\tagent.setAssist(PLACE_ON_MOVE, true)\n\tfor (let index = 0; index < 4; index++) {\n\t\t\tagent.move(FORWARD, 4)\n\t\t\tagent.turn(LEFT_TURN)\n\t}\n\tagent.move(UP, 1)\n\tagent.setAssist(PLACE_ON_MOVE, false)\n\tagent.move(FORWARD, 1)\n\tagent.setAssist(PLACE_ON_MOVE, true)\n\tfor (let index = 0; index < 4; index++) {\n\t\t\tagent.move(FORWARD, 2)\n\t\t\tagent.turn(LEFT_TURN)\n\t}\n\tagent.move(UP, 1)\n\t\n})\n```\n\n## Step 6\n\nThe last step is to have the agent place 1 block to top the pyramid. Add the code to have the agent place forward to do this. \n\n#### ~ tutorialhint\n\n```javascript \n\nplayer.onChat(\"run\", function () {\n\tagent.setItem(STONE, 64, 1)\n\tagent.setAssist(PLACE_ON_MOVE, true)\n\tfor (let index = 0; index < 4; index++) {\n\t\t\tagent.move(FORWARD, 6)\n\t\t\tagent.turn(LEFT_TURN)\n\t}\n\tagent.move(UP, 1)\n\tagent.setAssist(PLACE_ON_MOVE, false)\n\tagent.move(FORWARD, 1)\n\tagent.setAssist(PLACE_ON_MOVE, true)\n\tfor (let index = 0; index < 4; index++) {\n\t\t\tagent.move(FORWARD, 4)\n\t\t\tagent.turn(LEFT_TURN)\n\t}\n\tagent.move(UP, 1)\n\tagent.setAssist(PLACE_ON_MOVE, false)\n\tagent.move(FORWARD, 1)\n\tagent.setAssist(PLACE_ON_MOVE, true)\n\tfor (let index = 0; index < 4; index++) {\n\t\t\tagent.move(FORWARD, 2)\n\t\t\tagent.turn(LEFT_TURN)\n\t}\n\tagent.move(UP, 1)\n\tagent.place(FORWARD)\n})\n```\n\n\n## Step 7 @unplugged\n\nTo test your code:\nOnce you have fully read this step click the Green Ok button below to close this window to return to the tutorial to perform the below steps to test your code.\n\n1. Click on the **Green Start button** below to return to the game.\n\n \n\n\n\n2. Open the chat by pressing T and enter run\n3. You will know your code is correct when your agent builds a pyramid. \n\n\n## Step 8\nWhen your code works as expected move on to the next activity.\nIf it does not work as expected, try to fix and test again.\n","Lesson10/10.1/10.1.md":"# Expert Coding using JavaScript - Lesson 10 Activity 10.1\n### @explicitHints true\n\n## Step 1@unplugged\n\n**Program documentation is a written description of the function of a code segment, event, procedure, or program and how it was developed.**\nProgram documentation helps in developing and maintaining correct programs when working individually or in collaborative programming environments.\n\nHere's a breakdown of the key elements and purposes of program documentation:\n\n.1. **Function and Purpose:** Documentation outlines the primary purpose and intended functionality of the code segment, event, procedure, or program. It explains what the software is designed to do and its role within the larger system.\n \n2. **Code Explanation:** Documentation offers a detailed explanation of the code's logic, structure, and algorithms. It breaks down complex sections of code into manageable parts, making it easier for developers to understand and work with the codebase.\n \n3. **Usage Instructions:** Documentation provides instructions on how to use the code or software. This includes information on input formats, parameters, expected outputs, and any relevant usage examples. Proper usage instructions help other developers integrate the code correctly into their projects.\n \n4. **Dependencies and Requirements:** Documentation lists any external libraries, frameworks, or resources that the code relies on. It also outlines the hardware or software requirements for running the code successfully. \n\n5. **Contributor Guidelines:**\nIt is important to acknowledge any code segments that were developed collaboratively or by another source. Acknowledgement of a code segment(s) written by someone else and used in a program can be in the program documentation. The acknowledgement should include the origin or original author’s name.\n \n \n\n## Step 2 @unplugged\nProgrammers should document a program throughout its development. The often do this through comments. \n**Comments are a form of program documentation written into the program to be read by people and do not affect how a program runs.**\n\n*Note - Not all programming environments support comments, so other methods of documentation may be required.*\n\nThere are 2 ways to do comments in JavaScript. \n\n**Single-line comments:** These comments are used for adding explanations or notes on a single line of code. They start with `//` and continue until the end of the line.\n\n**Multi-line comments (block comments):** These comments are used for adding explanations or notes that span multiple lines. They start with `/*` and end with `*/`. Everything between these delimiters is considered a comment.\n\n## Step 3\n\nLet' practice creating comments in your code. \n\nThere is a code on your workspace. Run it to see what it does. \n\n```template\nplayer.onChat(\"wall\", function () {\n\tagent.setItem(STONE, 64, 1)\n\tagent.setAssist(PLACE_ON_MOVE, true)\n\tfor (let index = 0; index < 2; index++) {\n\t\tagent.move(FORWARD, 3)\n\t\tagent.move(UP, 1)\n\t\tagent.move(BACK, 3)\n\t\tagent.move(UP, 1)\n\t}\n})\n\n```\n\n## Step 4\n\nNow, add a multi line comment directly above the agent set Item code that explains what that line of code is doing. \n\n#### ~ tutorialhint\n\n```javascript\nplayer.onChat(\"wall\", function () {\n\t//The code below gives the agent 64 stone blocks in slot 1. //\n\tagent.setItem(STONE, 64, 1)\n\tagent.setAssist(PLACE_ON_MOVE, true)\n\tfor (let index = 0; index < 2; index++) {\n\t\tagent.move(FORWARD, 3)\n\t\tagent.move(UP, 1)\n\t\tagent.move(BACK, 3)\n\t\tagent.move(UP, 1)\n\t}\n})\n\n```\n\n## Step 5\n\nNext, add a single line comment directly above the loop describing what happens in the loop. \n\n```javascript\nplayer.onChat(\"wall\", function () {\n\t//The code below gives the agent 64 stone blocks in slot 1. //\n\tagent.setItem(STONE, 64, 1)\n\tagent.setAssist(PLACE_ON_MOVE, true)\n/* In the loop below, the agent will place as it walks forward by 3, up by 1, back by 3, and then up by 1 to build a wall. It will repeat those steps 2 times and\nbuild a 4 x 4 wall */\n\tfor (let index = 0; index < 2; index++) {\n\t\tagent.move(FORWARD, 3)\n\t\tagent.move(UP, 1)\n\t\tagent.move(BACK, 3)\n\t\tagent.move(UP, 1)\n\t}\n})\n\n```\n\n## Step 6\n\nRun the code by following the instructions in the next step.\n\n## Step 7 @unplugged\n\nTo test your code:\nOnce you have fully read this step click the Green Ok button below to close this window to return to the tutorial to perform the below steps to test your code.\n\n1. Click on the **Green Start button** below to return to the game.\n\n \n\n\n\n2. Open the chat and type wall. \n3. You will know your code is correct when your agent builds the wall. When you run the code, your code should NOT effect the building of the wall. \n\n\n## Step 8\n\nWhen your code works as expected move on to the next NPC.\nIf it does not work as expected, try to fix and test again.\n","Lesson10/10.1/10.01.md":"# Expert Coding using JavaScript - Lesson 10 Activity 10.01\n### @explicitHints true\n\n## Step 1 @unplugged\n\nIn programming, there are events. \n**An event is associated with an action and supplies input data to a program.** When an event occurs, it often provides some data (input) to the program. For example, when you click a button on a webpage, that's an event. The action of clicking triggers an event, and the program responds accordingly. The data associated with the event might include information about where you clicked or what button was pressed.\nEvents can be generated when a key is pressed, a mouse is clicked, a program is started, or any other defined action occurs that affects the flow of execution.\n\n## Step 2 @unplugged\n\n**In event-driven programming, program statements are executed when triggered rather than through the sequential flow of control.**\nIn event-driven programming, the flow of control doesn't follow a strict linear sequence from one line of code to the next. Instead, program statements are executed in response to events as they occur. The program waits for events to happen, and when they do, the corresponding code is executed. \n\nThis allows for more dynamic and interactive programs where actions happen in response to user interactions or other external factors.\n\n## Step 3 @unplugged\n\nContinue on to the next NPC to learn about Structure and Error Handling. \n","Lesson10/10.1/10.1.2.md":"# Expert Coding using JavaScript - Lesson 10 Activity 10.1.2\n### @explicitHints true\n\n## Step 1\n\nRun the code below and see what it does. \n\n\n```template\nplayer.onChat(\"run\", function () {\n\tagent.setItem(STONE, 64, 1)\n\tagent.setAssist(PLACE_ON_MOVE, true)\n\tfor (let index = 0; index < 4; index++) {\n\t\t\tagent.move(FORWARD, 6)\n\t\t\tagent.turn(LEFT_TURN)\n\t}\n\tagent.move(UP, 1)\n\tagent.setAssist(PLACE_ON_MOVE, false)\n\tagent.move(FORWARD, 1)\n\tagent.setAssist(PLACE_ON_MOVE, true)\n\tfor (let index = 0; index < 4; index++) {\n\t\t\tagent.move(FORWARD, 4)\n\t\t\tagent.turn(LEFT_TURN)\n\t}\n\tagent.move(UP, 1)\n\tagent.setAssist(PLACE_ON_MOVE, false)\n\tagent.move(FORWARD, 1)\n\tagent.setAssist(PLACE_ON_MOVE, true)\n\tfor (let index = 0; index < 4; index++) {\n\t\t\tagent.move(FORWARD, 2)\n\t\t\tagent.turn(LEFT_TURN)\n\t}\n\tagent.move(UP, 1)\n\tagent.place(FORWARD)\n})\n```\n\n## Step 2\n\nYou are going to write 5 comments. They should be the following:\n\n - What happens in the On Chat command\n - What part of the code builds the bottom layer\n - What part of the code builds the second layer\n - What part of the code builds the third layer\n - What part of the code builds the top\n\n#### ~ tutorialhint\n```javascript \n//When the player types run in the chat command, the agent will build a pyramid. \nplayer.onChat(\"run\", function () {\n\tagent.setItem(STONE, 64, 1)\n\tagent.setAssist(PLACE_ON_MOVE, true)\n\t//the code below will build the base of the pyramid\n\tfor (let index = 0; index < 4; index++) {\n\t\t\tagent.move(FORWARD, 6)\n\t\t\tagent.turn(LEFT_TURN)\n\t}\n\tagent.move(UP, 1)\n\t//the code below will build the second layer of the pyramid\n\tagent.setAssist(PLACE_ON_MOVE, false)\n\tagent.move(FORWARD, 1)\n\tagent.setAssist(PLACE_ON_MOVE, true)\n\tfor (let index = 0; index < 4; index++) {\n\t\t\tagent.move(FORWARD, 4)\n\t\t\tagent.turn(LEFT_TURN)\n\t}\n\tagent.move(UP, 1)\n\t//the code below will build the third layer of the pyramid\n\tagent.setAssist(PLACE_ON_MOVE, false)\n\tagent.move(FORWARD, 1)\n\tagent.setAssist(PLACE_ON_MOVE, true)\n\tfor (let index = 0; index < 4; index++) {\n\t\t\tagent.move(FORWARD, 2)\n\t\t\tagent.turn(LEFT_TURN)\n\t}\n\tagent.move(UP, 1)\n\t//the code below will build the top of the pyramid\n\tagent.place(FORWARD)\n})\n```\n\n## Step 3\n\nRun the code by following the instructions in the next step.\n\n## Step 4 @unplugged\n\nTo test your code:\nOnce you have fully read this step click the Green Ok button below to close this window to return to the tutorial to perform the below steps to test your code.\n\n1. Click on the **Green Start button** below to return to the game.\n\n \n\n\n\n2. Open the chat and type run \n3. You know your code is correct when your agent builds a pyramid. \n\n\n## Step 5\n\nWhen your code works as expected move on to the next NPC.\nIf there are errors, check your comments are formatted correctly and fix and test again.","Lesson10/10.1/10.1.1.md":"# Expert Coding using JavaScript - Lesson 10 Activity 10.1.1\n### @explicitHints true\n\n## Step 1\n\nWe are going to continue writing comments for our code. The code below uses functions to plant a garden. Run the code to see how it works. \n\nFirst, write a single line comment for the function sunflower, cornflower, and tulip. Put the command above the function it is documenting. \n\n```template\nfunction sunflower() {\n\tagent.setItem(SUNFLOWER, 1, 1)\n\tagent.place(DOWN)\t\n\tagent.move(FORWARD, 1)\n}\n\nfunction cornflower () {\n\tagent.setItem(CORNFLOWER, 1, 1)\n\tagent.place(DOWN)\n\tagent.move(FORWARD, 1)\n}\n\nfunction tulip () {\n\tagent.setItem(RED_TULIP, 1, 1)\n\tagent.place(DOWN)\n\tagent.move(FORWARD, 1)\n}\n\nfunction garden(flowers: number) {\n\tsunflower()\n\tcornflower()\n\ttulip()\n}\nplayer.onChat(\"plant\", function () {\n\tgarden(1)\n})\n```\n\n#### ~ tutorialhint\n\n```javascript\n//The function sunflower gives the agent 1 sunflower in slot 1 and has the agent place it down and then move forward by 1. \nfunction sunflower() {\n\tagent.setItem(SUNFLOWER, 1, 1)\n\tagent.place(DOWN)\t\n\tagent.move(FORWARD, 1)\n}\n//The function cornflower gives the agent 1 cornflower in slot 1 and has the agent place it down and then move forward by 1. \nfunction cornflower () {\n\tagent.setItem(CORNFLOWER, 1, 1)\n\tagent.place(DOWN)\n\tagent.move(FORWARD, 1)\n}\n//The function tulip gives the agent 1 tulip in slot 1 and has the agent place it down and then move forward by 1. \nfunction tulip () {\n\tagent.setItem(RED_TULIP, 1, 1)\n\tagent.place(DOWN)\n\tagent.move(FORWARD, 1)\n}\n\nfunction garden(flowers: number) {\n\tsunflower()\n\tcornflower()\n\ttulip()\n}\nplayer.onChat(\"plant\", function () {\n\tgarden(1)\n})\n```\n\n## Step 2\n\nNext, write a single line comment for the function garden. \n\n#### ~ tutorialhint\n\n```javascript\n//The function sunflower gives the agent 1 sunflower in slot 1 and has the agent place it down and then move forward by 1. \nfunction sunflower() {\n\tagent.setItem(SUNFLOWER, 1, 1)\n\tagent.place(DOWN)\t\n\tagent.move(FORWARD, 1)\n}\n//The function cornflower gives the agent 1 cornflower in slot 1 and has the agent place it down and then move forward by 1. \nfunction cornflower () {\n\tagent.setItem(CORNFLOWER, 1, 1)\n\tagent.place(DOWN)\n\tagent.move(FORWARD, 1)\n}\n//The function tulip gives the agent 1 tulip in slot 1 and has the agent place it down and then move forward by 1. \nfunction tulip () {\n\tagent.setItem(RED_TULIP, 1, 1)\n\tagent.place(DOWN)\n\tagent.move(FORWARD, 1)\n}\n//The function garden calls the functions of sunflower, cornflower, and tulip. \nfunction garden(flowers: number) {\n\tsunflower()\n\tcornflower()\n\ttulip()\n}\nplayer.onChat(\"plant\", function () {\n\tgarden(1)\n})\n```\n\n## Step 3\n\nLastly, write a multi-line comment for the on chat command. \n\n#### ~ tutorialhint\n\n```javascript\n//The function sunflower gives the agent 1 sunflower in slot 1 and has the agent place it down and then move forward by 1. \nfunction sunflower() {\n\tagent.setItem(SUNFLOWER, 1, 1)\n\tagent.place(DOWN)\t\n\tagent.move(FORWARD, 1)\n}\n//The function cornflower gives the agent 1 cornflower in slot 1 and has the agent place it down and then move forward by 1. \nfunction cornflower () {\n\tagent.setItem(CORNFLOWER, 1, 1)\n\tagent.place(DOWN)\n\tagent.move(FORWARD, 1)\n}\n//The function tulip gives the agent 1 tulip in slot 1 and has the agent place it down and then move forward by 1. \nfunction tulip () {\n\tagent.setItem(RED_TULIP, 1, 1)\n\tagent.place(DOWN)\n\tagent.move(FORWARD, 1)\n}\n//The function garden calls the functions of sunflower, cornflower, and tulip. \nfunction garden(flowers: number) {\n\tsunflower()\n\tcornflower()\n\ttulip()\n}\n/*The chat command will call the function garden when the player types plant in the chat. When the function garden is called, it calls the functions sunflower, cornflower, and tulip and has the agent plant all 3 flowers. */\nplayer.onChat(\"plant\", function () {\n\tgarden(1)\n})\n```\n\n## Step 4\n\nRun the code by following the instructions in the next step.\n\n## Step 5 @unplugged\n\nTo test your code:\nOnce you have fully read this step click the Green Ok button below to close this window to return to the tutorial to perform the below steps to test your code.\n\n1. Click on the **Green Start button** below to return to the game.\n\n \n\n\n\n2. Open the chat and type plant. \n3. You know your code is correct when your agent plants a sunflower, cornflower, and tulip. \n\n\n## Step 6\n\nWhen your code works as expected move on to the next NPC.\nIf there are errors, check your comments are formatted correctly and fix and test again.","Lesson10/10.2/10.2.md":"# Expert Coding using JavaScript - Lesson 10 Activity 10.2\n### @explicitHints true\n\n## Step 1 @unplugged\n\nThere are different types of errors in code. \nA **logic error** is a mistake in the algorithm or program that causes it to behave incorrectly or unexpectedly.\n\nA **syntax error** is a mistake in the program where the rules of the programming language are not followed.\n\nA **run-time error** is a mistake in the program that occurs during the execution of a program. Programming languages define their own run-time errors.\n\nAn **overflow error** is an error that occurs when a computer attempts to handle a number that is outside of the defined range of values.\nLet's look into each of these error types individually. \n\n## Step 2 @unplugged\n\nLogic errors in JavaScript, also known as \"bugs,\" occur when the code does not behave as intended due to flaws in the program's logic. Unlike syntax errors, which result from incorrect language usage, logic errors lead to unexpected outcomes that may not trigger any error messages. Here are a few examples of logic errors you may see in your code. \n\n**Incorrect Conditions or Expressions:** Logic errors often arise from mistakes in conditions or expressions used in conditional statements (if, else if, else) and loops (for, while). Incorrectly evaluating conditions can cause the code to take the wrong path or loop more or fewer times than intended.\n\n**Off-by-One Errors:** These errors occur when iterating through arrays or other data structures, and the loop runs one too many or too few times. This often happens due to using the wrong comparison operator or mismanaging array indices.\n\n**Misunderstanding Operator Precedence:** JavaScript operators have precedence rules that determine how expressions are evaluated. Mixing operators without considering their precedence can lead to incorrect results.\n\n## Step 3\n\nThe code below is supposed to make a 4x4 solid square on the grass when the player types run but it has a 3 logic errors. Run the code first to see what it it currently does. \n\n```template\nplayer.onChat(\"run\", function () {\n\tif (agent.inspect(AgentInspection.Block, FORWARD) == GRASS) {\n\t\tagent.setAssist(PLACE_ON_MOVE, true)\n\t\tagent.place(BACK)\n\t\tfor (let index = 0; index < 3; index++) {\n\t\t\tagent.move(FORWARD, 3)\n\t\t\tagent.turn(RIGHT_TURN)\n\t\t\tagent.move(FORWARD, 1)\n\t\t\tagent.turn(RIGHT_TURN)\n\t\t\tagent.move(FORWARD, 3)\n\t\t\tagent.turn(LEFT_TURN)\n\t\t\tagent.move(FORWARD, 1)\n\t\t\tagent.turn(LEFT_TURN)\n\t\t}\n\t}\n})\n```\n\n## Step 4\n\nNow, fix the 3 errors. \n\n#### ~ tutorialhint\n```javascript \nplayer.onChat(\"run\", function () {\n\tif (agent.inspect(AgentInspection.Block, DOWN) == GRASS) {\n\t\tagent.setAssist(PLACE_ON_MOVE, true)\n\t\tfor (let index = 0; index < 2; index++) {\n\t\t\tagent.move(FORWARD, 3)\n\t\t\tagent.turn(RIGHT_TURN)\n\t\t\tagent.move(FORWARD, 1)\n\t\t\tagent.turn(RIGHT_TURN)\n\t\t\tagent.move(FORWARD, 3)\n\t\t\tagent.turn(LEFT_TURN)\n\t\t\tagent.move(FORWARD, 1)\n\t\t\tagent.turn(LEFT_TURN)\n\t\t}\n\t}\n})\n```\n\n## Step 5\n\nRun the code by following the instructions in the next step.\n\n## Step 6 @unplugged\n\nTo test your code:\nOnce you have fully read this step click the Green Ok button below to close this window to return to the tutorial to perform the below steps to test your code.\n\n1. Click on the **Green Start button** below to return to the game.\n\n \n\n\n\n2. Open the chat and type run \n3. You know your code is correct when your agent builds a solid 4x4 square on the ground. \n\n\n## Step 7\n\nWhen your code works as expected move on to the next activity. \nIf there are errors, try again. ","Lesson10/10.2/10.2.1.md":"# Expert Coding using JavaScript - Lesson 10 Activity 10.2.1\n### @explicitHints true\n\n## Step 1 @unplugged\n\nIn JavaScript, **a syntax error** refers to a mistake or issue in the code that violates the language's rules and structure. JavaScript has specific syntax rules that must be followed for the code to be properly understood and executed. Therefore, if there is a syntax error, **the code will not run**. \n\n In MakeCode, when there are syntax errors, the coding editor will tell you and give you some information as to what the error is. An example of this is below.\n \n\n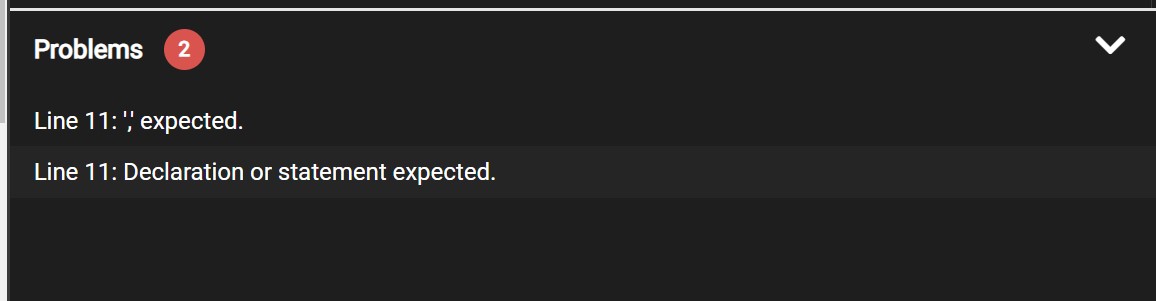\n\n## Step 2\n\nIn the code below there are 2 syntax errors. \n\nThe first one is on line 9. Find the error and fix it. \n\n```template\nplayer.onChat(\"run\", function () {\n\tfor (let index = 0; index < 5; index++) {\n\t\tagent.setAssist(PLACE_ON_MOVE, true)\n\t\tfor (let index = 0; index < 3; index++) {\n\t\t\tagent.move(FORWARD, 1)\n\t\t}\n\t\tagent.turn(LEFT_TURN)\n\t\tagent.turn(LEFT_TURN)\n\t\tagent.move(UP, 1\n\t\n})\n```\n\n#### ~ tutorialhint\n```javascript \nplayer.onChat(\"run\", function () {\n\tfor (let index = 0; index < 5; index++) {\n\t\tagent.setAssist(PLACE_ON_MOVE, true)\n\t\tfor (let index = 0; index < 3; index++) {\n\t\t\tagent.move(FORWARD, 1)\n\t\t}\n\t\tagent.turn(LEFT_TURN)\n\t\tagent.turn(LEFT_TURN)\n\t\tagent.move(UP, 1)\n\t\n})\n```\n\n## Step 3\n\nThe second error is on line 10. Fix the error. \n\n#### ~ tutorialhint\n```javascript \nplayer.onChat(\"run\", function () {\n\tfor (let index = 0; index < 5; index++) {\n\t\tagent.setAssist(PLACE_ON_MOVE, true)\n\t\tfor (let index = 0; index < 3; index++) {\n\t\t\tagent.move(FORWARD, 1)\n\t\t}\n\t\tagent.turn(LEFT_TURN)\n\t\tagent.turn(LEFT_TURN)\n\t\tagent.move(UP, 1)\n\t}\n})\n```\n\n## Step 4\n\nRun the code by following the instructions in the next step.\n\n## Step 5 @unplugged\n\nTo test your code:\nOnce you have fully read this step click the Green Ok button below to close this window to return to the tutorial to perform the below steps to test your code.\n\n1. Click on the **Green Start button** below to return to the game.\n\n \n\n\n\n2. Open the chat and type run \n3. You know your code is correct when your agent builds a 4x5 wall. \n\n\n## Step 6\n\nWhen your code works as expected move on to the next activity.\nIf there are errors, try again. ","Lesson10/10.2/10.2.2.md":"# Expert Coding using JavaScript - Lesson 10 Activity 10.2.2\n### @explicitHints true\n\n## Step 1 @unplugged\n\nA **runtime error** in JavaScript occurs when the code is syntactically correct and successfully parsed by the JavaScript engine, but an issue arises while the code is executing during runtime.\nWhen a runtime error occurs, it interrupts the normal flow of the program and can lead to unexpected behavior or crashes.\n\nHere are some examples of runtime errors. \n\n - **Reference Error**: This occurs when you try to access a variable or function that is not defined.\n - **Range Error:** This happens when a function receives an argument outside the expected range.\n - **Infinite Loop:** Creating a loop that never terminates can lead to a runtime error and potentially crash the browser or the environment where the code is running\n\n## Step 2\n\nThe code below has 1 reference error and 1 infinite loop error. Find the errors and fix the code. (For the infinite loop, change it to loop 4 times.)\n\n```template\nloops.forever(function () {\n\tmobs.spawn(CHICKEN, pos(-3, 4, 0))\n\tanimal += 1\n})\nif (animal == 4) {\n\tplayer.say(\"That's enough!\")\n}\n```\n#### ~ tutorialhint\n```javascript \nlet animal = 0\nfor (let index = 0; index < 4; index++) {\n\tmobs.spawn(CHICKEN, pos(-3, 4, 0))\n\tanimal += 1\n}\nif (animal == 4) {\n\tplayer.say(\"That's enough!\")\n}\n```\n\n## Step 3\n\nRun the code by following the instructions in the next step.\n\n## Step 4 @unplugged\n\nTo test your code:\nOnce you have fully read this step click the Green Ok button below to close this window to return to the tutorial to perform the below steps to test your code.\n\n1. Click on the **Green Start button** below to return to the game.\n\n \n\n\n\n2. You know your code is correct when you see 4 chickens spawned and your player says That's enough!\n\n\n## Step 5 @unplugged\n\nIn JavaScript, numbers have a limited range they can go up to. When you perform calculations or operations that cause a number to go beyond this maximum or minimum value, you get what's called an **overflow error.**\n\nIn Microsoft MakeCode for Minecraft, an overflow error can occur when you're working with numbers or variables that exceed the maximum or minimum values that can be represented. This can happen when dealing with various game mechanics, calculations, or interactions within the Minecraft environment.\n\nWe won't be practicing any overflow errors during this lesson. \n\n## Step 6\n\nContinue on to the next NPC. ","Lesson10/10.2/10.2.3.md":"# Expert Coding using JavaScript - Lesson 10 Activity 10.2.3\n### @explicitHints true\n\n## Step 1 @unplugged\n\nThe following are effective ways to find and correct errors: \n\n - test cases\n - hand tracing\n - visualizations\n - debuggers\n - adding extra output statement(s)\n\nLet's learn more about each of these.\n\n## Step 2 @unplugged\n\n**Test Cases:** Test cases involve creating specific situations or scenarios that your code should handle correctly. By feeding your code with various inputs and comparing the outputs to the expected results, you can quickly identify if your code is behaving as intended. Test cases help catch errors early and provide a structured way to verify your code's functionality.\n \n\n## Step 3 @unplugged\n\n**Hand Tracing:** Hand tracing involves mentally simulating the execution of your code step by step. You go through the code line by line, tracking the values of variables and the flow of control. This method helps you identify logic errors or unexpected behaviors in your code. It's like walking through the code manually to understand how it works.\n \n\n## Step 4 @unplugged\n\n**Visualizations:** Visualizations can be helpful for understanding complex algorithms or data structures. Diagrams, flowcharts, or even drawing out the relationships between components can make it easier to spot errors in your logic. Visualizations provide a higher-level view of your code's structure and can reveal patterns that might not be apparent in the code alone.\n\n## Step 5 @unplugged\n\n**Debuggers:** Debuggers are tools built into integrated development environments (IDEs) that allow you to pause your code's execution at specific points and inspect the values of variables. You can set breakpoints, step through your code line by line, and observe the state of your program at each step. Debuggers are powerful tools for pinpointing errors and understanding the behavior of your code during runtime.\n\n## Step 6 @unplugged\n\n**Adding Extra Output Statements:** Adding extra output statements involves inserting console log statements in your code to print out the values of variables or specific messages at certain points. This can help you track the flow of your code and understand what's happening at different stages of execution. By observing the output in the console, you can identify where things might be going wrong.\n\n## Step 7 @unplugged\n\nUsing a combination of these methods can greatly enhance your ability to find and fix errors in your code. Remember that debugging is a skill that improves with practice. Every programmer encounters errors, and learning how to effectively troubleshoot and debug will make you a more proficient coder.\n\n","Lesson10/10.2/10.2.4.md":"# Expert Coding using JavaScript - Lesson 10 Activity 10.2.4\n### @explicitHints true\n\n## Step 1\n\nPractice using your debugging techniques by debugging the code below. The code should build the walls of a 6x6 house that is 3 blocks high. \n\nThere are 5 errors. If you need help, click next to go to the next step. \n\n```template\nplayer.onChat(\"build\", function () {\n\tfor (let x = 1; x < 5; x++ {\n\t\tagent.move(UP, 1)\n\t\tfor (let y = 0; y < 6; y++) {\n\t\t\tfor (let z = 0; z < 7; z++) {\n\t\t\t\tagent.move(FORWARD, 1)\n\t\t\t\tagent.place(DOWN)\n\t\t\t\n\t\t\tagent.turn(LEFT_TURN)\n\t\t}\n\t}\n})\n\n```\n\n## Step 2\n\n3 of the errors are logic errors. \nThese 3 errors are on line 2, 4, and 5. \n\n#### ~ tutorialhint\n```javascript \nplayer.onChat(\"build\", function () {\n\tfor (let x = 1; x < 4; x++ {\n\t\tagent.move(UP, 1)\n\t\tfor (let y = 0; y < 4; y++) {\n\t\t\tfor (let z = 0; z < 5; z++) {\n\t\t\t\tagent.move(FORWARD, 1)\n\t\t\t\tagent.place(DOWN)\n\t\t\t\n\t\t\tagent.turn(LEFT_TURN)\n\t\t}\n\t}\n})\n```\n\n## Step 3\n\nThe other 2 errors are on lines 2 and 10 and are syntax errors. \n\n\n#### ~ tutorialhint\n```javascript \nplayer.onChat(\"build\", function () {\n\tfor (let x = 1; x < 4; x++) {\n\t\tagent.move(UP, 1)\n\t\tfor (let y = 0; y < 4; y++) {\n\t\t\tfor (let z = 0; z < 5; z++) {\n\t\t\t\tagent.move(FORWARD, 1)\n\t\t\t\tagent.place(DOWN)\n\t\t\t}\n\t\t\tagent.turn(LEFT_TURN)\n\t\t}\n\t}\n})\n```\n\n## Step 4\n\nRun the code by following the instructions in the next step.\n\n## Step 5 @unplugged\n\nTo test your code:\nOnce you have fully read this step click the Green Ok button below to close this window to return to the tutorial to perform the below steps to test your code.\n\n1. Click on the **Green Start button** below to return to the game.\n\n \n\n\n\n2. Open the chat and type build\n3. You know your code is correct when your agent builds a 3x6x6 building. \n\n\n## Step 6\n\nWhen your code works as expected move on to the assessment.\nIf there are errors, try again. ","Lesson11/11.1/11.01.md":"# Expert Coding using JavaScript - Lesson 10 Activity 11.01\n### @explicitHints true\n\n## Step 1 @unplugged\n\n**Program outputs are any data sent from a program to a device.** \nWhen a program processes data or performs tasks, it generates results or outcomes. These results, often referred to as \"outputs,\" are the data that the program sends to a device for users to perceive. Just as you might receive a printed document from a printer or see an image on a screen, these are examples of program outputs.\n\n## Step 2 @unplugged\n\n**Program output can come in a variety of forms, such as tactile, audio, visual, or text.**\nProgram outputs can take different forms to cater to various human senses and interactions.\n\n For instance,\n\n - **Tactile outputs** involve physical sensations, like a controller\n vibrating in a video game. \n \n - **Audio outputs** involve sounds, such as the music playing from your speakers. \n - **Visual outputs** are images, graphics, videos, or anything you see on a screen. \n - **Textual outputs** involve written or displayed information, like the words on a webpage or in a document.\n\n## Step 3 @unplugged\n\n**Program output is usually based on a program’s input or prior state (e.g., internal values).** When you provide specific data or instructions as input to a program, it processes that input to produce a corresponding output.\nAdditionally, a program's output can depend on its internal state, which includes variables, calculations, and decisions made during its execution. For example, a game's output might change based on the player's score or progress, reflecting the program's prior state.\n\n## Step 4 @unplugged\n\nGo to the next NPC to start your programming practice. ","Lesson11/11.1/11.1.md":"","Lesson12/12.1/12.1.md":"# Expert Coding using JavaScript - Lesson 10 Activity 12.1\n### @explicitHints true\n\n## Step 1 @unplugged\n\nYou are going to use a development process for your program. \nA development process can be ordered and intentional, or exploratory in nature.\nThese approaches reflect how a project is planned, executed, and progressed.\n\n**Ordered and intentional** development processes involve a structured and planned process. The development team follows a predefined set of steps, tasks, and milestones.\n\n**Exploratory development** processes are more flexible and adaptive. The team starts with a general direction or concept but allows for experimentation, creativity, and adaptation as the project progresses.\n\nThe choice between an ordered and intentional approach or an exploratory approach should be made based on factors such as project complexity, available resources, timeline constraints, and the level of uncertainty involved.\n\n## Step 2 @unplugged\nA development process can be iterative or incremental. \n\nA development process that is iterative **requires refinement and revision based on feedback, testing, or reflection throughout the process.** This may require revisiting earlier phases of the process.\n\nA development process that is incremental is one that **breaks the problem into smaller pieces and makes sure each piece works before adding it to the whole**.\n\nAs you have seen, there are multiple development processes. However, the following phases are commonly used when developing a program: \n\n - investigating and reflecting\n - designing\n - prototyping\n - testing\n\nLet's go through each of these steps individually. \n\n\n## Step 3 @unplugged\n\n**Investigating and Reflecting**\n\nThe investigating and reflecting step involves researching and gathering information to understand the problem or opportunity that the development process aims to address. \nIt's important to identify the requirements, constraints, and goals of the project.\n **Program requirements** describe how a program functions and may include a description of user interactions that a program must provide. \nInvestigation in a development process is also useful for understanding and identifying the **program constraints**, as well as the concerns and interests of the people who will use the program.\n\nSome ways investigation can be performed are as follows: \n\n - collecting data through surveys \n - user testing\n - interviews\n - direct observations\n\nThis phase helps in setting the foundation for the rest of the development process.\n\n## Step 4 @unplugged\n\n**Design Phase**\n\nIn a development process, the design phase **outlines how to accomplish a given program specification.** A program’s specification defines the requirements for the program.\n\nThe design phase of a program may include: \n\n - brainstorming\n - planning and storyboarding\n - organizing the program into modules and functional components\n - creation of diagrams that represent the layouts of the user interface\n - development of a testing strategy for the program\n\n## Step 5 @unplugged\n\n**Prototyping**\nPrototyping is a step that involves **creating a simplified, functional version of the product or solution.** This version, known as a prototype, allows stakeholders to see and interact with a tangible representation of the design. Prototypes can take various forms, from paper sketches to interactive digital models. The purpose of prototyping is to validate design decisions, test user interactions, and identify potential issues early in the development process. Feedback gathered from testing the prototype helps in refining the design before proceeding further.\n\n\n## Step 6 @unplugged\n\n**Testing**\nIn the development process, **testing uses defined inputs to ensure that an algorithm or program is producing the expected outcomes.** Programmers use the results from testing to revise their algorithms or programs.\nDefined inputs used to test a program should demonstrate the different expected outcomes that are at or just beyond the extremes. Program requirements are needed to identify appropriate defined inputs for testing.\n\nTherefore, testing should include a wide range of inputs, with a specific focus on inputs that challenge the program's boundaries. This helps identify and address potential issues, ensuring the program's robustness and reliability in real-world use.\n\n## Step 7 @unplugged\n\nNow that you understand more about the development process, go to the next NPC to begin working through the development process for your own program. ","Lesson12/12.1/12.1.1.md":"# Expert Coding using JavaScript - Lesson 10 Activity 12.1.1\n### @explicitHints true\n\n## Step 1 @unplugged\n\nYou are going to develop a program starting with the **Investigating and Reflecting Phase.** During this time you need to think about the requirements, constraints, and goals of the program. \n\nUse the link below to download the worksheet for this phase of the process. Once you fill it out, upload it to the portal and move on to the next NPC for the next stage. \n","Lesson12/12.1/12.1.2.md":"# Expert Coding using JavaScript - Lesson 10 Activity 12.1.2\n### @explicitHints true\n\n## Step 1 @unplugged\n\nThe next phase is the **Design phase**. During this phase you will do the following. \n - brainstorm\n - plan and storyboard\n - organize the program into modules and functional components\n - create diagrams that represent the layouts of the user interface\n - development of a testing strategy for the program\n - \nUse the link below to download the worksheet for this phase of the process. Once you fill it out, upload it to the portal and move on to the next NPC for the next stage. ","Lesson12/12.1/12.1.3.md":"# Expert Coding using JavaScript - Lesson 10 Activity 12.1.3\n### @explicitHints true\n\n## Step 1 @unplugged\n\nNow you will do the **prototype phase**. Prototypes can take various forms, from paper sketches to interactive digital models. You will use the worksheet to draw out a sketch of your program. \n\nUse the link below to download the worksheet for this phase of the process. Once you fill it out, upload it to the portal and move on to the next NPC for the next stage. ","Lesson12/12.1/12.1.4.md":"# Expert Coding using JavaScript - Lesson 10 Activity 12.1.4\n### @explicitHints true\n\n## Step 1 @unplugged\n\nThe last stage is **testing**. This stage is typically done AFTER the product is built so you will do this piece in the next lesson. \nHowever, it is a good idea to show your prototype to some of your classmates and get their feedback on what you have designed BEFORE you begin building the product. Use the provided worksheet to get this feedback from your classmates. \nOnce complete, upload it to the portal and move on to the next NPC for the next stage. ","Lesson3/3.1/3.1.1.md":"# Expert Coding using JavaScript - Lesson 3 Activity 3.1.1\n### @explicitHints true\n\n## Step 1\n\nLet's continuing practicing with if statements but this time, let's work with our agent. \nWe can use our agent to detect what type of block is below is feet. If the block is grass, we can have him place a cornflower. \n\nFirst, let's give our agent the inventory he needs for this to work. Below is the code to give your agent inventory. \n\n agent.setItem(ITEM, Amount, Slot)\n\nWe always want to give the agent the inventory in Slot 1 as that is the default slot it pulls items from. \n\nWrite the code below to give the Agent 64 Cornflowers in Slot 1. \n\n#### ~ tutorialhint\n\n```javascript\nagent.setItem(CORNFLOWER, 64, 1)\n\n```\n\n## Step 2\n\nNext, code the agent to move forward by 1. \n\n#### ~ tutorialhint\n\n```javascript\nagent.setItem(CORNFLOWER, 64, 1)\nagent.move(FORWARD, 1)\n```\n\n## Step 3\n\nNow we want to add an if statement that says if the agent inspects down and the block under him is grass, he will place down. \nIn order to do this, you will need to use the logic condition of equals (==). \n\nThe code for the agent to inspect is below. \nagent.inspect(AgentInspection.Block, DIRECTION)\n\n#### ~ tutorialhint\n\n```javascript\nagent.setItem(CORNFLOWER, 64, 1)\nagent.move(FORWARD, 1)\nIf (agent.inspect(AgentInspection.Block, DOWN) == GRASS) {\n\t agent.place(DOWN)\n\n}\n```\n\n## Step 4\n\nRun the code by following the instructions in the next step.\n\n## Step 5 @unplugged\n\nTo test your code:\nOnce you have fully read this step click the Green Ok button below to close this window to return to the tutorial to perform the below steps to test your code.\n\n1. Click on the **Green Start button** below to return to the game.\n\n \n\n\n\n2. You will know your code is correct when the agent moves forward by 1 and places a cornflower on the grass block. \n\n## Step 6\n\nWhen your code works as expected move on to the next activity.\nIf it does not work as expected, try to fix and test again.","pxt.json":"{\n \"name\": \"coding-in-minecraft-expert-javascript\",\n \"version\": \"0.0.15\",\n \"description\": \"\",\n \"dependencies\": {\n \"core\": \"*\",\n \"builder\": \"*\"\n },\n \"files\": [\n \"Lesson1/1.1/1.1.9.md\",\n \"Lesson1/1.2/1.2.2.md\",\n \"Lesson1/1.1/1.1.8.md\",\n \"Lesson1/1.1/1.1.7.md\",\n \"Lesson1/1.1/1.1.6.md\",\n \"Lesson1/1.1/1.1.5.md\",\n \"Lesson1/1.1/1.1.4.md\",\n \"Lesson1/1.1/1.1.md\",\n \"Lesson1/1.1/1.1.2.md\",\n \"Lesson1/1.1/1.1.3.md\",\n \"Lesson1/1.2/1.2.md\",\n \"README.md\",\n \"main.blocks\",\n \"main.ts\",\n \"Lesson2/2.1/2.1.md\",\n \"Lesson2/2.1/2.01.md\",\n \"Lesson2/2.1/2.2.md\",\n \"Lesson2/2.1/2.3.md\",\n \"Lesson2/2.1/2.4.md\",\n \"Lesson2/2.1/2.5.md\",\n \"Lesson3/3.1/3.1.md\",\n \"Lesson3/3.1/3.01.md\",\n \"Lesson3/3.2/3.2.md\",\n \"Lesson3/3.2/3.2.1.md\",\n \"Lesson3/3.1/3.1.2.md\",\n \"Lesson3/3.3/3.3.md\",\n \"Lesson3/3.3/3.3.1.md\",\n \"Lesson3/3.3/3.3.2.md\",\n \"Lesson4/4.1/4.1.md\",\n \"Lesson4/4.1/4.01.md\",\n \"Lesson4/4.1/4.1.1.md\",\n \"Lesson4/4.2/4.2.md\",\n \"Lesson4/4.2/4.2.1.md\",\n \"Lesson4/4.2/4.2.2.md\",\n \"Lesson4/4.3/4.3.1.md\",\n \"Lesson4/4.3/4.3.md\",\n \"Lesson5/5.1/5.1.md\",\n \"Lesson5/5.1/5.01.md\",\n \"Lesson6/6.1/6.1.md\",\n \"Lesson6/6.1/6.01.md\",\n \"Lesson7/7.1/7.01.md\",\n \"Lesson7/7.1/7.1.md\",\n \"Lesson7/7.1/7.1.1.md\",\n \"Lesson7/7.1/7.1.2.md\",\n \"Lesson7/7.2/7.2.md\",\n \"Lesson7/7.2/7.2.1.md\",\n \"Lesson7/7.3/7.3.md\",\n \"Lesson7/7.3/7.3.1.md\",\n \"Lesson7/7.3/7.3.2.md\",\n \"Lesson7/7.3/7.3.3.md\",\n \"Lesson8/8.1/8.01.md\",\n \"Lesson8/8.1/8.1.md\",\n \"Lesson9/9.1/9.01.md\",\n \"Lesson9/9.1/9.1.md\",\n \"Lesson9/9.1/9.1.1.md\",\n \"Lesson9/9.1/9.1.2.md\",\n \"Lesson9/9.2/9.2.md\",\n \"Lesson9/9.3/9.3.md\",\n \"Lesson9/9.3/9.3.1.md\",\n \"Lesson9/9.3/9.3.2.md\",\n \"Lesson9/9.2/9.2.1.md\",\n \"Lesson9/9.2/9.2.2.md\",\n \"Lesson10/10.1/10.1.md\",\n \"Lesson10/10.1/10.01.md\",\n \"Lesson10/10.1/10.1.2.md\",\n \"Lesson10/10.1/10.1.1.md\",\n \"Lesson10/10.2/10.2.md\",\n \"Lesson10/10.2/10.2.1.md\",\n \"Lesson10/10.2/10.2.2.md\",\n \"Lesson10/10.2/10.2.3.md\",\n \"Lesson10/10.2/10.2.4.md\",\n \"Lesson11/11.1/11.01.md\",\n \"Lesson11/11.1/11.1.md\",\n \"Lesson12/12.1/12.1.md\",\n \"Lesson12/12.1/12.1.1.md\",\n \"Lesson12/12.1/12.1.2.md\",\n \"Lesson12/12.1/12.1.3.md\",\n \"Lesson12/12.1/12.1.4.md\",\n \"Lesson3/3.1/3.1.1.md\"\n ],\n \"testFiles\": [\n \"test.ts\"\n ],\n \"public\": true,\n \"targetVersions\": {\n \"target\": \"1.7.13\",\n \"targetId\": \"minecraft\"\n },\n \"supportedTargets\": [\n \"minecraft\"\n ],\n \"preferredEditor\": \"tsprj\"\n}\n","test.ts":"// tests go here; this will not be compiled when this package is used as an extension.\n"}}],"shares":[]}