Name: Huy Dat NGUYEN
Email: huy-dat.nguyen@etu.univ-grenoble-alpes.fr
Github ID: Huydatnguyen
Master 2 MOSIG
Lab on Microservices – Pratices with Jhipster
I. Introduction
The objective of the practical session is to be more familiar and get acquainted with the way to construct a microservice application with Jhipster tool and the way to deploy the application on some cloud platform such as Google Cloud Platform (GCP). This lab is also an oppoturnity to recall, pratice and learn more about the concept of Kuberneters, Docker, which was introduced in the previous lab.
The first stage is to generate and deploy locally a microservice application with Jhipster. The architecture is composed of:
- The Jhipster Sercive Registry (Service discovery uses Haezlcast).
- The Jhipster API Gateway.
- One microsevice productorder (using a mysql database).
- One microsevice invoice (using a postgresql database).
- One microsevice notification (using a mongodb database).
After generating and browsering microservices, we need to build Docker images corresponding with each service and generate a Docker-compose file for configuring the running of all microservices at one time.
The next stage is to deploy the application on Google Kubernetes Engine (an open-source container orchestration system for automating software deployment, scaling and mangement , a part of GCP) using Docker images generated from previous stage and perform a scalability for one microservice and monitor dashboard through Promethous/Grafana or GCP dashboard.
The result is to provide some screenshots illustrating the deployment of the microservice application on GKE and the way to enable scalability on GKE and the way to monitor the dashboard.
II. Result
- Deployment of Microservices with JHipster on GCP
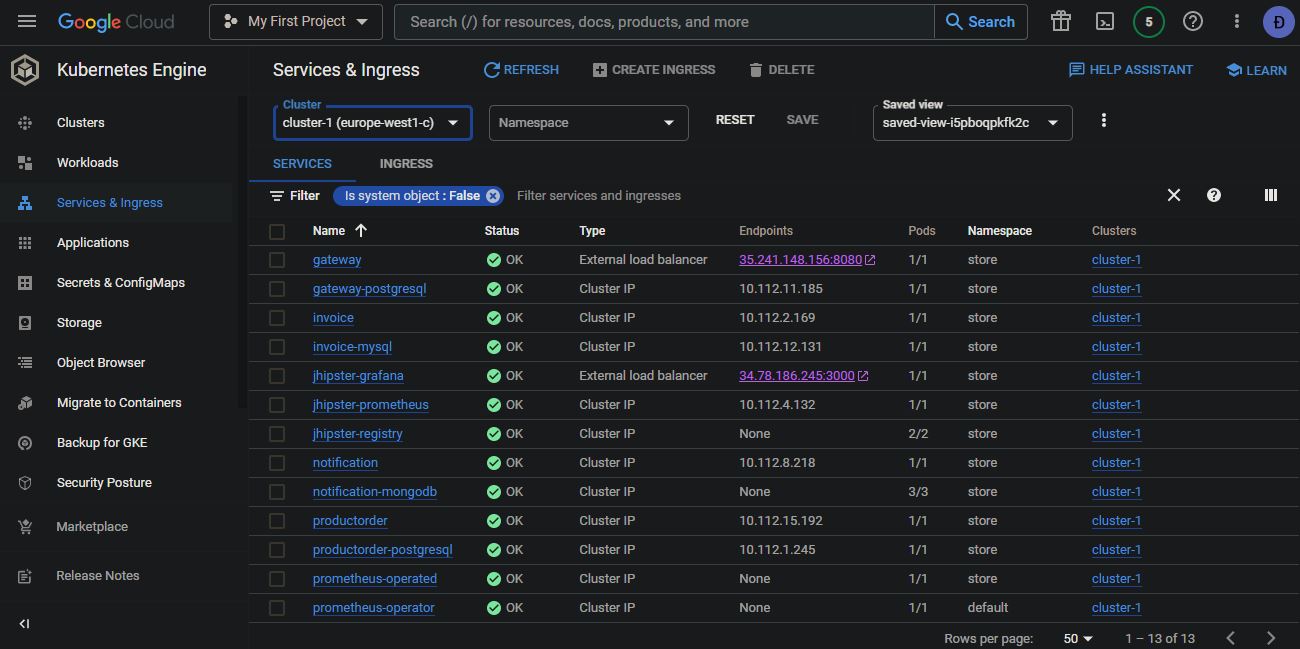
Picture 1: List of services
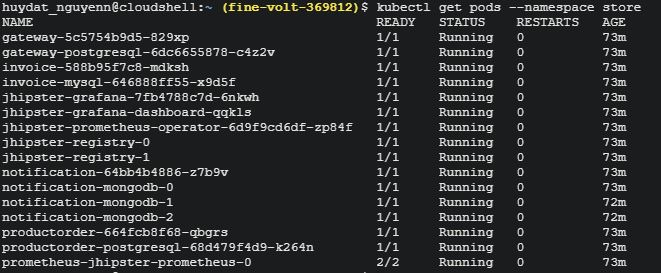
Picture 2: List of pods
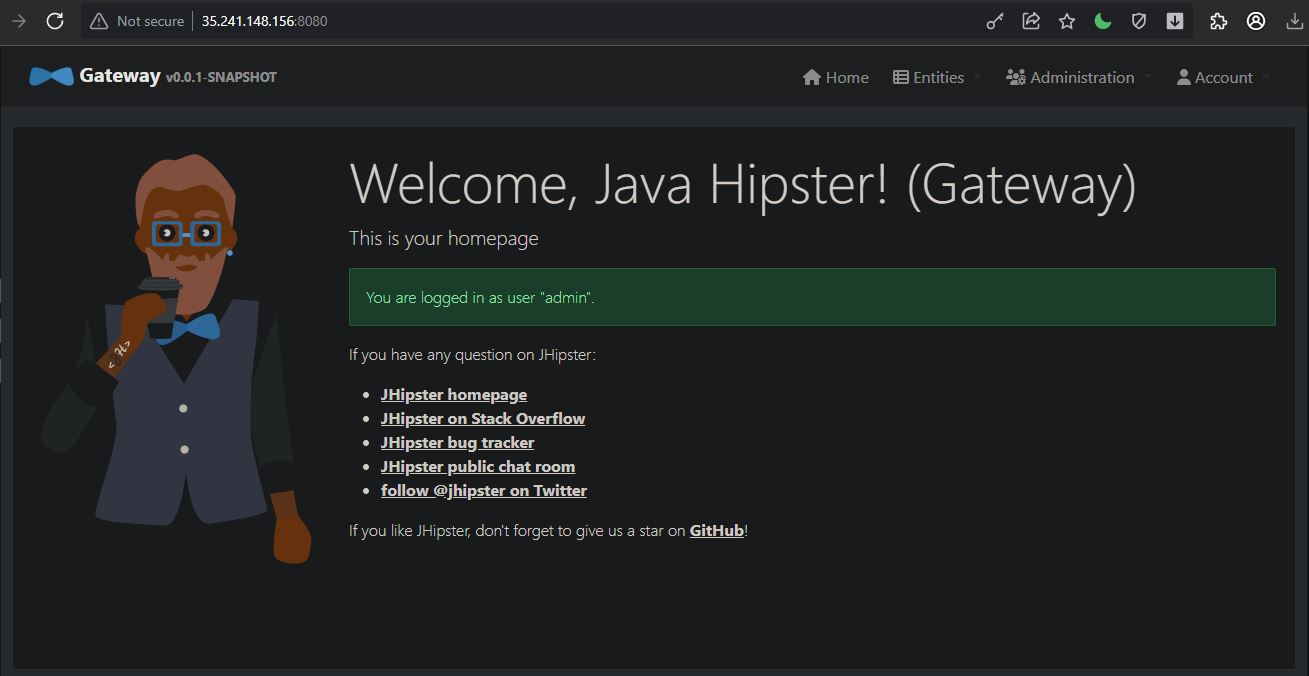
Picture 3: Application interface deployed with assigned IP from GCP
- Enabling scalability on GCP for one microservice

Picture 4: Enabling the scalability
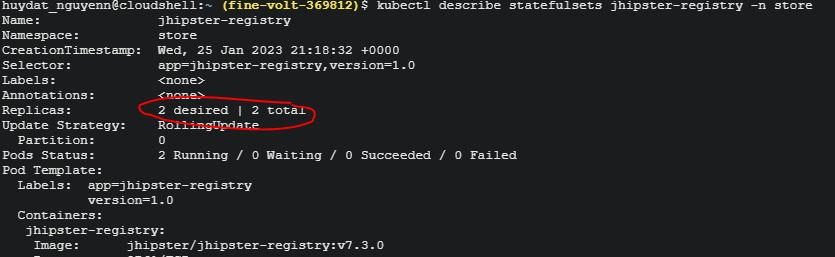
Picture 5: Enabling the scalability
-
Monitoring dashboard
3.1. Dashboard metrics scraper
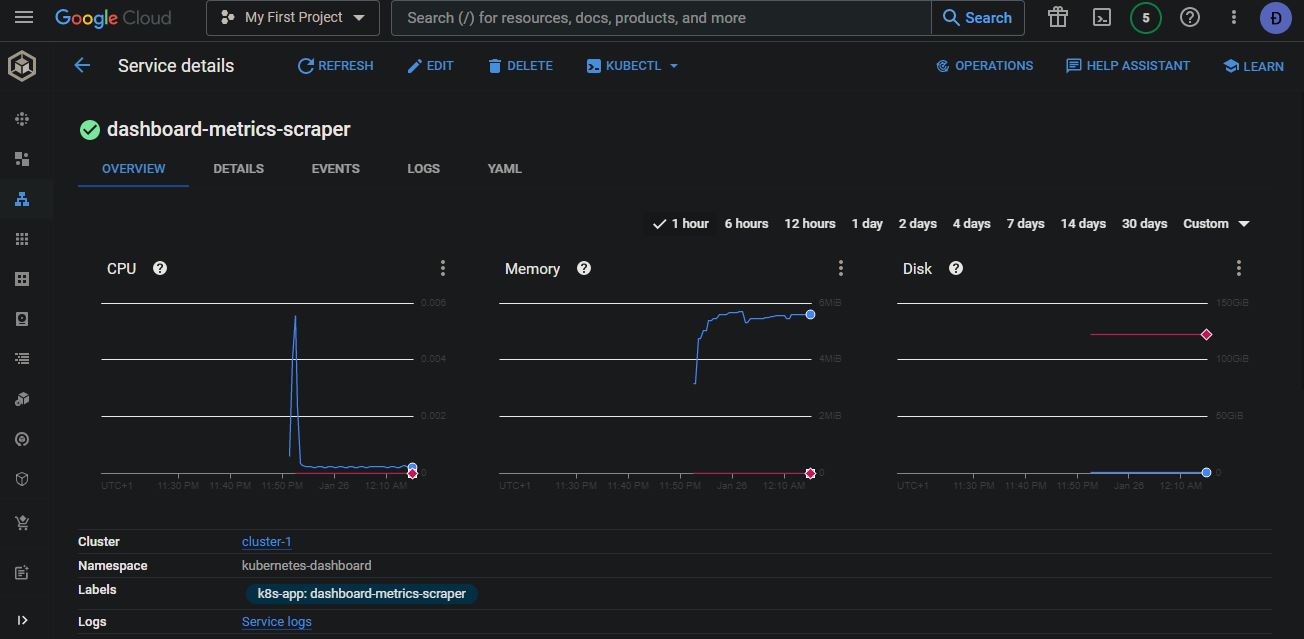
Picture 6: Monitoring the dashboard with the Dashboard metrics scraper
3.2. Kubernetes dashboard
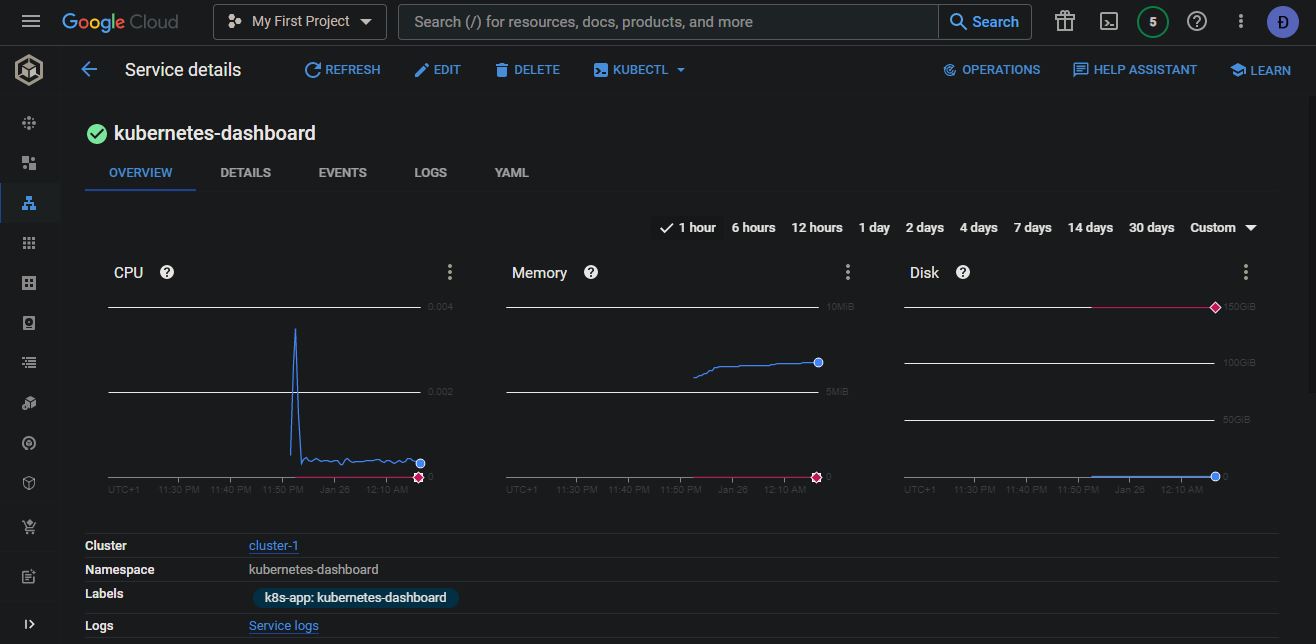
Picture 7: Monitoring the dashboard with the Kubernetes Dashboard