Tab layout
✨ Branch: tab-layout
Introduction
Tab Layout is layout structuring paradigm created in Store Framework to allow the creation of layouts with tabs.
We have the following two containers in this paradigm: tab-list and tab-content. Each of these containers contains the items that it's comprised of. In tab-list, we have tab-list.item, whereas in tab-content, we have tab-content.item, respectively.
We'll look at a tab layout implementation example below.
First, you need to declare the tab-layout block in the desired template:
{
  "store.custom#about-us": {
    "blocks": [
      ...
      "tab-layout"
    ]
  }
}
Then, you need to declare a tab-list and a tab-content as tab-layout's children:
...
"tab-layout": {
  "children": [
    "tab-list",
    "tab-content"
  ]
}
Having done this, these two containers are components of our tab-layout. The next step is to declare tab-list.item and tab-content.item as tab-list's and tab-content's children:
...
"tab-list": {
  "children": [
    "tab-list.item#1",
    "tab-list.item#2"
    ]
}
...
"tab-content": {
"children": [
"tab-content.item#1",
"tab-content.item#2"
]
}In the next step, we'll declare the tab-list.item properties. The code below creates a tab interface similar to the image below:
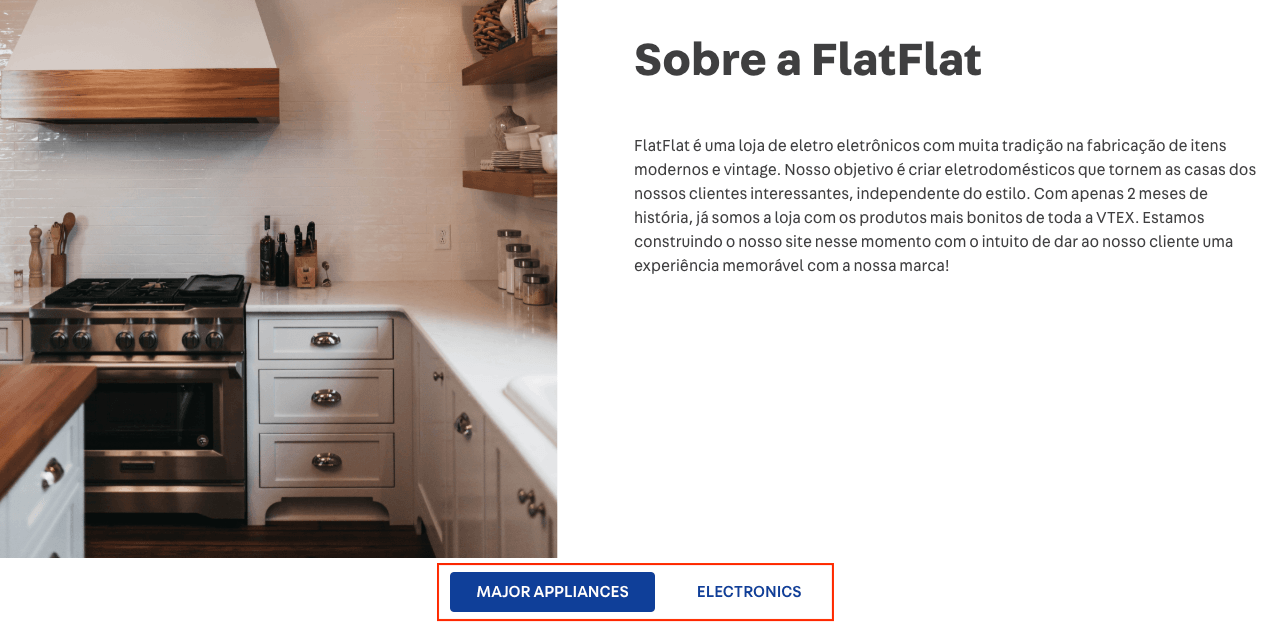
The tabId property is very important as it's the key that connect a tab-list.item button with a tab-content.item.
...
"tab-list.item#1": {
  "props": {
    "tabId": "majorAppliances",
    "label": "Major Appliances",
    "defaultActiveTab": true
  }
},
"tab-list.item#2": {
  "props": {
    "tabId": "electronics",
    "label": "Electronics"
  }
}
Now, let's declare the children and props pertaining to tab-content.item.
In the child array, you can include several blocks such as rich-text, info-card, image, flex-layout and etc.
In the tabId prop, you need to include the same ids that were declared in tab-list.item for the link between the tab and content to function properly.
...
"tab-content.item#1": {
  "children": [
    "rich-text#1"
  ],
  "props": {
    "tabId": "majorAppliances"
  }
},
"tab-content.item#2": {
  "children": [
    "rich-text#2"
  ],
  "props": {
    "tabId": "electronics"
  }
}
Lastly, you must declare your content's proprieties. In our example, we just placed a rich-text in each tab-content.item:
"rich-text#1": {
  "props": {
    "text": "Texto para Major Appliances",
    "textPosition": "CENTER",
    "font": "t-heading-3"
  }
},
"rich-text#2": {
  "props": {
    "text": "Texto para Electronics",
    "textPosition": "CENTER",
    "font": "t-heading-3"
  }
}
Activity
In this activity, we will create the simple structure of a tab layout, as shown below. Thereafter, we will add some content to give our page a custom style.

-
In the previously created about-us.jsonc, add a tab-layout#home to the store.custom#about-us template;
-
Declare the tab-layout#home block and add tab-list#home and tab-content#home as its children;
-
Declare tab-list#home and add tab-list.item#home1 and tab-list.item#home2 as its children;
-
Declare the props pertaining to tab-list.item#home1 so that the interface displays "Major Appliances". (Tip: Do not forget to include tabId = "majorAppliances" as well as the property defaultActiveTab = true to the props);
-
Declare tab-list.item#home2's props so that the interface displays "Electronics". (Tip: Don't forget to include tabId = "electronics" to the props);
-
Now, let's move on to the content. Declare tab-content#home in your theme and add tab-content.item#home1 and tab-content.item#home2 as children;
-
For each tab-content.item, declare just one rich-text as child (for example, rich-text#home1 and rich-text#home2);
-
Thereafter, include a tabId prop for each tab-content.item to create a link between the previously created tab-list and tab-content;
-
Lastly, add the rich-text and declare its props according to the code below:
"rich-text#home1": {
  "props": {
    "text": "Área do conteúdo da tab-list.item com  tabId = majorAppliances",
    "textPosition": "CENTER",
    "font": "t-heading-3"
  }
},
"rich-text#home2": {
  "props": {
    "text": "Área do conteúdo da tab-list.item com  tabId = electronics",
    "textPosition": "CENTER",
    "font": "t-heading-3"
  }
}
ℹ️ Remember to access the Tab Layout and Rich Text documentation for any questions during the activity.
🚫 Are you lost?
Is there any problem with this step? What about sending us a feedback? 🙏
Submit feedback
If you're still unsure as to how to send your answers, click here.
Tab layout
✨ Branch: tab-layout
Introduction
Tab Layout is layout structuring paradigm created in Store Framework to allow the creation of layouts with tabs.
We have the following two containers in this paradigm:
tab-listandtab-content. Each of these containers contains the items that it's comprised of. Intab-list, we havetab-list.item, whereas intab-content, we havetab-content.item, respectively.We'll look at a tab layout implementation example below.
First, you need to declare the
tab-layoutblock in the desired template:{ "store.custom#about-us": { "blocks": [ ... "tab-layout" ] } }Then, you need to declare a
tab-listand atab-contentastab-layout's children:Having done this, these two containers are components of our
tab-layout. The next step is to declaretab-list.itemandtab-content.itemastab-list's andtab-content's children:In the next step, we'll declare the
tab-list.itemproperties. The code below creates a tab interface similar to the image below:The
tabIdproperty is very important as it's the key that connect atab-list.itembutton with atab-content.item.Now, let's declare the children and props pertaining to
tab-content.item.In the child array, you can include several blocks such as
rich-text,info-card,image,flex-layoutand etc.In the
tabIdprop, you need to include the same ids that were declared intab-list.itemfor the link between the tab and content to function properly.Lastly, you must declare your content's proprieties. In our example, we just placed a
rich-textin eachtab-content.item:Activity
In this activity, we will create the simple structure of a tab layout, as shown below. Thereafter, we will add some content to give our page a custom style.
In the previously created
about-us.jsonc, add atab-layout#hometo thestore.custom#about-ustemplate;Declare the
tab-layout#homeblock and addtab-list#homeandtab-content#homeas its children;Declare
tab-list#homeand addtab-list.item#home1andtab-list.item#home2as its children;Declare the props pertaining to
tab-list.item#home1so that the interface displays "Major Appliances". (Tip: Do not forget to includetabId="majorAppliances"as well as the propertydefaultActiveTab=trueto the props);Declare
tab-list.item#home2's props so that the interface displays "Electronics". (Tip: Don't forget to includetabId="electronics"to the props);Now, let's move on to the content. Declare
tab-content#homein your theme and addtab-content.item#home1andtab-content.item#home2as children;For each
tab-content.item, declare just onerich-textas child (for example,rich-text#home1andrich-text#home2);Thereafter, include a
tabIdprop for eachtab-content.itemto create a link between the previously createdtab-listandtab-content;Lastly, add the
rich-textand declare its props according to the code below:ℹ️ Remember to access the Tab Layout and Rich Text documentation for any questions during the activity.
🚫 Are you lost?
Is there any problem with this step? What about sending us a feedback? 🙏
Submit feedback
If you're still unsure as to how to send your answers, click here.