Client-server architecture is an architecture of a computer network in which many clients (remote processors) request and receive service from a centralized server (host computer). Client computers provide an interface to allow a computer user to request services of the server and to display the results the server returns. Servers wait for requests to arrive from clients and then respond to them. Ideally, a server provides a standardized transparent interface to clients so that clients need not be aware of the specifics of the system (i.e., the hardware and software) that is providing the service. Clients are often situated at workstations or on personal computers, while servers are located elsewhere on the network, usually on more powerful machines. This computing model is especially effective when clients and the server each have distinct tasks that they routinely perform. In hospital data processing, for example, a client computer can be running an application program for entering patient information while the server computer is running another program that manages the database in which the information is permanently stored.
Client Server Architecture
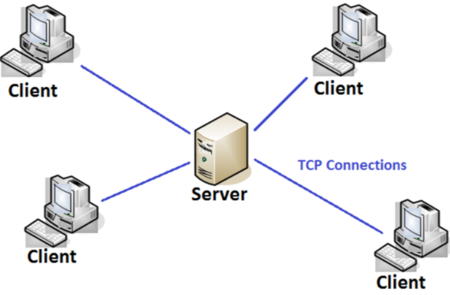
At its simplest, the client/server architecture is about dividing up application processing into two or more logically distinct pieces. The database makes up half of the client/server architecture. The database is the “server”; any application that uses that data is a “client.” In many cases, the client and server reside on separate machines; in most cases, the client application is some sort of user-friendly interface to the database.

A graphical representation of a simple client/server system.
- We open up out terminal and install curl if it doesnt exist.
$ sudo apt -y install curl
In this example, the linux terminal will be the client, while www.propitixhomes.com will be the server
- Send a request from client (Linux Terminal) with the curl command below
$ curl -Iv www.propitixhomes.com

In this project we will be Implementing a Client Server Architecture using a Database Management System (MySQL).
The instructions below will be followed to complete the project.
- We are going to configure 2 new Linux servers in our Virtualbox
Server A - mysql server
Server B - mysql client
- On mysql server Linux Server, we will install the MySQL software.
$ sudo apt install mysql-server -y
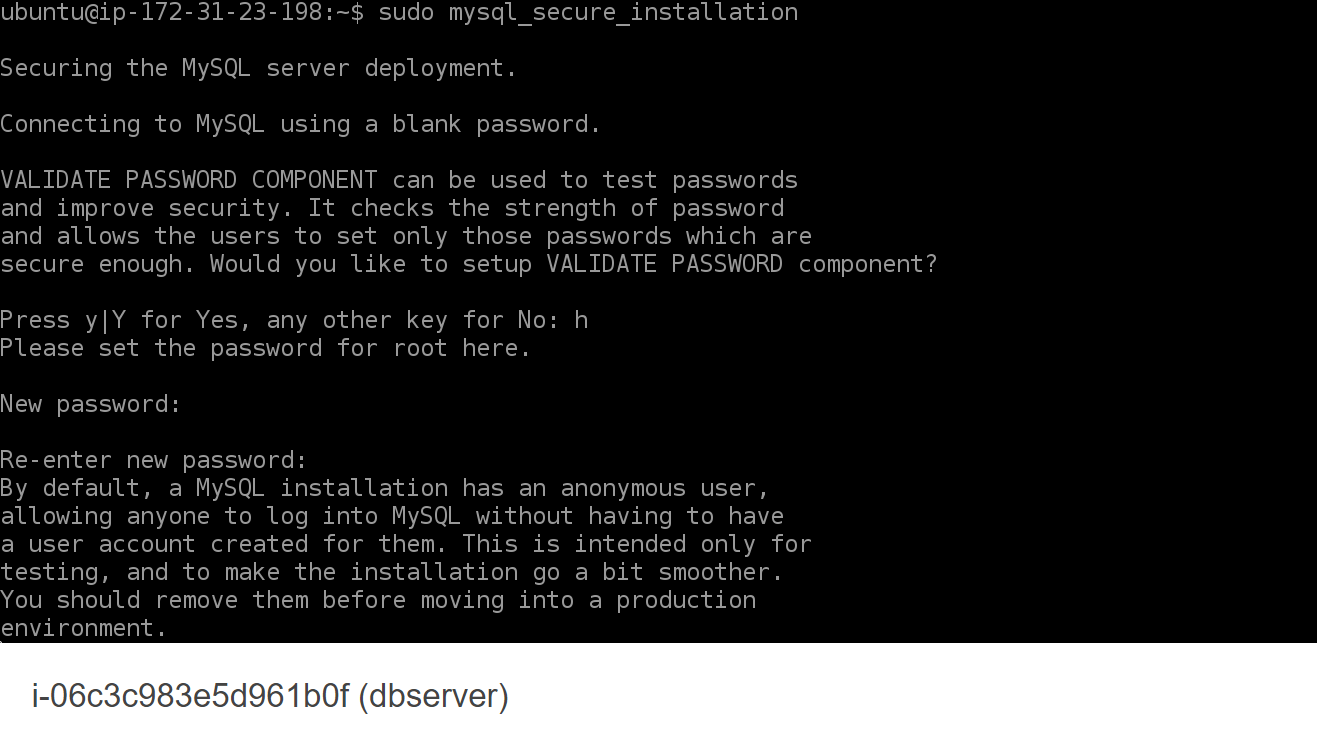
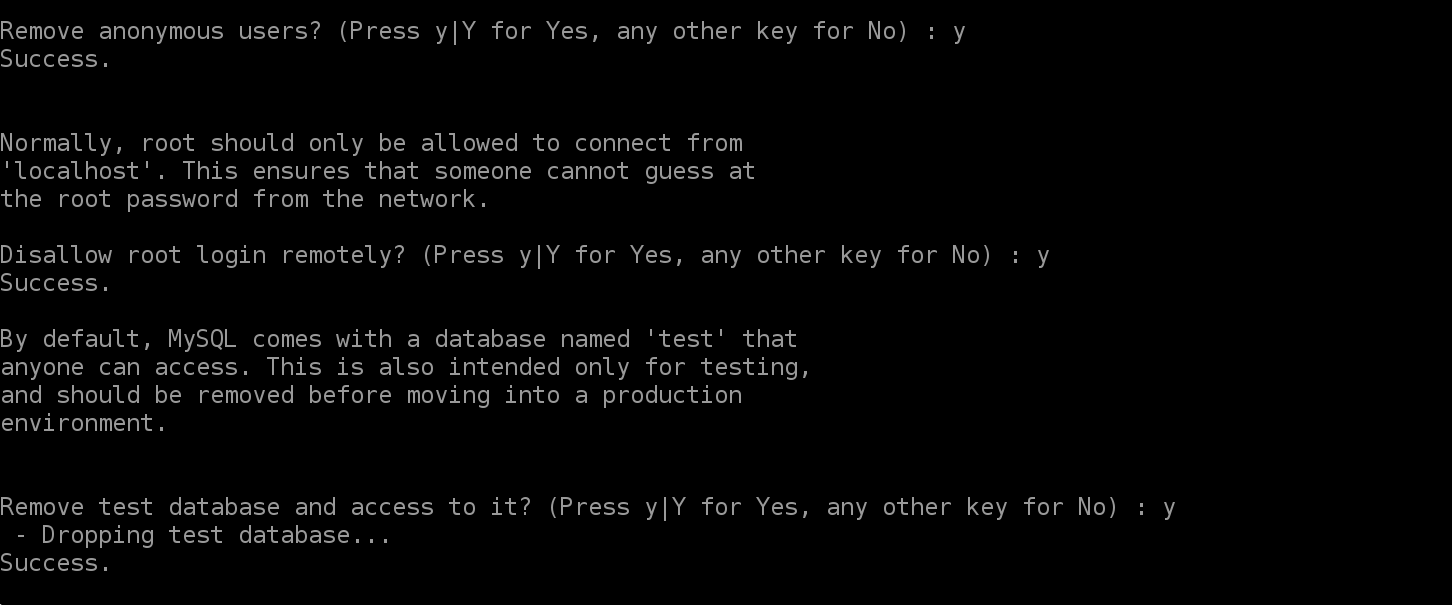
- We need to configure our mysql server installation using this command
$ sudo mysql_secure_installation
- To test that our mysql server installation is successful we use this command
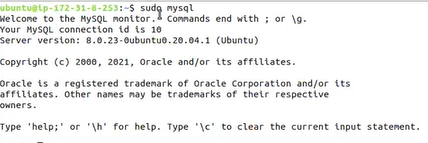
- Created a user on the mysql server with the following command
mysql> CREATE USER ann@'%' IDENTIFIED BY 'your_password';
mysql> GRANT ALL ON *.* TO ann@'%'; FLUSH PRIVILEGES;

- On mysql client Linux Server, we will install the MySQL client software.
$ sudo apt install mysql-client -y
- Using the ip addr or ifconfig command, We will figure out the IP address of the mysql server Linux Server.
ifconfig
or
ipaddr
By default, both of your Ec2 virual serves are located in the same local virtual network, so they can communicate to eachother using the local ip addresses. use mysql server's local ip address to connect from mysql client . MySQL Server uses TCP port 3306 by default, so you have to open it by creating a new entry in 'inbound rules' in 'MySQL server' security groups.
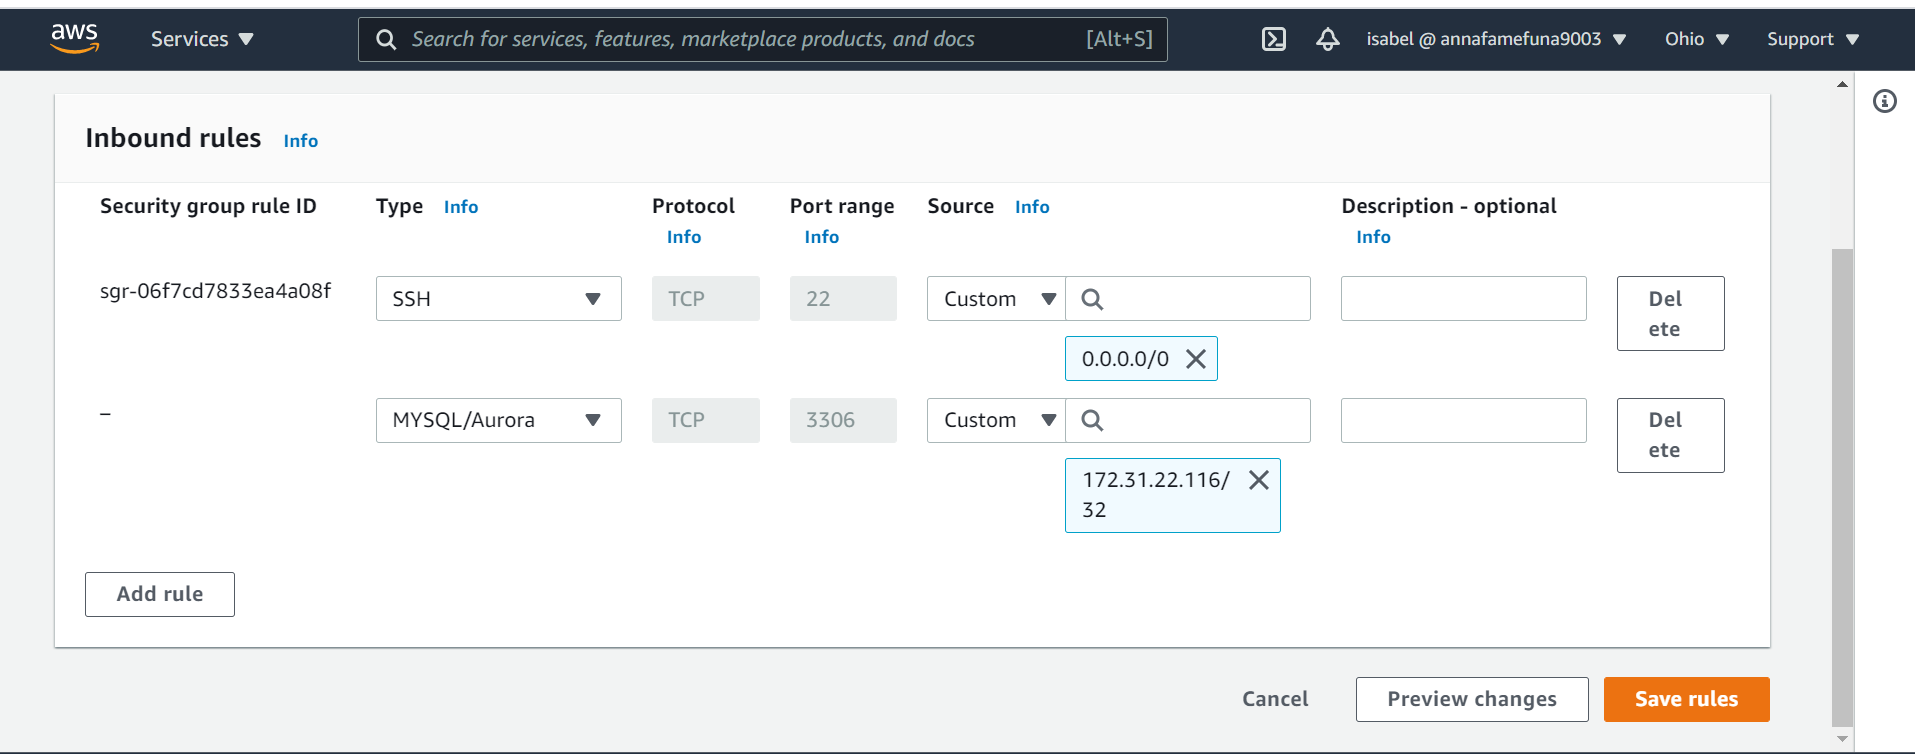
For extra security, do not allow all IP Addresses to reach 'MySQL Server' allow access only to a specific local IP Address of 'MySQL Client' .
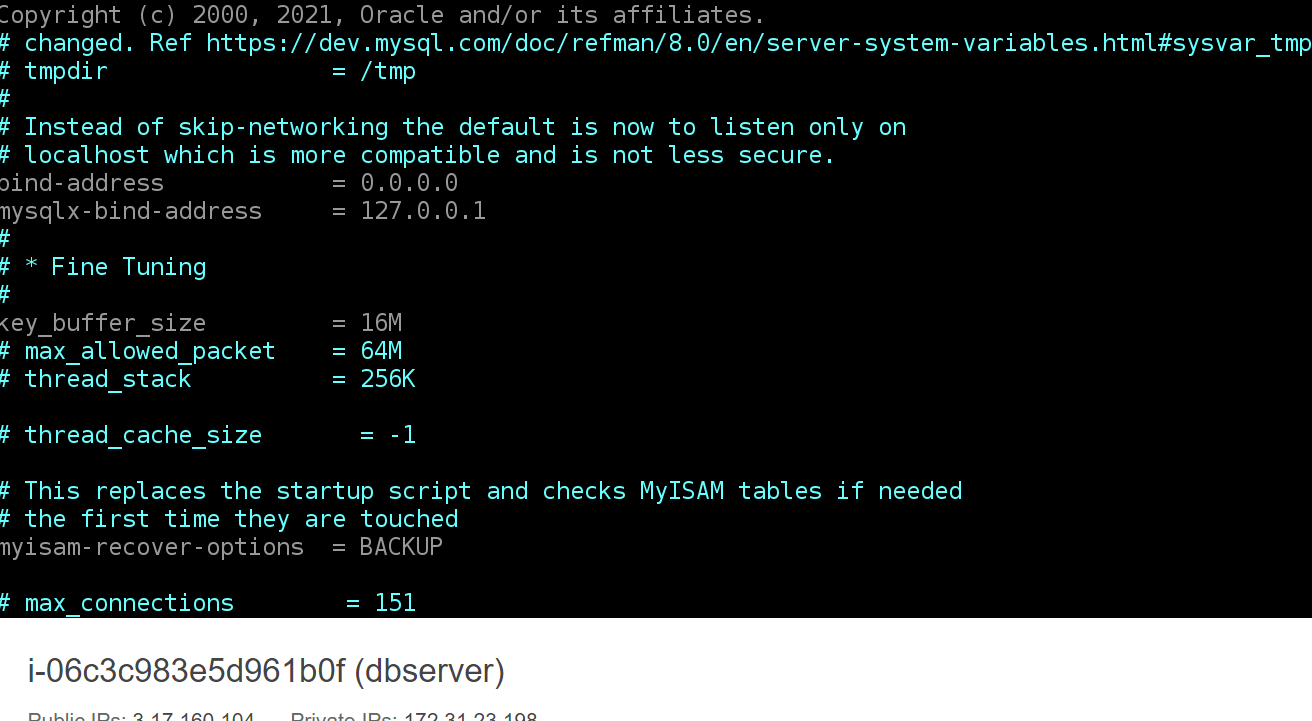
1* You might need to configure MySQL Server to allow connections from remote hosts.
$ sudo iv /etc/mysql/mysql.config.d/mysqld.cnf
Replace '127.0.0.1' to '0.0.0.0'
As shown in the diagram
From 'MySQL Client' Linux server connect remotely to 'MySQL Server' DataBase Engine without using 'SSH'. You must use the mysql utility to perform this action.
$ mysql -u remote_user -h IP-address -p
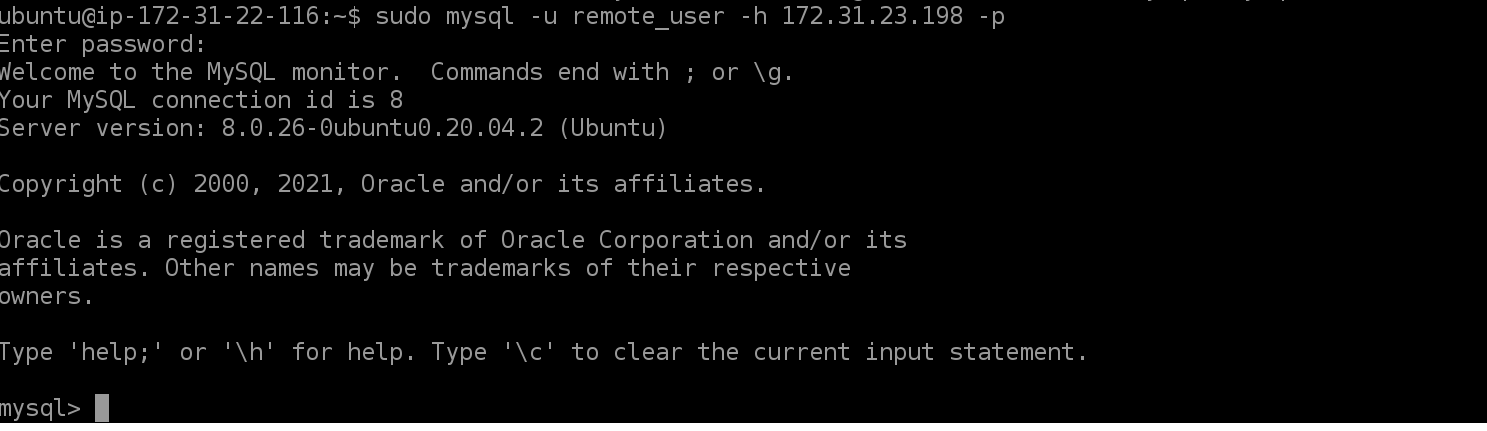
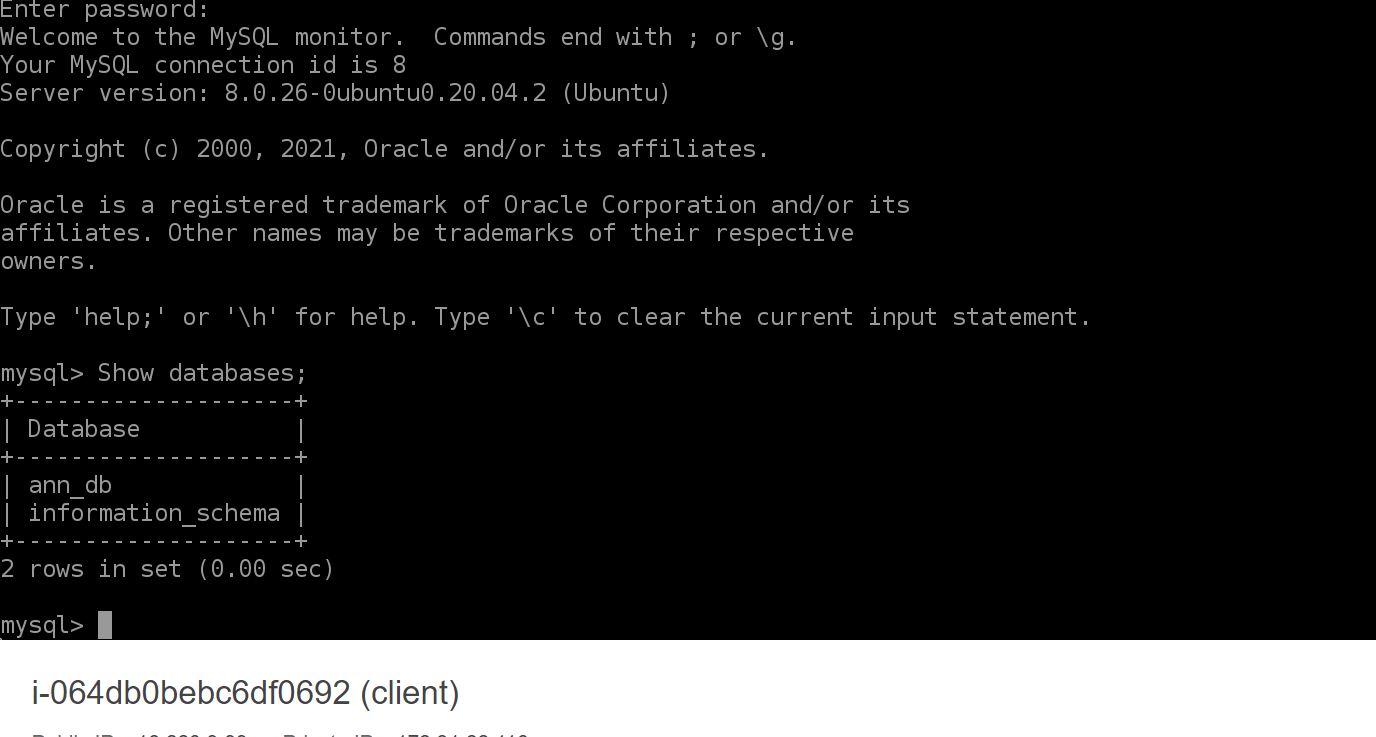
Check that you have successfully connected to a remote MySQL Server and can perform MySQL Queries.
Show databases;