The following steps will allow you to compile your own NorthstarLauncher executable from the code in this repository.
(Images aren't changed, use your own intelligence to figure out how it should be in the latest Visual Studio, I couldn't be bothered fully rewriting this)
This guide assumes you have already installed Northstar as shown in this page
- Install Git from this link
- Clone the R2Ion/IonLauncher repo using this command
git clone https://github.com/R2Ion/IonLauncher.git - Install Visual Studio 2026 from this link. Northstar uses the vc2026 compiler, which is provided with Visual Studio. You only need to download the Community edition. It is highly likely that older versions (2022 etc) will not work, but this hasn't been checked.
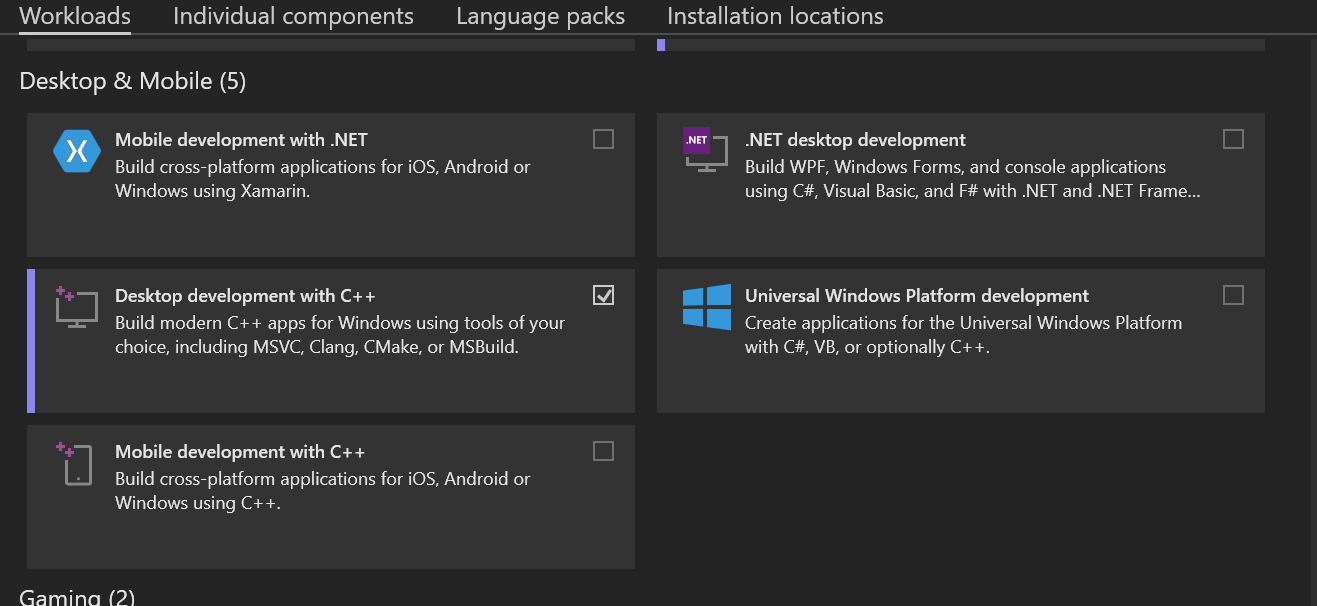
- If you are prompted to download Workloads, check "Desktop Development with C++" and ".NET Desktop Development". If you are not prompted, don't worry, you'll be able to install this later on as well.
-
Open the NorthstarLauncher folder you unzipped with Visual Studio.
-
You may be prompted by visual studio to generate the cmake cache. To do this open the root
CMakeLists.txtand click Generate. Once you do this you should be able to build the project. Note that some editors might not use CMake Presets out of the box, you only need to check this if you're getting errors while configuring. If so, double check you are using one (might be something likex64 Releaseconsult your nearest LLM if this doesn't make sense)

- In the top ribbon, press on Build, then Build all.

- Wait for your build to finish. You can check on its status from the Output tab at the bottom
- Once your build is finished, Open the directory in File Explorer. Then, go to
build/game. You should see NorthstarLauncher.exe and Northstar.dll, as well as a couple other files. - In your Titanfall2 directory, move the preexisting NorthstarLauncher.exe and Northstar.dll into a new folder. You'll want to keep the default launcher backed up before testing any changes.
- Back in the build debug directory, Move NorthstarLauncher. (all files are needed if you aren't publishing the launcher to a single file) and Northstar.dll to your Titanfall2 folder.*
If everything is correct, you should now be able to launch the Northstar client with your changes applied.
You can tweak how Ion is built with config.cmake which will be created after first generating the cmake cache.
NS_BINARY_DIRsets the path Northstar will output binaries to, useful for testing e.g you might use"C:/Program Files/EA Games/Titanfall2"NS_PUBLISH_LAUNCHERwhenON(which it is by default), publishes the C# launcher WPF binary into a single executable, you might want to disable (set value toOFF) if you need to do proper testing.NS_BUILD_LEGACY_CPP_LAUNCHERwhenONwill build the old C++ launcher for Northstar, useful if you're having issues with the C# binary.
Developers who can work a command line may be interested in using Visual Studio Build Tools to compile the project, as an alternative to installing the full Visual Studio IDE.
Note that you cannot use Ninja for Ion, this is due to the haunted technology we use to build C# in cmake.
-
Follow the same steps as above for Visual Studio Build Tools, but instead of opening in Visual Studio, run the Command Prompt for VS 2022 and navigate to the NorthstarLauncher.
-
Run
cmake . -G "Visual Studio 18 2026" -B buildto generate build files. -
Run
cmake --build build/to build the project.
Note these probably DO NOT work for Ion, if you are a Linux developer who would like to fix this please get in touch.
- Clone the GitHub repo
- Use
cdto navigate to the cloned repo's directory - Then, run the following commands in order:
docker build --rm -t northstar-build-fedora .docker run --rm -it -e CC=cl -e CXX=cl --mount type=bind,source="$(pwd)",destination=/build northstar-build-fedora cmake . -DCMAKE_BUILD_TYPE=Release -DCMAKE_SYSTEM_NAME=Windows -G "Ninja" -B builddocker run --rm -it -e CC=cl -e CXX=cl --mount type=bind,source="$(pwd)",destination=/build northstar-build-fedora cmake --build build/
When using podman instead of Docker on an SELinux enabled distro, make sure to add the z flag when mounting the directory to correctly label it to avoid SELinux denying access.
As such the corresponding commands are
podman build --rm -t northstar-build-fedora .podman run --rm -it -e CC=cl -e CXX=cl --mount type=bind,source="$(pwd)",destination=/build,z northstar-build-fedora cmake . -DCMAKE_BUILD_TYPE=Release -DCMAKE_SYSTEM_NAME=Windows -G "Ninja" -B buildpodman run --rm -it -e CC=cl -e CXX=cl --mount type=bind,source="$(pwd)",destination=/build,z northstar-build-fedora cmake --build build/