
postgresql
postgresql-contrib
libboost1.88-dev
libboost-program-options1.88-dev
libboost-filesystem1.88-dev
libboost-json1.88-dev
cmake
m4
libsqlite3-dev
Note: FreeBSD users can skip this step because the pkg contains all the required delegates.
Clone and configure Imagemagick with the delegates for JPEG, PNG, WEBP, XML, and JPEG-XL.
You may need to install dependencies first:
libxml2-dev
libjxl-dev
Configure:
./configure --with-jpeg --with-jxl --with-png --with-webp --with-xml
Ensure the configure output ends with all the delegates listed:
DELEGATES = jng jpeg jxl lcms png webp xml zlib
Then install:
make
sudo make install
ImageMagick may use significant amounts of memory, which can crash the program if system memory runs out. To set memory limits add these environment variables:
MAGICK_MEMORY_LIMIT=512MiB
MAGICK_MAP_LIMIT=1GiB
MAGICK_DISK_LIMIT=2GiB
ImageMagick7-nox11
boost-libs
sqlite3
postgresql18-server Versions 15-17 work too
postgresql18-contrib ^
If using the PostgreSQL interface, add the following line to /etc/rc.conf:
postgresql_enable="YES"
Install Homebrew
Brew install: imagemagick boost postgresql@17 cmake
add to ~/.zshrc:
export PATH=/opt/homebrew/Cellar/postgresql@17/<INSERT VERSION>/bin:$PATH
The pkg-config for postgresql may not work out of the box. If that is the case, follow these instructions:
Brew ls postgresql | grep pkgconfig
export PATH=/opt/homebrew/Cellar/postgresql@17/<INSERT VERSION>/bin:$PATH - Adjust the postgresql version to match the result from brew ls in the line above.
export PKG_CONFIG_PATH=/opt/homebrew/Cellar/postgresql@17/<INSERT VERSION>/lib/pkgconfig/
First ensure that submodules are downloaded. Use this command:
git submodule update --init --recursive
Now, to build with the default SQLite interface:
cmake -B build
Alternatively, you can build with the PostgreSQL interface instead:
cmake -B build -D FUZEDBI_USE_POSTGRES=ON
cmake --build build
Then refer to section PostgreSQL setup
After building, you use this command:
cmake --install build --prefix install
The prefix can be changed. Simply using install will put it alongside the build directory.
And now you can run it:
./install/bin/MediaboardServer
AppImage distribution coming soon.
This is only required when built with FUZEDBI_USE_POSTGRES=ON - See Building section.\
This may be skipped on certain Linux distros such as Debian. Check if the server is already running with systemctl status postgresql or service postgresql status
initdb -D /var/db/postgres/18/main/
pg_ctl -D /var/db/postgres/18/main start\
To create the database:
su -
su postgres
createdb fuze_mediaboard
psql -d fuze_mediaboard
fuze_mediaboard=# CREATE USER mediaboard_server WITH PASSWORD '<password>';
fuze_mediaboard=# GRANT ALL ON SCHEMA public TO mediaboard_server;
fuze_mediaboard=# \q
To import the database template, go back to your user account and run:
psql -U postgres fuze_mediaboard < database_template.sql
Add the following line to pg_hba.conf. Insert it at the top of the table so that it won't be overridden by other settings:
local fuze_mediaboard mediaboard_server password
mediaboard_server is the PostgreSQL user which interacts with the database named fuze_mediaboard.
Set the environment variable FUZE_MEDIABOARD_PASSWORD with the same password used in the CREATE_USER statement earlier. Open a new terminal window or reboot your system to apply the change.
Now you must point the Mediaboard server to the database. Edit the lines of config.ini which contains PostgreSQL connection parameters. These options start with postgresql_.
The owner has the highest permission level. By default, only the owner has read and write permissions. To create the owner account:
./build/MediaboardServer -o
The server will start normally, but this time an invite link will appear in the command line output. Find the line which looks like the following:
Use this link to register the owner account: http://localhost:8300/invite/j0kXVLI0Xvocw3b1b9n9Ig
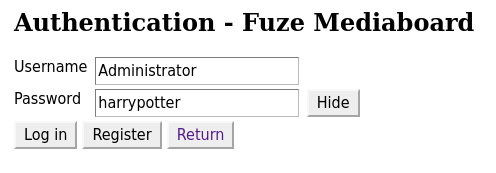
Enter this link in your browser (you may be able to CTRL+click it) and enter your desired credentials. If you ever forget the password, you can simply run the above command again. Note that it will not be the same account.
If you built at the default directory, run ./build/MediaboardServer.
If you used --install, execute the binary MediaboardServer.
In a browser open localhost:8300
You should see an empty page with a toolbar at the top. You can login to the owner account with the credentials you set earlier. Refer to section Owner account if you hadn't yet.
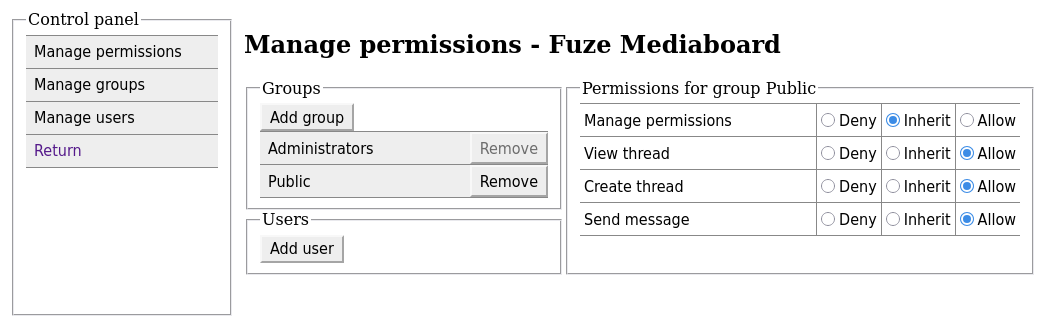
By default, users cannot view or create threads or send messages. To enable this, click on the "Manage server" tab in the toolbar as an administrator.
Let's say, for example, the Mediaboard will be accessible under /mediaboard/.
Open tokens.m4 and locate the following line:
define(`_WEBSOCKET_URL', `ws://localhost:8300')
Set the value to the publicly accessible URL Mediaboard is proxied to.
In this example, if our domain is fuze.page, the value should be wss://fuze.page/mediaboard/. Do not forget: if using HTTPS, set the scheme to wss://.
Also change the definition of _ROOT_URL from / to /mediaboard/
Run make to apply the changes, or sh build.sh if using Meson.
Fuze Mediaboard does not provide HTTPS. For that, you should use a reverse proxy like NGINX.
Example NGINX reverse proxy settings:
location /mediaboard/ {
  proxy_pass http://localhost:8300/; # Fuze Mediaboard
  proxy_set_header X-Real-IP $remote_addr;
  proxy_set_header Host $host;
  proxy_set_header X-Forwarded-For $proxy_add_x_forwarded_for;
  client_max_body_size 100M;
  proxy_pass_request_headers on;
  # Uncomment the following line if the Mediaboard is not served from the root URL.
  # proxy_redirect / /mediaboard/;

  # WebSocket support
  proxy_http_version 1.1;
  proxy_set_header Upgrade $http_upgrade;
  proxy_set_header Connection "upgrade";
  proxy_send_timeout 7d;
  proxy_read_timeout 7d;
}
# Optional: store media in another location
location /mediaboard/media/ {
  try_files $uri $uri/ =404;
  alias /path/to/media/folder/;
}
User-uploaded content is stored in a subdirectory named media/. By default, this is in the same directory as the server executable. You can choose a different directory within the server's filesystem to store media; Open config.ini and set media_directory to another location.
No portion of the code is generated by AI. You may use AI to help make decisions and gain knowledge, but not to program for you.
To create Appdir required by AppImage, run:
cmake --install build --prefix AppDir/usr
Then to bundle the dependencies, use Linuxdeploy:
./linuxdeploy-x86_64.AppImage --appdir AppDir --output appimage
pg_dump fuze_mediaboard > mediaboard_dump.sql
psql -X --set ON_ERROR_STOP=on fuze_mediaboard < mediaboard_dump.sql