Repository navigation
Module Browse Map
Base module including Map, Compass, PositionLockFab, ZoomControls and PlaceDetail. Every feature is customizable by end developer (can be turned on/off or styled).
Before you start, please use README to learn how to integrate this module into your project.
The most basic example. It shows the Browse Map module with zero lines of configuration.
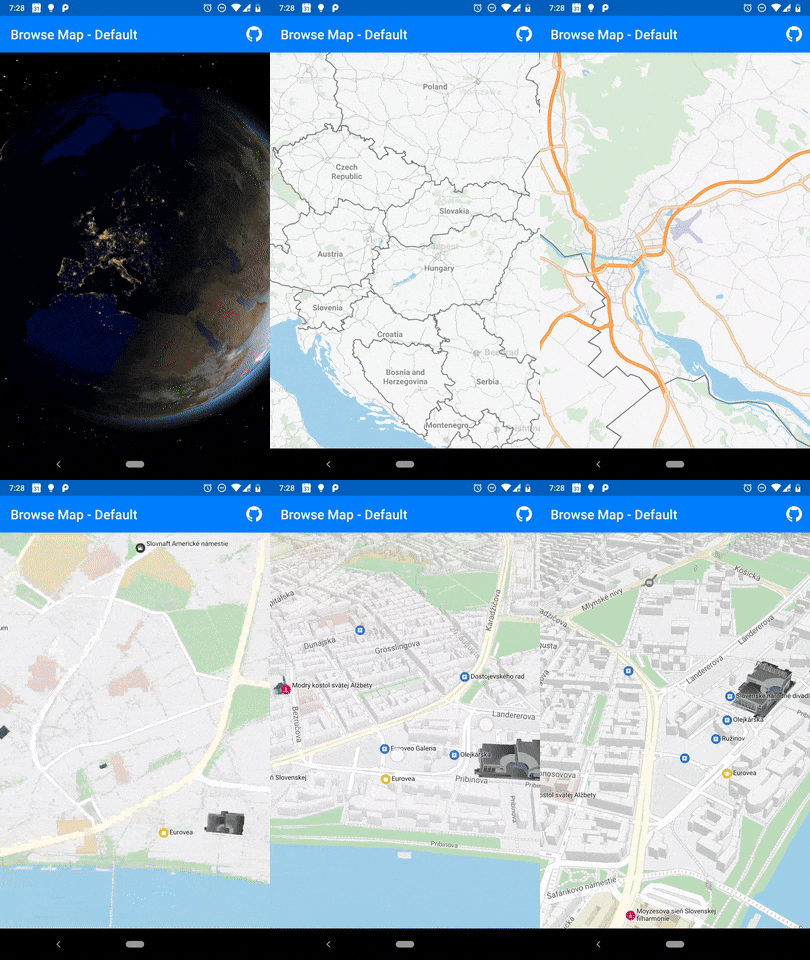
<FrameLayout xmlns:android="http://schemas.android.com/apk/res/android"
    android:layout_width="match_parent"
    android:layout_height="match_parent">

    <fragment
        android:id="@+id/browseMapFragment"
        class="com.sygic.modules.browsemap.BrowseMapFragment"
        android:layout_width="match_parent"
        android:layout_height="match_parent" />

</FrameLayout>
or runtime:
override fun onCreate(savedInstanceState: Bundle?) {
    super.onCreate(savedInstanceState)

    ...

    val browseMapFragment = BrowseMapFragment()
    browseMapFragment.compassEnabled = false
    browseMapFragment.mapSelectionMode = MapSelectionMode.MARKERS_ONLY
    supportFragmentManager.beginTransaction().replace(R.id.container, browseMapFragment).commit()
}It shows the Browse Map module with all available configuration attributes.
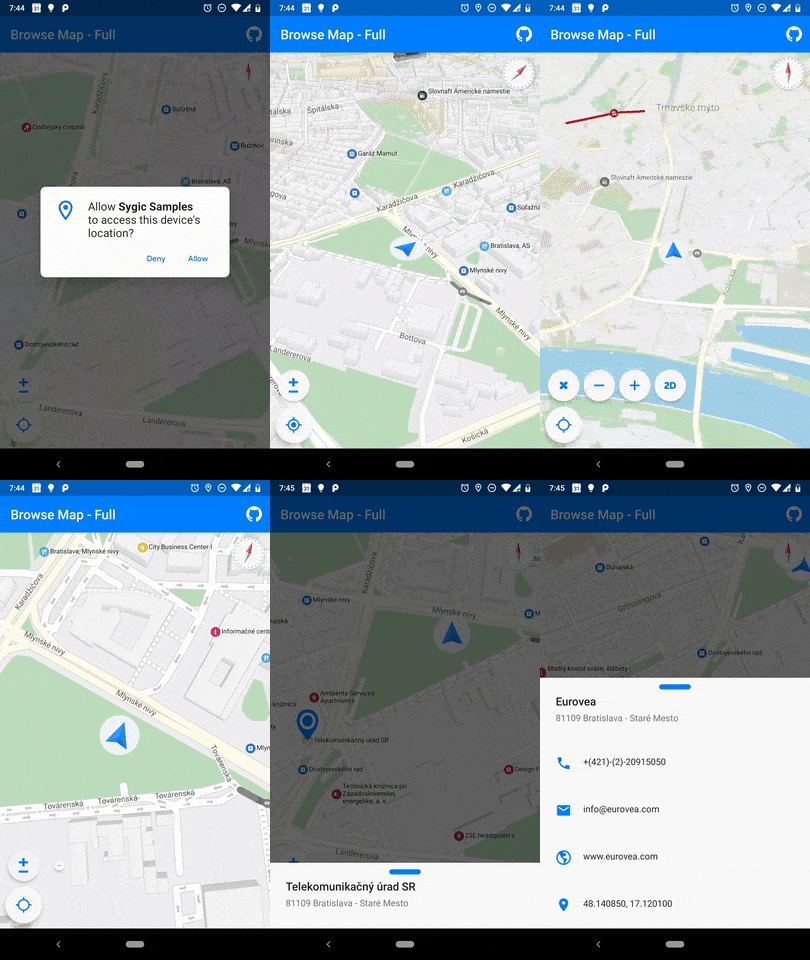
<FrameLayout xmlns:android="http://schemas.android.com/apk/res/android"
    xmlns:app="http://schemas.android.com/apk/res-auto"
    android:layout_width="match_parent"
    android:layout_height="match_parent">

    <fragment
        android:id="@+id/browseMapFragment"
        class="com.sygic.modules.browsemap.BrowseMapFragment"
        android:layout_width="match_parent"
        android:layout_height="match_parent"
        app:sygic_gl_surfaceType="SURFACE_VIEW"
        app:sygic_compass_enabled="true"
        app:sygic_compass_hideIfNorthUp="false"
        app:sygic_map_centerX="0.5"
        app:sygic_map_centerY="0.5"
        app:sygic_map_latitude="48.145764"
        app:sygic_map_longitude="17.126015"
        app:sygic_map_movementMode="followGpsPosition"
        app:sygic_map_rotation="90"
        app:sygic_map_rotationMode="free"
        app:sygic_map_selectionMode="full"
        app:sygic_map_skin="night"
        app:sygic_map_tilt="44"
        app:sygic_map_zoom="16"
        app:sygic_positionOnMap_enabled="true"
        app:sygic_positionLockFab_enabled="true"
        app:sygic_vehicle_skin="pedestrian"
        app:sygic_zoomControls_enabled="true" />

</FrameLayout>- All available Enum attributes
- sygic_gl_surfaceType -> SURFACE_VIEW / TEXTURE_VIEW
- sygic_map_rotationMode -> free / northUp / attitude / vehicle
- sygic_map_movementMode -> free / followGpsPosition / followGpsPositionWithAutoZoom
- sygic_map_selectionMode -> none / markersOnly / full
This sample interactively demonstrate all available map selection modes. The default mode is markersOnly.
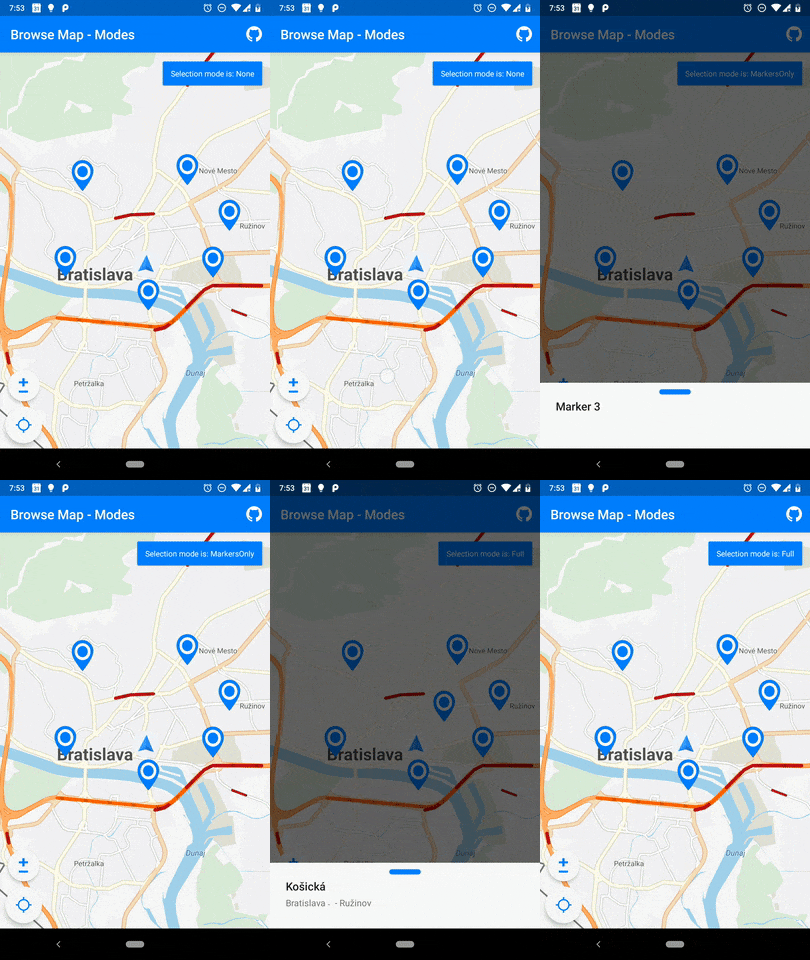
<FrameLayout xmlns:android="http://schemas.android.com/apk/res/android"
    xmlns:app="http://schemas.android.com/apk/res-auto"
    android:layout_width="match_parent"
    android:layout_height="match_parent">

    <fragment
        android:id="@+id/browseMapFragment"
        class="com.sygic.modules.browsemap.BrowseMapFragment"
        android:layout_width="match_parent"
        android:layout_height="match_parent"
        app:sygic_map_selectionMode="none" />

</FrameLayout>- Selection Modes:
- none
- markersOnly
- full
This sample allows you to add own map Marker(s) with multiple available methods.
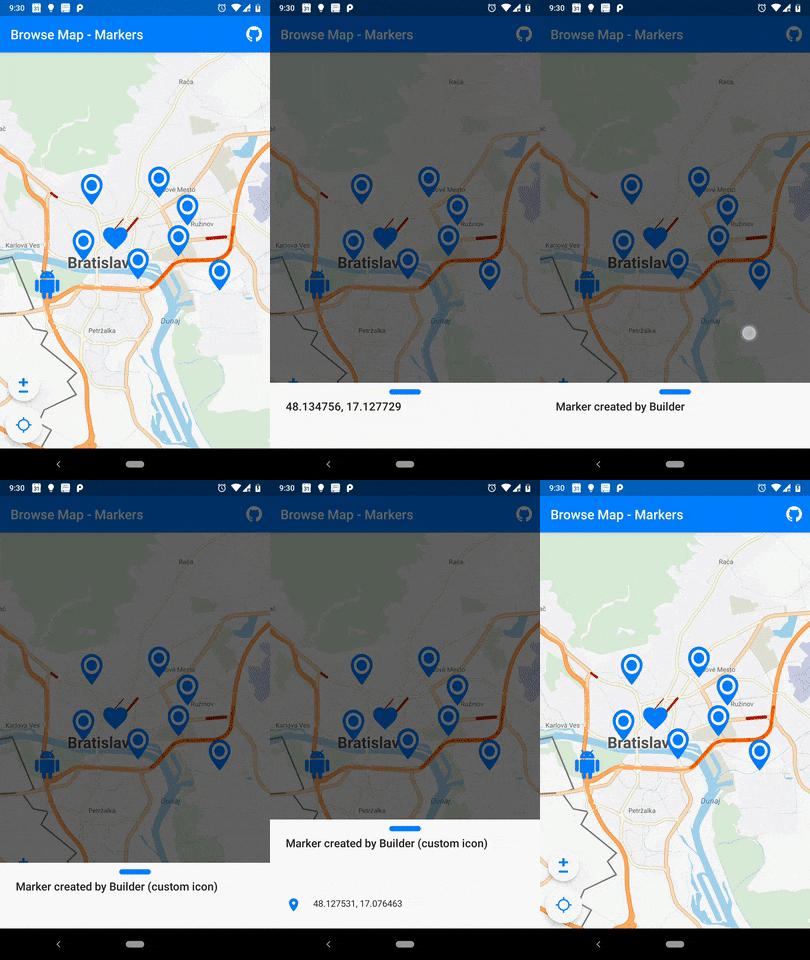
override fun onCreate(savedInstanceState: Bundle?) {
    super.onCreate(savedInstanceState)

    ...

    val markerFromBuilder = MapMarker.at(48.130550, 17.173795)
        .withPayload(BasicData("Marker created by Builder (default icon)"))
        .build()

    val markerFromBuilderWithCustomIcon = MapMarker.at(48.127531, 17.076463)
        .withPayload(BasicData("Marker created by Builder (custom icon)", "And with stunning description :-D"))
        .withIcon(R.drawable.ic_android)
        .build()

    val browseMapFragment = supportFragmentManager.findFragmentById(R.id.browseMapFragment) as BrowseMapFragment
    browseMapFragment.addMapMarkers(
        listOf(
            MapMarker.at(48.143489, 17.150560).build(),
            MapMarker.at(48.162805, 17.101621).build(),
            MapMarker.at(48.165561, 17.139550).build(),
            MapMarker.at(48.155028, 17.155674).build(),
            MapMarker.at(48.141797, 17.097001).build(),
            MapMarker.at(48.134756, 17.127729).build(),
            markerFromBuilder,
            markerFromBuilderWithCustomIcon,
            MapMarker.at(48.144921, 17.114853)
                .withIcon(DrawableFactory(R.drawable.ic_favorite))
                .build()
        )
    )
}This sample allows you to set the custom DetailsViewFactory as replacement for the default PlaceDetailBottomDialogFragment. After the click on some point, the details will be shown in your custom layout, defined by this factory (note: if you set your own onMapClickListener and handle click by yourself, this factory won't be used).
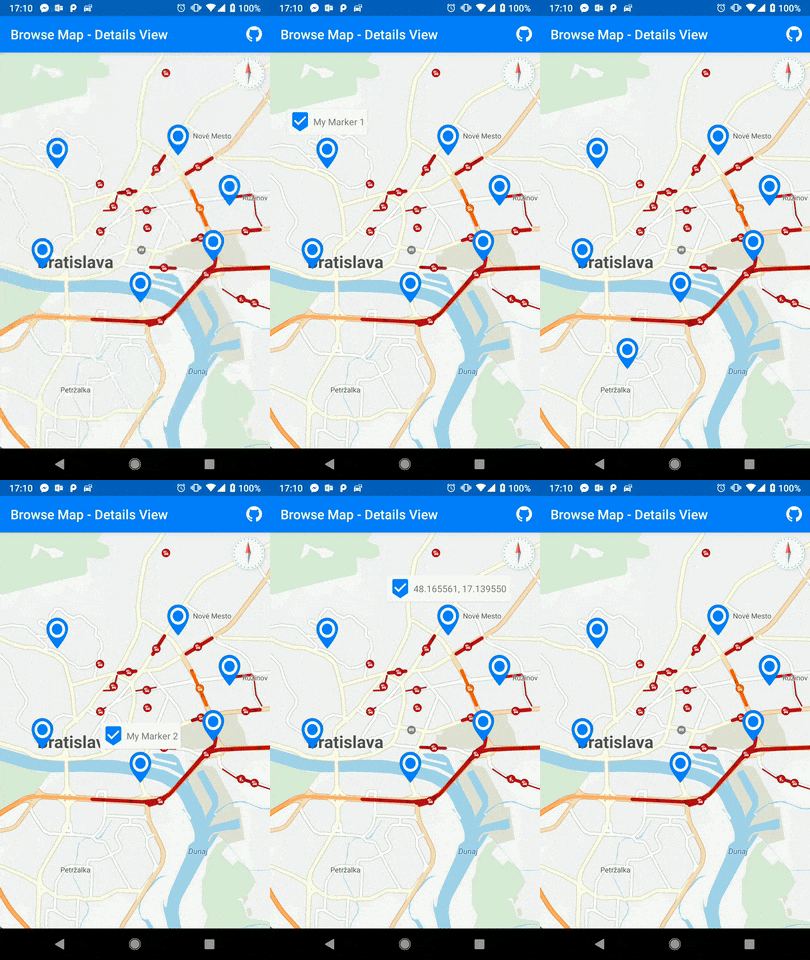
custom layout:
<LinearLayout xmlns:android="http://schemas.android.com/apk/res/android"
    xmlns:tools="http://schemas.android.com/tools"
    android:layout_width="wrap_content"
    android:layout_height="wrap_content"
    android:background="?android:attr/colorBackground"
    android:orientation="horizontal"
    android:padding="4dp">

    <ImageView
        android:id="@+id/icon"
        android:layout_width="32dp"
        android:layout_height="32dp"
        android:layout_gravity="center"
        android:contentDescription="@string/place_info_description"
        android:src="@drawable/ic_beenhere"/>

    <TextView
        android:id="@+id/title"
        android:layout_width="wrap_content"
        android:layout_height="wrap_content"
        android:layout_gravity="center_vertical"
        android:layout_marginStart="4dp"
        tools:text="Globe" />

</LinearLayout>
custom factory:
@Parcelize
class CustomDetailsViewFactory() : DetailsViewFactory() {

    override fun getDetailsView(inflater: LayoutInflater, container: ViewGroup, data: ViewObjectData): View {
        val root = inflater.inflate(R.layout.layout_info_window, container, false)

        //fill layout with data from marker's Data
        data.payload.let { payload: Parcelable ->
            when (payload ) {
                is BasicData -> {
                    payload.title.let {
                        root.findViewById<TextView>(R.id.title).text =
                            if (!it.isEmpty()) it else data.position.getFormattedLocation()
                    }
                    payload.description.let { description ->
                        if (description.isEmpty()) {
                            root.findViewById<TextView>(R.id.snippet).visibility = View.GONE
                        } else {
                            root.findViewById<TextView>(R.id.snippet).text = description
                        }
                    }
                }
                else -> root.findViewById<TextView>(R.id.title).text = data.position.getFormattedLocation()
            }
        }

        return root
    }

    override fun getYOffset() = 10f
}
usage:
override fun onCreate(savedInstanceState: Bundle?) {
    super.onCreate(savedInstanceState)

    ...

    val browseMapFragment = supportFragmentManager.findFragmentById(R.id.browseMapFragment) as BrowseMapFragment
    browseMapFragment.setDetailsViewFactory(CustomDetailsViewFactory())
}This sample allows you to set the custom OnMapClickListener. You will receive all data from map click event based on actual MapSelectionMode. For more complex usage, the other OnMapClickListener methods can be overridden. See OnMapClickListener interface documentation for more information.
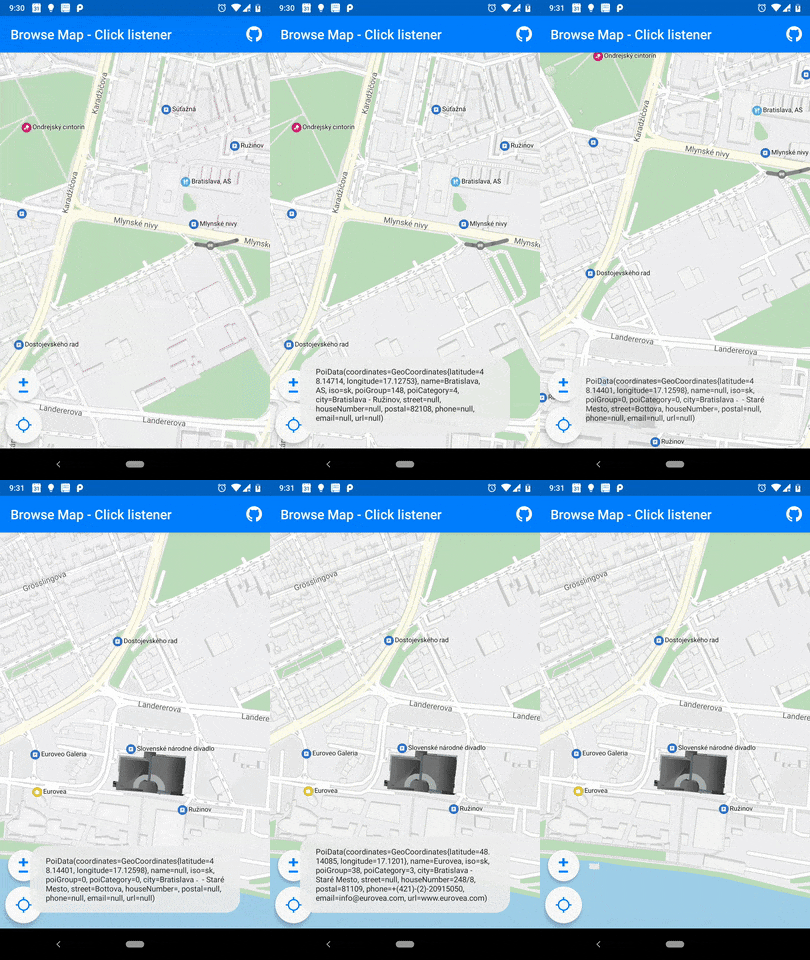
override fun onCreate(savedInstanceState: Bundle?) {
    super.onCreate(savedInstanceState)

    ...

    val markerFromBuilder = MapMarker
        .from(48.146514, 17.124175)
        .payload(CustomDataPayload("This is my custom payload"))
        .build()

    val browseMapFragment = supportFragmentManager.findFragmentById(R.id.browseMapFragment) as BrowseMapFragment
    browseMapFragment.addMapMarker(markerFromBuilder)
    browseMapFragment.setOnMapClickListener(object : OnMapClickListener {
        override fun showDetailsView(): Boolean = false
        override fun onMapDataReceived(data: ViewObjectData) {
            data.payload.let { payload ->
                when (payload) {
                    is CustomDataPayload -> {
                        // Note: This is my custom payload
                        Toast.makeText(this@BrowseMapClickListenerActivity, payload.customString, Toast.LENGTH_LONG).show()
                    }
                    else -> Toast.makeText(this@BrowseMapClickListenerActivity, payload.toString(), Toast.LENGTH_LONG).show()
                }
            }
        }
    })
}In this example you can see two maps displayed side by side. Every map can display different position, can be controlled and configured separately See browse map - full documentation.
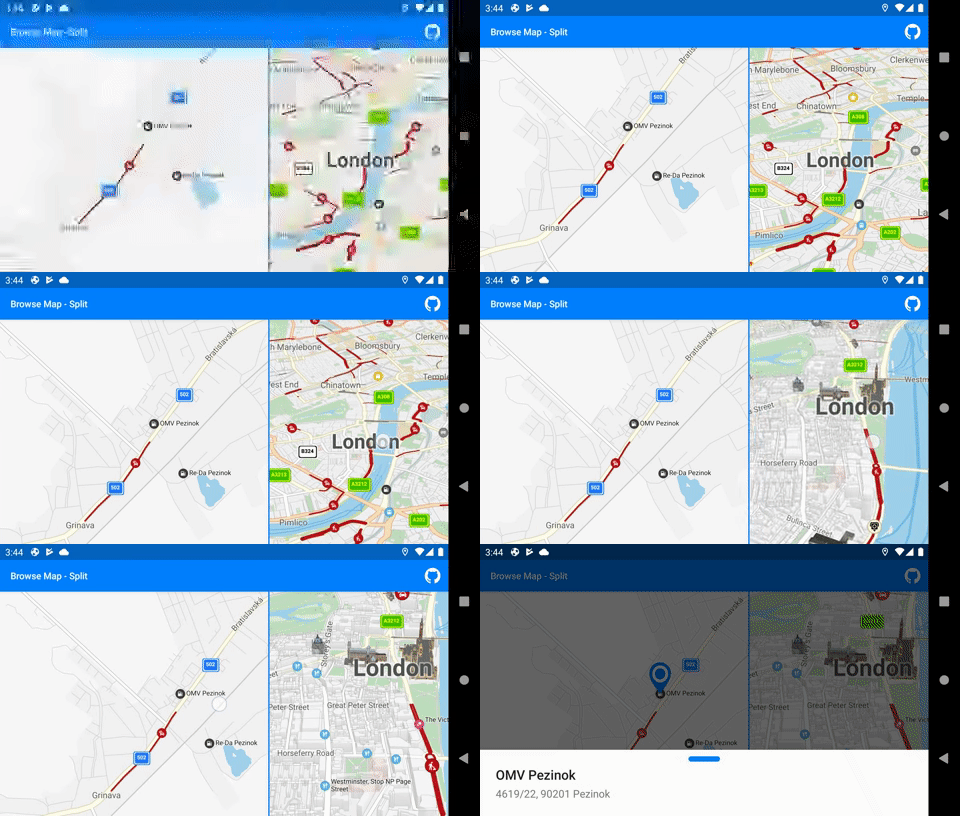
<LinearLayout xmlns:android="http://schemas.android.com/apk/res/android"
    xmlns:app="http://schemas.android.com/apk/res-auto"
    android:layout_width="match_parent"
    android:layout_height="match_parent"
    android:baselineAligned="false"
    android:divider="@drawable/divider"
    android:orientation="horizontal"
    android:showDividers="middle">

    <FrameLayout
        android:id="@+id/fragmentContainer"
        android:layout_width="0dp"
        android:layout_height="match_parent"
        android:layout_weight="0.6" />

    <fragment
        android:id="@+id/browseMapFragmentRight"
        class="com.sygic.maps.module.browsemap.BrowseMapFragment"
        android:layout_width="0dp"
        android:layout_height="match_parent"
        android:layout_weight="0.4"
        app:sygic_map_latitude="48.140363"
        app:sygic_map_longitude="17.109469"
        app:sygic_map_selectionMode="none"
        app:sygic_map_tilt="0"
        app:sygic_map_zoom="14" />

</LinearLayout>
and
override fun onCreate(savedInstanceState: Bundle?) {
    super.onCreate(savedInstanceState)

    setContentView(R.layout.activity_browsemap_split)

    if (savedInstanceState == null) {
        browseMapFragment = BrowseMapFragment().apply {
            cameraDataModel.zoomLevel = 14F
            cameraDataModel.position = GeoCoordinates(48.264514, 17.248591)
            positionOnMapEnabled = true
            mapSelectionMode = MapSelectionMode.FULL
            addMapMarker(MapMarker.at(48.264514, 17.248591).build())
        }.also {
            supportFragmentManager
                ?.beginTransaction()
                ?.replace(R.id.fragmentContainer, it, BROWSE_MAP_FRAGMENT_TAG)
                ?.commit()
        }
    } else {
        browseMapFragment = supportFragmentManager.findFragmentByTag(BROWSE_MAP_FRAGMENT_TAG) as BrowseMapFragment
    }
}This example show you how to use the sygic_map_skin and sygic_vehicle_skin fragment attribute. Note: this will be overwritten by the equivalent theme attribute when defined.
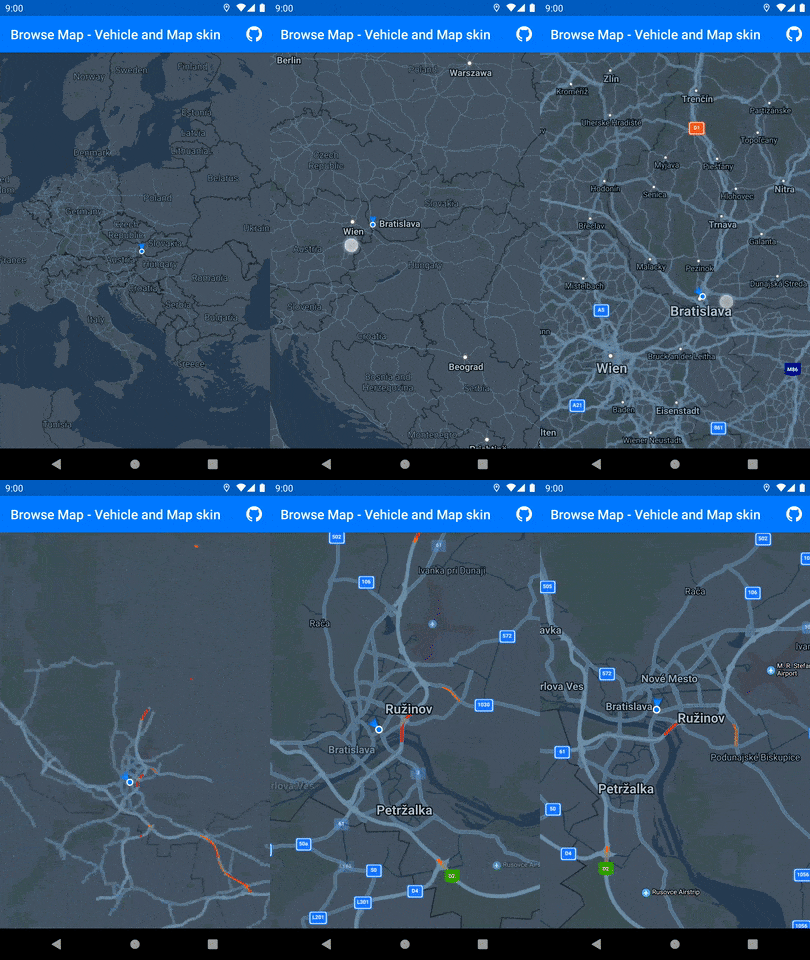
<FrameLayout xmlns:android="http://schemas.android.com/apk/res/android"
    xmlns:app="http://schemas.android.com/apk/res-auto"
    android:layout_width="match_parent"
    android:layout_height="match_parent">

    <fragment
        android:id="@+id/browseMapFragment"
        class="com.sygic.maps.module.browsemap.BrowseMapFragment"
        android:layout_width="match_parent"
        android:layout_height="match_parent"
        app:sygic_map_zoom="2"
        app:sygic_positionOnMap_enabled="true"
        app:sygic_map_skin="night"
        app:sygic_vehicle_skin="pedestrian" />

</FrameLayout>
or programmatically
class BrowseMapVehicleMapSkinActivity : CommonSampleActivity() {

    override fun onCreate(savedInstanceState: Bundle?) {
        super.onCreate(savedInstanceState)

        setContentView(R.layout.activity_browsemap_vehicle_map_skin)

        val browseMapFragment = supportFragmentManager.findFragmentById(R.id.browseMapFragment) as BrowseMapFragment
        browseMapFragment.setVehicleSkin(VehicleSkin.PEDESTRIAN)
        browseMapFragment.setMapSkin(MapSkin.NIGHT)
    }
}In this example you can see a different theme applied to all UI elements with few lines of code. For each individual component customization, please look to the UiKit documentation.
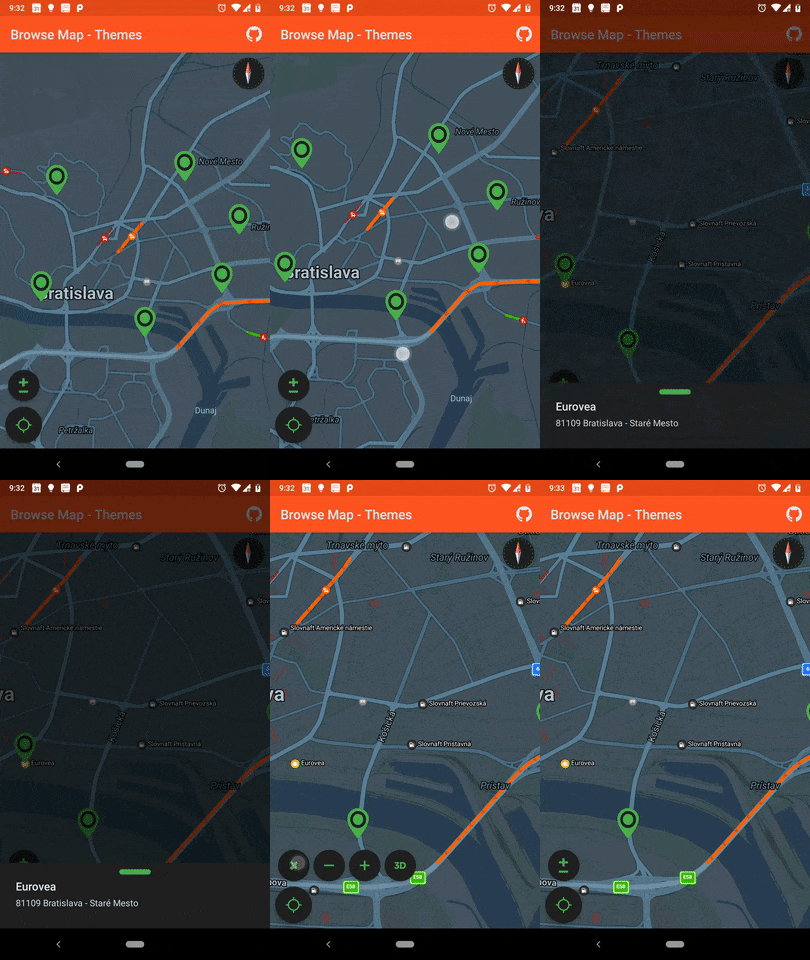
<manifest xmlns:android="http://schemas.android.com/apk/res/android"
    package="com.sygic.samples">

    <application>
        <activity
            android:name=".BrowseMapDefaultActivity"
            android:label="@string/browse_map_default"
            android:theme="@style/Theme.Sygic.Colored"/>
    </application>

</manifest>
and
<style name="Theme.Sygic.Colored" parent="Theme.AppCompat.DayNight">
    <item name="colorPrimary">@color/orange</item>
    <item name="colorPrimaryDark">@color/cinnabar</item>
    <item name="colorAccent">@color/fruit_salad</item>

    <item name="android:colorBackground">@color/mine_shaft</item>
    <item name="android:textColorPrimary">@color/mystic</item>
    <item name="android:textColorSecondary">@color/botticelli</item>

    <item name="sygicMapSkin">"night"</item>
</style>