A real-time audio multi-tool for the FREE-WILi 2 — twelve effects, a five-slot sampler, a drum machine, a synth, a light-controlled theremin, a chord keyboard and a tuner, all running on the display processor's second core and driven entirely from the touchscreen.
It is built against one dependency: wilibsp, the FREE-WILi 2
board support package. No vendored drivers, no private headers. Everything here
is reachable from a stock FREE-WILi 2 and a git clone --recursive.

It launches from the device's own /apps menu like any other FREE-WILi 2 app —
it does not replace your display firmware — and it executes from PSRAM,
which is what keeps SRAM free for the audio path.
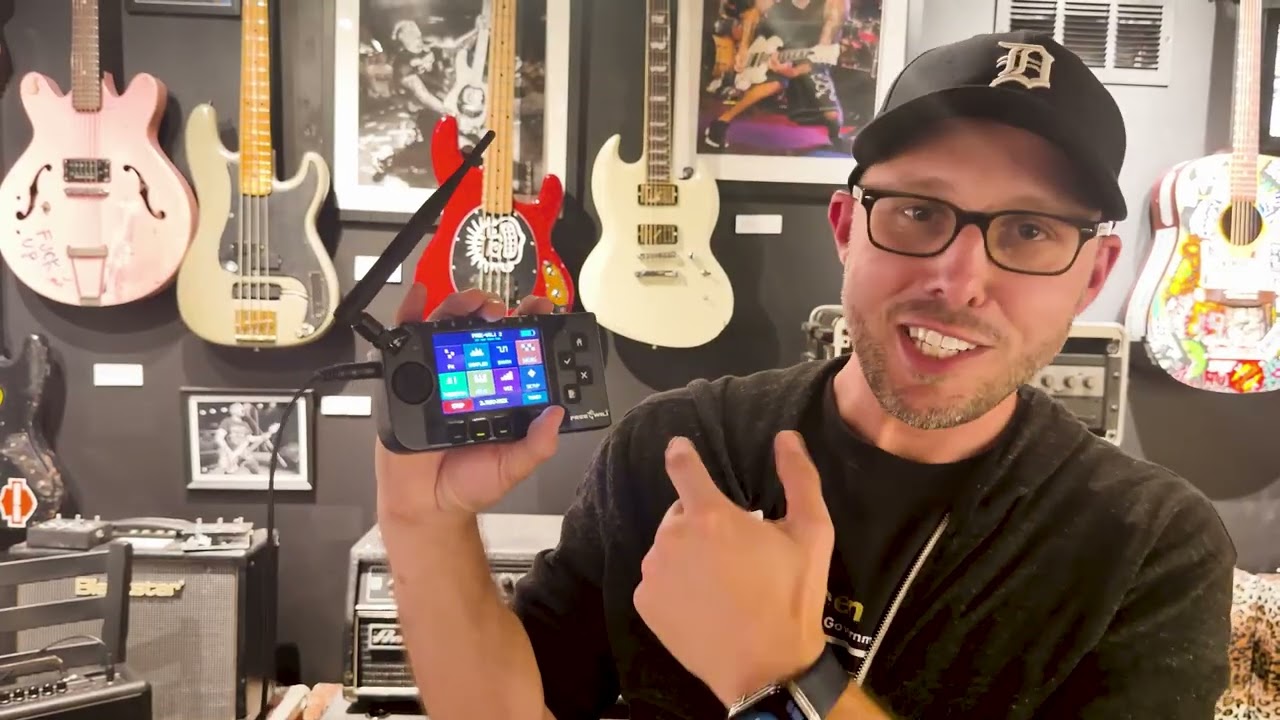
Demoing Orcastra at the Punk Rock Museum in Las Vegas. ▶ Watch on YouTube
- Grab
prebuilt/orcastra.uf2. - Mount your FREE-WILi 2's SD card and drop it in
/apps. - Unmount, then pick orcastra from the on-device apps menu.
That's the whole install. The app is ~420 KB and stages itself into PSRAM at
0x11000000; your display firmware is untouched, and a power cycle puts you
back in the launcher.
Start at
PAD 24DBbefore you put headphones on, then bring it up. The onboard speaker is deliberately volume-limited (see Sound safety); the 3.5 mm jack is not — it runs full-scale, which is right for an amp or an audio interface and loud into headphones.Bench check with in-ear monitors: they work fine, and they get loud.
PAD 12DBwas plenty for comfortable listening, so there is no reason to go anywhere near the top of the range on headphones.

Tap a tile to toggle the effect; hold it to open that effect's parameter page. The chain runs in a fixed order so the results stay predictable.
Four more are written, tested and dormant — TREMOLO, PHASER, RINGMOD and
VOWEL — each behind an FX_ENABLE_* define in apps/orcastra/fx.h, with a
note there on why it lost its grid slot. Flipping one back on is a one-line
change and a good way to find your way around.
| Orcatune — real-time vocal pitch correction (autocorrelation pitch detection + PSOLA resynthesis), key/scale aware, natural or robotic | Octave — up/down octave and detune modes | Auto Wah — envelope-following band-pass |
| Pitch XY — a full-screen pad, ±1.5 octaves on X, wet amount on Y, and the position sticks when you let go | OD — soft-clip overdrive | Shred — hard-clip, mid-focused |
| Bitcrush — bit-depth and sample-rate reduction | EQ — five-band parametric with a live response plot | Flanger — short modulated delay with feedback, classic analog BBD-style |
| Glitch — buffer stutter / repeat | Delay — tempo-ish delay with feedback | Reverb — eight-comb, four-allpass tank |

Orcatune is the deepest of them: it detects pitch by autocorrelation and resynthesises with PSOLA, so it snaps to the nearest note in the key and scale you pick rather than to the nearest semitone. Robotic mode holds the snap hard; natural mode glides into it.

The EQ page is worth calling out: drag any of the five band handles to set frequency and gain at once, set Q on the strip underneath, and pick the active band with the coloured hardware buttons or the D-pad. The five bands are named for the five coloured buttons, so what the readout says is what you press.

Tap a slot to select it, hold to record. Drag on the waveform pad to scrub playback rate continuously from 1× reverse, through stop, to 1× forward — it tracks your finger, so it behaves like a turntable rather than a speed knob.
HOLD latches the loop hands-free, and that is the interesting part: the loop keeps running while you back out to the FX menu and build a chain on top of it, so the sampler becomes a source for everything else in the app rather than a page you visit.
Two slots ship pre-seeded so there is something to play with on first launch — a dial-up modem handshake and a synthesised singing voice, both generated rather than sampled.

Five voices, all synthesised. Tap cells to program, chain banks A–D into a longer pattern, and set tempo on the strip at the bottom. The playhead chases in real time and the sounding cells flash.

Saw, sine or square. X is pitch across 2.5 octaves, Y opens and closes the filter. With a note held, the onboard IMU takes over as a modulation source: shake for rattle, bank for tremolo, tip for resonance, snap-tip to dive.

The ambient light sensor sets pitch — shade it to go lower — and a touch strip sets volume. There's a magnetometer mode too, if you'd rather wave a magnet around than your hand.

An octave of keys plus eight chord qualities, with sustain. Each key strikes a 4-voice polyphonic chord — enough for the widest 7th — in one of two instruments: a 2-operator FM electric piano, or detuned PolyBLEP saw strings.
A needle tuner with LED guidance for when the display is facing away, and a spectrum/scope visualiser reachable from any page with the PAGE button.

Pick your input (3.5 mm, onboard PDM mics, or a gain-staged guitar/line/mic profile) and output (speaker or jack), and set the output pad. The status line shows the live route and whether the audio codec's power rail actually came up.
The onboard speaker is an 8 Ω micro-speaker rated 300 mW continuous / 500 mW absolute maximum — not the 2 W that some early documentation claimed. A full-scale sine at 0 dB delivers roughly 0.7–1.1 W into it, which is 2–3× the absolute maximum. We know because that is how the first bench speaker died.
So this app will not let you do that. Two guards, and you should keep both if you fork this:
- Speaker output is capped at −9 dB (88–139 mW worst case, 29–46% of the continuous rating). The derate is against the continuous number rather than the peak, because this app really does sustain full-scale tones indefinitely — the theremin, the test tone, and the synth with HOLD on. The 3.5 mm jack path is unrestricted.
- A 2nd-order 900 Hz high-pass on the speaker route. The driver's passband floor is around 1.7 kHz; content below its self-resonance is raw cone excursion, which damages the driver and sounds broken regardless of level.
Both live in apps/orcastra/main.c — search for VOL_ORDER and
vol_loud_ok().
You need the Raspberry Pi Pico SDK toolchain (the VS Code Raspberry Pi Pico
extension installs a self-contained one under ~/.pico-sdk, which is what the
build driver looks for).
git clone --recursive https://github.com/gtasseff/orcastra.gitcd orcastra && python tools/fw.py buildThat configures and builds, and the artifact you want is
build/apps/orcastra/orcastra.uf2. Copy it to /apps on the SD card as above.
If you already cloned without --recursive:
git submodule update --init --recursiveThere is one target, orcastra, and it produces orcastra.uf2. It
executes in place from PSRAM, staged at 0x11000000 by the display loader.
The scheme comes from the BSP: fw2_psram_app() supplies the linker scripts,
the SRAM-resident bootstrap that raises the clock and re-times the QMI before
entering PSRAM-resident main(), the app metadata record, and UF2 generation.
Nothing here can be programmed into the device's flash, by design — that range
holds the stock display firmware, which is the bootloader that launches apps
from the card.
python tools/check_psram_xip.py asserts the properties an app can still get
wrong after any change to the linker overrides or source list; several of them
fail silently on hardware rather than at link time. See
AGENTS.md invariant 21.
cmake -B build -DFW2_AGENTIO=ON && python tools/fw.py buildEvery screenshot in this README was taken that way, over SWD, from the running device:
python tools/agentio.py screenshot -o shot.pngtouch x y, press, hold, release and type work too. The harness code
lands in PSRAM alongside the app, so it costs about 7 KB of SRAM.
That's what it's for. The audio engine is deliberately boring to extend:
everything is a block-based process(in, out, n) function on 16-bit mono at
48,828 Hz, and the whole chain is assembled in one readable place.
Start here: docs/ADDING-AN-EFFECT.md walks
through adding one end to end — DSP, a menu tile, a parameter page and touch
handling — by following what an existing effect already does.
Then read AGENTS.md. It is the accumulated
this-cost-us-an-afternoon list for this hardware: the capture deadline, why
full-screen redraws tear the microphone ring, the PSRAM timing that has to be
set before the clock changes, how the power coprocessor wants to be asked for
the audio rail, and which reset gesture recovers a wedged unit. Most of it was
learned the expensive way. It is written for a coding agent but it reads fine
for a human, and it will save you real time.
apps/orcastra/
  main.c        UI, pages, touch/button handling, the audio pump      (the bulk)
  fx.c/.h       the twelve effects, the chain, EQ, pitch correction
  vox.c/.h      five-slot sampler in PSRAM
  synth.c/.h    the XY synth voice
  drums.c/.h    drum voices + the step sequencer
  keys.c/.h     chord keyboard
  viz.c/.h      spectrum / scope visualiser
  voice_data.c  the synthesised voice, generated (see LICENSE for provenance)
  psram_link_override/  one linker override: adds libgcc to the BSP's SRAM
                bootstrap section (see AGENTS.md invariant 21)
tools/
  fw.py         build / flash / RTT log driver
  agentio.py    screenshot + input injection over SWD
  check_psram_xip.py   structural verification of the PSRAM-execution build
Built and tested on a production FREE-WILi 2 (RP2350B display processor, 8 MB
PSRAM, NAU88C10 codec). The audio path is 16-bit mono at 48,828 Hz with a
5.2 ms capture deadline — see AGENTS.md for what that constrains.
The FREE-WILi 2 is a handheld hardware-hacking and embedded-development tool; if you don't have one, it lives at https://freewili.com. Everything here runs on a stock unit — no modifications, no added hardware, and it does not replace the firmware that shipped on it.
Getting audio in and out of the single 3.5 mm TRRS jack needs the right adapter, which is not obvious and is easy to get wrong — a buying guide is on the roadmap.
A breakout wiring diagram for line-level input exists but is deliberately not published yet: adding a headphone jack to it disturbed the impedance and the unit stopped working with headphones plugged in. Publishing it as-is would just have people building the same fault. It goes up once it is fixed and retested.
Kept honest on purpose — these are known gaps, not vague ambitions.
- TRRS adapter buying guide. One 3.5 mm TRRS jack carries both input and output, so routing audio in and out at once needs a specific splitter — and the wrong one silently gives you no input, or no output, with no error to tell you which. A parts list with links is the single most useful thing missing from this README.
- The orca-shaped breakout box. A 3D-printed orca that sits at the end of a plain TRRS-to-TRRS cable and breaks the single jack out into a separate input and output. The point is that the cable is the only thing touching the device — all the adapters and wiring live in the orca instead of dangling off the FREE-WILi 2 in a tangle. STEP files to publish so anyone can print one.
- The breakout's wiring diagram. Withheld until fixed. Adding a headphone jack to the breakout disturbed the impedance and the unit stopped working with headphones plugged in, so publishing it as-is would just reproduce the fault in other people's builds. Needs a rework and a retest first.
- Arpeggiator. Specced, not built. It is the feature that ran the copy_to_ram build out of SRAM in the first place, and a large part of why the app now executes from PSRAM — so the room for it exists now.
- The four dormant effects (TREMOLO, PHASER, RINGMOD, VOWEL) are written and
disabled behind
FX_ENABLE_*infx.h, each with a note on why it lost its grid slot. Twelve tiles fill a 4×3 grid with no empty cell, so bringing one back means retiring another. - An RMS-tracking limiter on the speaker route. This is the honest way to raise the speaker ceiling past −9 dB: the current cap has to assume a sustained full-scale sine, because nothing stops you playing one. A limiter that tracks real programme material could safely allow more headroom for music while still catching the pathological case. See Sound safety for why a bigger static number is not the answer.
- Lower latency. Currently ~24–32 ms, which musicians on the bench have called acceptable and fun. Going lower means smaller capture blocks, which is a BSP-level change rather than an app one.
Issues and pull requests welcome on any of these.
MIT — see LICENSE. Do what you like with it.
The submodule and the Pico SDK keep their own (also permissive) terms, and the audio asset provenance is documented in the LICENSE file as well.