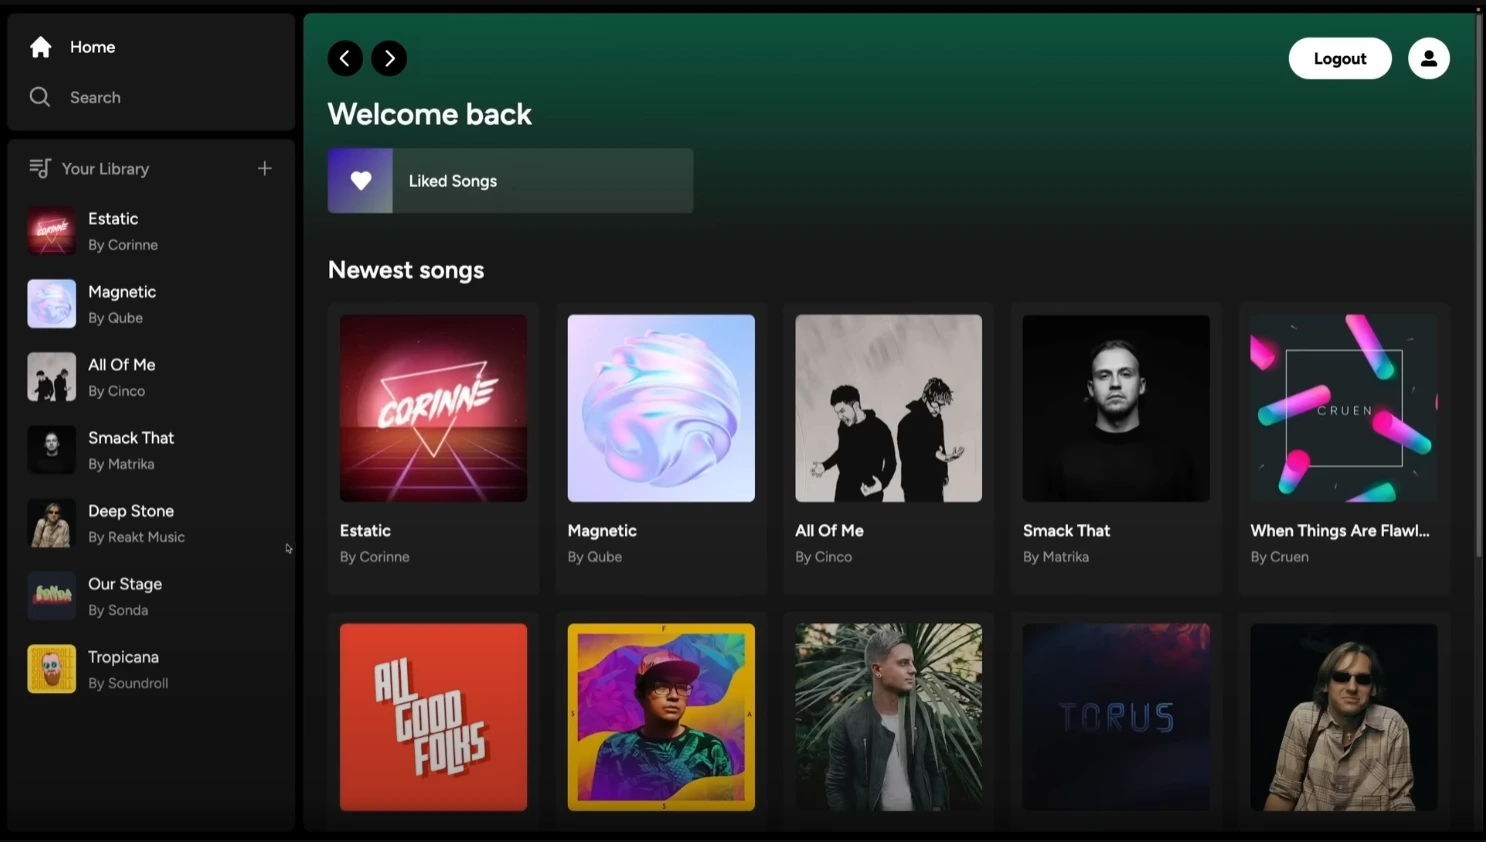
A full-featured Spotify Clone built with the latest Next.js App Router, fully responsive and integrated with Supabase, Stripe, and PostgreSQL. This project reproduces key features of the real Spotify app, including audio streaming, authentication, playlists, payments, and more. All with a modern UI powered by Tailwind CSS.
This application is the result of a comprehensive full stack tutorial that guides developers through the process of creating a production-ready music streaming service.
You’ll find implementations for:
- User authentication (via email/password and GitHub)
- Audio playback with a custom player
- File uploads (images and songs)
- Playlists and liked songs
- Premium subscription via Stripe
- Protected routes and access control
- Data fetching via server components
Disclaimer: This is a learning project and not intended for commercial use. Spotify™ is a trademark of Spotify AB.
The project was built using the following technologies and tools:
- Next.js (App Router) - React framework for web applications.
- React - JavaScript library for building user interfaces.
- TypeScript - JavaScript superset for static typing.
- Tailwind CSS - Utility-first CSS framework for fast and customizable design.
- Supabase (auth, storage, PostgreSQL)
- Stripe (subscriptions and payments)
- PostgreSQL
- Zustand (state management)
- React Hook Form (form handling)
- React Toast (notifications)
- Play Songs: Stream music directly in-app
- Advanced Audio Player: Responsive and persistent across pages
- Upload Songs & Images: Via Supabase Storage
- Authentication: Email/password and GitHub login
- Database: Full CRUD with Supabase (PostgreSQL)
- Liked Songs System
- Playlists Creation
- Stripe Integration: Premium subscription with recurring payments
- Protected Routes
- Client-side and server-side validations
- Responsive UI with transitions and animations
- Server Components with direct DB queries (no API routes needed)
git clone https://github.com/pedroestevaodev/spotify-clone.git
cd spotify-clone$ npm installCreate a .env.local file in the root and configure the following variables:
NEXT_PUBLIC_SUPABASE_URL="tobemodified"
NEXT_PUBLIC_SUPABASE_ANON_KEY="tobemodified"
SUPABASE_SERVICE_ROLE_KEY="tobemodified"
NEXT_PUBLIC_STRIPE_PUBLISHABLE_KEY="tobemodified"
STRIPE_SECRET_KEY="tobemodified"
STRIPE_WEBHOOK_SECRET="tobemodified"
You need to set up storage buckets in Supabase (for music and images) and activate Stripe with your plans/subscriptions.
$ npm run devOpen your browser and visit http://localhost:3000 to see the project in action.
You can start editing the homepage by modifying the app/layout.tsx file. The browser will automatically update as you make changes to the code.
Here are the main commands available for the project:
| Command | Description |
|---|---|
dev |
Starts the development server |
build |
Builds the app for production |
start |
Runs the built app |
lint |
Lints the code using ESLint |
To learn more about the technologies used in this project, check out the following resources:
- Next.js Docs - Learn more about Next.js features and APIs.
- Next.js Learn - Interactive tutorial to learn Next.js.
- React Docs - Access the official React guide.
- Tailwind CSS Docs - Learn how to use Tailwind CSS to style your application.
- Supabase Docs - Learn how to get up and running with Supabase through tutorials, APIs and platform resources.
The easiest way to deploy your Next.js application is by using the Vercel Platform, created by the developers of Next.js.
Check out the Next.js deployment documentation for more details.
Make sure to set the environment variables in Vercel > Settings > Environment Variables.
This project is open source and available under the MIT License.
Built with ☕ by Pedro Estevão