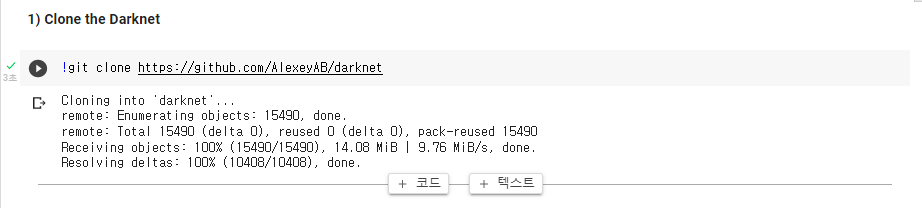
- Raspbeery Pi 4
- SD card 32G
- element14 camera module
- Ubuntu 21.0.4 desktop verion
- debian
-
약통 인식 (실시간 스트리밍)
- 약통 물체 인식
- Yolov3 모델 > tenserflow 변환 후 구현
- 약통에 적힌 숫자 인식
- Tensorflow 사용
- 약통 물체 인식
-
흐름 Dialog
- 약통 등록 상황
- 사용자가 카메라에 숫자가 적힌 약통을 보여줌
- tensorflow를 이용하여 약통과 약통에 적힌 숫자 인식
- 사용자에게 약통(약)에 대한 정보를 입력하도록 요구
- 약통(약) 정보와 인식된 숫자를 Spring을 통해 DB에 저장
- 약통 등록 완료
- 약통 인식 상황
- 사용자가 카메라에 숫자가 적힌 (사전 등록된) 약통을 보여줌
- tensorflow를 이용하여 약통과 약통에 적힌 숫자 인식
- DB에 저장된 약통(약)에 대한 정보를 불러옴
- Step2로 넘어감
ⓐ 환경구축
- 임베디드 환경 구축
- 우분투 서버 구축
ⓑ 데이터 추출 및 전처리
- Posenet 이미지 추출 페이지 ( 라즈베리파이 카메라)
- Posenet 이미지 --> 엑셀 추출 (3. 엑셀 라벨링)
- Spring 기반 웹페이지
ⓒ AI 모델링
- Dense 모델 생성
- weight 학습
- 가중치 학습 결과 확인
- Colab 사용
ⓓ 동영상 스트리밍 환경 구축
- Spring 웹페이지
- 라즈베리파이 스트리밍 API
- 동작인식 AI
- 포드포워딩 및 웹 서비스 구축
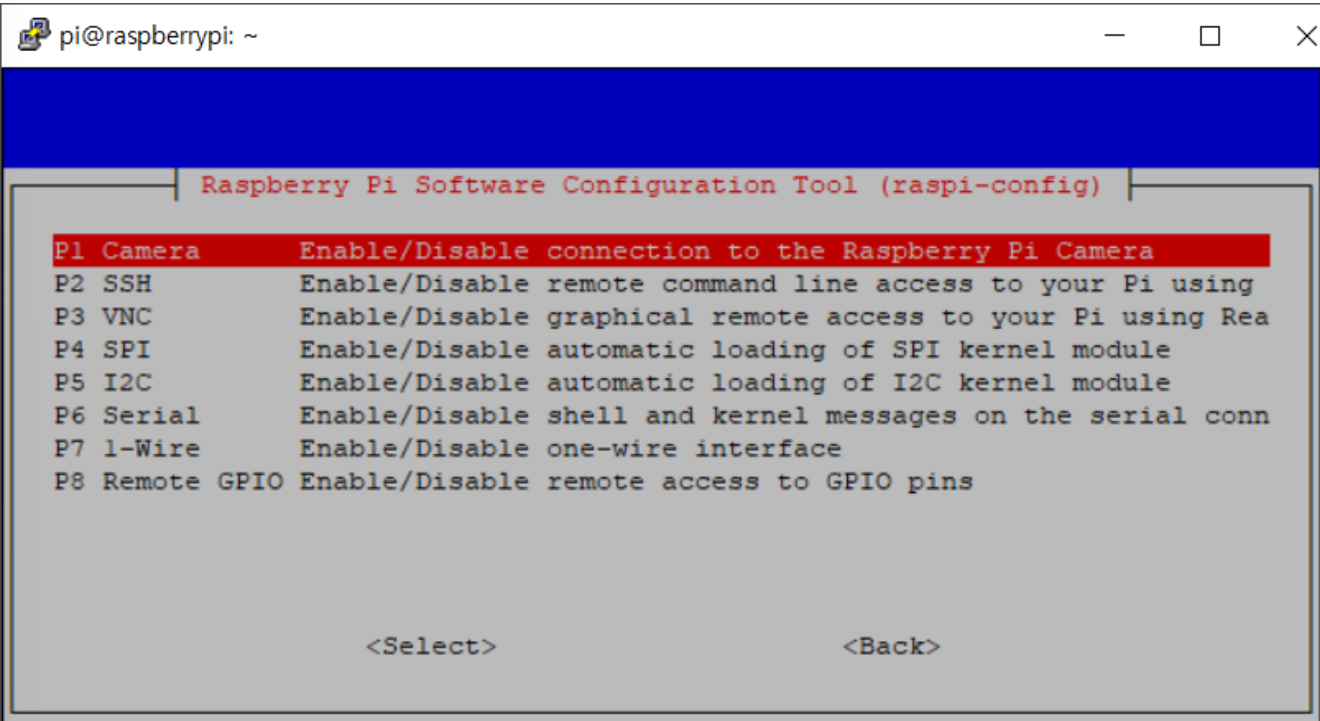
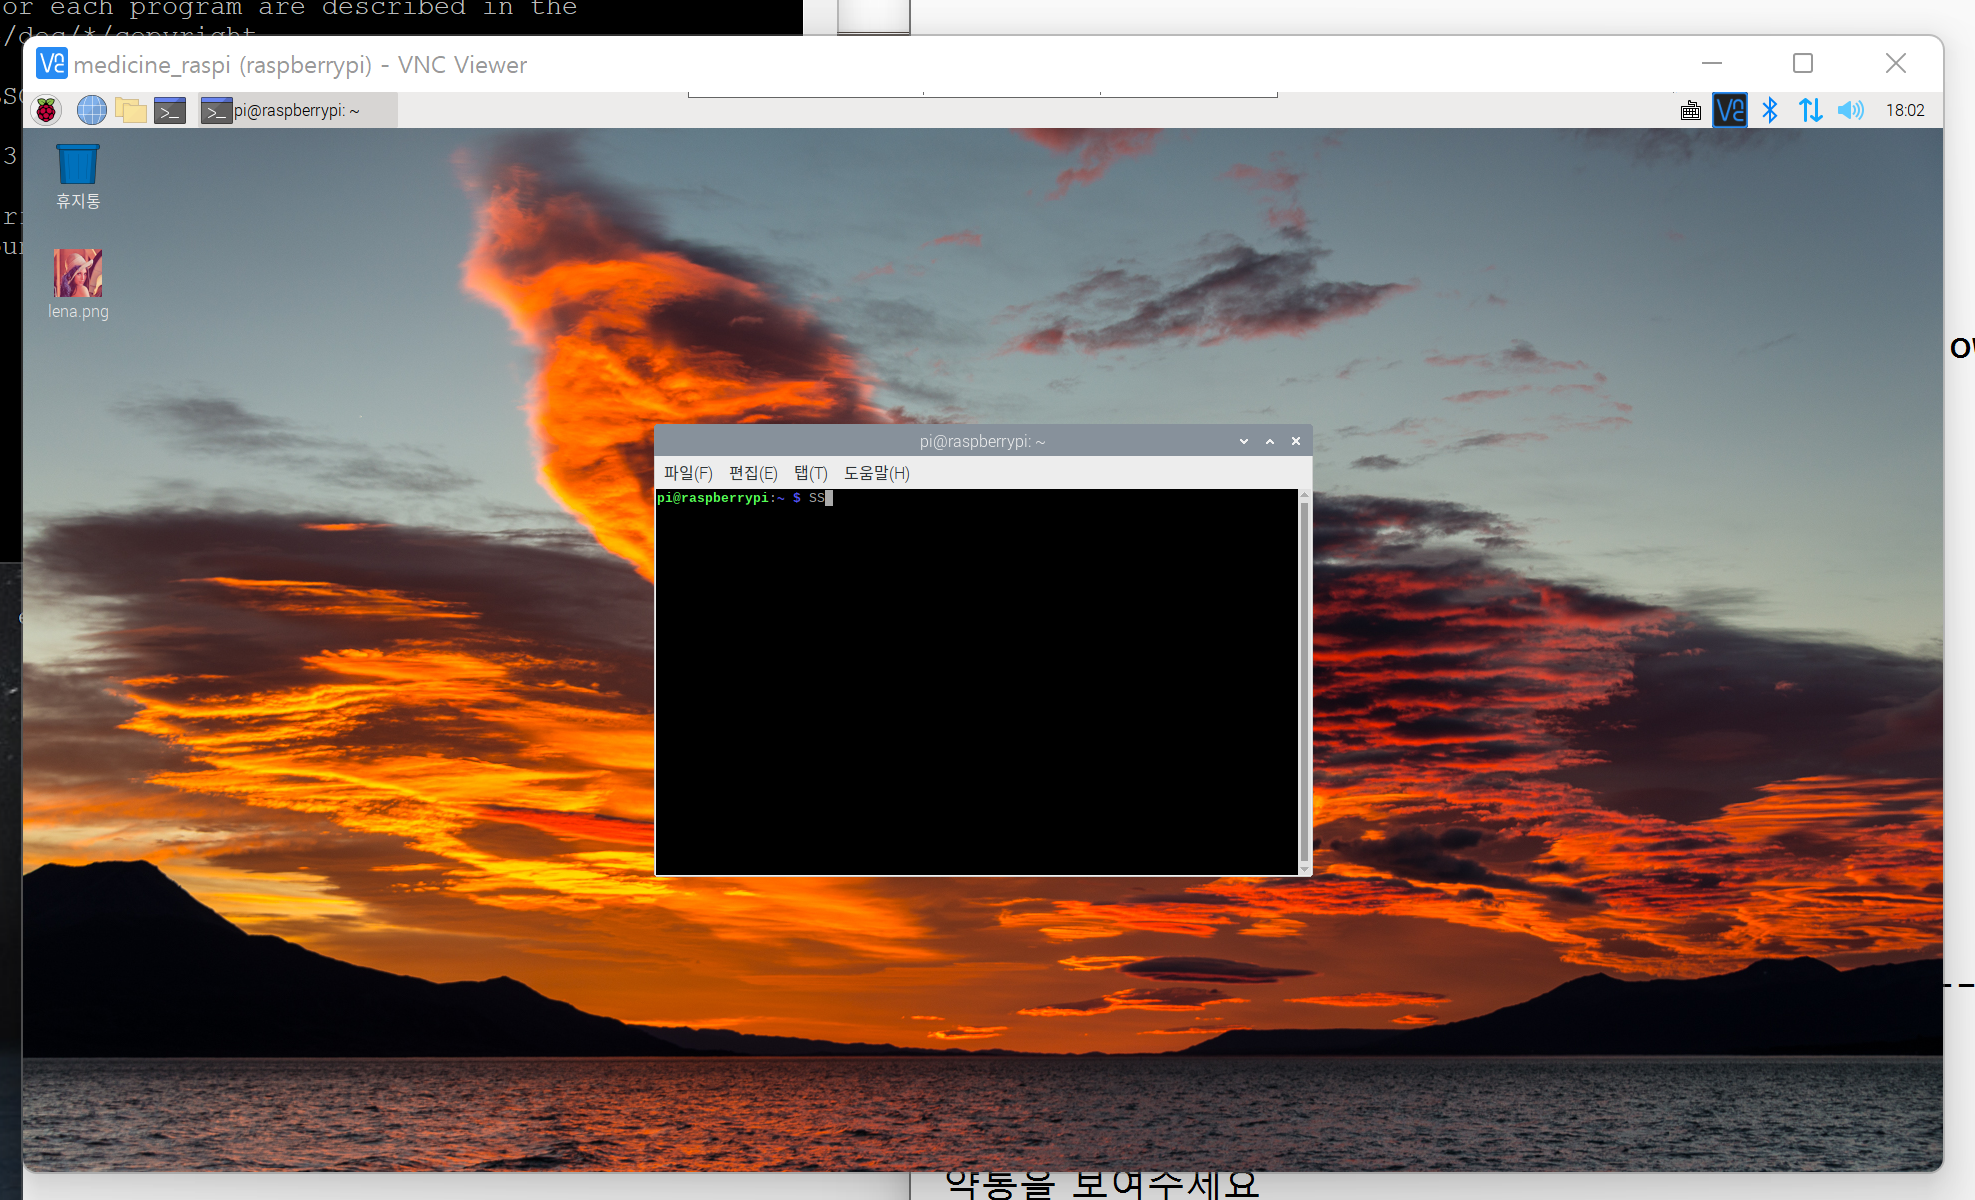
sudo raspi-config
Interfacing Option > camera & ssh > enable
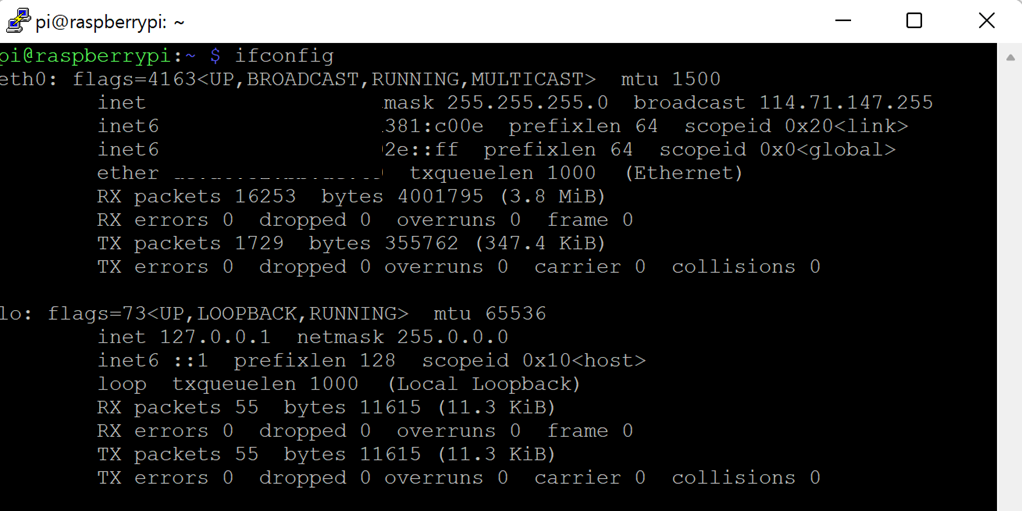
- check IP
ifconfig
- IP assignment
sudo vim /etc/dhcpcd.conf

- Raspberry PI setting
sudo raspi-config
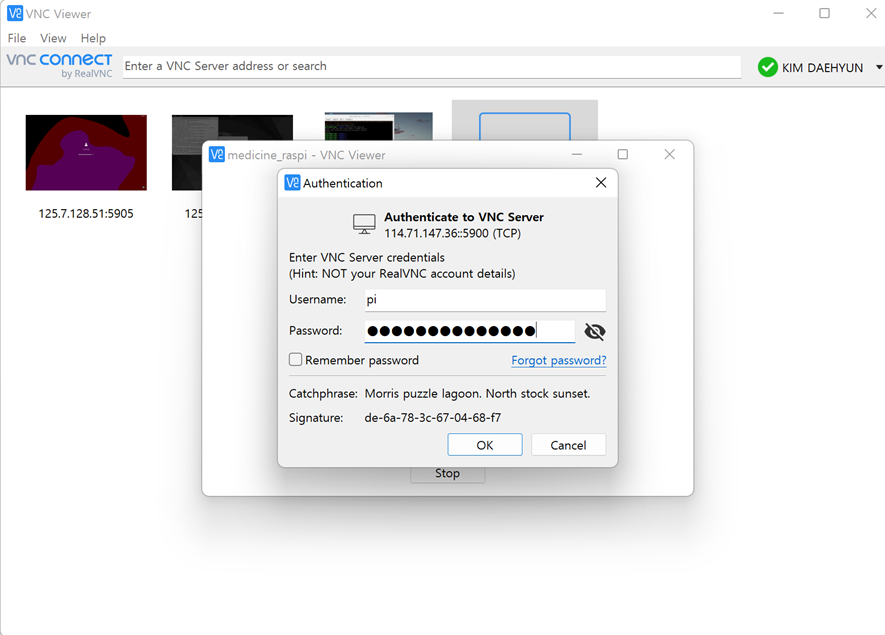
Interfacing Option > VNC > enable
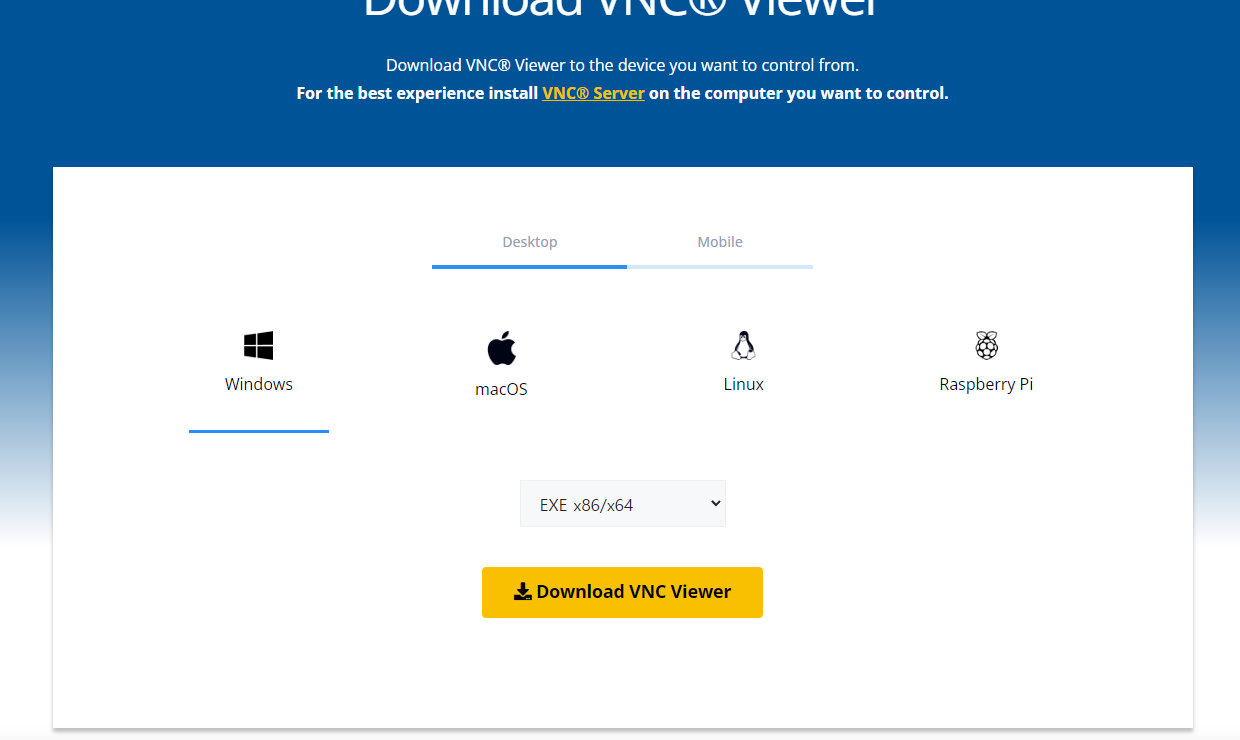
- Install Ultra VNC
https://www.realvnc.com/en/connect/download/viewer/
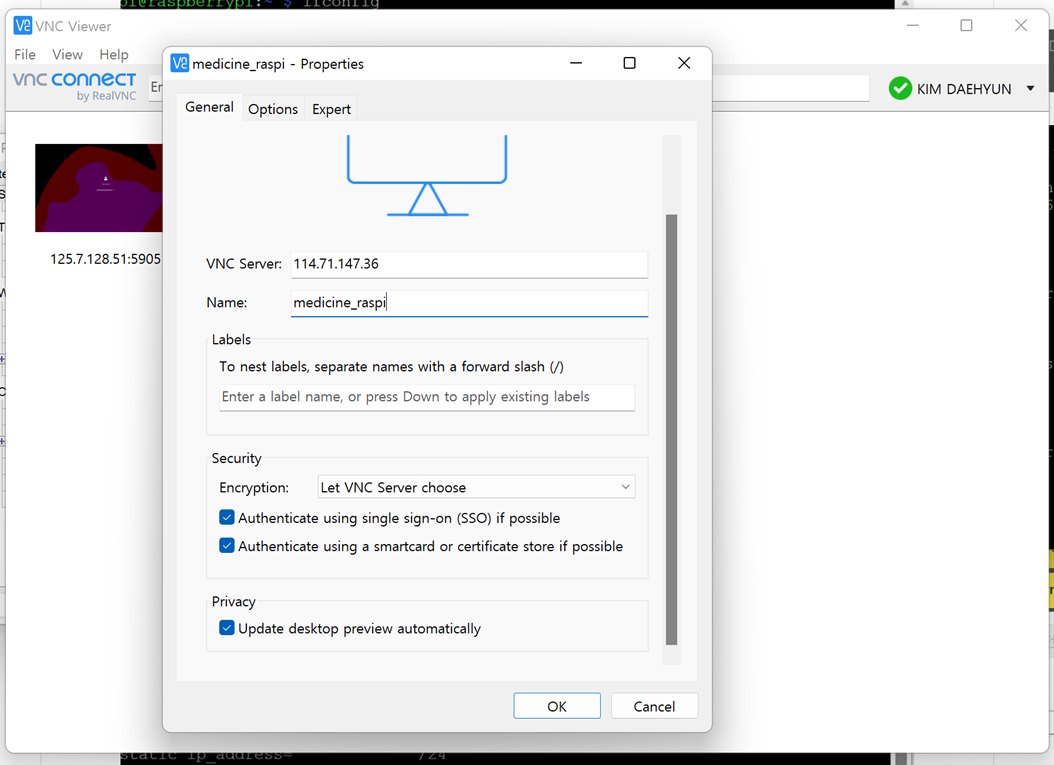
- Input IP Info & Login
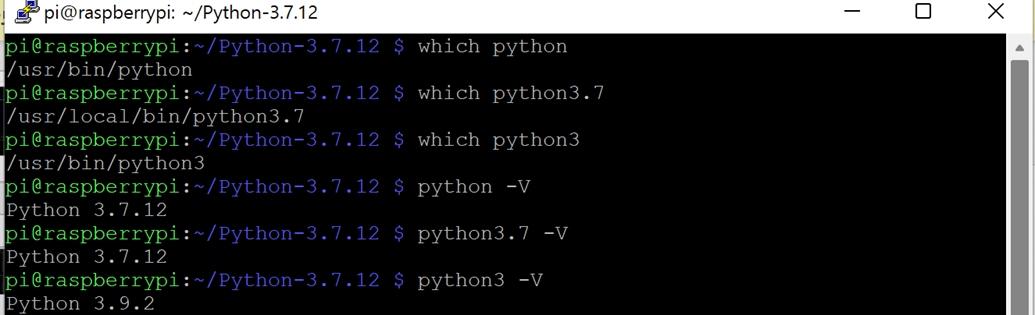
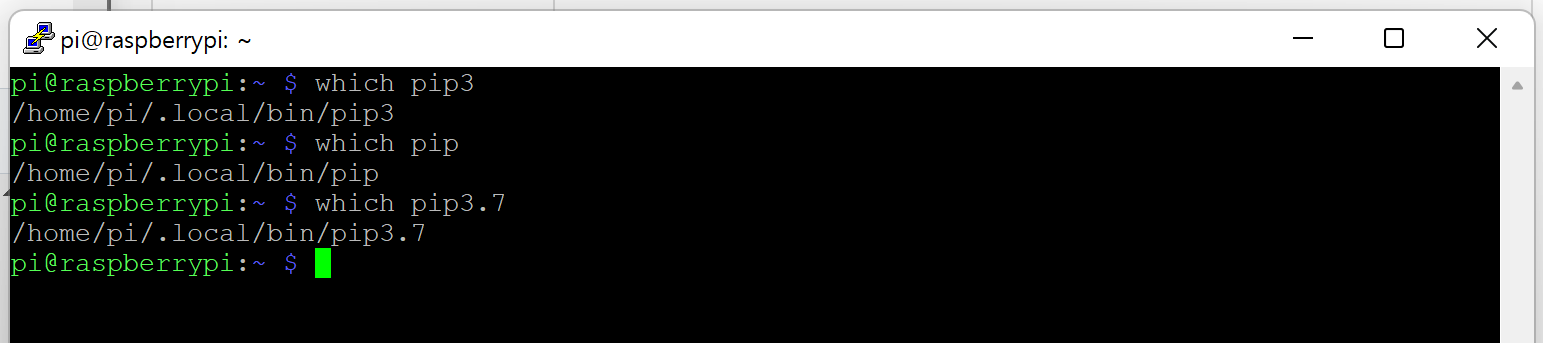
!! To use tensorflow & OpenCV in raspberrypi4, you should downgrade python version and manage dependency --- python3.7.12
- Check current version & path
which python
python -V

which python3
python3 -V
- Firmware upgrade & update
sudo apt-get update & sudo apt-get upgrade
- Install python 3.7.12
wget https://www.python.org/ftp/python/3.7.12/Python-3.7.12.tgz
sudo tar xzf Ptyhon-3.7.12.tgz

cd Python-3.7.21
./configure --enable-optimizations
sudo make -j 4
sudo make altinstall
- Change default python version
echo "alias python=/usr/local/bin/python3.7" >> ~/.bashrc
source ~/.bashrc
- Symbolic link python3.7.12 path
sudo ln -sf /usr/local/bin/python3.7 /usr/bin/python
sudo ln -sf /usr/local/bin/python3.7 /usr/bin/python3
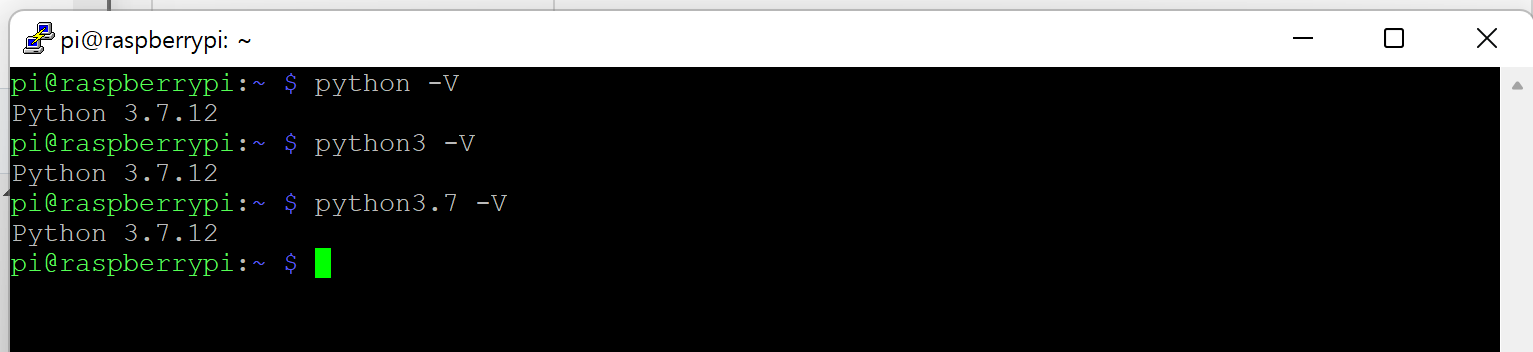
- Symblic link pip3.7 (to avoid dependency issue)
sudo ln -sf /usr/local/bin/pip3.7 /usr/bin/pip
sudo ln -sf /usr/local/bin/pip3.7 /usr/bin/pip3
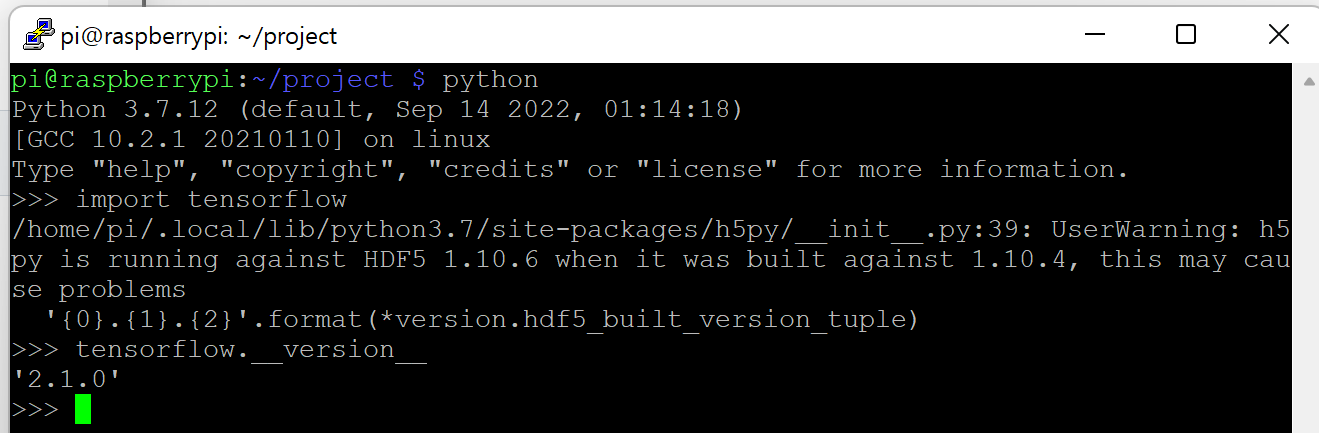
!! you should check firmware & python version and install suitable tensorflow
tensorflow-2.1.0-cp37-cp37m-linux_armv7l.whl
- Check System
uname -a

- Find & Check matching version
- Make virtual envrionment
cd Desktop
mkdir project
cd project
python3 -m pip install virtualenv
python3 -m virtualenv env
source env/bin/activate
(type 'deactivate' to quit)
- Install prerequired package
sudo apt-get install -y libhdf5-dev libc-ares-dev libeigen3-dev gcc gfortran libgfortran5 libatlas3-base libatlas-base-dev libopenblas-dev libopenblas-base libblas-dev liblapack-dev cython3 libatlas-base-dev openmpi-bin libopenmpi-dev python3-dev
pip install -U wheel mock six
sudo -H pip3 install --upgrade setuptools
- Install tensorflow (tensorflow-2.1.0-cp37-cp37m-linux_armv7l.whl)
wget https://github.com/Qengineering/Tensorflow-Raspberry-Pi/raw/master/tensorflow-2.1.0-cp37-cp37m-linux_armv7l.whl
sudo -H pip3 install tensorflow-2.1.0-cp37-cp37m-linux_armv7l.whl
sudo reboot
- Test tensorflow
python
import tensorflow
tensorflow.__version__
https://github.com/rnasterofmysea/RaspberryPi4_Yolov3
- raspberrypi upgrade
sudo apt-get -y update && sudo apt-get -y  upgrade
sudo apt-get -y install python3-dev
- install python package
pip3 install opencv-python
- install opencv library
pip3 install opencv-contrib-python
sudo apt-get install -y libatlas-base-dev libhdf5-dev libhdf5-serial-dev libatlas-base-dev libjasper-dev  libqtgui4  libqt4-test
or
sudo apt-get install libatlas-base-dev
- make test.py
import cv2
img = cv2.imread("/lenna.png")

cv2.imshow("Test",img)

img_canny = cv2.Canny(img, 50, 150)

cv2.imshow("Test img Edge", img_canny)

cv2.waitKey(0)

cv2.destroyAllWindows()
- save image in current directory
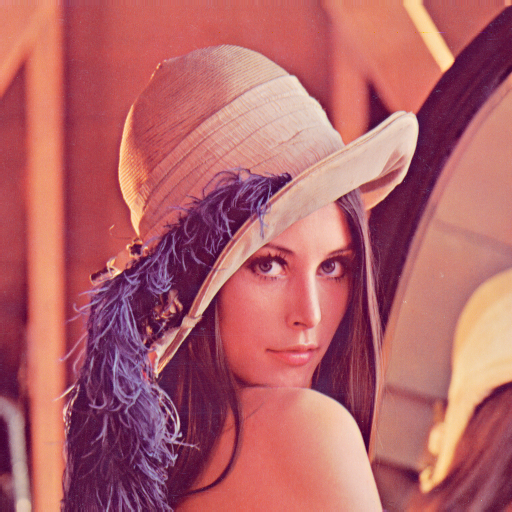
- run test.py
python test.py
sudo apt upgrade
sudo apt update
sudo apt install nginx mariadb-server php php-fpm php-mysql php-zip php-common php-zip php-xml php-mbstring php-gd php-curl -y
- check raspberry pi IP address
ifconfig
- connect [IP address]

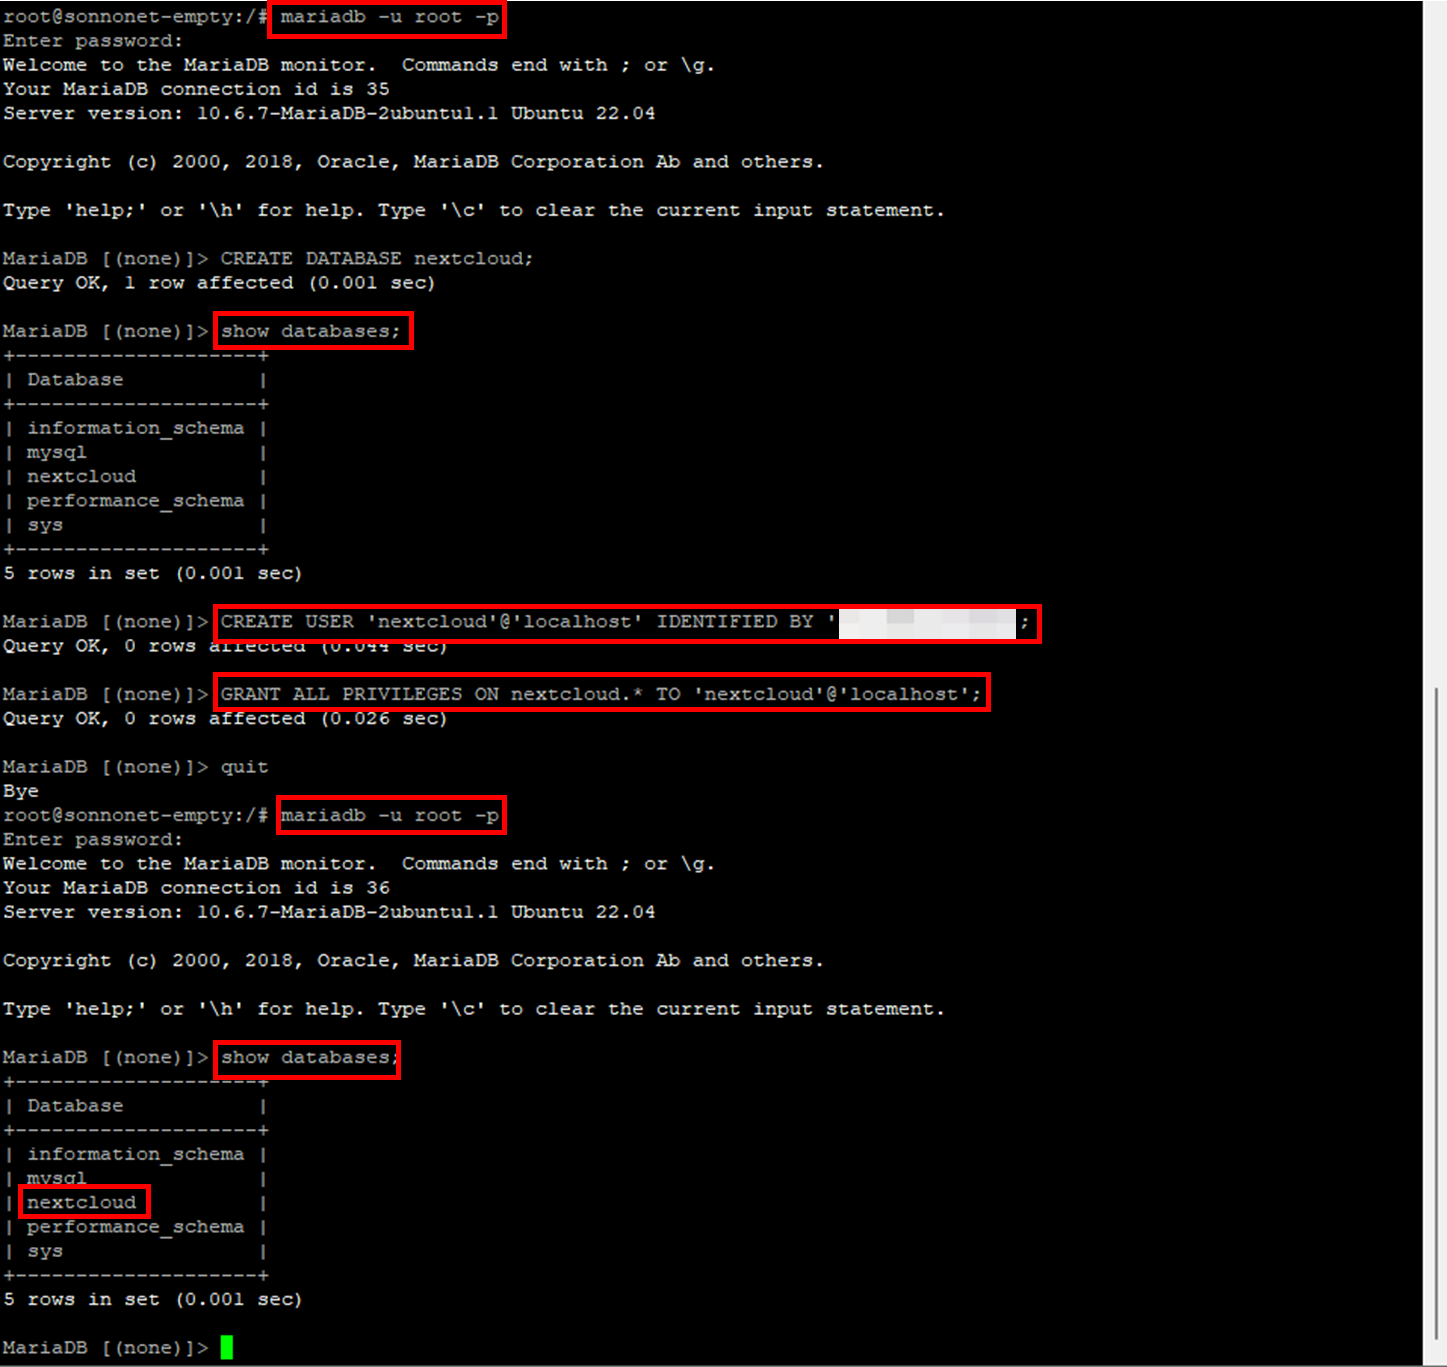
- Enter mariadb as root
sudo mariadb -u root
- Create database
MariaDB [(none)]> CREATE DATABASE nextcloud;
- Create new account
MariaDB [(none)]> CREATE USER 'nextcloud'@'localhost' IDENTIFIED BY '1234';
- Grant setting
MariaDB [(none)]> GRANT ALL PRIVILEGES ON nextcloud.* TO 'nextcloud'@'localhost';
quit
- Download zip file
wget https://download.nextcloud.com/server/releases/latest.zip
- unzip zip file
sudo rm /var/www/html/*
sudo unzip ./latest.zip -d /var/www/html/
sudo chown -R www-data:www-data /var/www/html
(auth setting)
- php 버전 확인
php -v

sudo nano /etc/nginx/sites-enabled/default
- delete code > copy & paste
upstream php-handler {
    server unix:/var/run/php/php8.1-fpm.sock;
}

server {
    listen 80;
    listen [::]:80;
    server_name localhost;

    add_header X-Content-Type-Options nosniff;
    add_header X-XSS-Protection "1; mode=block";
    add_header X-Robots-Tag none;
    add_header X-Download-Options noopen;
    add_header X-Permitted-Cross-Domain-Policies none;
    add_header Referrer-Policy no-referrer;
    fastcgi_hide_header X-Powered-By;

    root /var/www/html/nextcloud;

    location = /robots.txt {
        allow all;
        log_not_found off;
        access_log off;
    }

    location = /.well-known/carddav {
      return 301 $scheme://$host:$server_port/remote.php/dav;
    }
    location = /.well-known/caldav {
      return 301 $scheme://$host:$server_port/remote.php/dav;
    }

    client_max_body_size 512M;
    fastcgi_buffers 64 4K;

    gzip on;
    gzip_vary on;
    gzip_comp_level 4;
    gzip_min_length 256;
    gzip_proxied expired no-cache no-store private no_last_modified no_etag auth;
    gzip_types application/atom+xml application/javascript application/json application/ld+json application/manifest+json application/rss+xml applicaEnter this intion/vnd.geo+json application/vnd.ms-fontobject application/x-font-ttf application/x-web-app-manifest+json application/xhtml+xml application/xml font/opentype image/bmp image/svg+xml image/x-icon text/cache-manifest text/css text/plain text/vcard text/vnd.rim.location.xloc text/vtt text/x-component text/x-cross-domain-policy;

    location / {
        rewrite ^ /index.php;
    }

    location ~ ^\/(?:build|tests|config|lib|3rdparty|templates|data)\/ {
        deny all;
    }
    location ~ ^\/(?:\.|autotest|occ|issue|indie|db_|console) {
        deny all;
    }

    location ~ ^\/(?:index|remote|public|cron|core\/ajax\/update|status|ocs\/v[12]|updater\/.+|oc[ms]-provider\/.+)\.php(?:$|\/) {
        fastcgi_split_path_info ^(.+?\.php)(\/.*|)$;
        set $path_info $fastcgi_path_info;
        try_files $fastcgi_script_name =404;
        include fastcgi_params;
        fastcgi_read_timeout 1800;
        fastcgi_param SCRIPT_FILENAME $document_root$fastcgi_script_name;
        fastcgi_param PATH_INFO $path_info;
        fastcgi_param modHeadersAvailable true;
        fastcgi_param front_controller_active true;
        fastcgi_pass php-handler;
        fastcgi_intercept_errors on;
        fastcgi_request_buffering off;
    }

    location ~ ^\/(?:updater|oc[ms]-provider)(?:$|\/) {
        try_files $uri/ =404;
        index index.php;
    }

    location ~ \.(?:css|js|woff2?|svg|gif|map)$ {
        try_files $uri /index.php$request_uri;
        add_header Cache-Control "public, max-age=15778463";
        add_header X-Content-Type-Options nosniff;
        add_header X-XSS-Protection "1; mode=block";
        add_header X-Robots-Tag none;
        add_header X-Download-Options noopen;
        add_header X-Permitted-Cross-Domain-Policies none;
        add_header Referrer-Policy no-referrer;

        access_log off;
    }

    location ~ \.(?:png|html|ttf|ico|jpg|jpeg|bcmap)$ {
        try_files $uri /index.php$request_uri;
        access_log off;
    }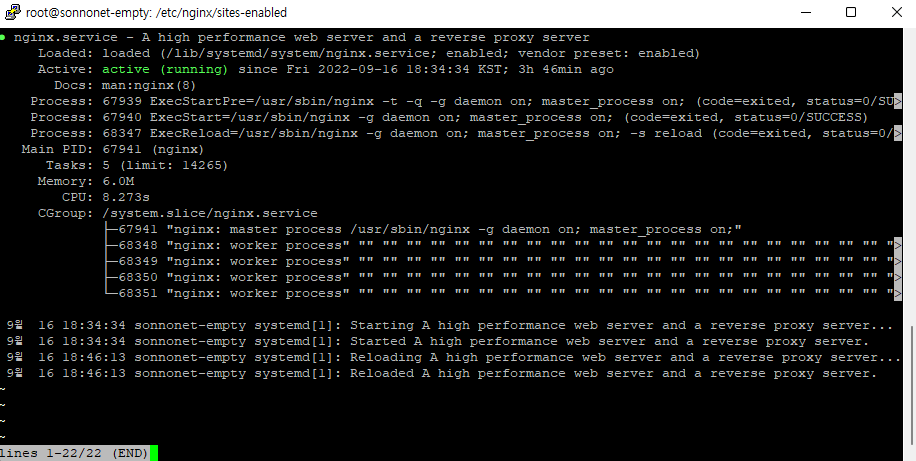
}- Reload nginx
sudo nginx -s reload
- nginx 상태 확인
service nginx status
- http://도메인 주소 또는 IP
http://127.0.0.1/

http://localhost/
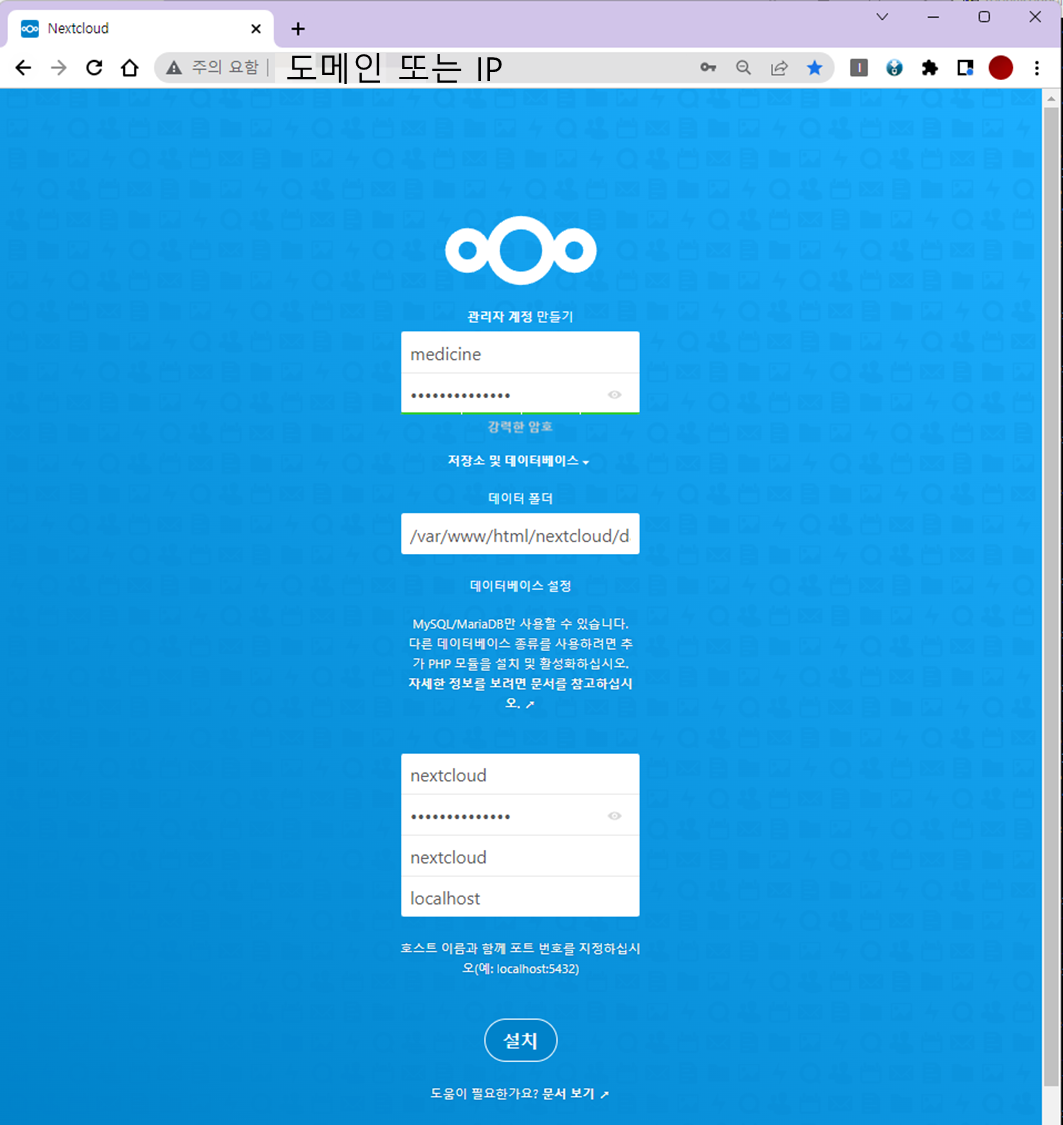
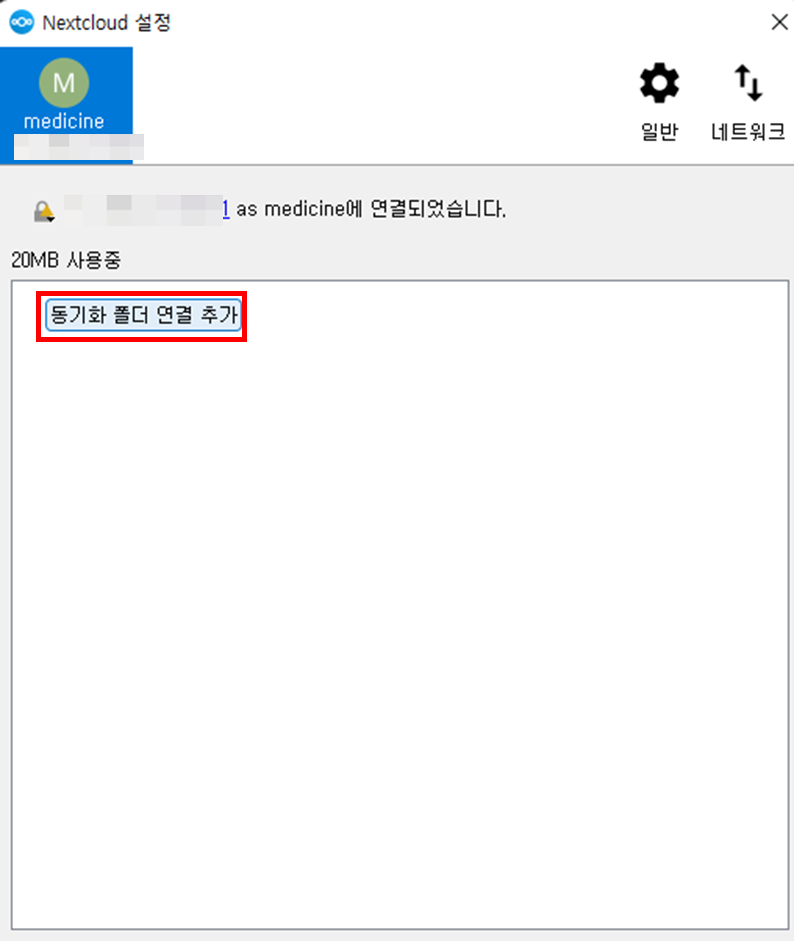
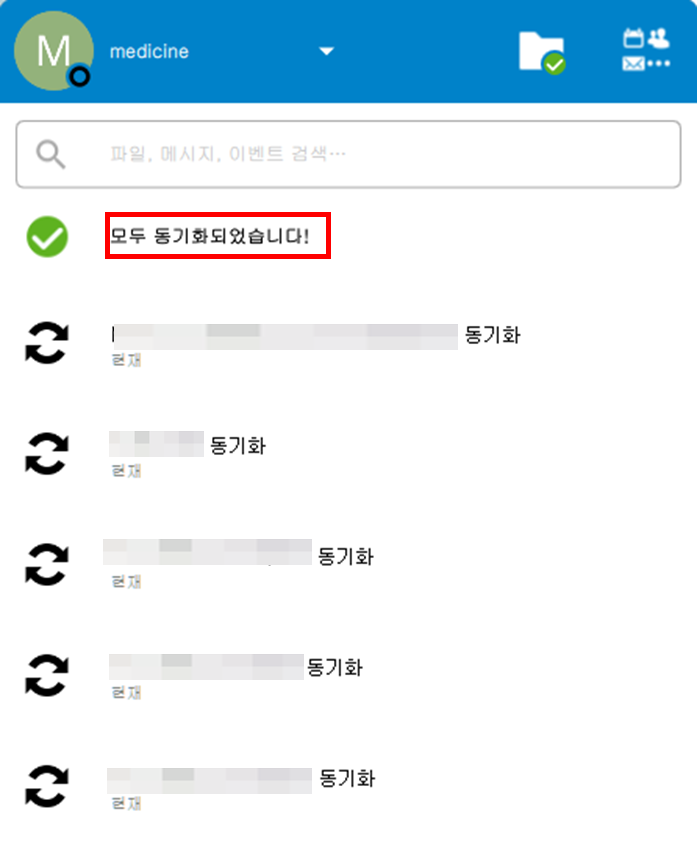
- 로컬PC의 nextlcoud 실행 후 프로필 => 설정

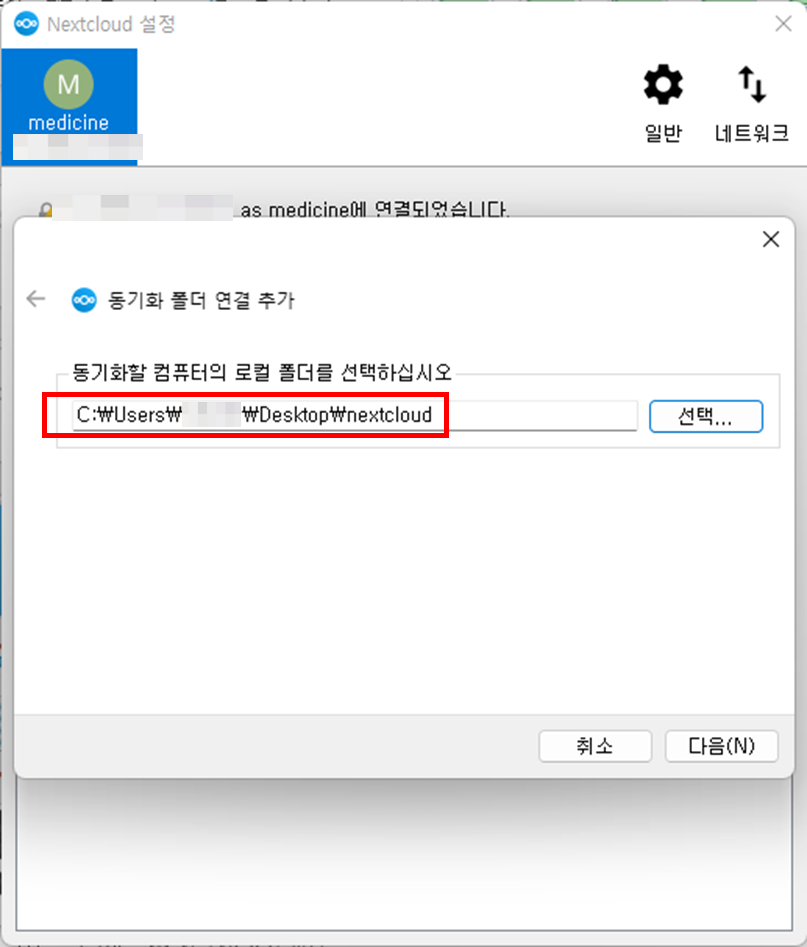
- 동기화 폴더 연결 추가
- 동기화 할 로컬 폴더 선택
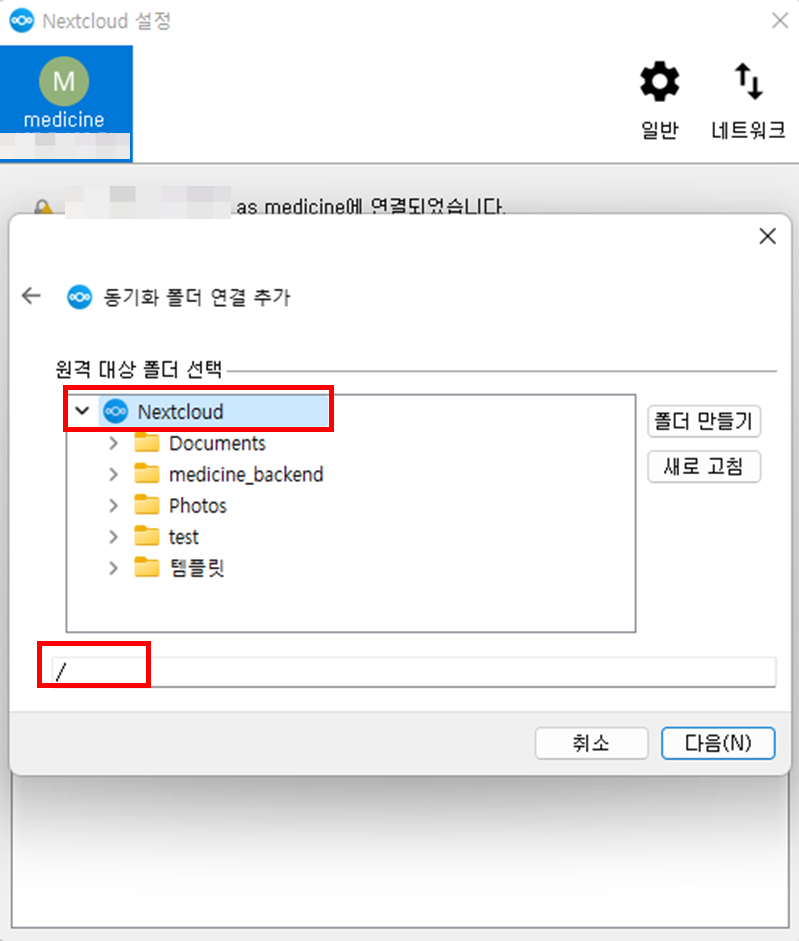
- nextcloud의 원격 대상 폴더 선택
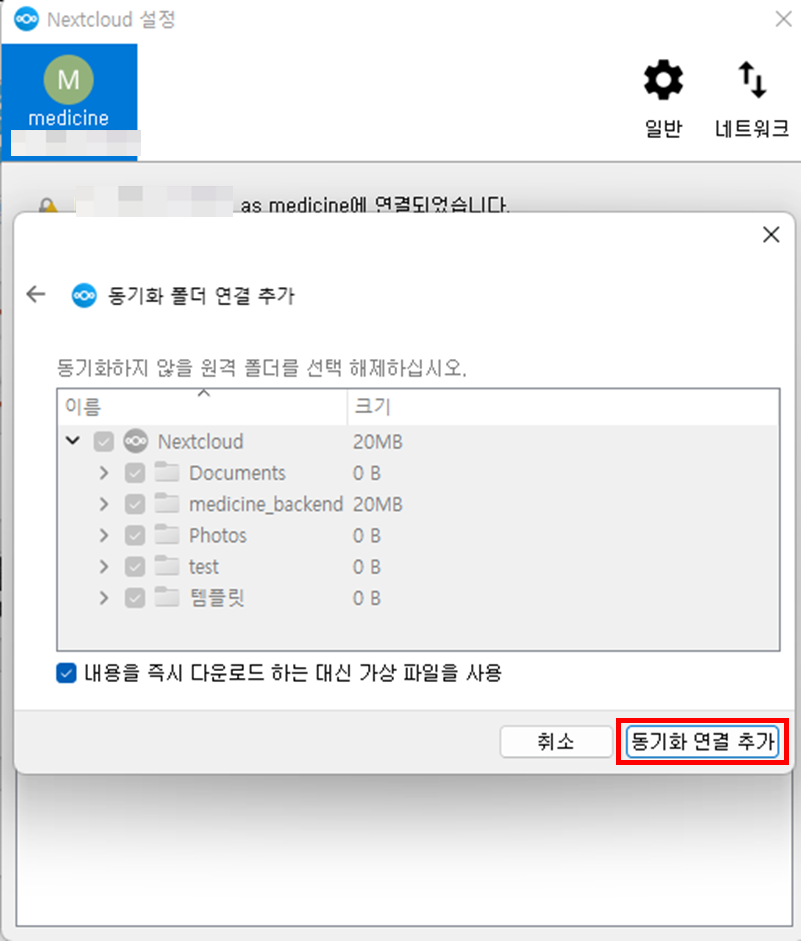
- 동기화하지 않을 원격 폴더 선택
- nextcloud와 로컬 PC 연동 완료
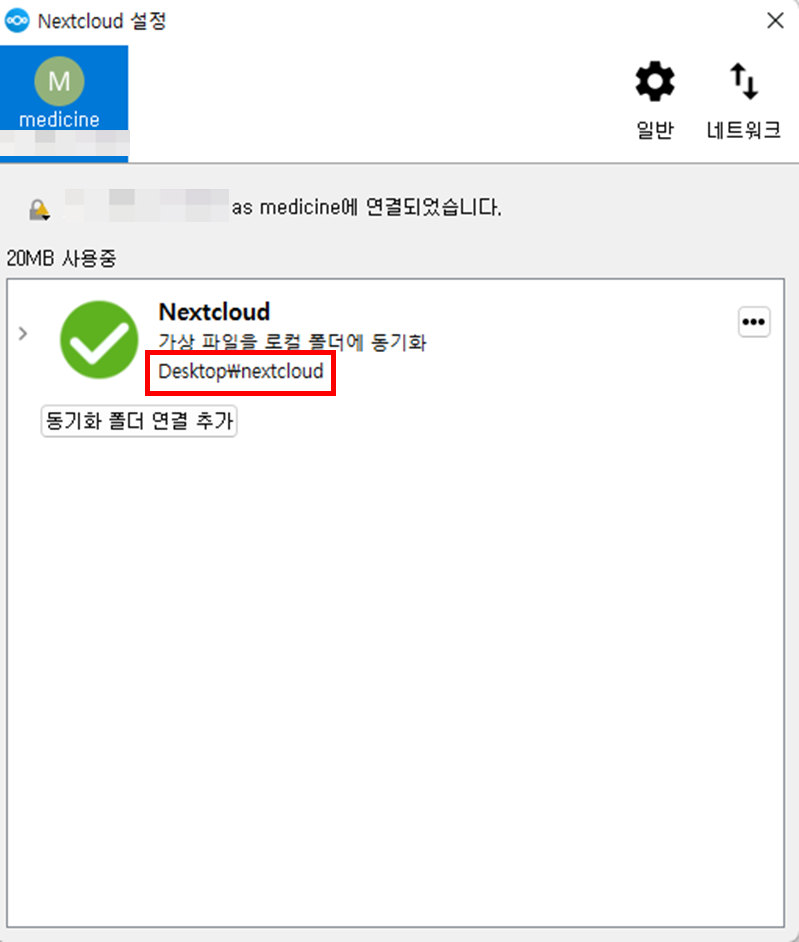
- 동기화 확인
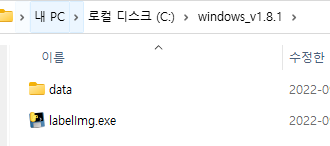
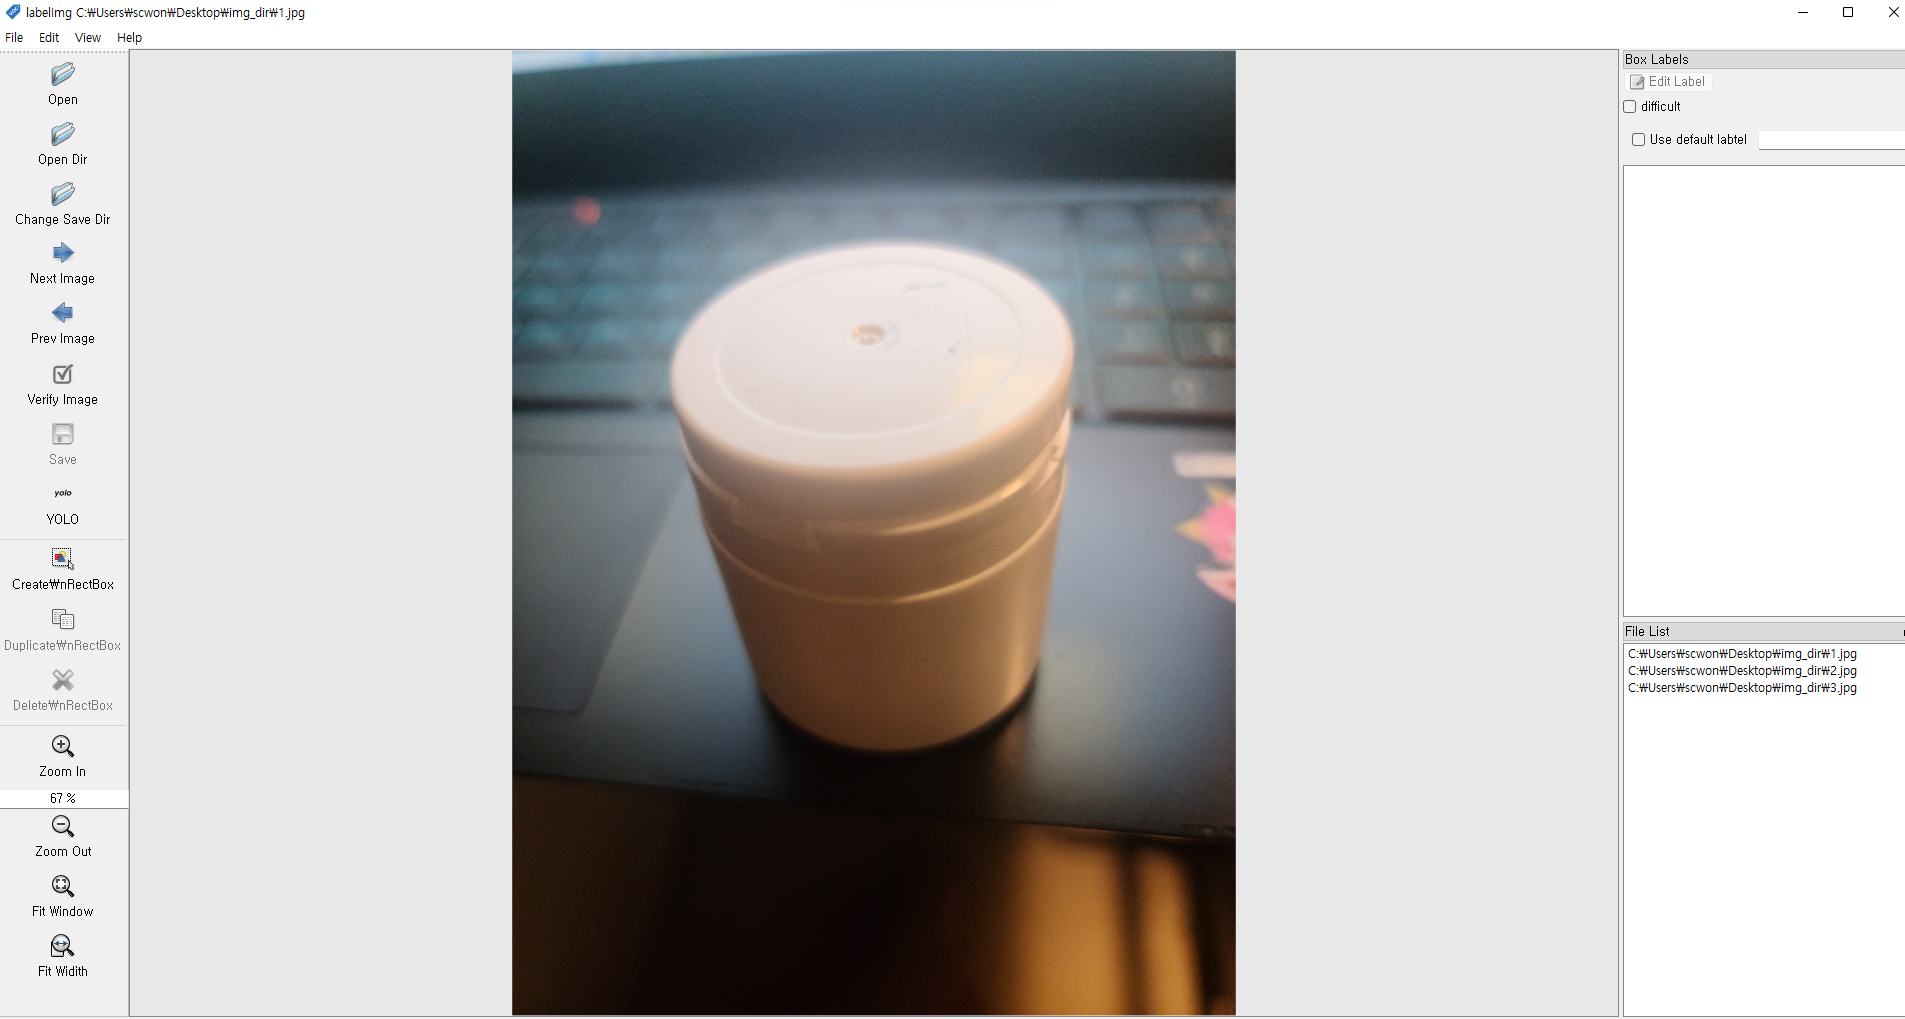
- ./windows_v1.8.1/data
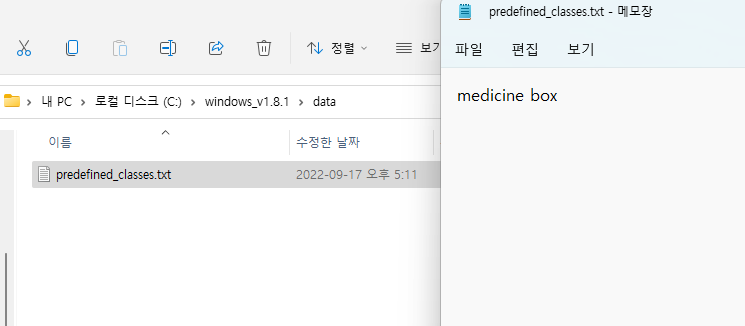
- 클래스를 추가할 수 있는 txt파일
- ./windows_v1.8.1/labelImg.exe
- 실행파일
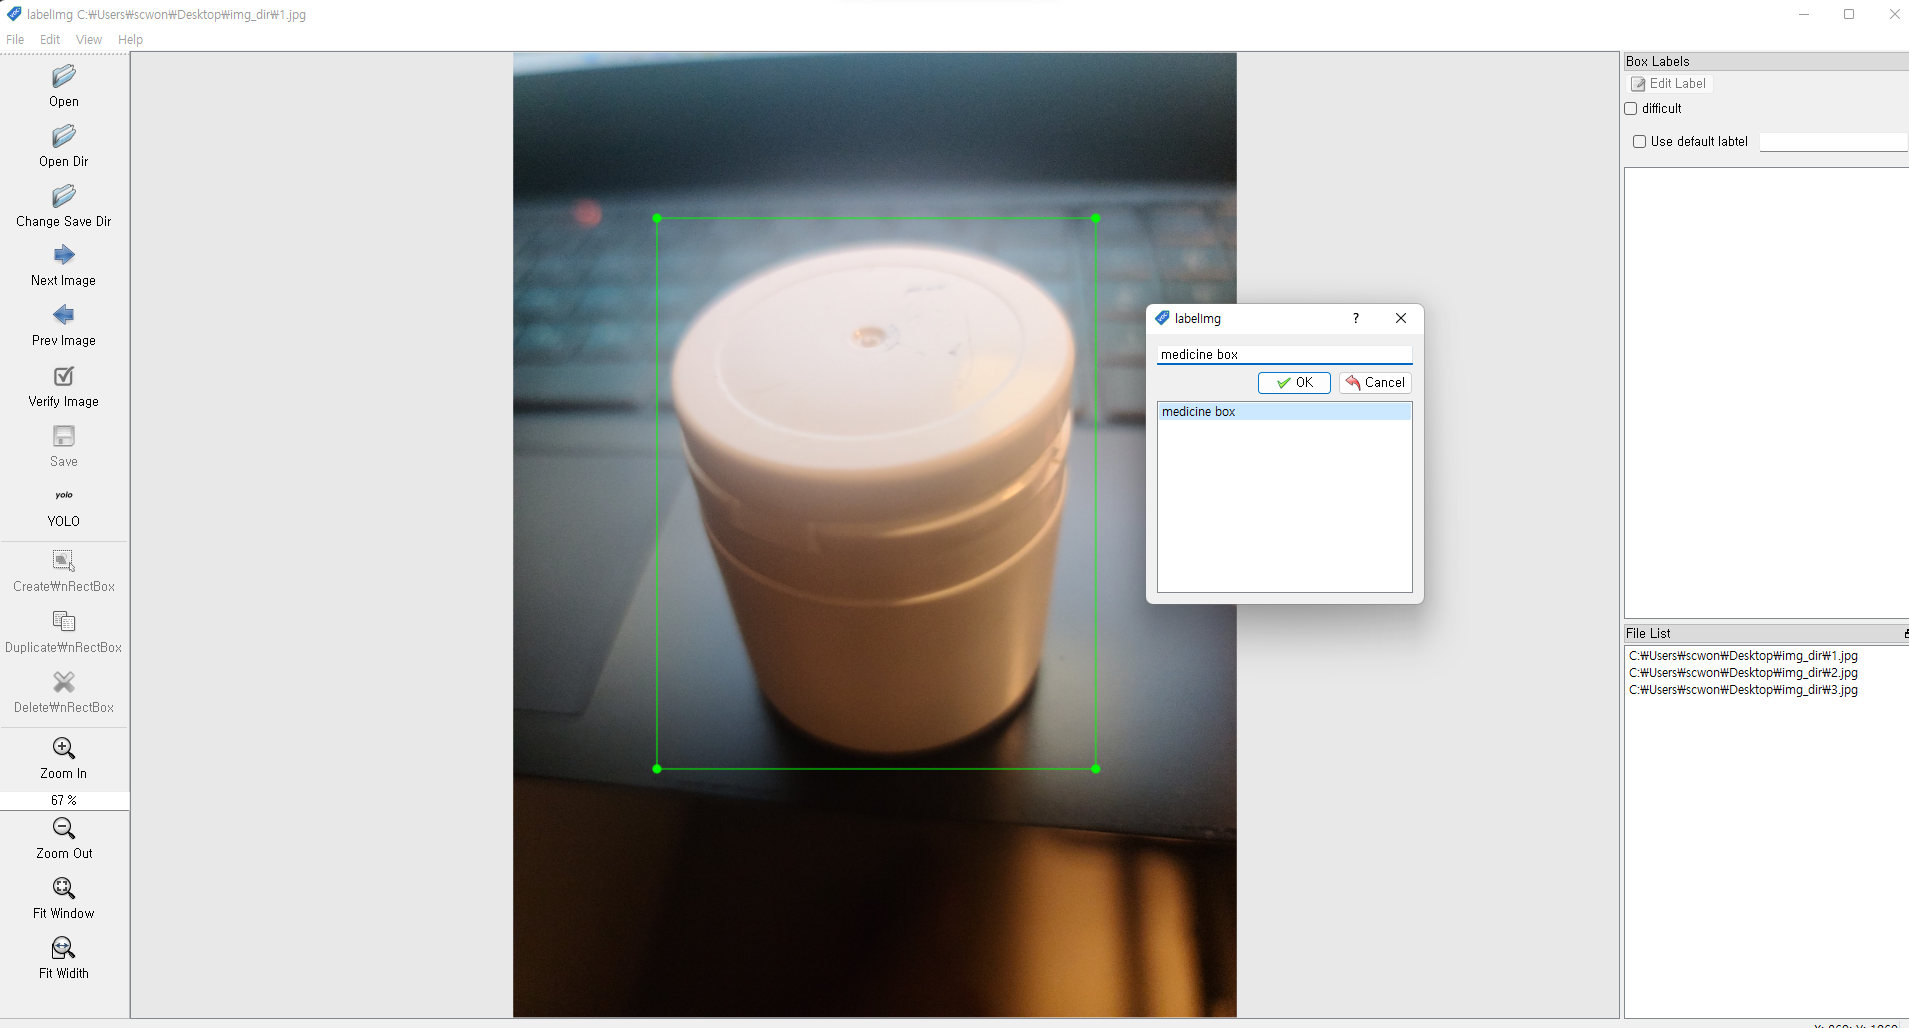
- medicine box를 추가
- 1번 클릭하여
YOLO로 변경 - 2번 클릭 후 라벨링할 이미지 파일을 선택
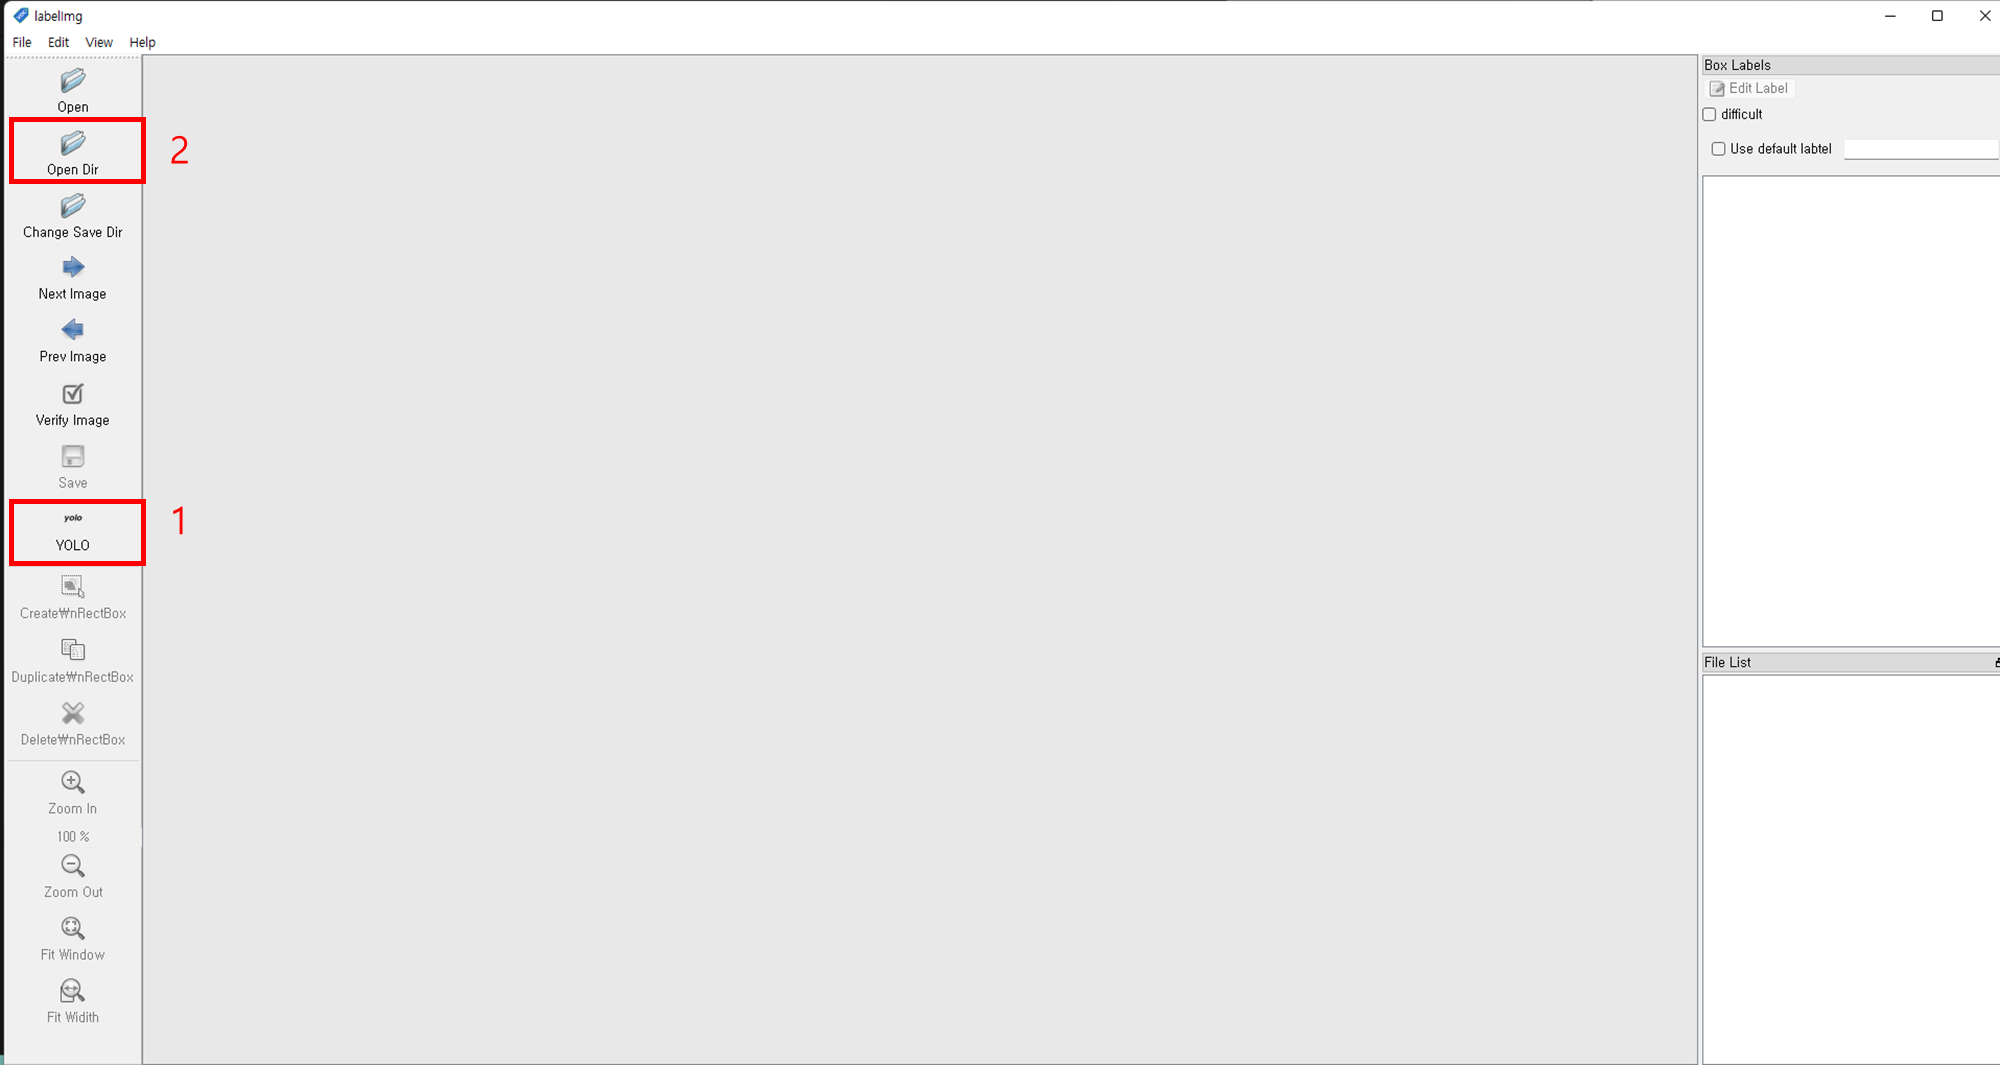
- 키보드
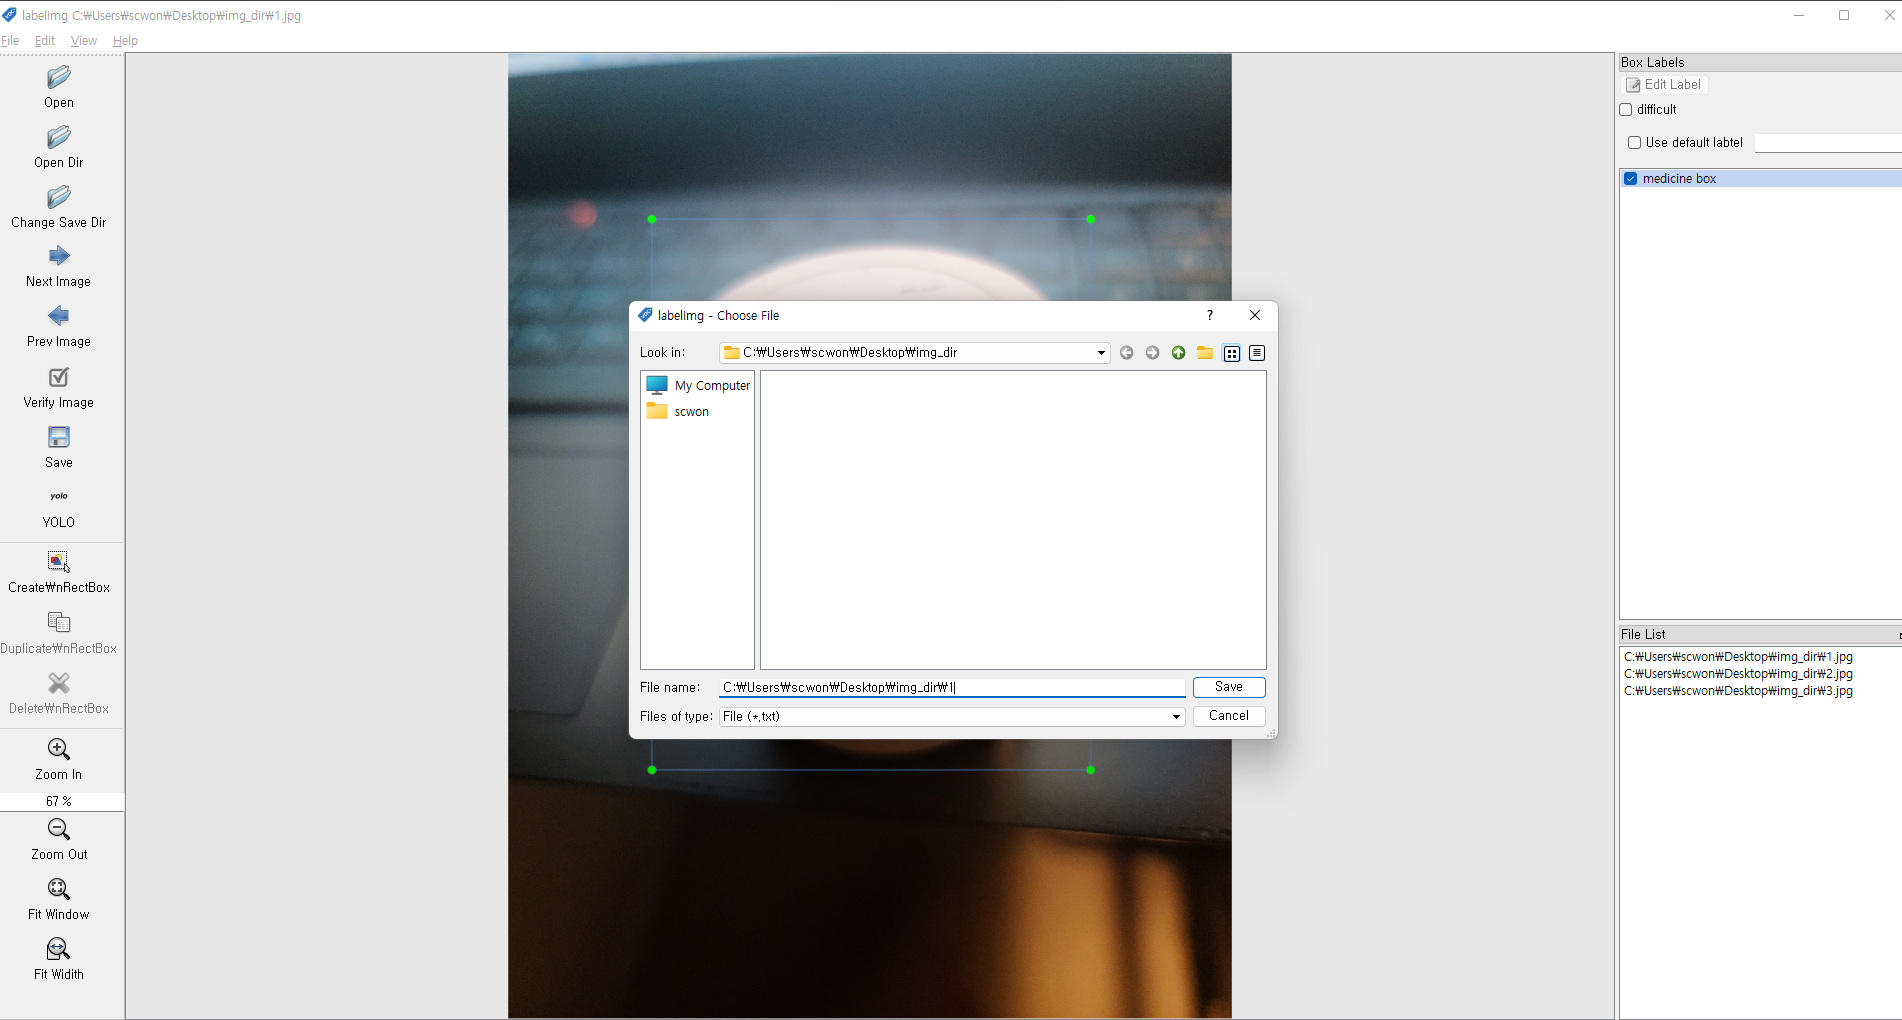
w클릭하여 이미지 라벨링 - txt파일에서 추가시킨 class명을 선택
- 저장하여 txt파일 추가
- 키보드
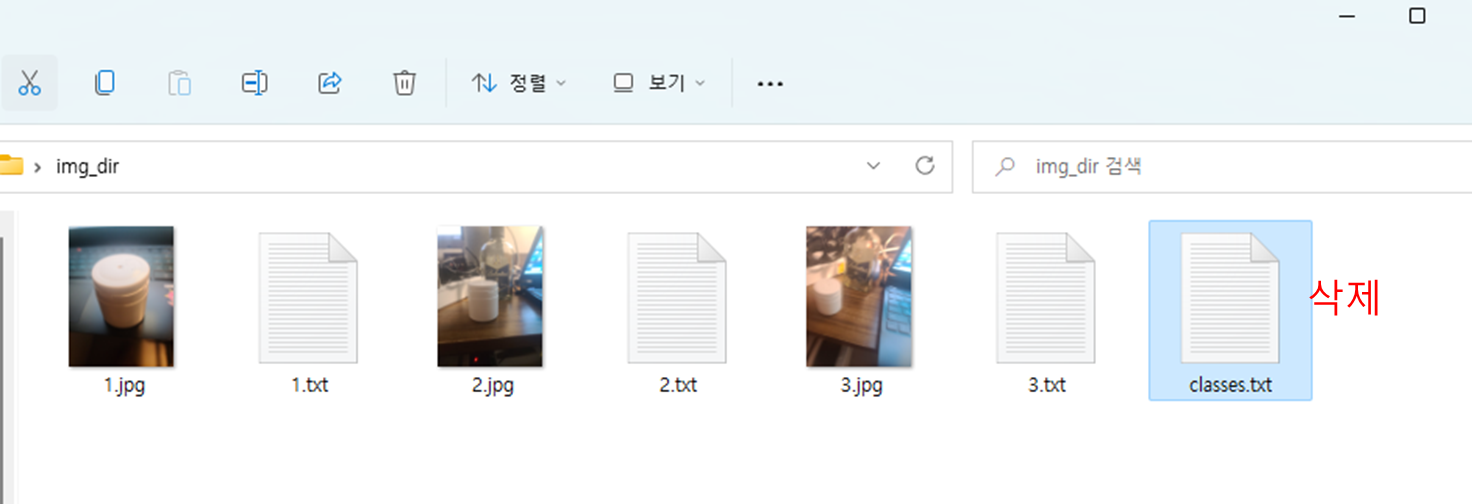
d를 눌러 다음 이미지로 전환 - 학습시킬 이미지 파일에 이동하여
classes.txt파일 삭제
- txt파일에는 이미지의 라벨링 좌표값이 저장되어있다.

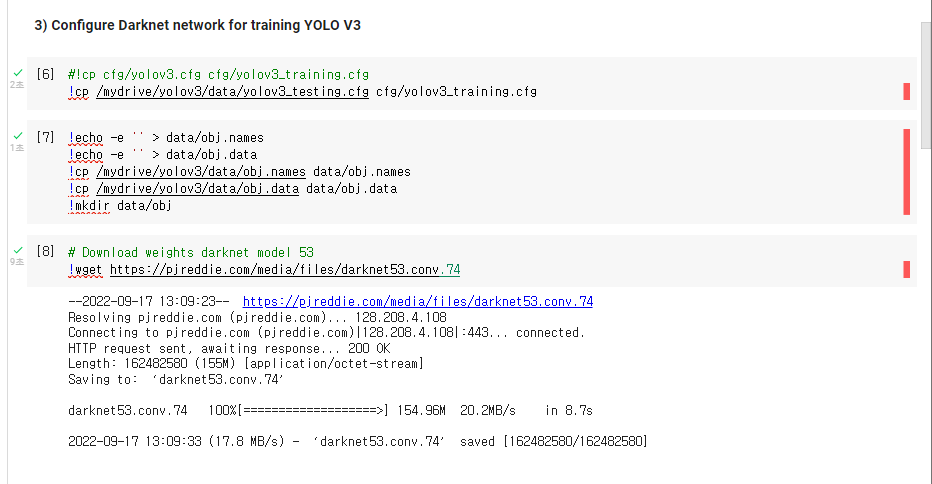
yolov3_testing.cfg: YOLO3 config 파일yolov3_training_last.weights: 학습된 YOLO3 가중치 데이터
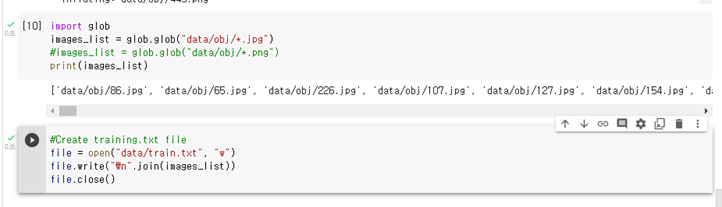
import cv2
import numpy as np
from google.colab.patches import cv2_imshow

net = cv2.dnn.readNet("../gdrive/MyDrive/yolov3/yolov3_training_last.weights", "cfg/yolov3_training.cfg")
classes = []
with open("./data/coco.names", "r") as f:
    classes = [line.strip() for line in f.readlines()]
layer_names = net.getLayerNames()
output_layers = [layer_names[i - 1] for i in net.getUnconnectedOutLayers()]
colors = np.random.uniform(0, 255, size=(len(classes), 3))
img = cv2.imread("test_medicine2.jpg")
img = cv2.resize(img, None, fx=0.4, fy=0.4)
height, width, channels = img.shape
blob = cv2.dnn.blobFromImage(img, 0.00392, (416, 416), (0, 0, 0), True, crop=False)
net.setInput(blob)
outs = net.forward(output_layers)
class_ids = []
confidences = []
boxes = []
flag = "flag"
for out in outs:
    for detection in out:
        scores = detection[5:]
        class_id = np.argmax(scores)
        confidence = scores[class_id]
        if confidence > 0.5:
            flag = str(confidence)
            center_x = int(detection[0] * width)
            center_y = int(detection[1] * height)
            w = int(detection[2] * width)
            h = int(detection[3] * height)
            x = int(center_x - w / 2)
            y = int(center_y - h / 2)
            boxes.append([x, y, w, h])
            confidences.append(float(confidence))
            class_ids.append(class_id)
            indexes = cv2.dnn.NMSBoxes(boxes, confidences, 0.5, 0.4)
            from google.colab.patches import cv2_imshow
font = cv2.FONT_HERSHEY_PLAIN
for i in range(len(boxes)):
    if i in indexes:
        x, y, w, h = boxes[i]
        label = str(classes[class_ids[i]])
        color = colors[i]
        cv2.rectangle(img, (x, y), (x + w, y + h), color, 2)
        cv2.putText(img, label+flag, (x, y + 30), font, 3, color, 3)
cv2_imshow(img)
cv2.waitKey(0)
cv2.destroyAllWindows()- setting url path by "By"
from selenium import webdriver
from selenium.webdriver.chrome.service import Service
from webdriver_manager.chrome import ChromeDriverManager
from selenium.webdriver.common.keys import Keys
from selenium.webdriver.common.by import By
import time
import urllib.request
import os

#def set_chrome_driver():
#    chrome_options = webdriver.ChromeOptions()
#    driver = webdriver.Chrome(service=Service(ChromeDriverManager().install()), options=chrome_options)
#    return driver

def createDirectory(directory):
    try:
        if not os.path.exists(directory):
            os.makedirs(directory)
    except OSError:
        print("Error: Failed to create the directory.")

def crawling_img(name):
#     driver = webdriver.Chrome("D:\chromedriver\chromedriver")
    options = webdriver.ChromeOptions()
    options.add_argument('--headless')
    options.add_argument('--no-sandbox')
    options.add_argument('--disable-dev-shm-usage')
    driver = webdriver.Chrome(executable_path="/usr/bin/chromedriver",options=options)
    #driver = set_chrome_driver()
    driver.get("https://www.google.co.kr/imghp?hl=ko&tab=wi&authuser=0&ogbl")
    elem = driver.find_element(By.NAME,"q")
    elem.send_keys(name)
    elem.send_keys(Keys.RETURN)

    #
    SCROLL_PAUSE_TIME = 1
    # Get scroll height
    last_height = driver.execute_script("return document.body.scrollHeight")  # 브라우저의 높이를 자바스크립트로 찾음
    while True:
        # Scroll down to bottom
        driver.execute_script("window.scrollTo(0, document.body.scrollHeight);")  # 브라우저 끝까지 스크롤을 내림
        # Wait to load page
        time.sleep(SCROLL_PAUSE_TIME)
        # Calculate new scroll height and compare with last scroll height
        new_height = driver.execute_script("return document.body.scrollHeight")
        if new_height == last_height:
            try:
                driver.find_element(BY.CSS_SELECTOR,".mye4qd").click()
            except:
                break
        last_height = new_height

    imgs = driver.find_elements(By.CSS_SELECTOR, ".rg_i.Q4LuWd")
    dir = "./before" + "/" + name + "1"
    createDirectory(dir) #폴더 생성
    count = 1
    for img in imgs:
        try:
            img.click()
            time.sleep(2)
            imgUrl = driver.find_element(By.XPATH,
                '/html/body/div[2]/c-wiz/div[3]/div[1]/div/div/div/div[1]/div[1]/span/div[1]/div[1]/div[1]/a[1]/div[1]/img').get_attribute(
                "src")
            path = "./before" + "/" + name + "1/"
            urllib.request.urlretrieve(imgUrl, path + name + str(count) + ".jpg")
            count = count + 1
            if count >= 1000:
                break
        except:
            pass
    driver.close()
idols = ["white pill bottle"]
for idol in idols:
    crawling_img(idol)
from selenium import webdriver
from selenium.webdriver.chrome.service import Service
from webdriver_manager.chrome import ChromeDriverManager
from selenium.webdriver.common.keys import Keys
from selenium.webdriver.common.by import By
import time
import urllib.request
import os

def set_chrome_driver():
    chrome_options = webdriver.ChromeOptions()
    driver = webdriver.Chrome(service=Service(ChromeDriverManager().install()), options=chrome_options)
    return driver

def createDirectory(directory):
    try:
        if not os.path.exists(directory):
            os.makedirs(directory)
    except OSError:
        print("Error: Failed to create the directory.")

def crawling_img(name):
#     driver = webdriver.Chrome("D:\chromedriver\chromedriver")
    driver = set_chrome_driver()
    driver.get("https://www.google.co.kr/imghp?hl=ko&tab=wi&authuser=0&ogbl")
    elem = driver.find_element(By.NAME,"q")
    elem.send_keys(name)
    elem.send_keys(Keys.RETURN)

    #
    SCROLL_PAUSE_TIME = 1
    # Get scroll height
    last_height = driver.execute_script("return document.body.scrollHeight")  # 브라우저의 높이를 자바스크립트로 찾음
    while True:
        # Scroll down to bottom
        driver.execute_script("window.scrollTo(0, document.body.scrollHeight);")  # 브라우저 끝까지 스크롤을 내림
        # Wait to load page
        time.sleep(SCROLL_PAUSE_TIME)
        # Calculate new scroll height and compare with last scroll height
        new_height = driver.execute_script("return document.body.scrollHeight")
        if new_height == last_height:
            try:
                driver.find_element(BY.CSS_SELECTOR,".mye4qd").click()
            except:
                break
        last_height = new_height

    imgs = driver.find_elements(By.CSS_SELECTOR, ".rg_i.Q4LuWd")
    dir = ".\idols" + "\\" + name
    createDirectory(dir) #폴더 생성
    count = 1
    for img in imgs:
        try:
            img.click()
            time.sleep(2)
            #저장할 이미지 경로 및
            imgUrl = driver.find_element(By.XPATH,
                '/html/body/div[2]/c-wiz/div[3]/div[1]/div/div/div/div[1]/div[1]/span/div[1]/div[1]/div[1]/a[1]/div[1]/img').get_attribute(
                "src")
            path = ".\idols" + "\\" + name + "\\"
            urllib.request.urlretrieve(imgUrl, path + name + str(count) + ".jpg")
            count = count + 1
            if count >= 10:
                break
        except:
            pass
    driver.close()
idols = ["white pill bottle"]
for idol in idols:
    crawling_img(idol)
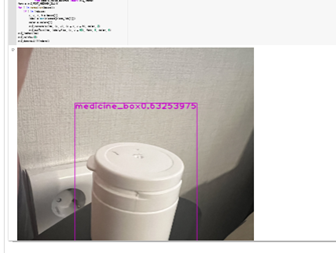
import cv2
import numpy as np
from google.colab.patches import cv2_imshow
# 웹캠 신호 받기
VideoSignal = cv2.VideoCapture("http://182.226.36.189:6974/?action=stream")
# YOLO 가중치 파일과 CFG 파일 로드
YOLO_net = cv2.dnn.readNet("../gdrive/MyDrive/yolov3/yolov3_training_last.weights","cfg/yolov3_training.cfg")

# YOLO NETWORK 재구성
classes = []
with open("./data/coco.names", "r") as f:
    classes = [line.strip() for line in f.readlines()]
layer_names = YOLO_net.getLayerNames()
output_layers = [layer_names[i - 1] for i in net.getUnconnectedOutLayers()]

while True:
    # 웹캠 프레임
    ret, frame = VideoSignal.read()
    h, w, c = frame.shape

    # YOLO 입력
    blob = cv2.dnn.blobFromImage(frame, 0.00392, (416, 416), (0, 0, 0),
    True, crop=False)
    YOLO_net.setInput(blob)
    outs = YOLO_net.forward(output_layers)

    class_ids = []
    confidences = []
    boxes = []

    for out in outs:

        for detection in out:

            scores = detection[5:]
            class_id = np.argmax(scores)
            confidence = scores[class_id]

            if confidence > 0.5:
                # Object detected
                center_x = int(detection[0] * w)
                center_y = int(detection[1] * h)
                dw = int(detection[2] * w)
                dh = int(detection[3] * h)
                # Rectangle coordinate
                x = int(center_x - dw / 2)
                y = int(center_y - dh / 2)
                boxes.append([x, y, dw, dh])
                confidences.append(float(confidence))
                class_ids.append(class_id)
                indexes = cv2.dnn.NMSBoxes(boxes, confidences, 0.45, 0.4)


    for i in range(len(boxes)):
        if i in indexes:
            x, y, w, h = boxes[i]
            label = str(classes[class_ids[i]])
            score = confidences[i]

            # 경계상자와 클래스 정보 이미지에 입력
            cv2.rectangle(frame, (x, y), (x + w, y + h), (0, 0, 255), 5)
            cv2.putText(frame, label, (x, y - 20), cv2.FONT_ITALIC, 0.5,
            (255, 255, 255), 1)
    from google.colab.patches import cv2_imshow
    cv2_imshow(frame)

    if cv2.waitKey(100) > 0:
        break
-
1초당 10 프레임 (10fps)
-
인식 확인
-
보안 사항
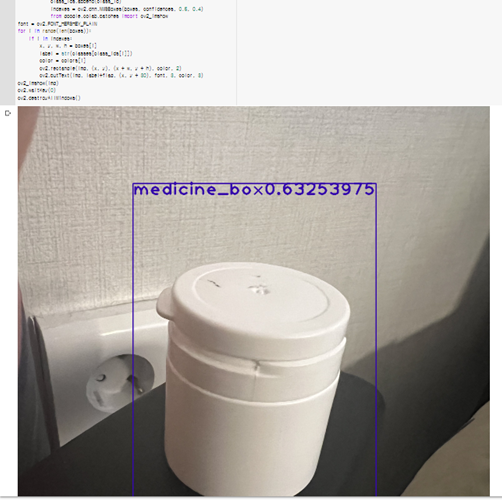
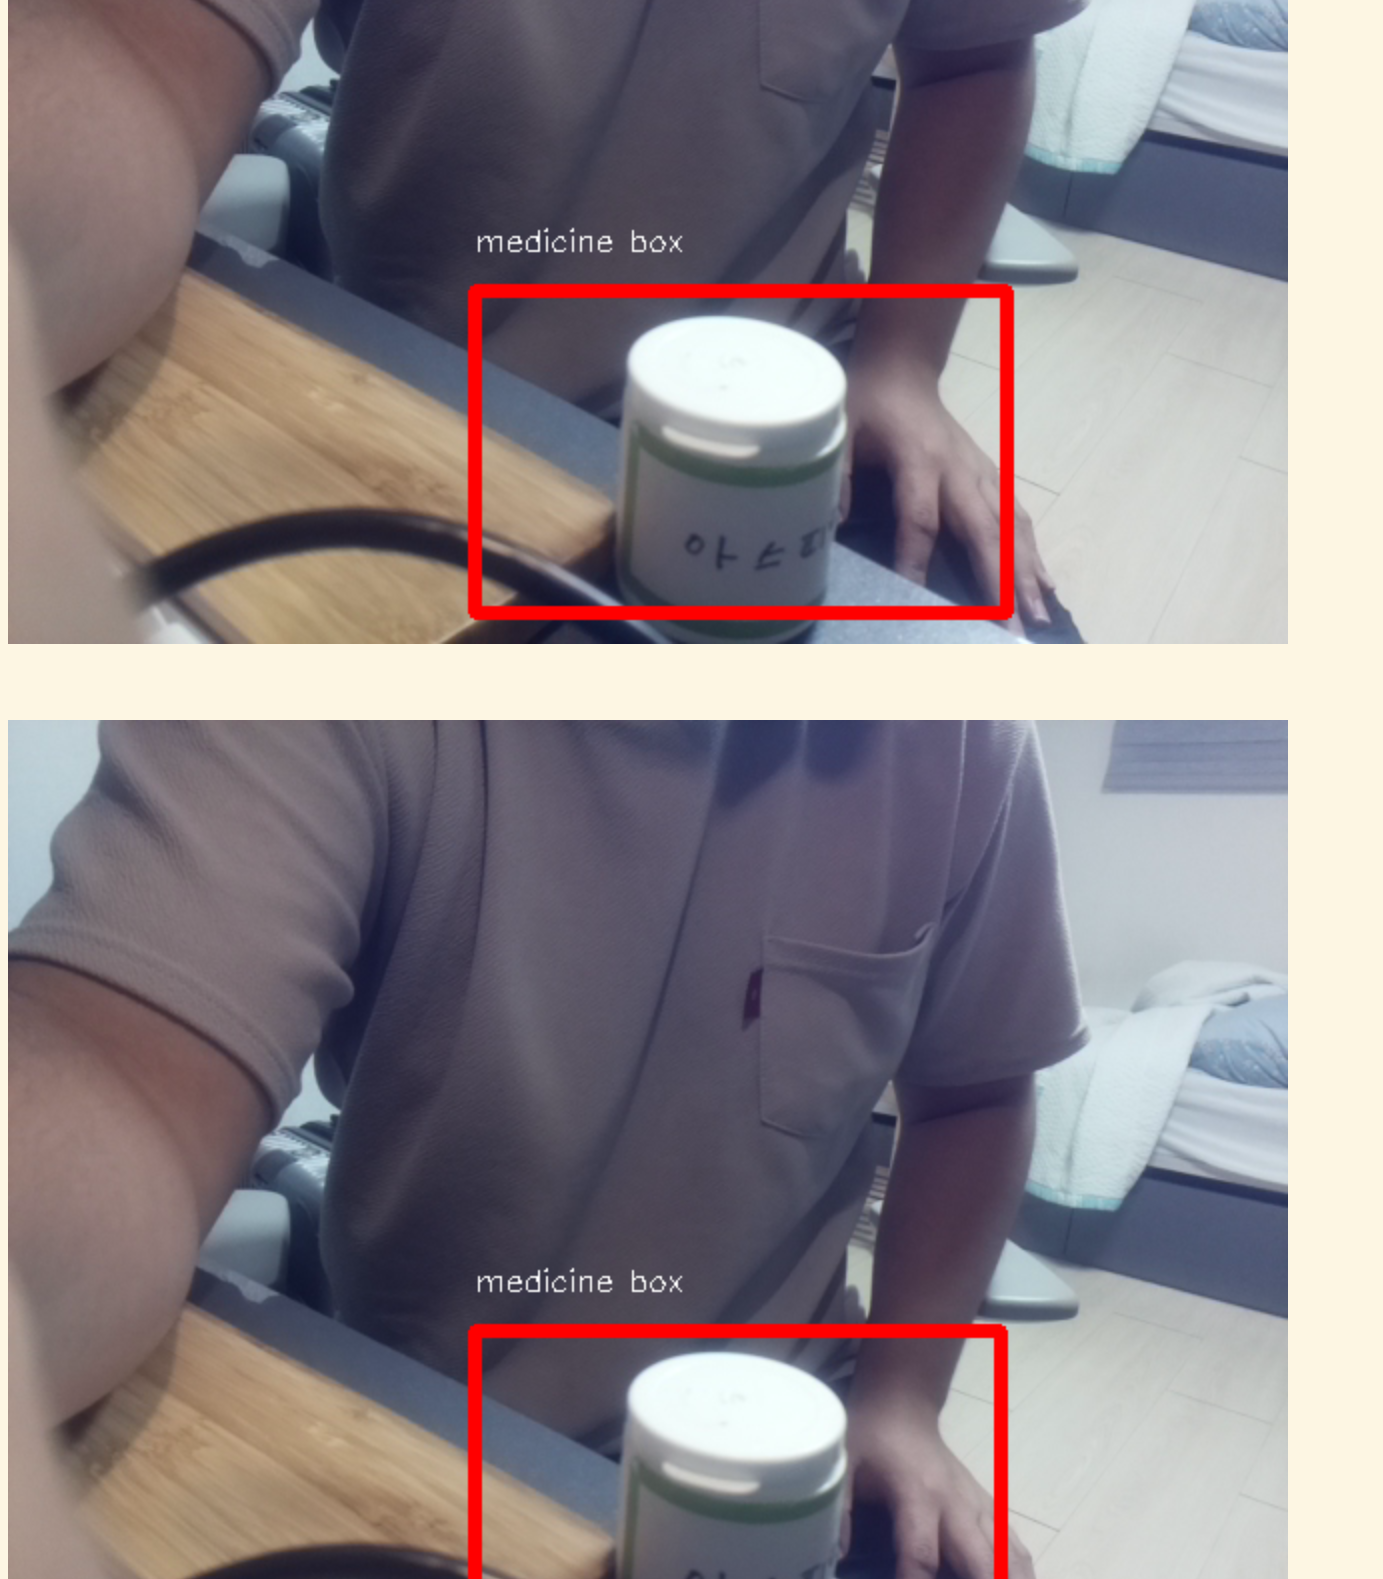
- 인식률, rectablge box 좌표 반환
<<<<<<< HEAD
=======
d9c1456dd340004d668d86f368162b7232ee19a0
import random
import numpy as np
import os
import cv2
import glob
from PIL import Image
import PIL.ImageOps
import copy
from random import randint
import shutil
#다음 변수를 수정하여 새로 만들 이미지 갯수를 정합니다.
num_augmented_images = 2
file_path = 'C:\\Users\\scwon\\Desktop\\StudyDir\\jupyter_study\\img\\'
#file_names = os.listdir(file_path)
#total_origin_image_num = len(file_names)
file_list = os.listdir(file_path)
file_names = [file for file in file_list if file.endswith(".jpg")]
total_origin_image_num = len(file_names)
augment_cnt = 3


def SaltPepper(img):
    # Getting the dimensions of the image
    if img.ndim > 2:  # color
        height, width, _ = img.shape
    else:  # gray scaleㅋ
        height, width = img.shape

    result = copy.deepcopy(img)

    # Randomly pick some pixels in the image
    # Pick a random number between height*width/80 and height*width/10
    number_of_pixels = randint(int(height * width / 100), int(height * width / 10))

    for i in range(number_of_pixels):
        # Pick a random y coordinate
        y_coord = randint(0, height - 1)

        # Pick a random x coordinate
        x_coord = randint(0, width - 1)

        if result.ndim > 2:
            result[y_coord][x_coord] = [randint(0, 255), randint(0, 255), randint(0, 255)]
        else:
            # Color that pixel to white
            result[y_coord][x_coord] = 255

    # Randomly pick some pixels in image
    # Pick a random number between height*width/80 and height*width/10
    for i in range(number_of_pixels):
        # Pick a random y coordinate
        y_coord = randint(0, height - 1)

        # Pick a random x coordinate
        x_coord = randint(0, width - 1)

        if result.ndim > 2:
            result[y_coord][x_coord] = [randint(0, 255), randint(0, 255), randint(0, 255)]
        else:
            # Color that pixel to white
            result[y_coord][x_coord] = 0

    return result


for i in range(0, total_origin_image_num):
    change_picture_index = i
    print(file_names[i])
    file_name = file_names[change_picture_index]

    origin_image_path = 'C:\\Users\\scwon\\Desktop\\StudyDir\\jupyter_study\\img\\' + file_name
    print(origin_image_path)
    image = cv2.imread(origin_image_path)

    #1. 이미지 노이즈 추가 전환
    print("blur")
    converted_image = cv2.medianBlur(image, 3)
    cv2.imwrite(file_path + str(augment_cnt) + '.jpg',converted_image)
    # txt파일 증폭
    src = 'C:\\Users\\scwon\\Desktop\\StudyDir\\jupyter_study\\img\\' + str(i) + ".txt"
    dst = 'C:\\Users\\scwon\\Desktop\\StudyDir\\jupyter_study\\img\\' + str(augment_cnt) + ".txt"
    shutil.copy(src, dst)
    augment_cnt += 1

    print("gray")
    converted_image = cv2.cvtColor(image, cv2.COLOR_BGR2GRAY)
    cv2.imwrite(file_path + str(augment_cnt) + '.jpg',converted_image)
    # txt파일 증폭
    src = 'C:\\Users\\scwon\\Desktop\\StudyDir\\jupyter_study\\img\\' + str(i) + ".txt"
    dst = 'C:\\Users\\scwon\\Desktop\\StudyDir\\jupyter_study\\img\\' + str(augment_cnt) + ".txt"
    shutil.copy(src, dst)
    augment_cnt += 1

    #2. 이미지 RGB 전환
    print("cv2.COLOR_BGR2RGB")
    converted_image = cv2.cvtColor(image, cv2.COLOR_BGR2RGB)
    cv2.imwrite(file_path + str(augment_cnt) + '.jpg',converted_image)
    # txt파일 증폭
    src = 'C:\\Users\\scwon\\Desktop\\StudyDir\\jupyter_study\\img\\' + str(i) + ".txt"
    dst = 'C:\\Users\\scwon\\Desktop\\StudyDir\\jupyter_study\\img\\' + str(augment_cnt) + ".txt"
    shutil.copy(src, dst)
    augment_cnt += 1

    #3. 이미지 LUV 전환
    print("cv2.COLOR_BGR2Luv")
    converted_image = cv2.cvtColor(image, cv2.COLOR_BGR2Luv)
    cv2.imwrite(file_path + str(augment_cnt) + '.jpg',converted_image)
    # txt파일 증폭
    src = 'C:\\Users\\scwon\\Desktop\\StudyDir\\jupyter_study\\img\\' + str(i) + ".txt"
    dst = 'C:\\Users\\scwon\\Desktop\\StudyDir\\jupyter_study\\img\\' + str(augment_cnt) + ".txt"
    shutil.copy(src, dst)
    augment_cnt += 1

    #4. 이미지 noise 추가
    print("noise")
    converted_image = SaltPepper(image)
    cv2.imwrite(file_path + str(augment_cnt) + '.jpg',converted_image)
    # txt파일 증폭
    src = 'C:\\Users\\scwon\\Desktop\\StudyDir\\jupyter_study\\img\\' + str(i) + ".txt"
    dst = 'C:\\Users\\scwon\\Desktop\\StudyDir\\jupyter_study\\img\\' + str(augment_cnt) + ".txt"
    shutil.copy(src, dst)
    augment_cnt += 1

    #5. 이미지 선명하게 표현
    kernel = np.array([[0, -1, 0],
                   [-1, 5, -1],
                   [0, -1, 0]])
    # 커널 적용
    converted_image = cv2.filter2D(image, -1, kernel)
    cv2.imwrite(file_path + str(augment_cnt) + '.jpg',converted_image)
    # txt파일 증폭
    src = 'C:\\Users\\scwon\\Desktop\\StudyDir\\jupyter_study\\img\\' + str(i) + ".txt"
    dst = 'C:\\Users\\scwon\\Desktop\\StudyDir\\jupyter_study\\img\\' + str(augment_cnt) + ".txt"
    shutil.copy(src, dst)
    augment_cnt += 1

    #6. 이미지 HLS 전환
    print("HLS")
    converted_image = cv2.cvtColor(image,cv2.COLOR_BGR2HLS)
    cv2.imwrite(file_path + str(augment_cnt) + '.jpg',converted_image)
    # txt파일 증폭
    src = 'C:\\Users\\scwon\\Desktop\\StudyDir\\jupyter_study\\img\\' + str(i) + ".txt"
    dst = 'C:\\Users\\scwon\\Desktop\\StudyDir\\jupyter_study\\img\\' + str(augment_cnt) + ".txt"
    shutil.copy(src, dst)
    augment_cnt += 1
- https://velog.io/@jungeun-dev/Python-%EC%9B%B9-%ED%81%AC%EB%A1%A4%EB%A7%81Selenium-%EA%B5%AC%EA%B8%80-%EC%9D%B4%EB%AF%B8%EC%A7%80-%EC%88%98%EC%A7%91
- https://durian9s-coding-tree.tistory.com/56
- https://velog.io/@bae_mung/%EB%9D%BC%EC%A6%88%EB%B2%A0%EB%A6%AC%ED%8C%8C%EC%9D%B4-4-openCV-tensorflow-%EC%84%B8%ED%8C%85
- https://eun-dolphin.tistory.com/21
- https://installvirtual.com/install-python-3-7-on-raspberry-pi/
- https://www.youtube.com/watch?v=QLZWQlg-Pk0
- https://github.com/PINTO0309/Tensorflow-bin
- https://qengineering.eu/install-tensorflow-2.1.0-on-raspberry-pi-4.html
https://sote.tistory.com/249 https://m.blog.naver.com/PostView.naver?isHttpsRedirect=true&blogId=duehd88&logNo=20201603052