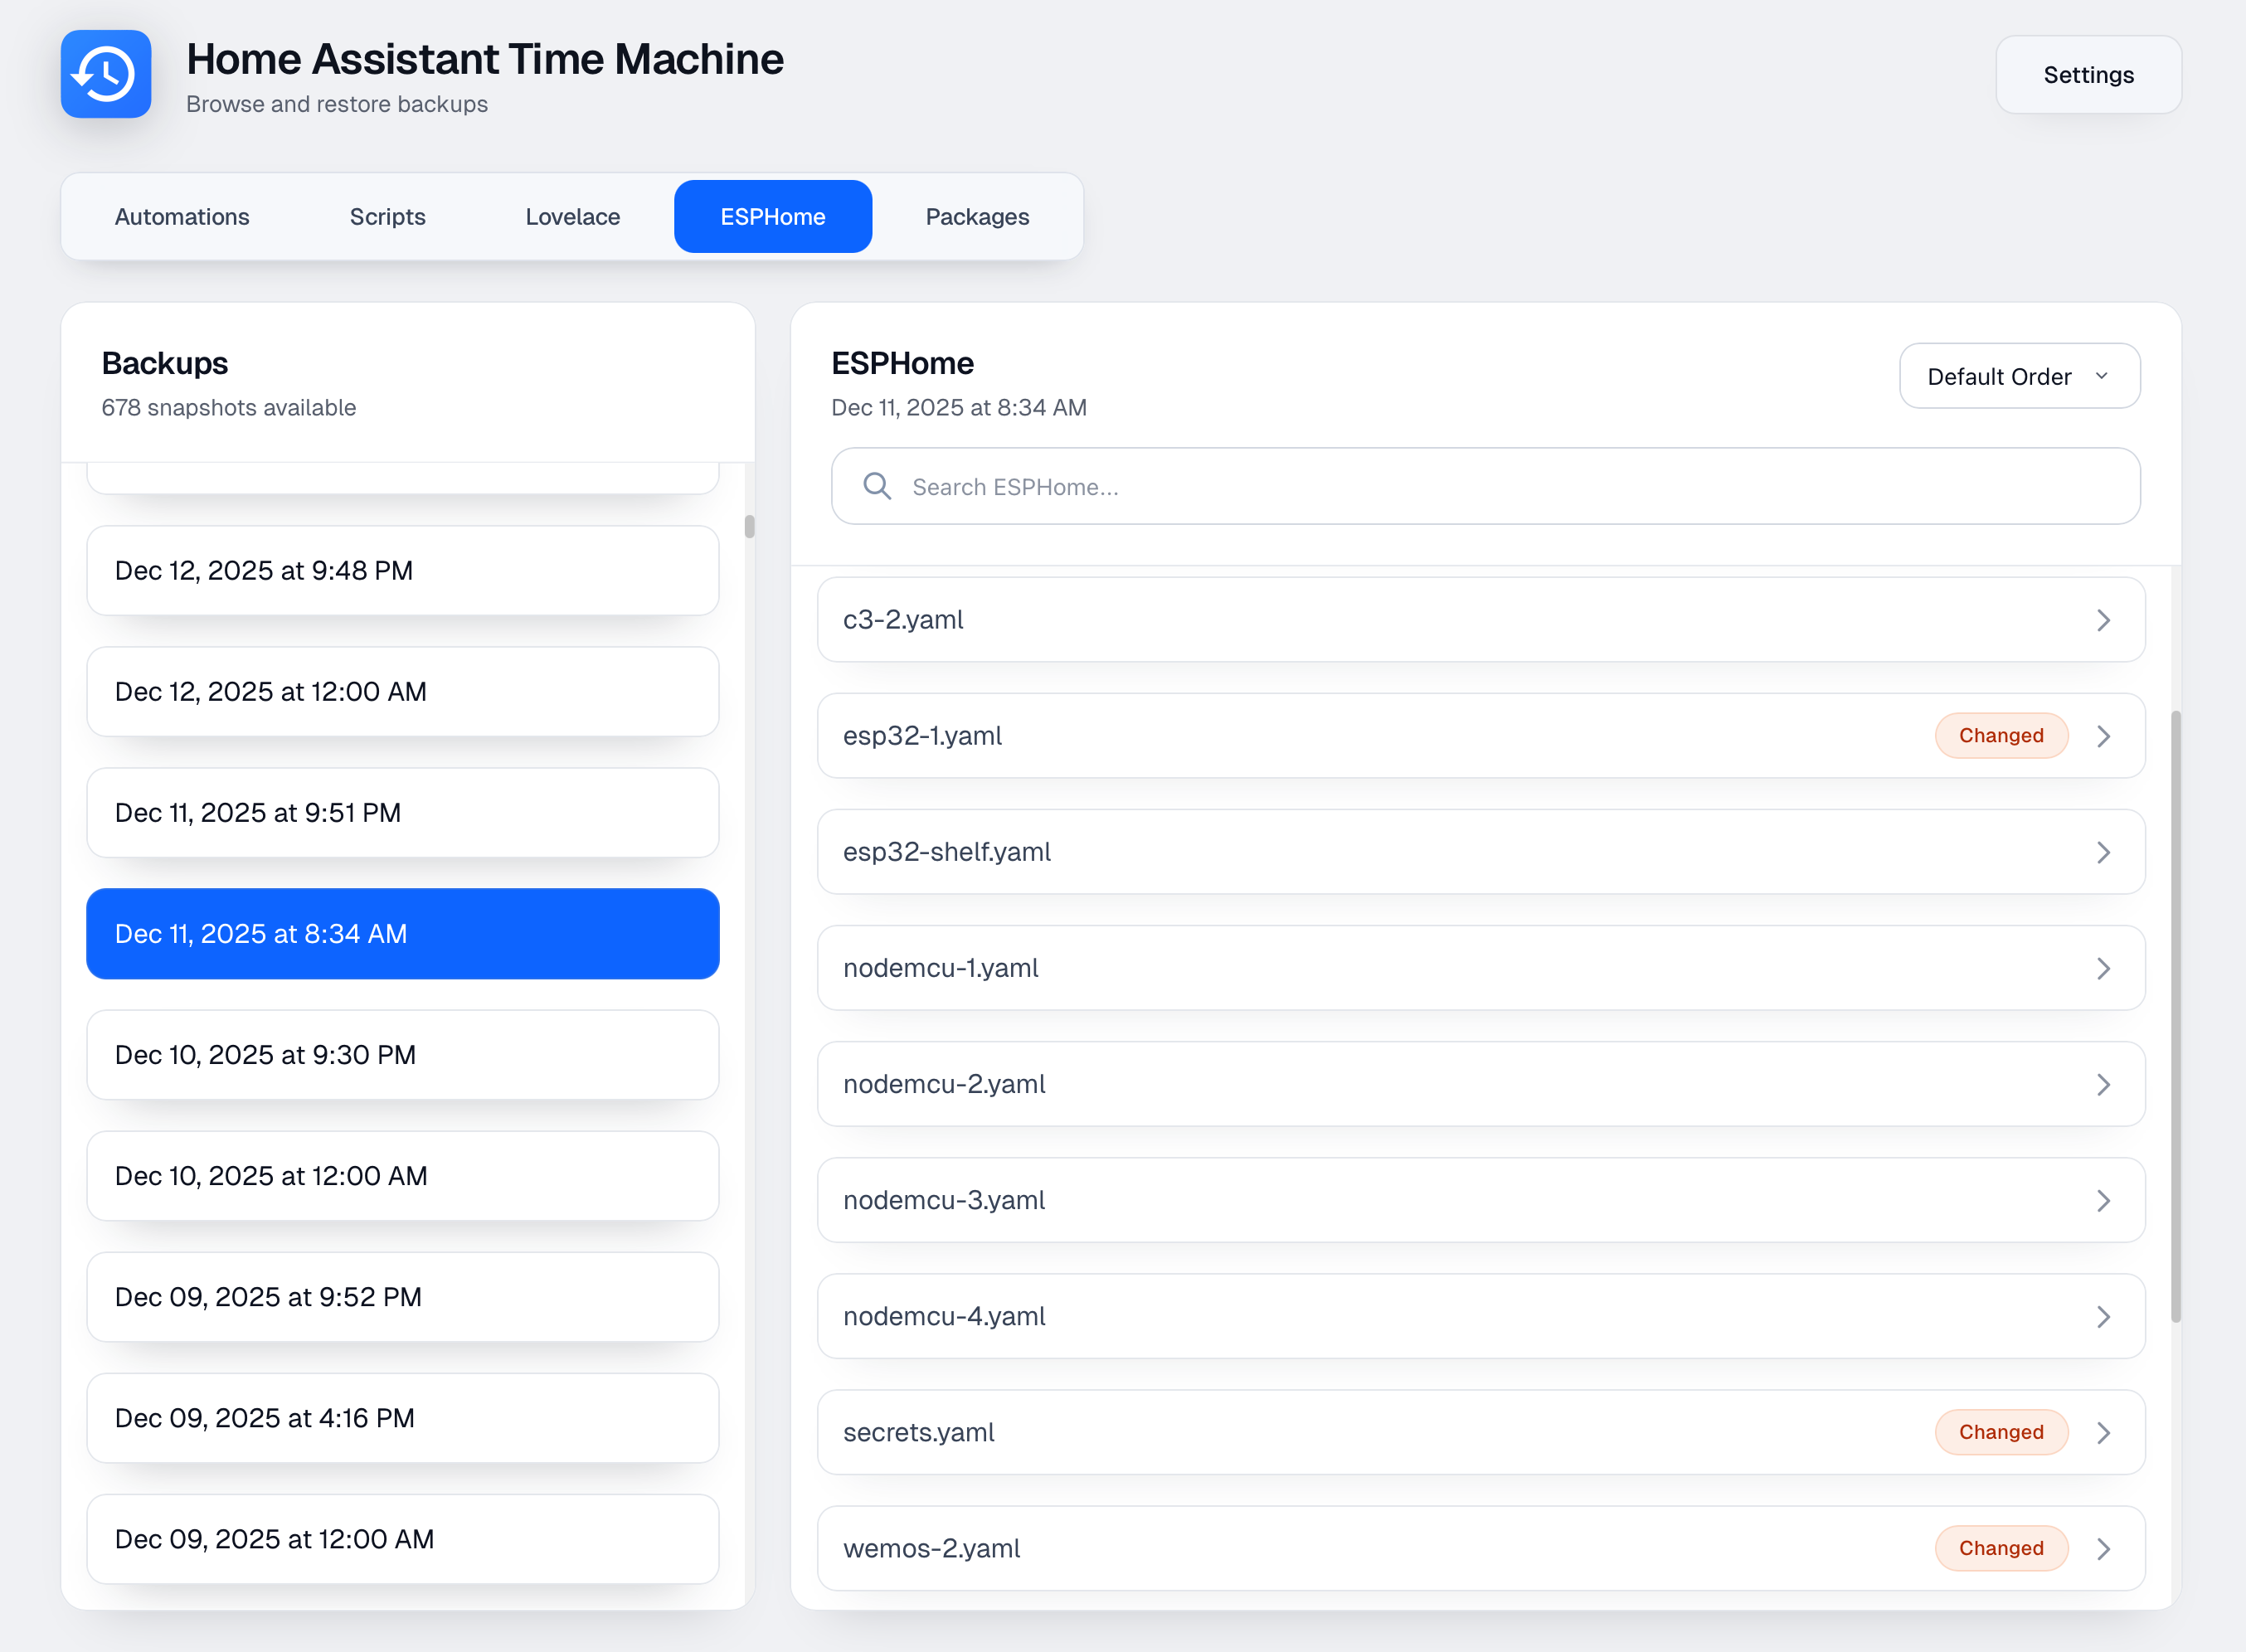
Home Assistant Time Machine is a web-based tool that acts as a "Time Machine" for your Home Assistant configuration. Browse YAML backups across automations, scripts, Lovelace dashboards, ESPHome files, and packages, then restore individual items back to your live setup with confidence.
- Backup Lock, Deletion & Export: Added a new backup lock feature to prevent accidental deletion of snapshots. You can now also manually delete or export individual backups as .tar.gz archives directly from the web UI using the new right-click context menu.
- HACS Integration: Now available as a companion integration via HACS! Track backup status with a native sensor and trigger backups using the
time_machine.backup_nowservice. - Keyboard Navigation: Navigate backups and items using arrow keys! Use Up/Down to change selection and Left/Right to switch between panels. Press Enter on an item to view its diff.
- Manifest-Driven Backups & Restoration: Every backup now includes a detailed file manifest, ensuring that restores and change detection are perfectly aware of where your files live and are automatically placed back exactly where they belong in your YAML structure.
- Docker Env Var: Added
ESPHOME_CONFIG_PATHenvironment variable support for Docker installations, allowing custom locations for ESPHome configuration files. - Split Config Support: Optimized for advanced Home Assistant setups using
!include,!include_dir_list, and other split configuration methods.
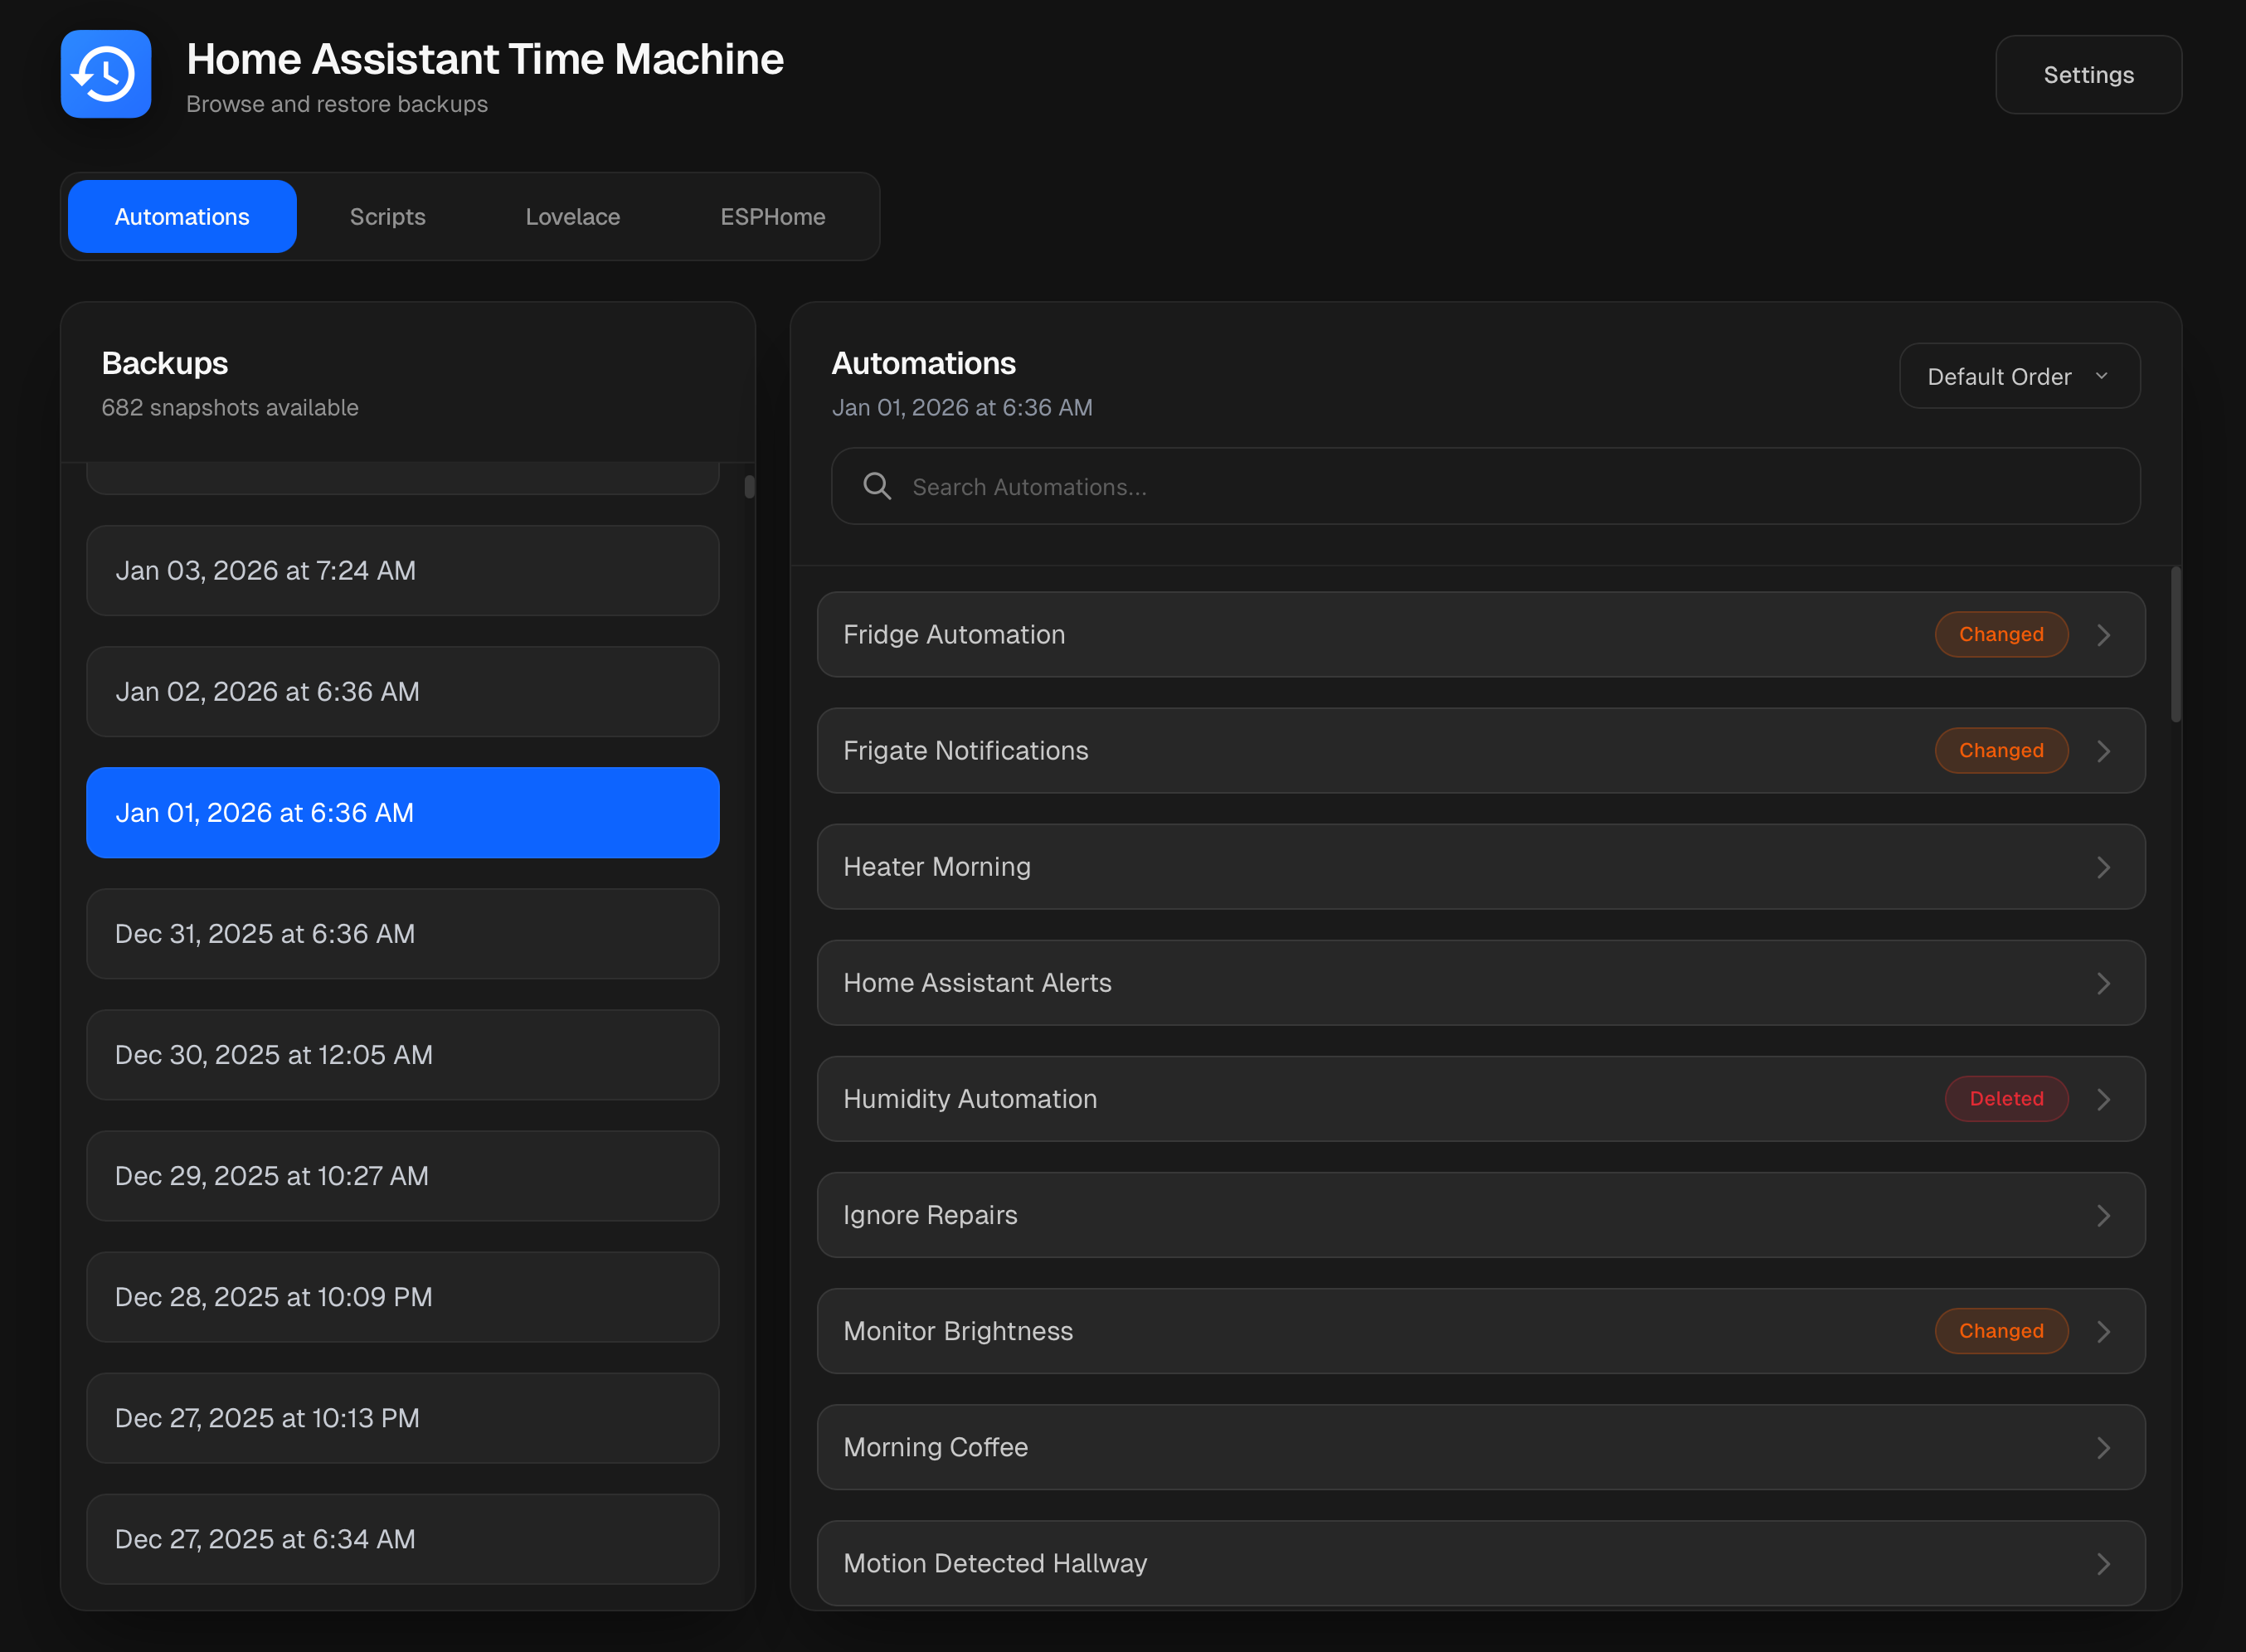
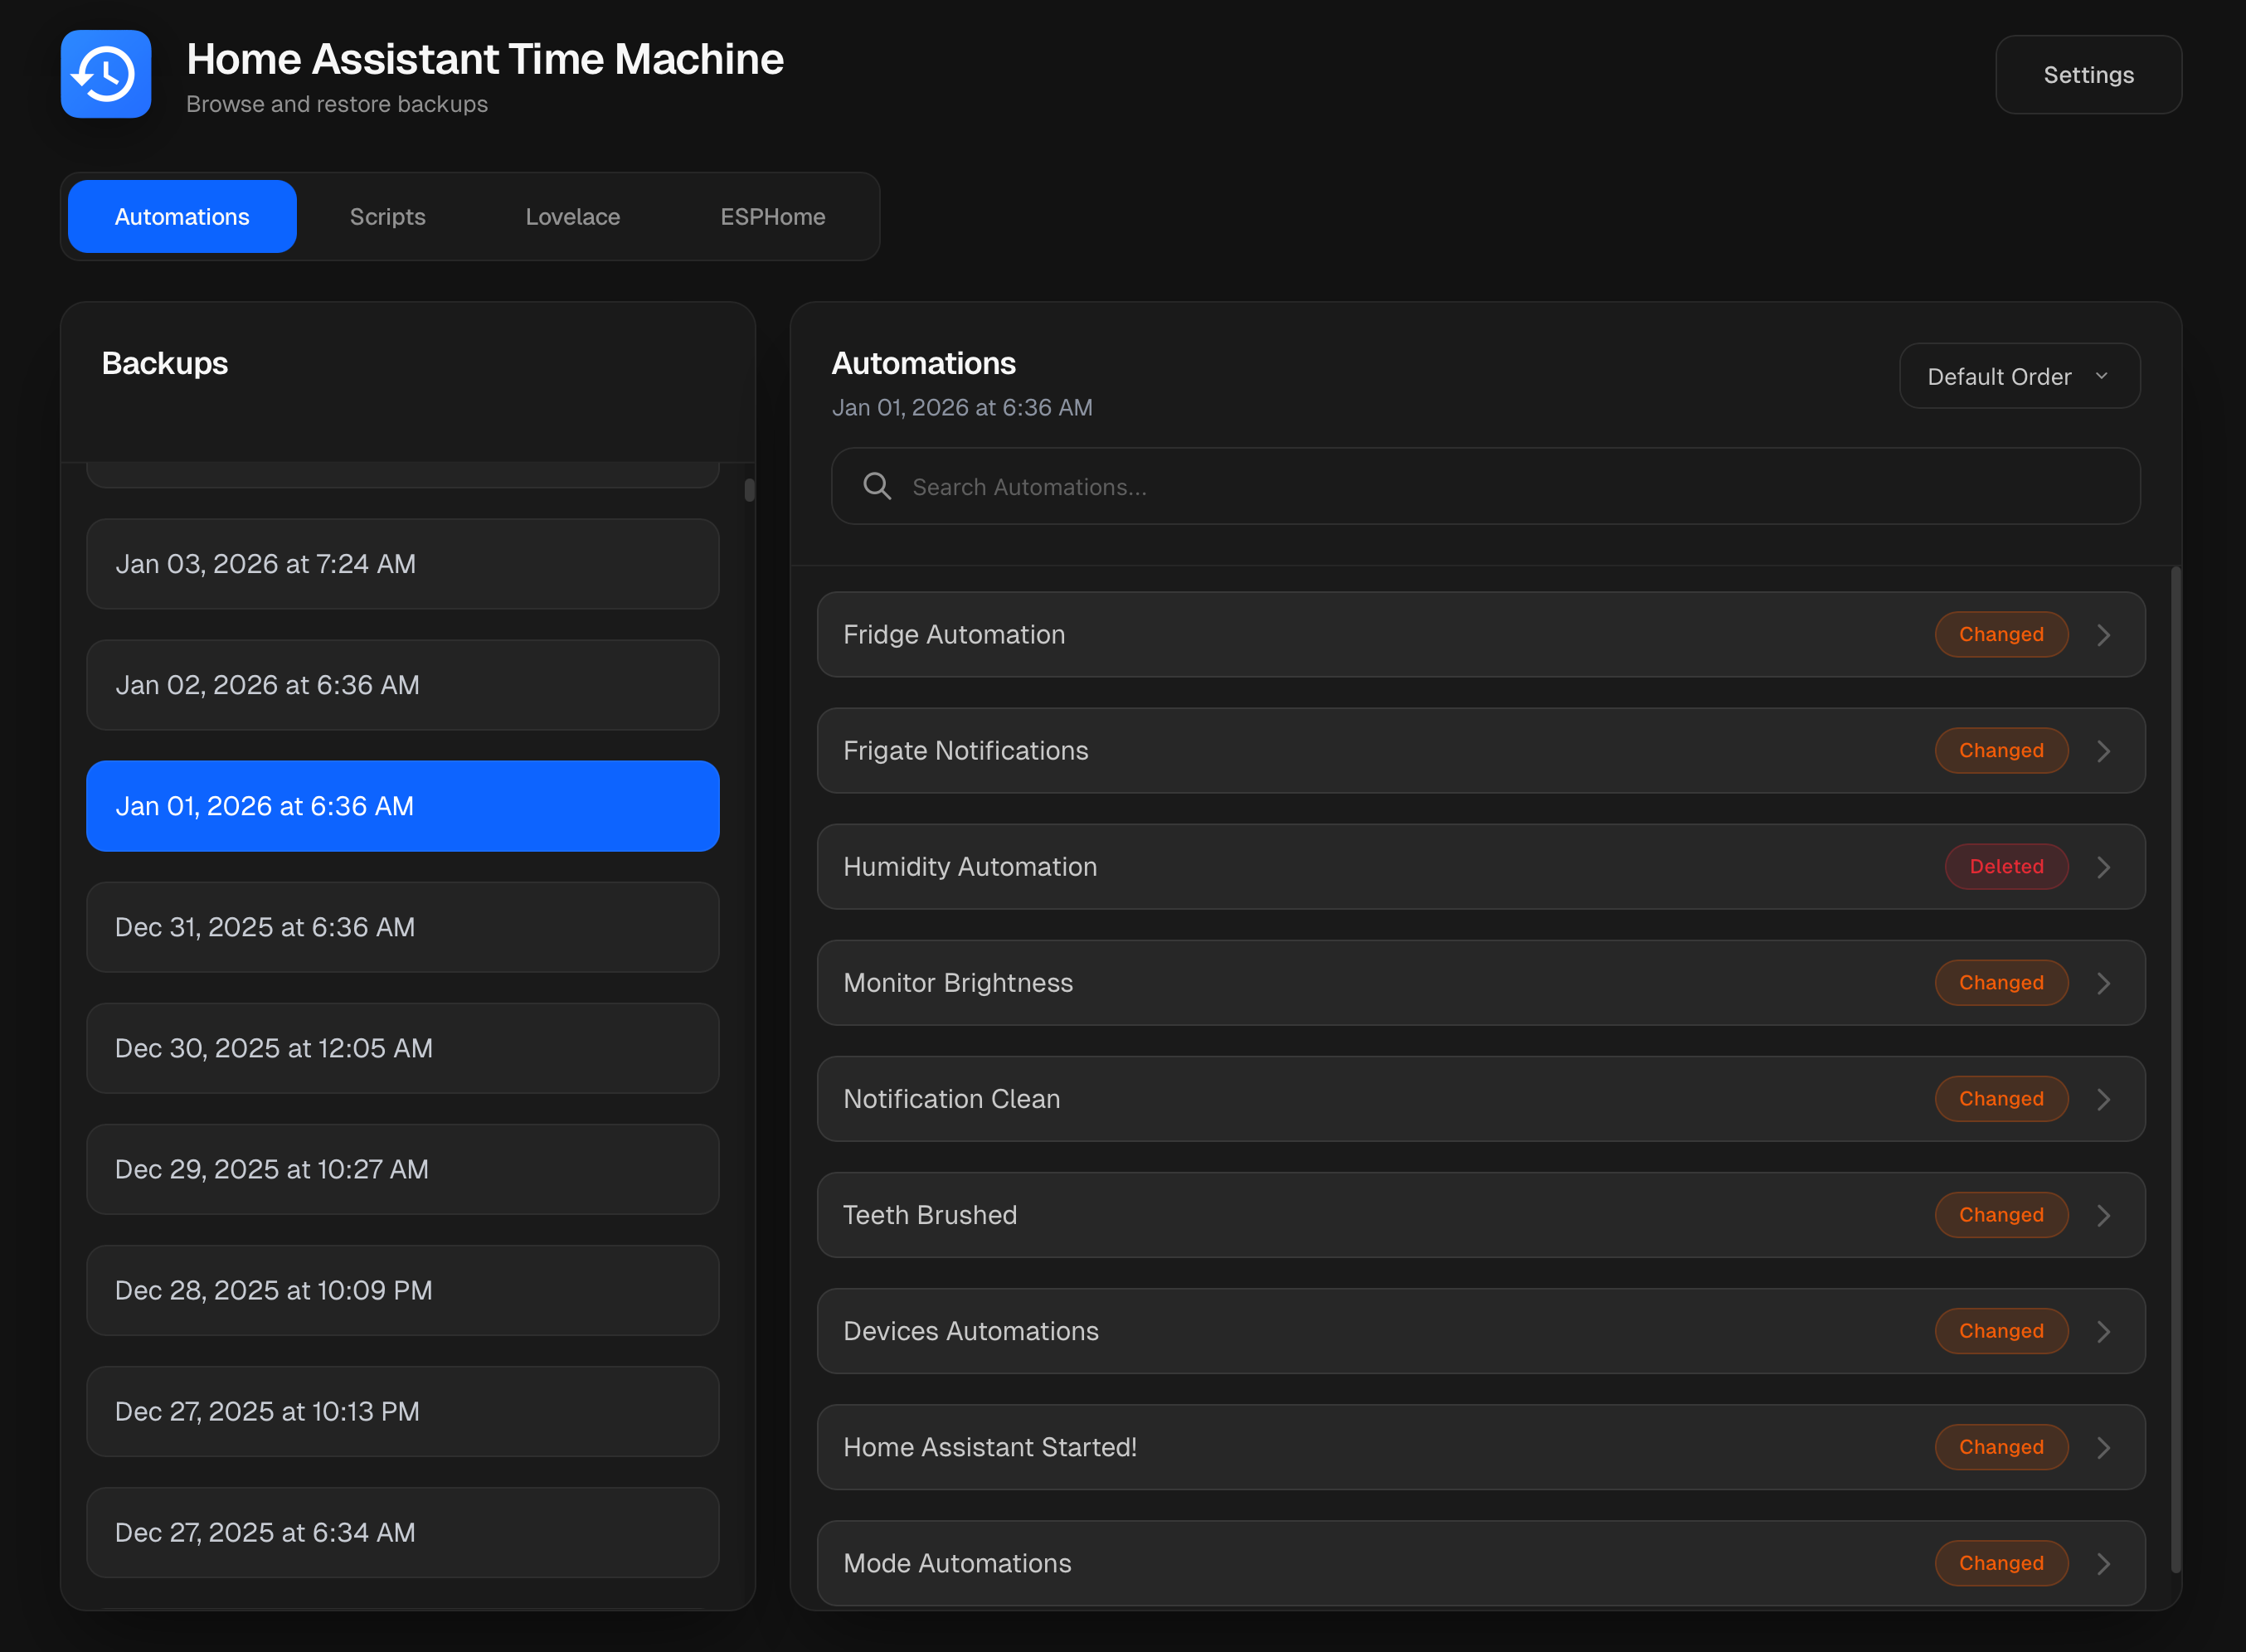

- Browse Backups: Easily browse through your Home Assistant backup YAML files.
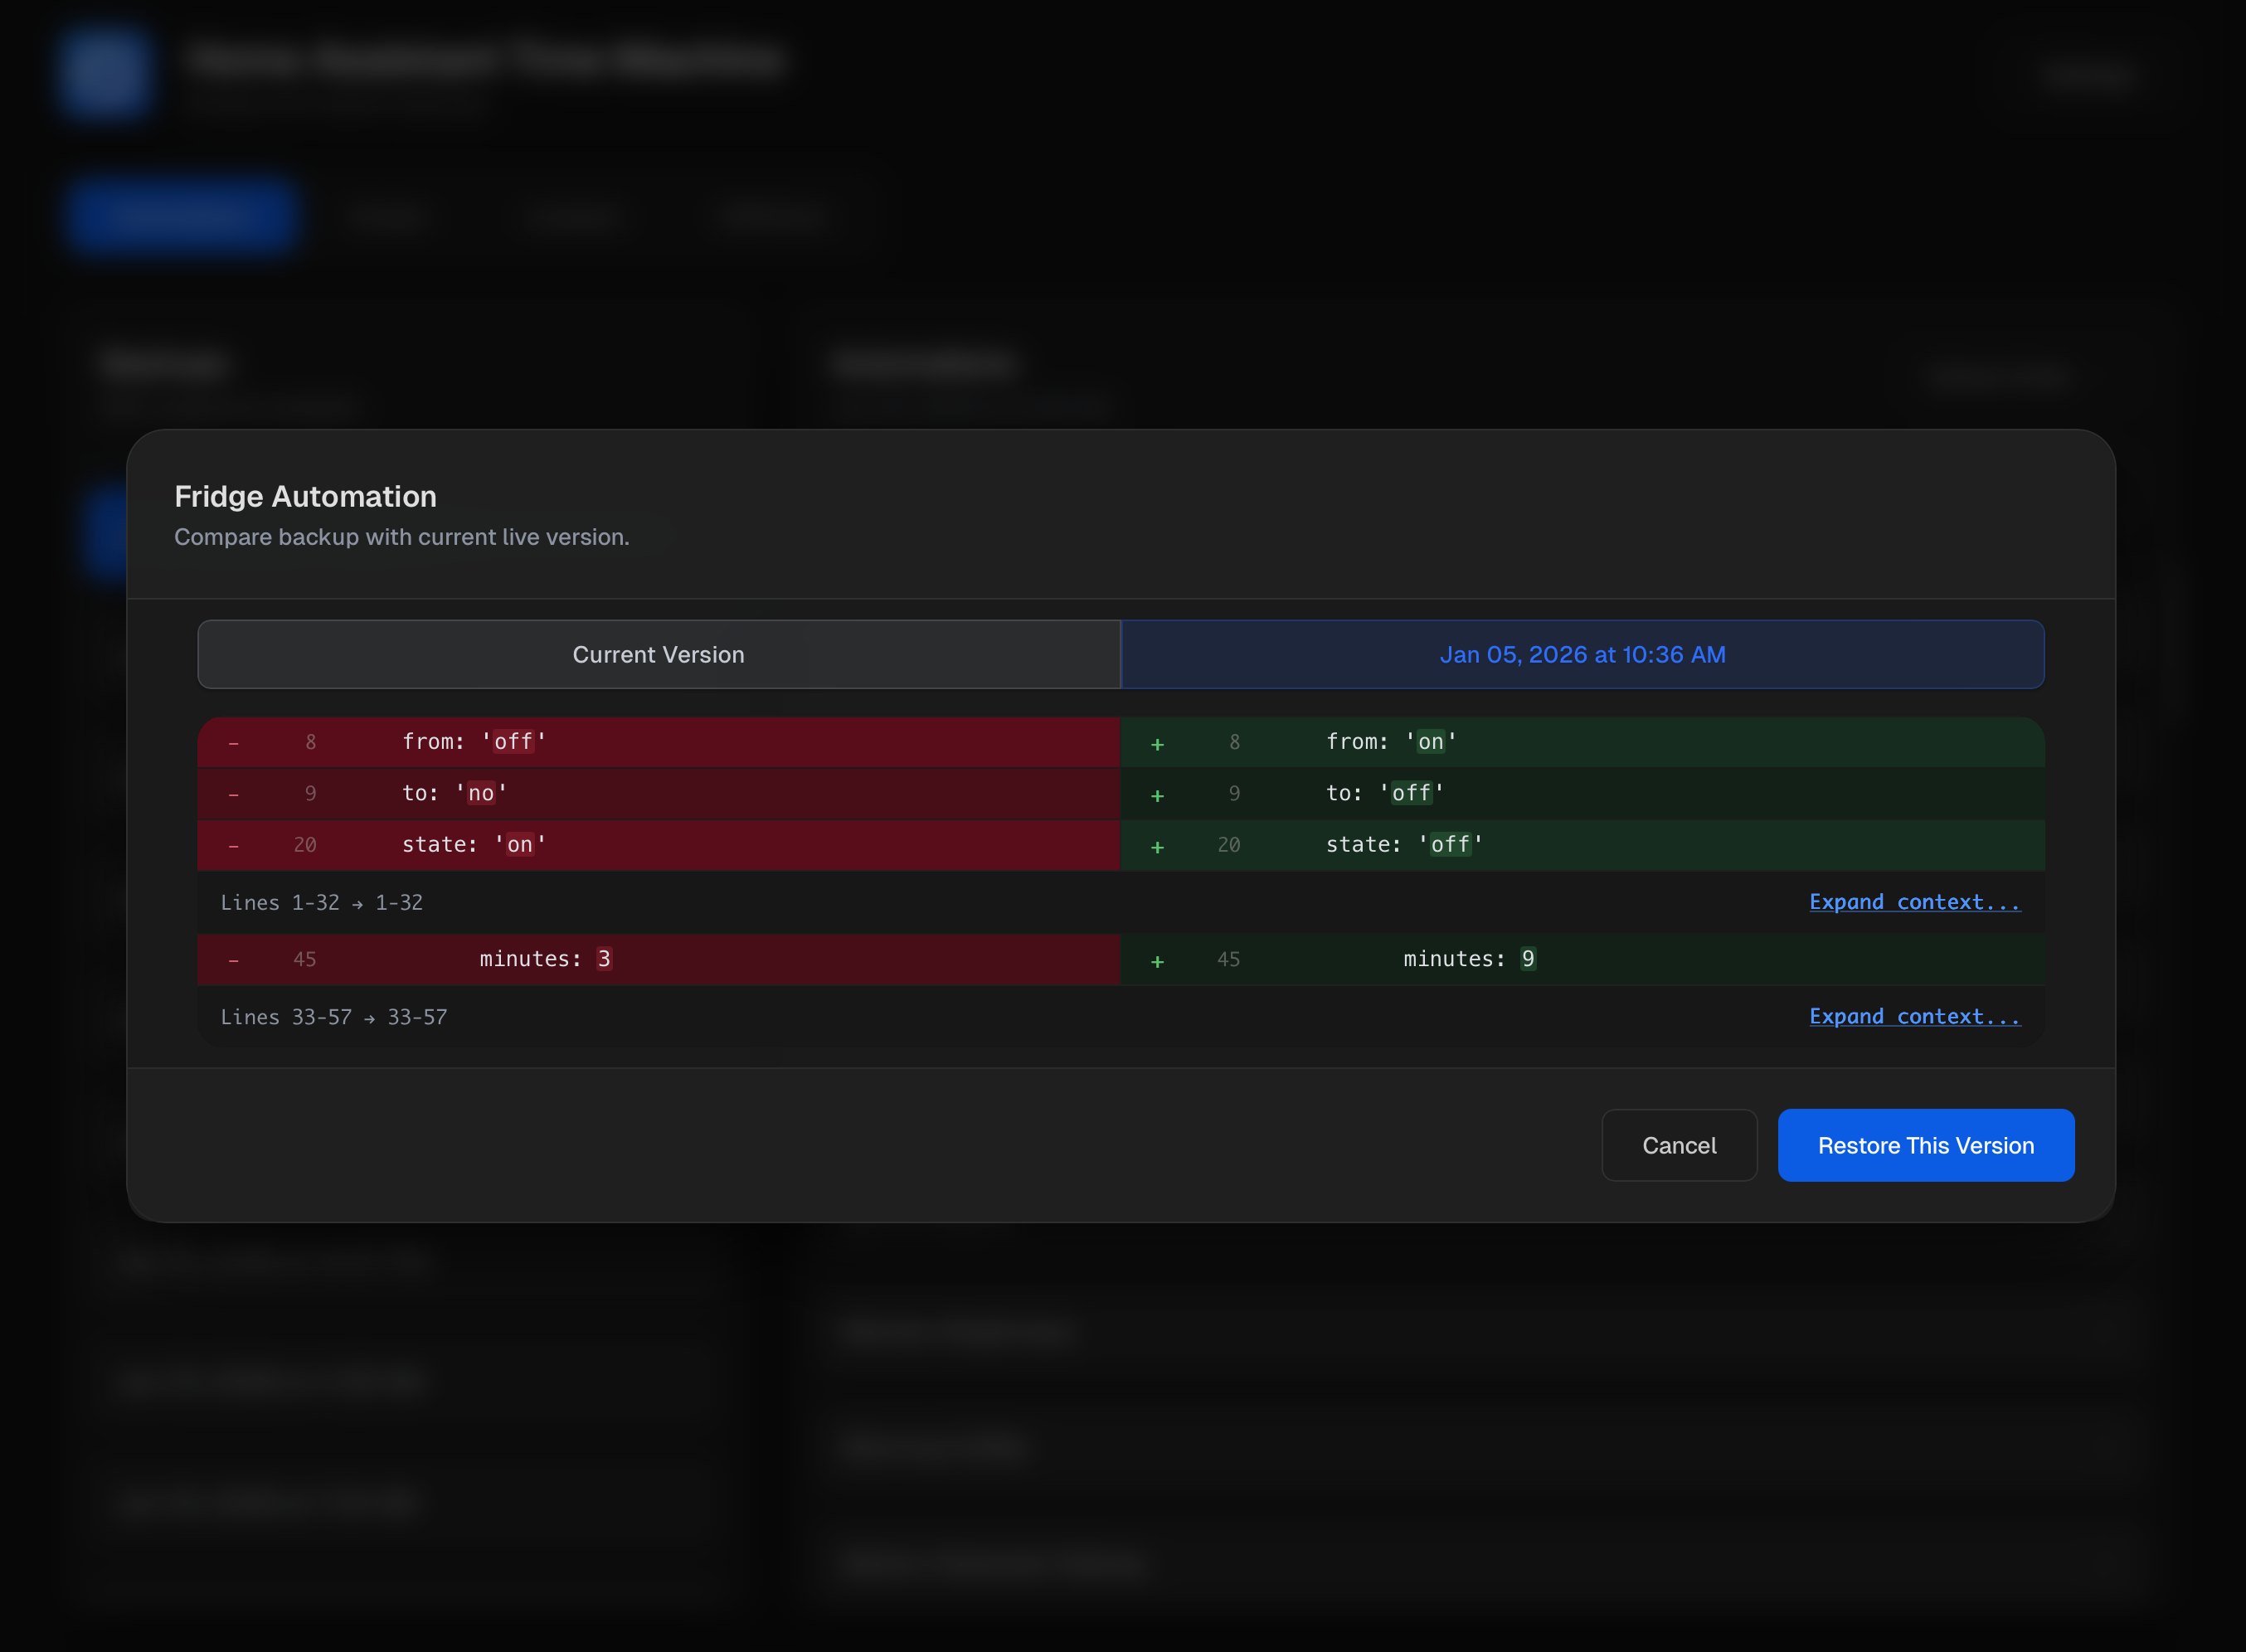
- View Changes & Diff Palettes: See side-by-side diffs with 8 vibrant color palettes to choose from.
- Restore Individual Items: Restore individual automations or scripts without having to restore an entire backup.
- Smart Backup: Incremental backup mode that only saves changed files, significantly reducing storage usage.
- Show Changes Only: Filter backups to only show snapshots that contain changed or deleted items compared to live config.
- Safety First: Automatically creates a backup before restoring anything.
- Reload Home Assistant: Reload automations or scripts directly from the UI after a restore.
- Scheduled Backups: Configure automatic backups on a schedule.
- Service Call Support: Trigger backups from Home Assistant automations or scripts using the
hassio.addon_stdinservice. - Multi-language Support: Available in English, Spanish, German, French, Dutch, and Italian.
- Ingress Support: Access through the Home Assistant UI without port forwarding.
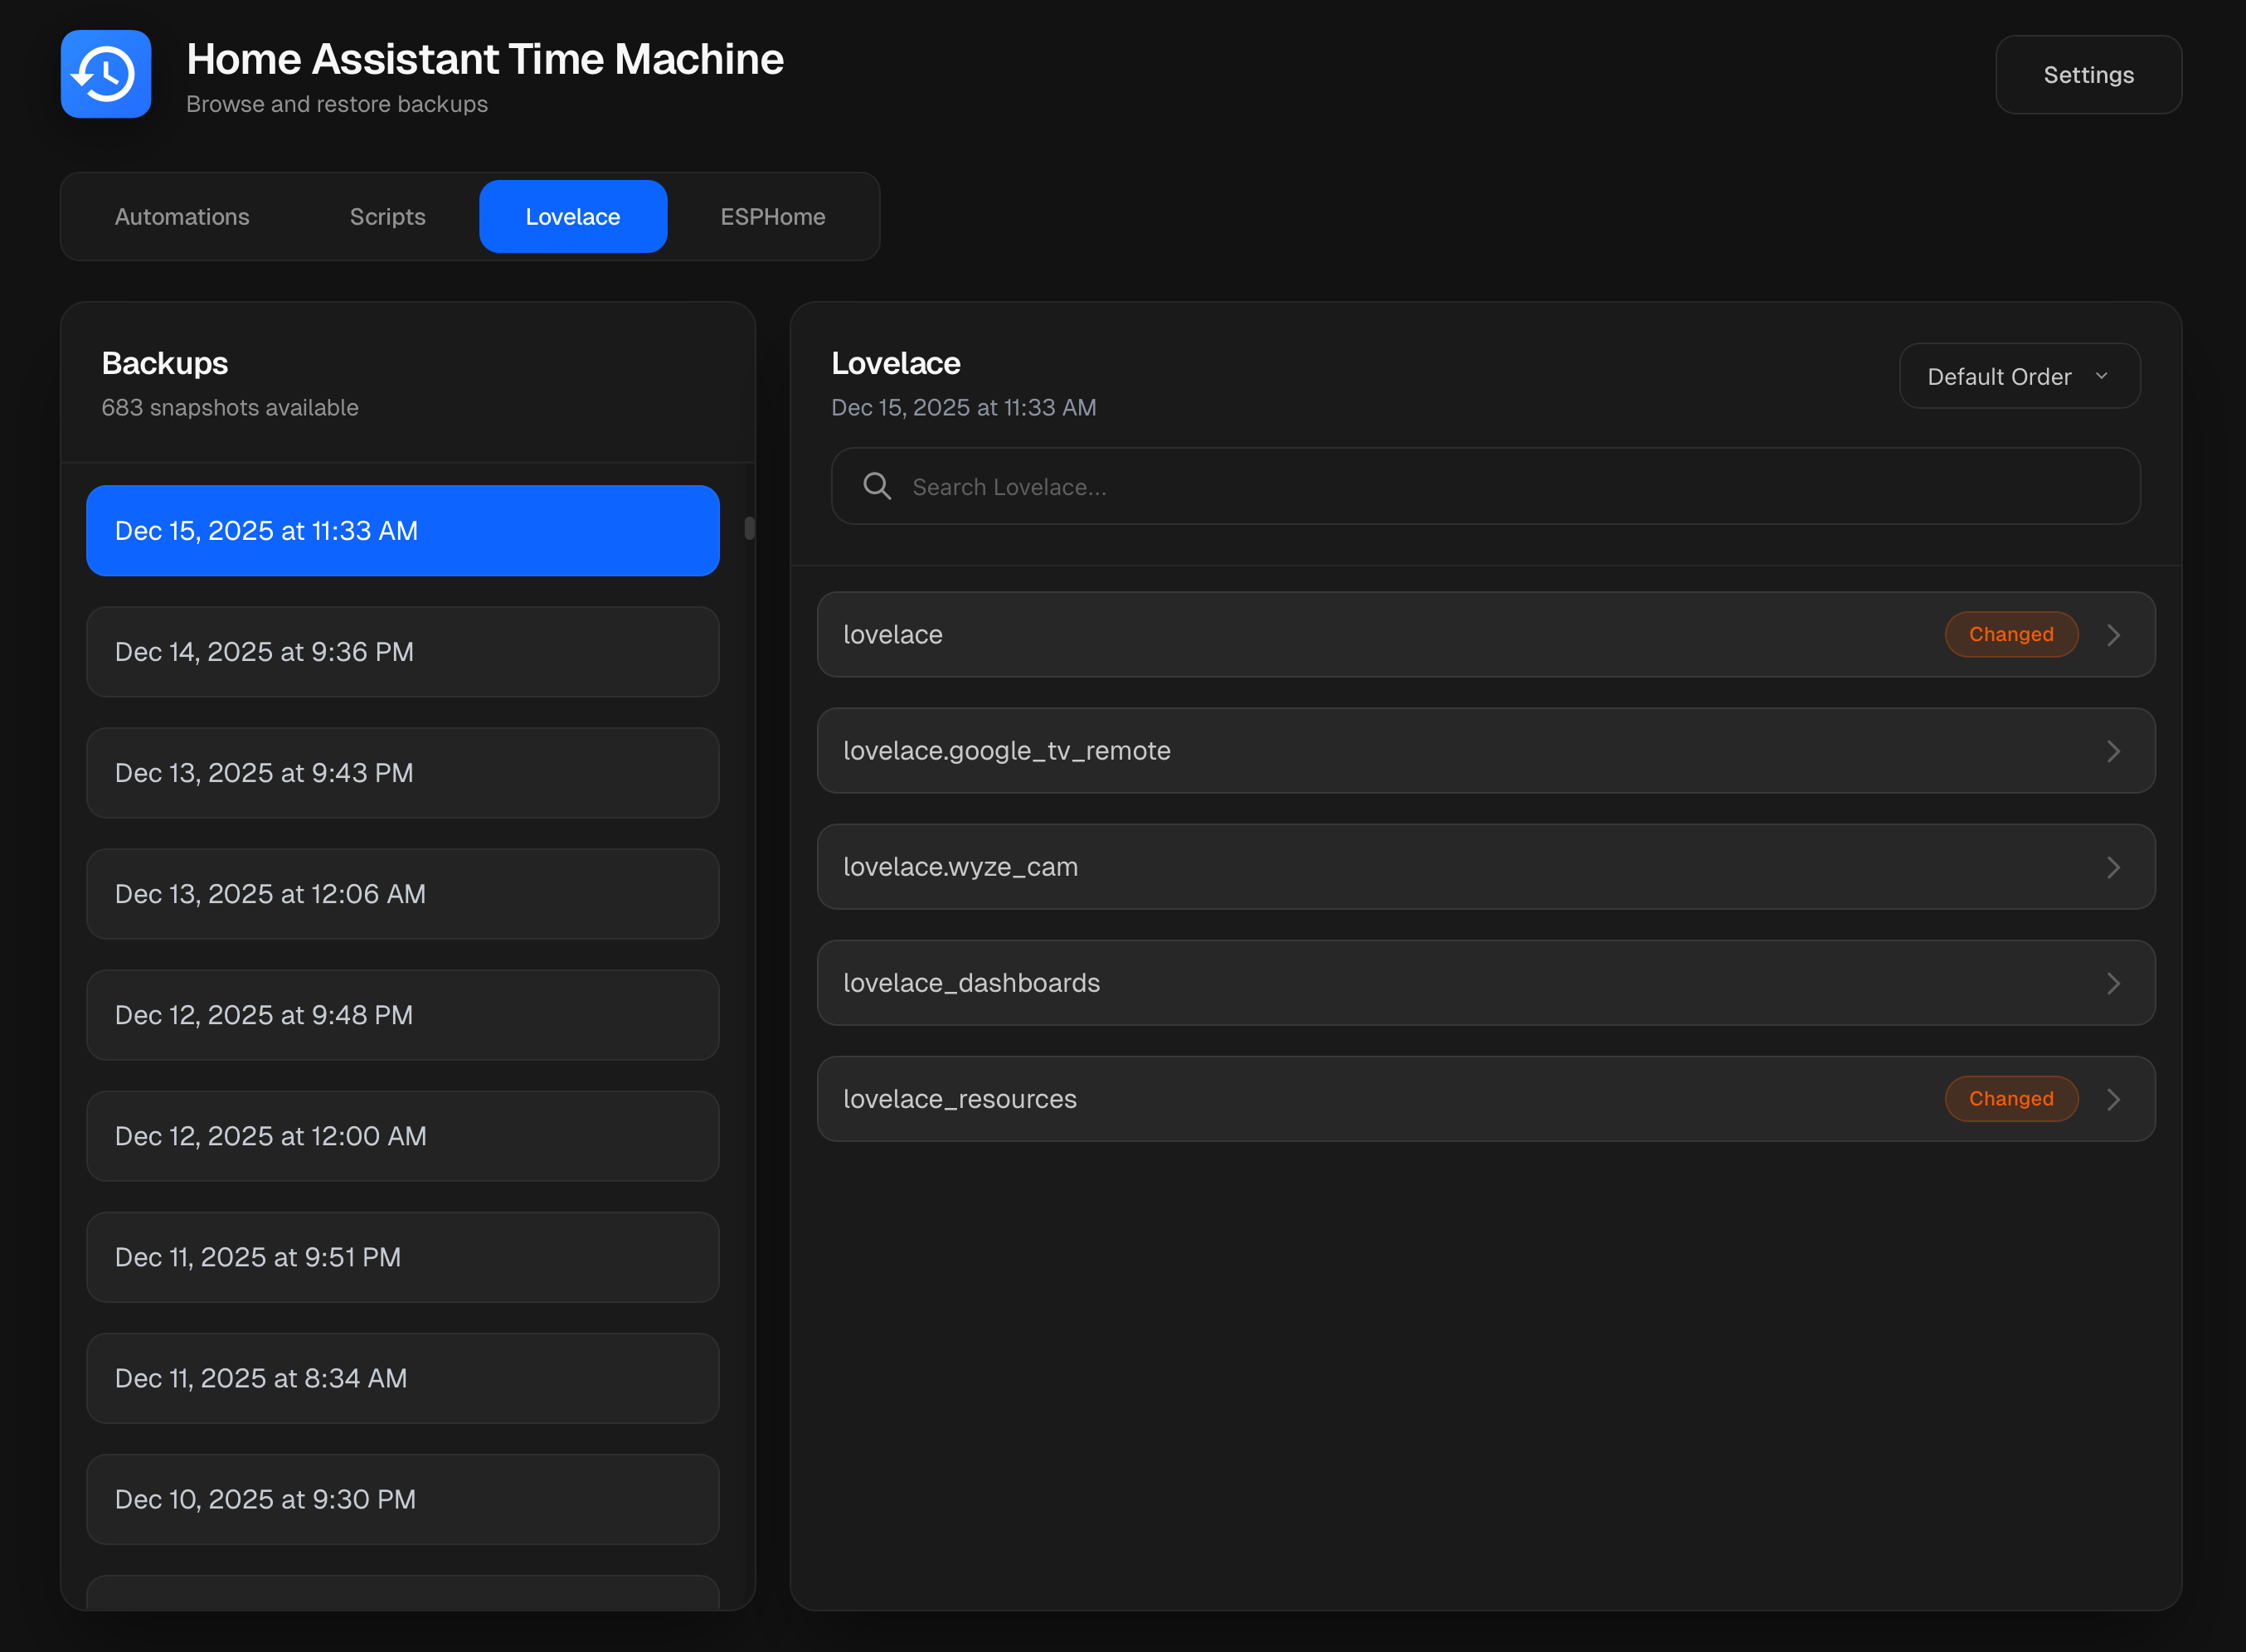
- Lovelace, ESPHome & Packages: Full support for backing up and restoring dashboards, ESPHome files, and package configurations.
- Max Backups & Flexible Locations: Control retention limits and store backups in
/share,/backup,/media, or remote shares. - Backup Lock & Context Menu: Prevent accidental deletion by locking your favorite backups. Right-click any backup to Lock, Unlock, Export, or Delete it instantly.
- REST API: Full API for programmatic backup management.
There are two ways to install Home Assistant Time Machine: as a Home Assistant add-on or as a standalone Docker container.
-
Add Repository: Click the button below to add the repository to your Home Assistant instance:
Or manually add it:
- Navigate to Settings → Add-ons → Add-on Store
- Click the three dots (⋮) in the top right corner and select Repositories
- Add the repository URL:
https://github.com/saihgupr/ha-addons
-
Install the Add-on: The "Home Assistant Time Machine" add-on will now appear in the store. Click on it and then click "Install".

For Docker users who aren't using the Home Assistant add-on, you have three deployment options:
Option A: Docker Compose (recommended):
-
Download the compose.yaml file:
curl -o compose.yaml https://github.com/saihgupr/HomeAssistantTimeMachine/raw/branch/main/compose.yaml
-
Edit the file to set your paths and credentials:
nano compose.yaml
-
Start the service:
docker compose up -d
Option B: Docker Run (pre-built image):
docker run -d \
  -p 54000:54000 \
  -e HOME_ASSISTANT_URL="http://your-ha-instance:8123" \
  -e LONG_LIVED_ACCESS_TOKEN="your-long-lived-access-token" \
  -e ESPHOME_CONFIG_PATH="/path/to/esphome/config" \
  -e THEME="dark" \
  -e DEBUG_LOGS="false" \
  -v /path/to/your/ha/config:/config \
  -v /path/to/your/backups:/media \
  -v ha-time-machine-data:/data \
  --name ha-time-machine \
  ghcr.io/saihgupr/homeassistanttimemachine:latest
Option C: Build locally:
git clone https://github.com/saihgupr/HomeAssistantTimeMachine.git
cd HomeAssistantTimeMachine/homeassistant-time-machine
docker build -t ha-time-machine .

docker run -d \
  -p 54000:54000 \
  -e HOME_ASSISTANT_URL="http://your-ha-instance:8123" \
  -e LONG_LIVED_ACCESS_TOKEN="your-long-lived-access-token" \
  -e ESPHOME_CONFIG_PATH="/path/to/esphome/config" \
  -e THEME="dark" \
  -e DEBUG_LOGS="false" \
  -v /path/to/your/ha/config:/config \
  -v /path/to/your/backups:/media \
  -v ha-time-machine-data:/data \
  --name ha-time-machine \
  ha-time-machine
Supplying the URL and token keeps credentials out of the UI. These environment variables are optional—if you set them, the settings fields are read-only; if you omit them, you can enter credentials in the web UI instead.
Alternative: omit the environment variables, start the container with the same volumes, then visit http://localhost:54000 to enter credentials in the settings modal. They are stored in /data/docker-ha-credentials.json.
After the container is running, you can toggle ESPHome support, adjust text style, and switch light/dark modes by POSTing to the app settings API. This persists the value in /data/homeassistant-time-machine/docker-app-settings.json so the UI reflects it on reload:
curl -X POST http://localhost:54000/api/app-settings \
  -H 'Content-Type: application/json' \
  -d '{
        "theme": "light",
        "esphomeEnabled": true,
        "packagesEnabled": true,
        "language": "de"
      }'
Adjust the payload if you need different paths, theme, or want to enable/disable features ("esphomeEnabled": true|false, "packagesEnabled": true|false, "theme": light|dark, "language": en|es|de|fr|nl|it).
After starting the container, access the web interface at http://localhost:54000 (or your server's IP/port).
[!NOTE] The HA URL and token fields in settings will be read-only if configured via environment variables, or editable if configured through the web UI.
Enhance your Home Assistant experience by adding the Time Machine companion integration via HACS. This provides:
- Sensors: Track backup status and health directly in Home Assistant.
- Services: Trigger backups using native
time_machine.backup_nowservice calls in your automations.

Or manually add the custom repository:
- Ensure HACS is installed.
- In Home Assistant, go to HACS → Integrations.
- Click the three dots (⋮) in the top right and select Custom repositories.
- Add
https://github.com/saihgupr/HomeAssistantTimeMachineas an Integration. - Find Home Assistant Time Machine in HACS and click Download.
- Go to Settings → Devices & Services.
- Click Add Integration in the bottom right and search for Home Assistant Time Machine.
- Follow the UI prompts.
- If installed via the official Home Assistant Add-on, it will automatically discover the instance!
- If installed via Docker (or if auto-discovery fails), you will be prompted to enter the instance URL.
[!IMPORTANT] Docker Users: Use the internal container name (e.g.,
http://ha-time-machine:54000) if they share a network, or your server's LAN IP if they are on separate hosts.
- Note: If
sensor.time_machine_statusshows asOffline, it usually means Home Assistant cannot reach the Time Machine API at that address.
Monitor your backup system health directly in Home Assistant.
| Attribute | Description | Example |
|---|---|---|
state |
Current status of the instance | Online |
version |
Running version | 2.3.1 |
backup_count |
Total number of backups stored | 764 |
last_backup |
Timestamp of the last backup | 2026-02-17-000000 |
disk_total_gb |
Total storage space | 111.73 |
disk_free_gb |
Available storage space | 13.68 |
disk_used_pct |
Storage usage percentage | 87.8% |
last_backup_status |
Status of the most recent run | success |
Trigger backups via service calls in your automations or scripts.
| Parameter | Description | Example |
|---|---|---|
url |
(Optional) The URL of your Time Machine instance. Uses the integration's configured URL if left blank. | http://192.168.1.4:54000 |
smart_backup_enabled |
Only backup if changes are detected compared to the last snapshot. | true |
max_backups_enabled |
Whether to enforce the maximum number of backups to keep. | true |
max_backups_count |
The number of backups to keep before removing oldest ones. | 100 |
live_config_path |
The source path in the container to backup (default is /config). |
/config |
backup_folder_path |
The destination path in the container for backups (default is /media/timemachine). |
/media/timemachine |
timezone |
The timezone to use for the backup folder name (e.g., America/New_York). |
America/New_York |
Example Automation:
action: time_machine.backup_now
data:
  smart_backup_enabled: true
  max_backups_enabled: true
  max_backups_count: 100
timezone: "America/New_York"Tip
If you expose port 54000/tcp (for example, via the add-on's Configuration tab), you can open the UI directly at http://your-host:54000 without relying on ingress.
- Configure the add-on: In the add-on's configuration tab, set theme, language, esphome/packages toggle, and port.
- Start the add-on.
- Open the Web UI:
- Use Open Web UI from the add-on panel to launch ingress (default recommended when the external port is disabled).
- Or, if you've enabled port
54000/tcpin the add-on configuration, browse tohttp://homeassistant.local:54000(or your configured host/port).
- In-app setup:
- In the web UI, go to the settings menu.
- Live Home Assistant Folder Path: Set the path to your Home Assistant configuration directory (e.g.,
/config). - Backup Folder Path: Set the path to the directory where your backups are stored (e.g.,
/media/timemachine).
- Start the container with the required volume mounts (see Docker installation above).
- Open the Web UI at
http://localhost:54000(or your server's IP/port). - In-app setup:
- In the web UI, go to the settings menu.
- Live Home Assistant Folder Path: Set to
/config(this is the mounted volume). - Backup Folder Path: Set to
/media/timemachine(this is the mounted volume).
Basic Method (Add-on built-in):
You can trigger a backup from Home Assistant automations or scripts using the hassio.addon_stdin service:
service: hassio.addon_stdin
data:
  addon: 0f6ec05b_homeassistant-time-machine
  input: backup
Note
Replace 0f6ec05b_homeassistant-time-machine with your addon's slug if different.
For more control over your backups (like setting a custom timezone, limiting max backups, or only backing up when changes occur), install the HACS Companion Integration and use the time_machine.backup_now service instead.
To configure backups to a remote share, first set up network storage within Home Assistant (Settings > System > Storage > 'Add network storage'). Name the share 'backups' and set its usage to 'Media'. Once configured, you can then specify the backup path in Home Assistant Time Machine settings as '/media/backups', which will direct backups to your remote share.
- POST /api/backup-now: Trigger an immediate backup. Requires
liveFolderPathandbackupFolderPath. Optional parameters (smartBackupEnabled,maxBackupsEnabled,maxBackupsCount,timezone) fall back to saved settings when not provided. - POST /api/restore-automation / POST /api/restore-script: Restore a single automation or script after creating a safety backup.
- POST /api/restore-lovelace-file / POST /api/restore-esphome-file / POST /api/restore-packages-file: Restore Lovelace, ESPHome, or package files with automatic pre-restore backups.
- *POST /api/get-backup- ** & */api/get-live- ** families: Fetch specific items from backups or the live config (automations, scripts, Lovelace, ESPHome, packages).
- GET /api/schedule-backup / POST /api/schedule-backup: Inspect or update scheduled backup jobs.
- POST /api/scan-backups: Scan the backup directory tree and list discovered backups.
- POST /api/validate-path / POST /api/validate-backup-path: Verify that provided directories exist and contain Home Assistant data/backups.
- POST /api/test-home-assistant-connection: Confirm stored Home Assistant credentials work before saving.
- POST /api/reload-home-assistant: Invoke a Home Assistant reload service (e.g.,
automation.reload). - GET /api/health: Simple status endpoint exposing version, ingress state, and timestamp.
Example usage:
# Trigger backup
curl -X POST http://localhost:54000/api/backup-now \
  -H "Content-Type: application/json" \
  -d '{"liveFolderPath": "/config", "backupFolderPath": "/media/timemachine"}'

# Get scheduled jobs
curl http://localhost:54000/api/schedule-backup

# Scan backups
curl -X POST http://localhost:54000/api/scan-backups \
  -H "Content-Type: application/json" \
-d '{"backupRootPath": "/media/timemachine"}'For detailed history tracking powered by a local Git backend, check out Home Assistant Version Control. It provides complete version history for your setup by automatically tracking every change to your YAML files.
Thank you to everyone who has written about or featured Home Assistant Time Machine!
- XDA Developers – "Home Assistant Time Machine tool is amazing"
- Glooob Domo – YouTube Video
- smarterkram | Olli – YouTube Video
If you encounter a bug or have a feature request, feel free to open an issue. If you'd like to contribute, check out the contribution guidelines.
If you find this add-on useful, consider giving it a ⭐ star or making a donation to support development.