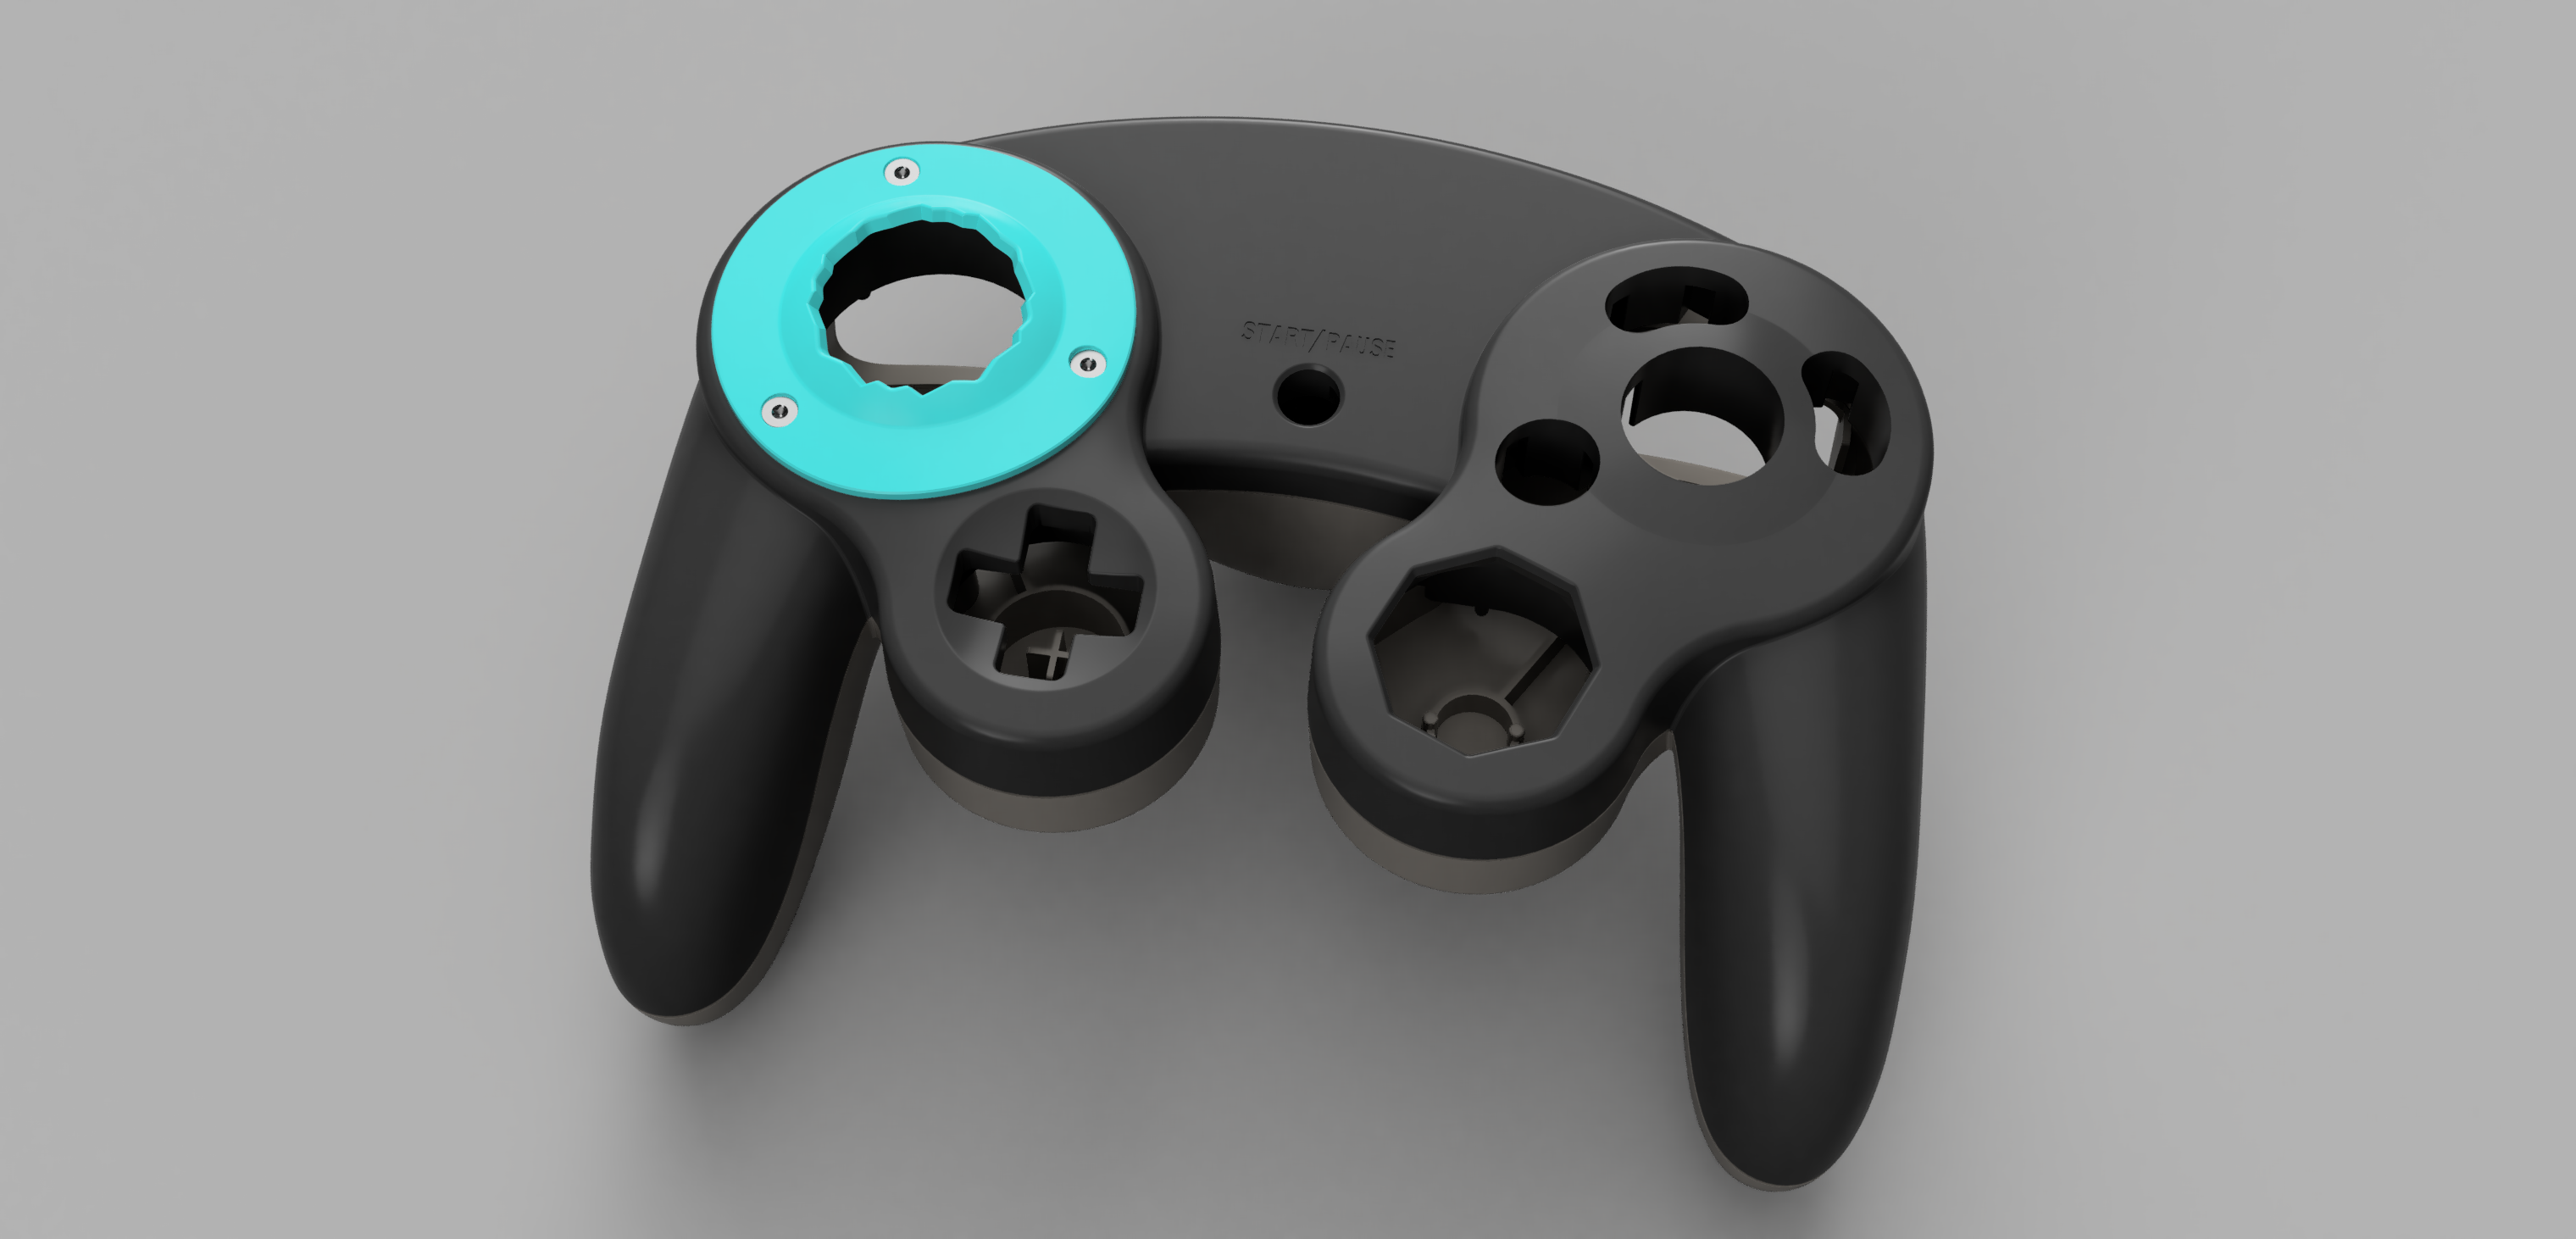
Removable Gate OEM is a project based on my previous work designed to bring the removable gate system to OEM Gamecube Controller shells in the form of a small DIY kit
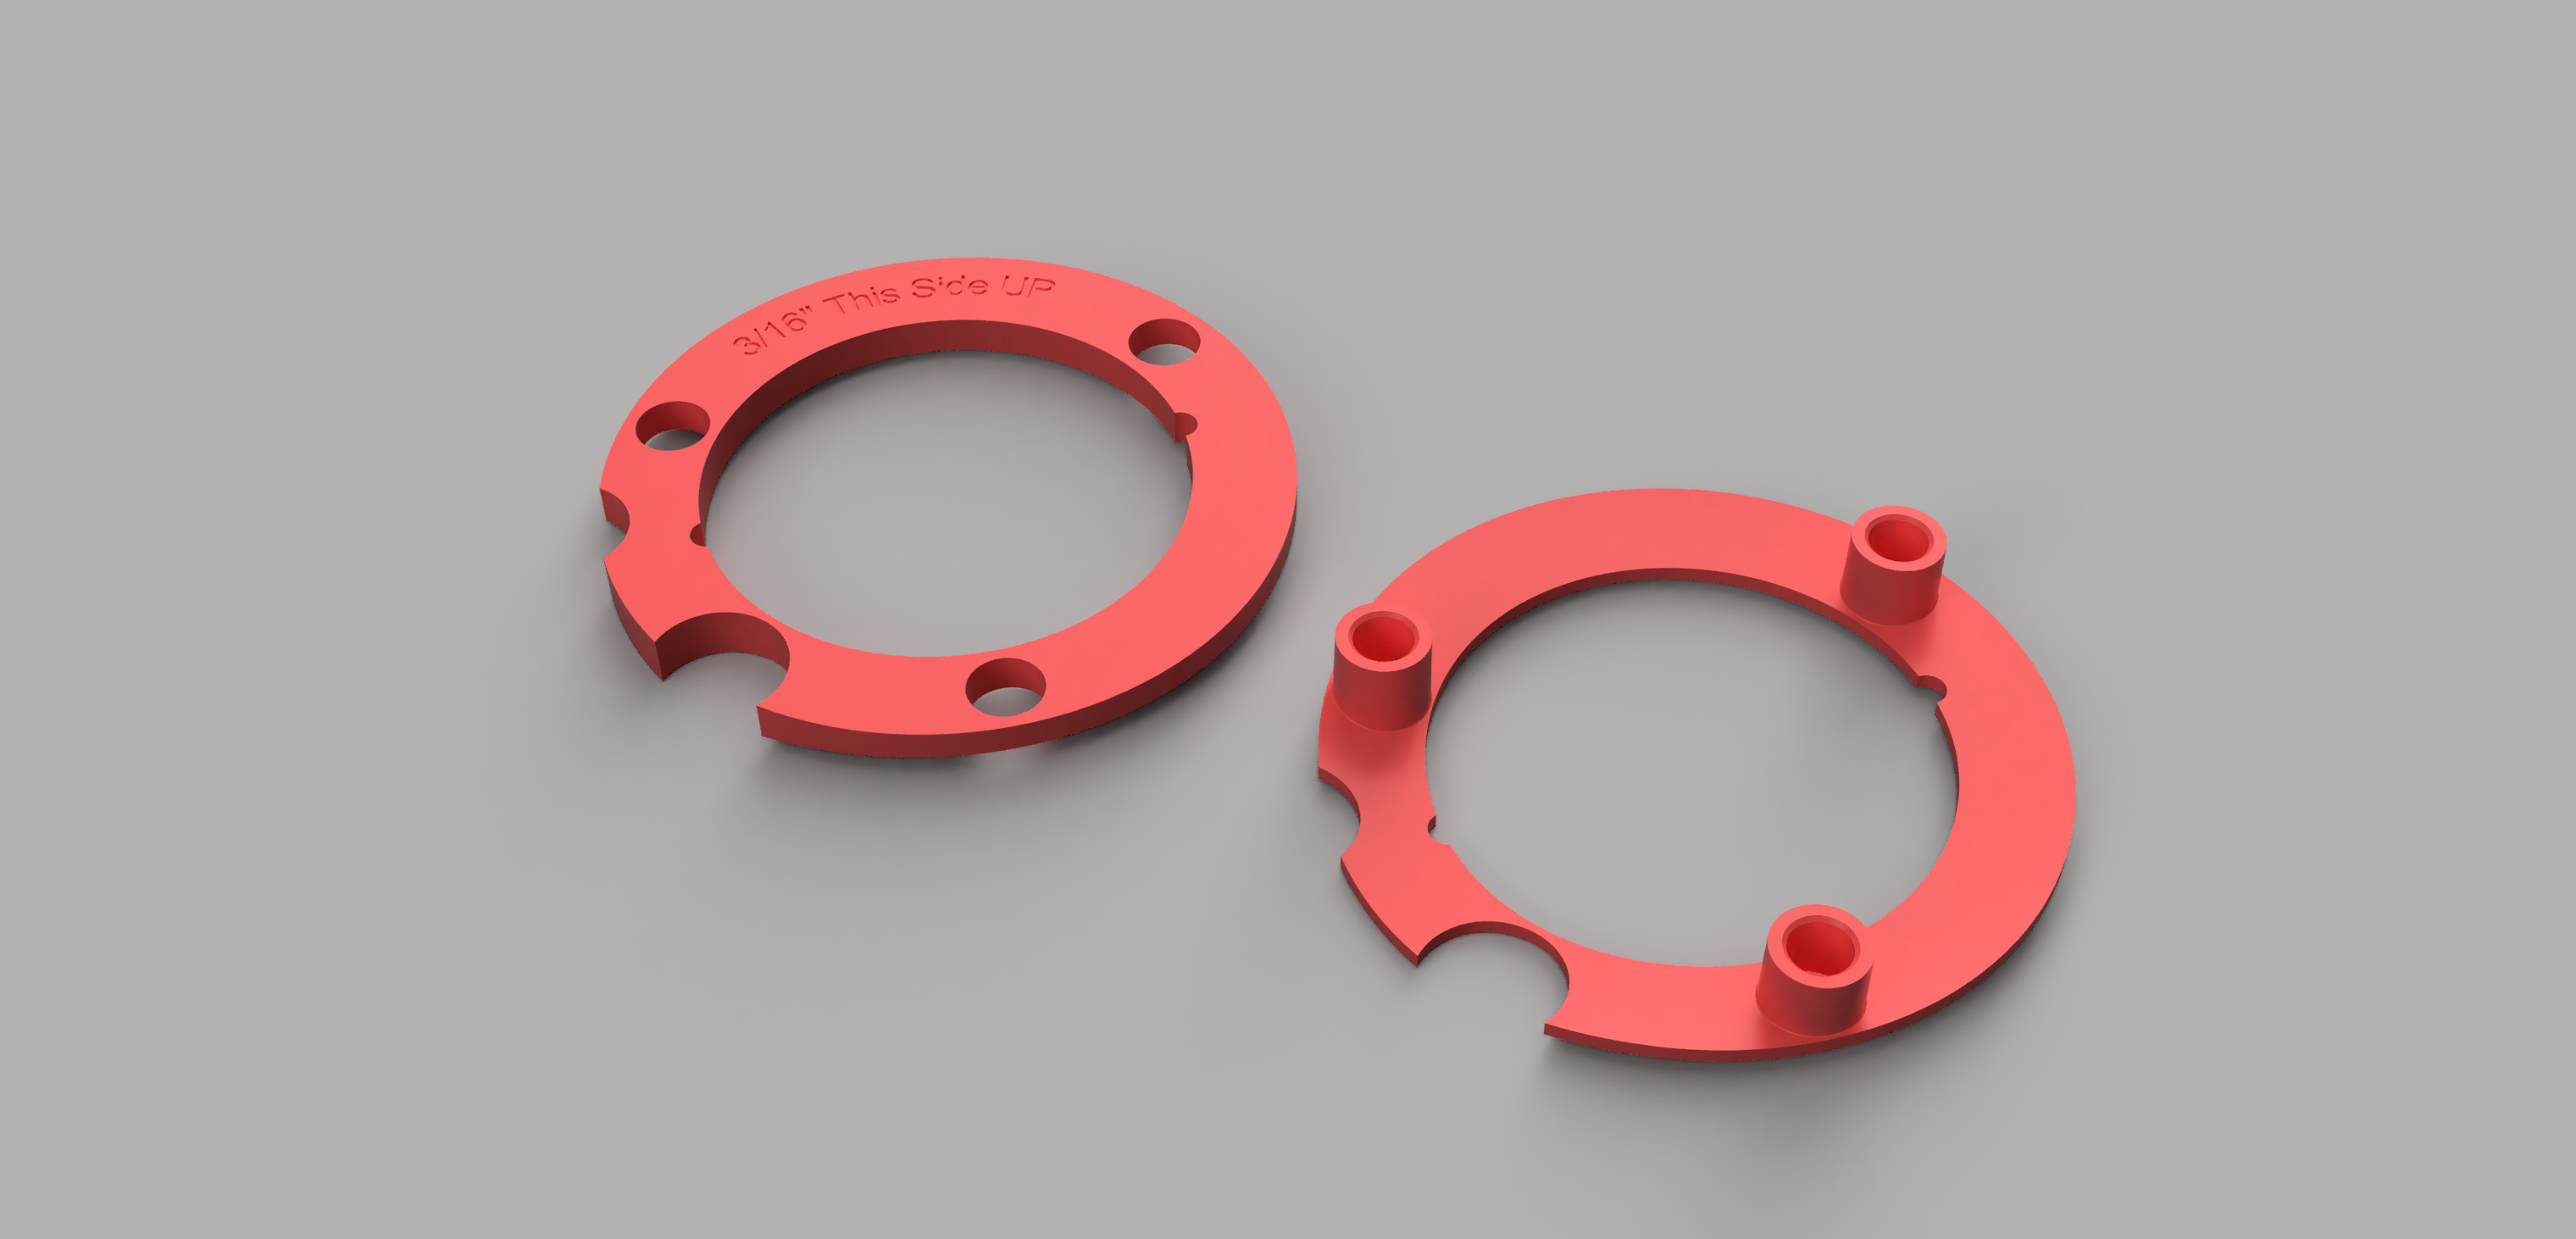
This release contains STL, STEP, and F3D files for each part of the project. The STLs are high resolution and ready to be resin printed. You can import the F3D file into fusion360, or the STEP files into any other CAD program you like to make changes to the design as you see fit! The files feature 5 unique gateplate designs, each with their own different number of notches for you to experiment with. Additionally, the files also include what I call a ThreadHolder and a DrillJig. The ThreadHolder is a piece that will slide under the control stick area of the GCC front shell. It has slots inside that will hold the metal threads permanently inside of the shell. When you put a gateplate onto the front of your controller, the gateplate will screw into these threads and hold it firmly in place!
This project requires modification of the OEM Gamecube Controller front shell in order to fit and function. A section of the shell first needs to be removed, and then 3 holes need to be drilled into the shell. These holes require a 3/16 inch drill bit. The DrillJig is a piece that slides under the control stick area of the GCC, just like the ThreadHolder, and shows you exactly where to drill so that you can put the drill holes in the exact perfect spot. After you are done drilling, the DrillJig is to be removed from the controller and replaced by the ThreadHolder, the permanent piece that goes in that spot for the mod to work. You can reuse the DrillJig to drill holes in multiple controller shells. Use the DrillJig after removing the gate area of the front shell and before installing the ThreadHolder!
Gateplate Screws: https://www.mcmaster.com/90236A105/
Gateplate Threads: https://www.mcmaster.com/90363A110/
Where to Purchase the 3D Printed Parts: https://jlc3dp.com
The Gateplate Screws are T6 Torx Screws. If you do not have a T6 Torx Screwdriver, you can buy them anywhere
YouTube Video going over the concept and explaining how the kit works with visuals: https://youtu.be/-zyUboVVk4A
Video Build Guide: https://youtu.be/2FYZF3ZB4hE
Parametric Notch Builder Tool: https://www.printables.com/model/1191100-parametric-notch-builder-tool-for-oem-stubby-gatep
This design is based on, and uses the OEM GCC step file collection made by GearHawkStudios
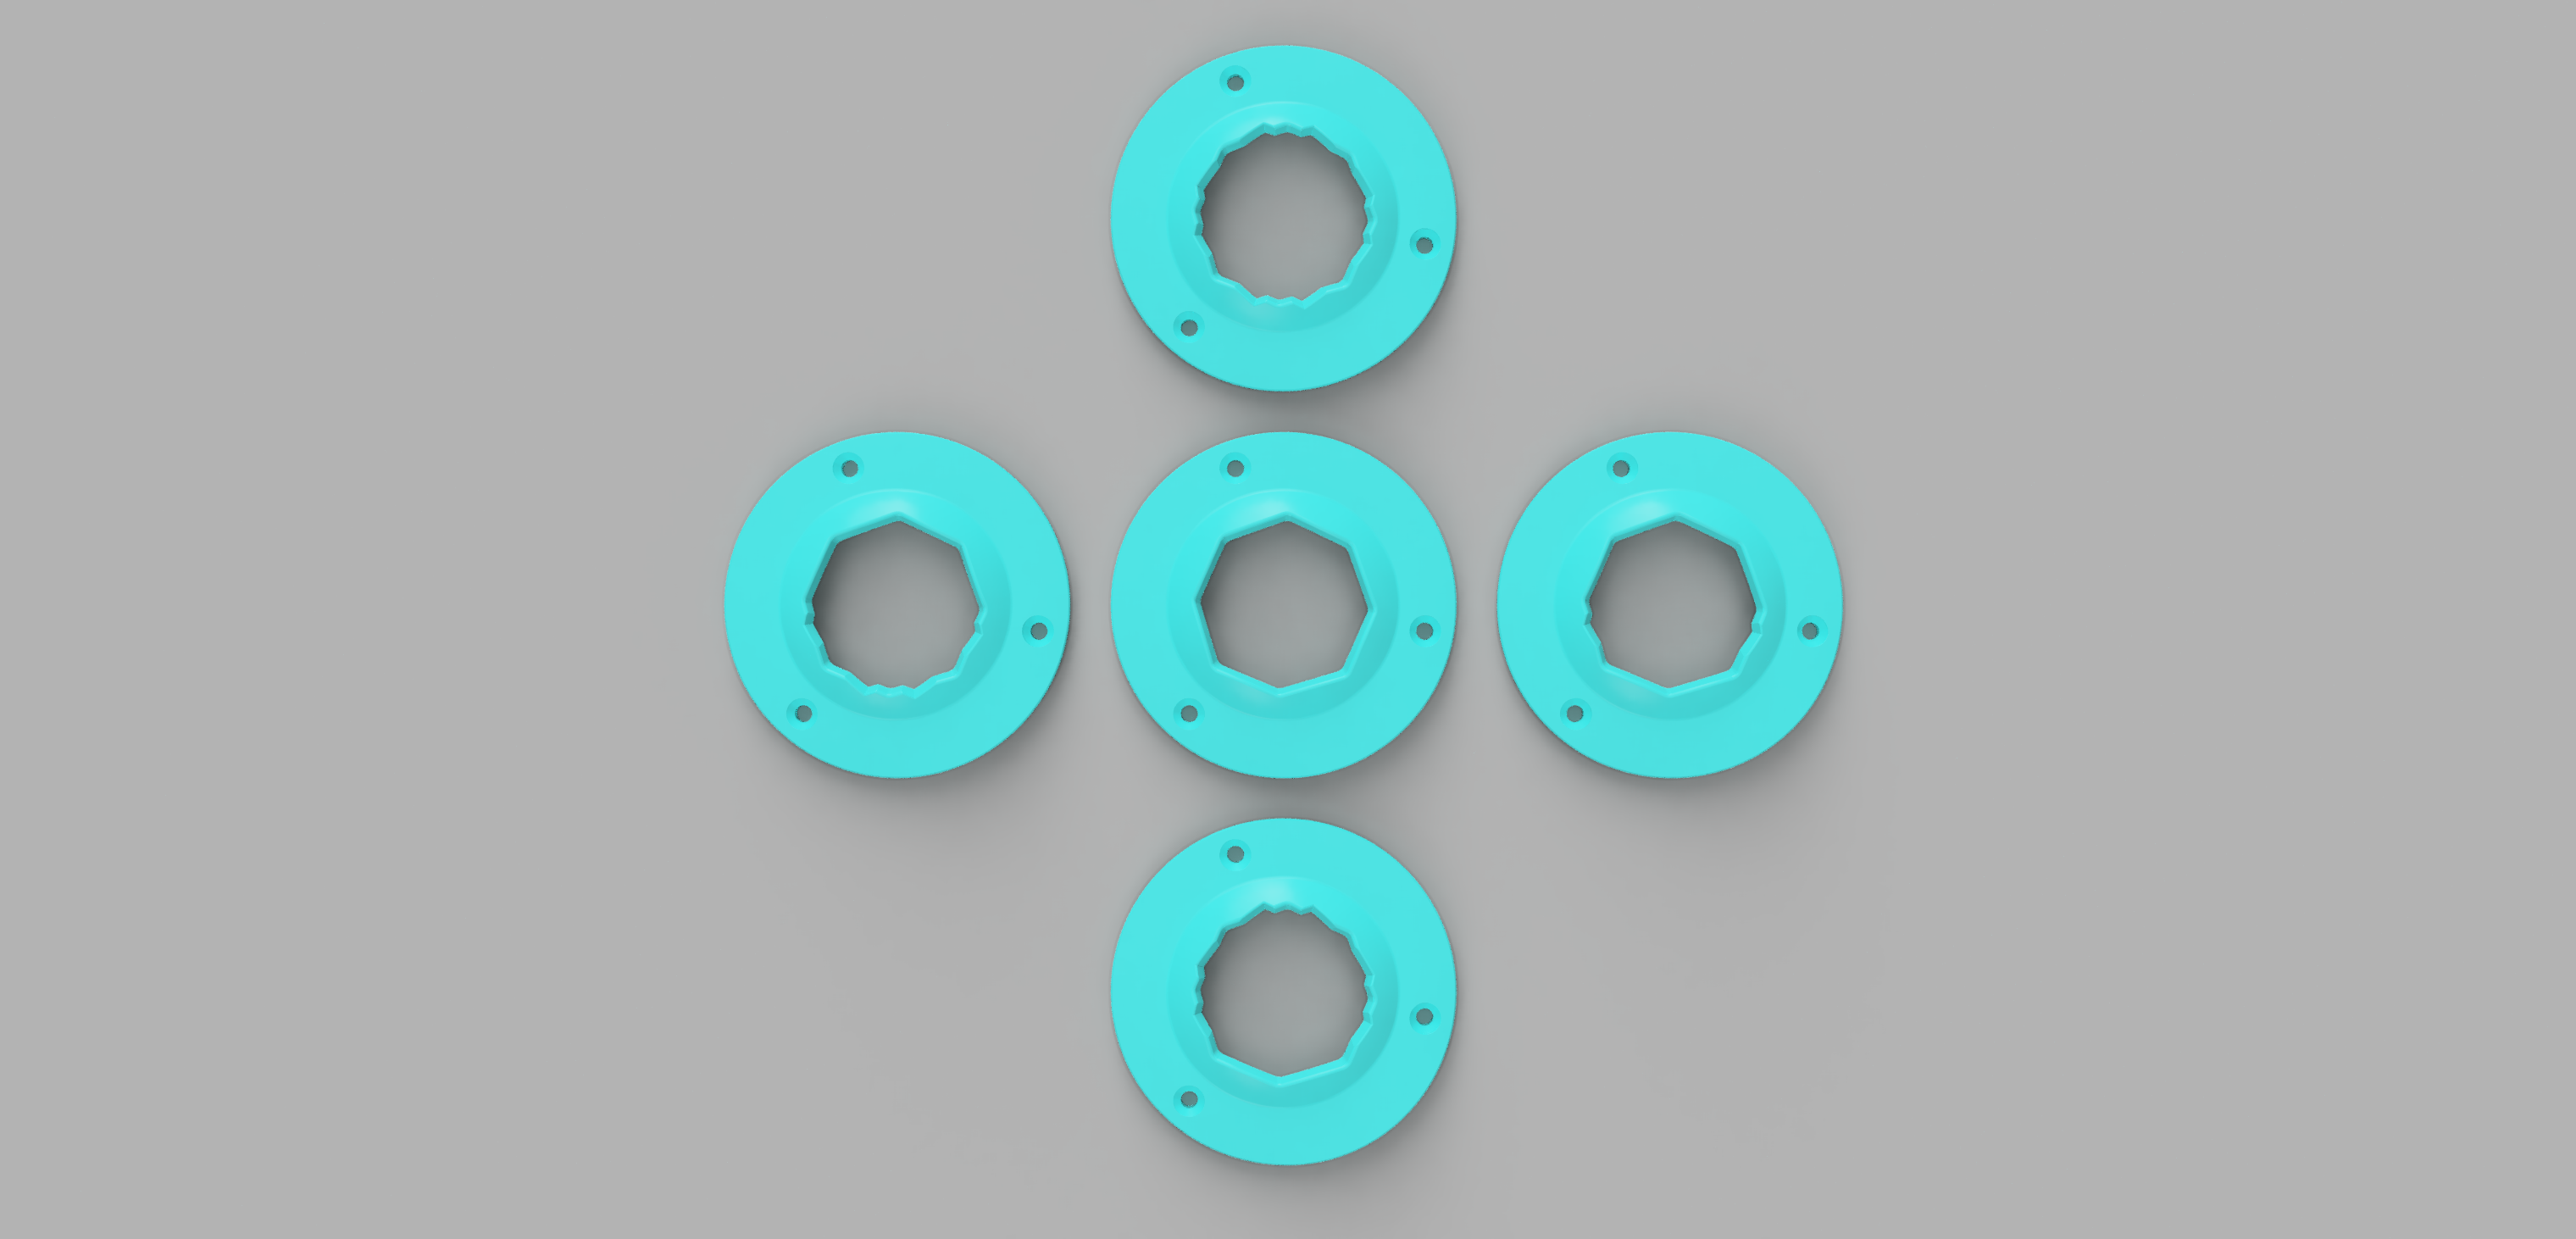
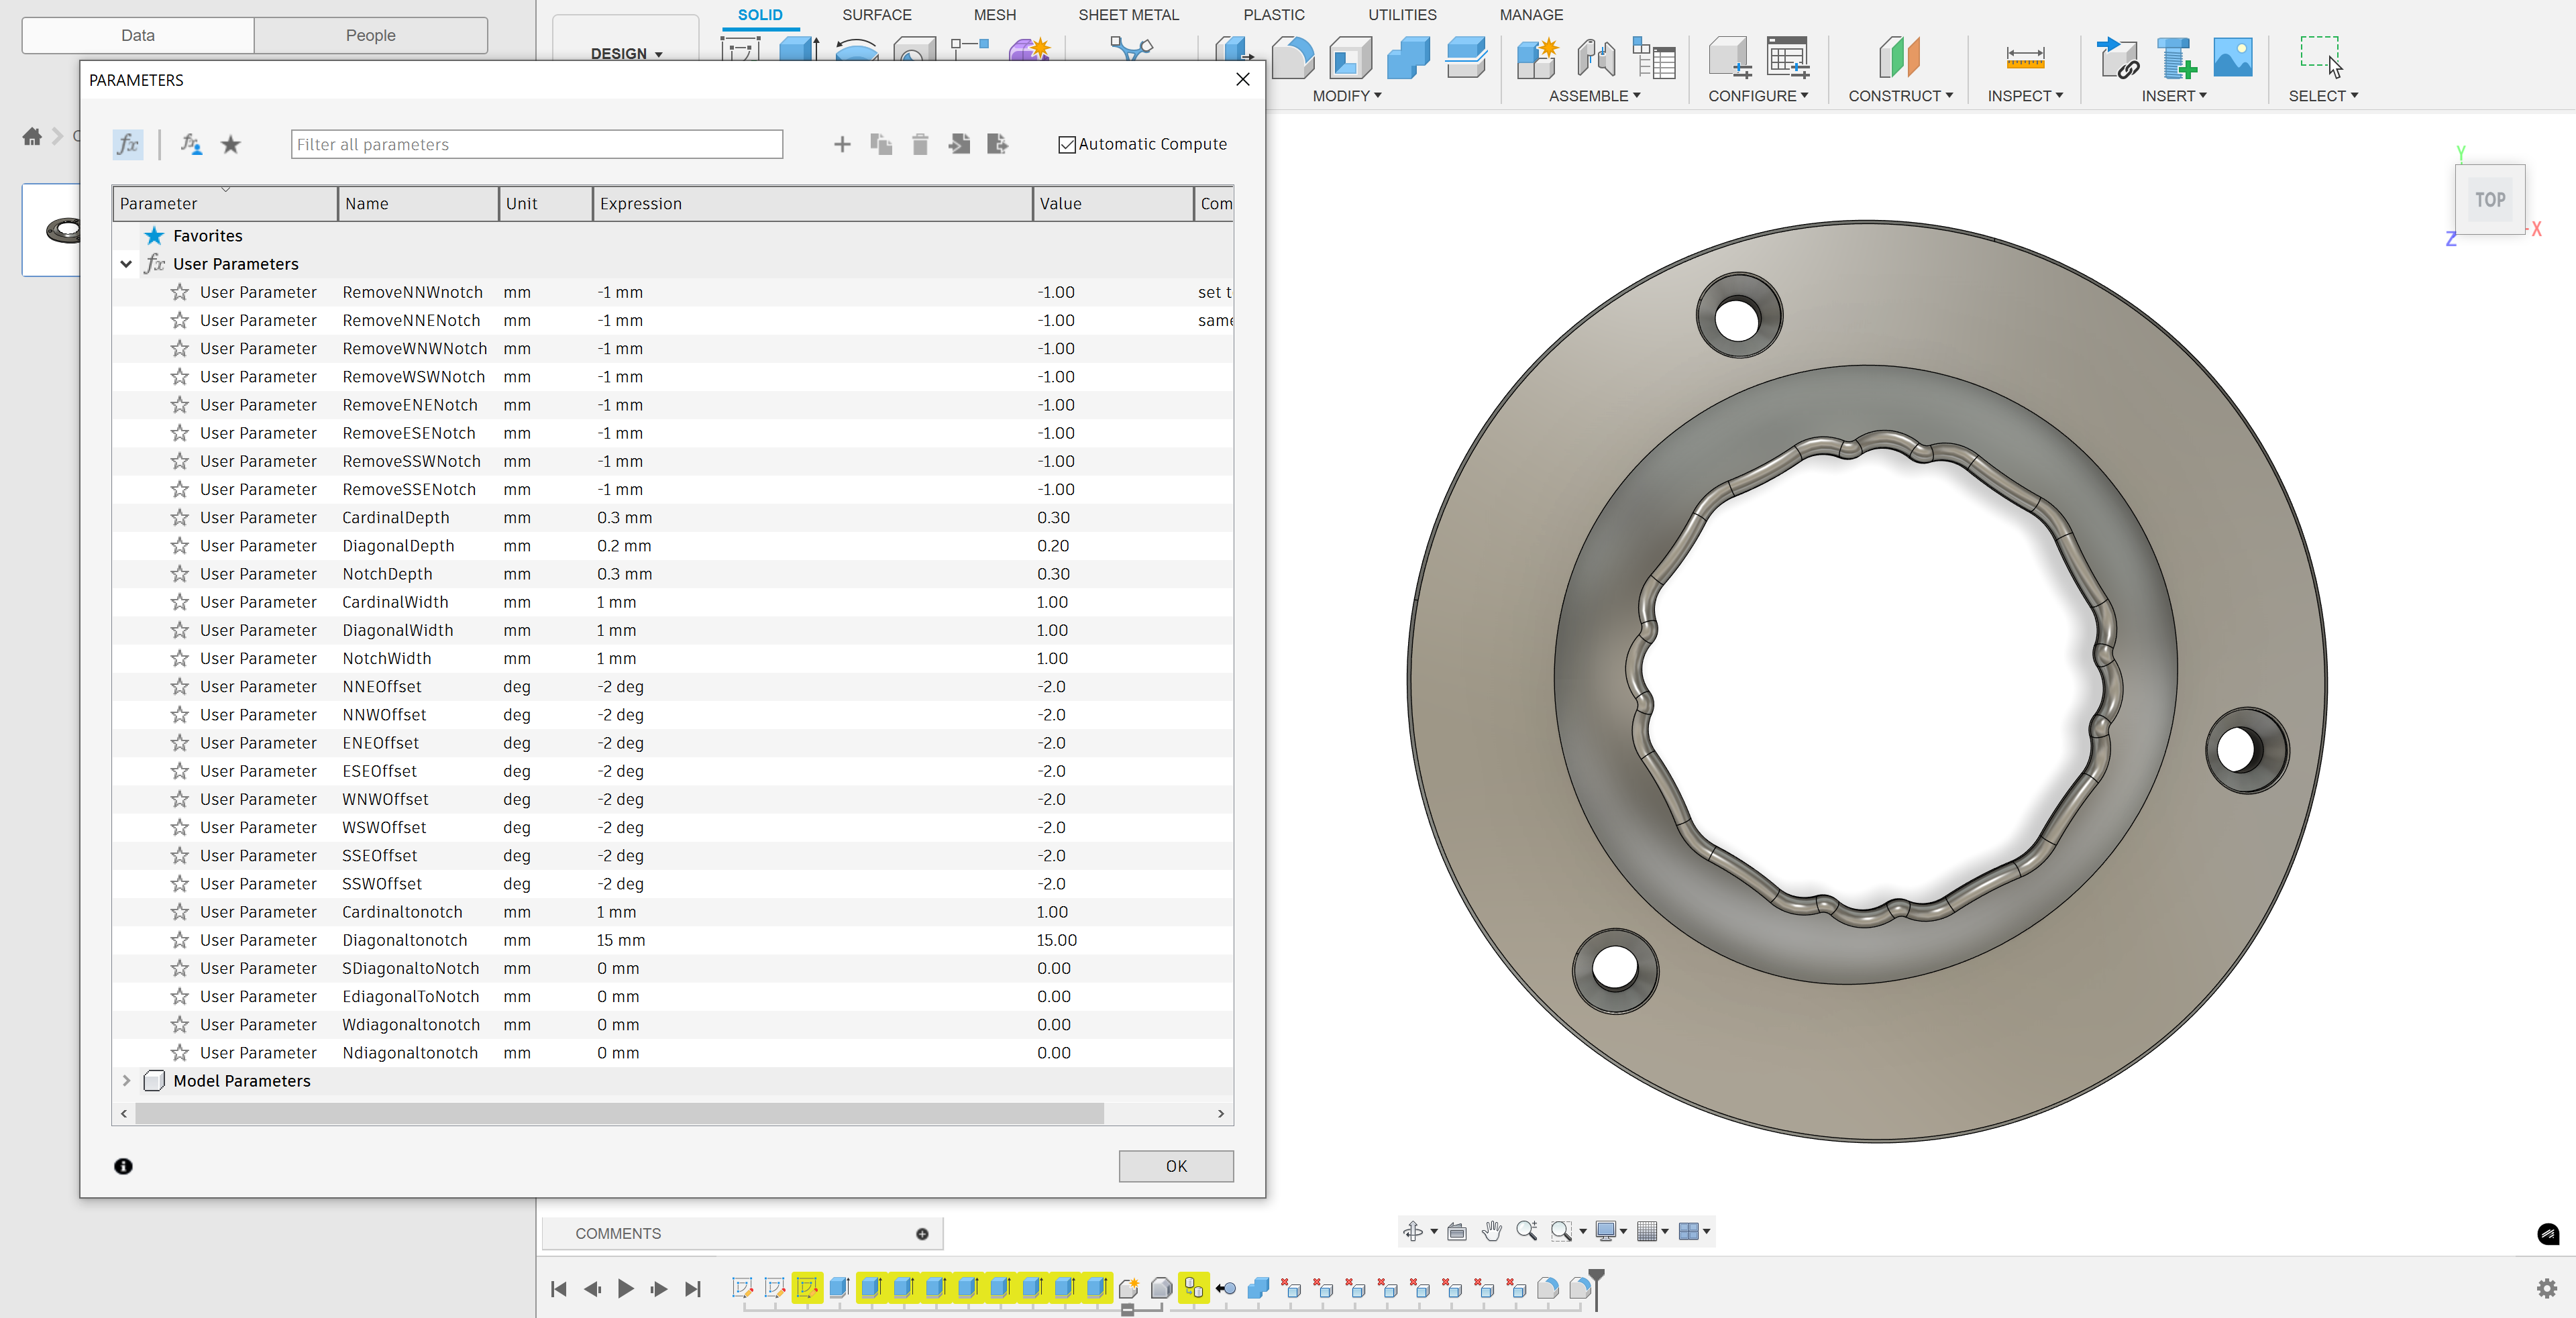
The Parametric Notch Builder Tool allows you to input values into a menu and slightly adjust the geometry of a Notched Gateplate. With this, you can remove notches, adjust notches, move notches around the gate, and adjust the overall shape and profile. This lets you get very specific with your Gateplate design and allows you to do things that are character specific on a whim.
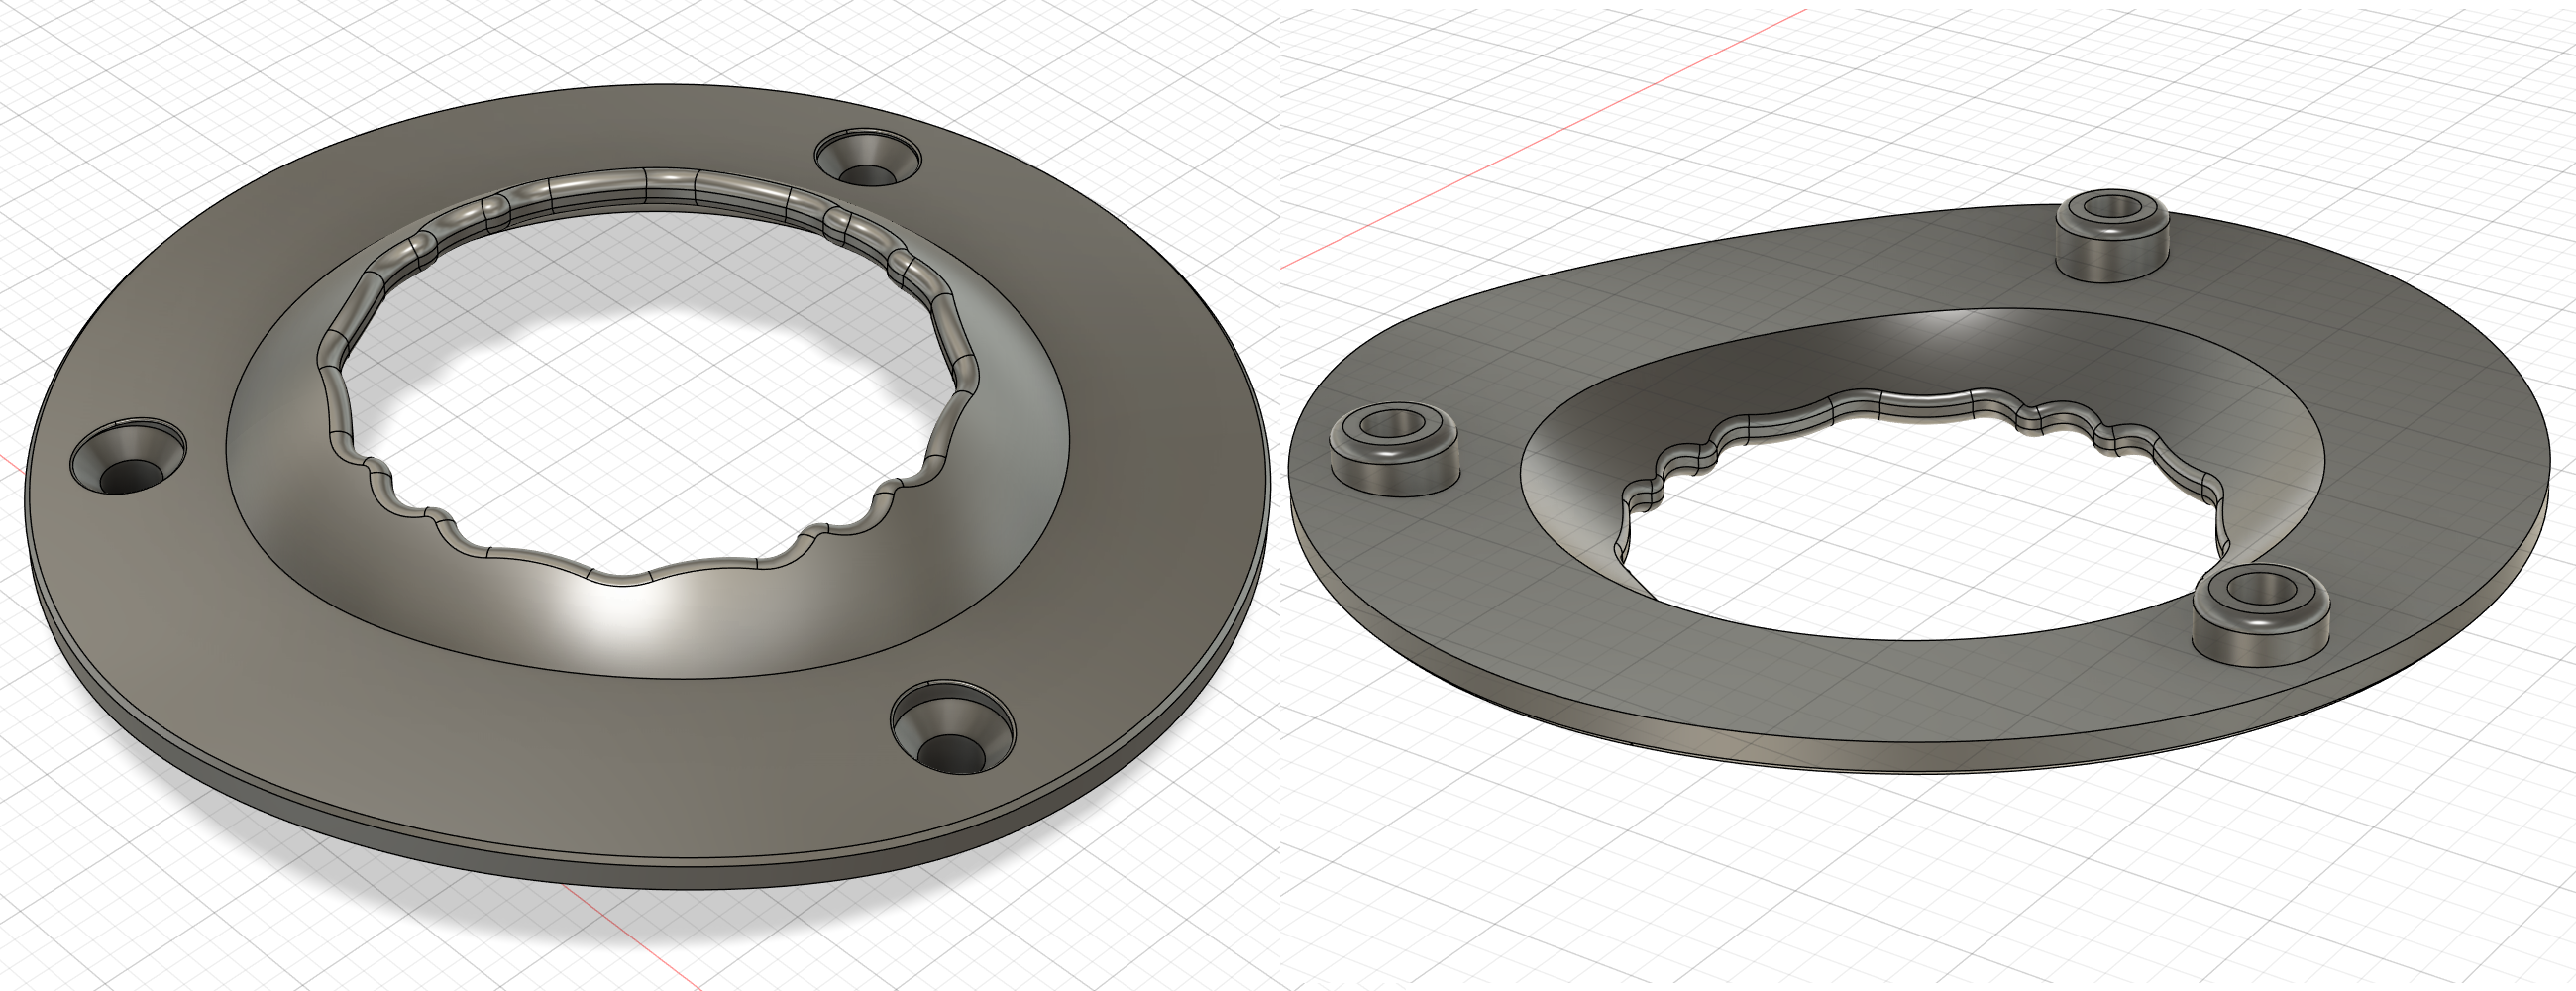
Personally, I prefer the smooth profile of the parametric notched gateplate over harsher notched gateplates included in the standard release. I have included some sample gateplates made using this tool, and I encourage you to try it out and create your own!
Click to expand
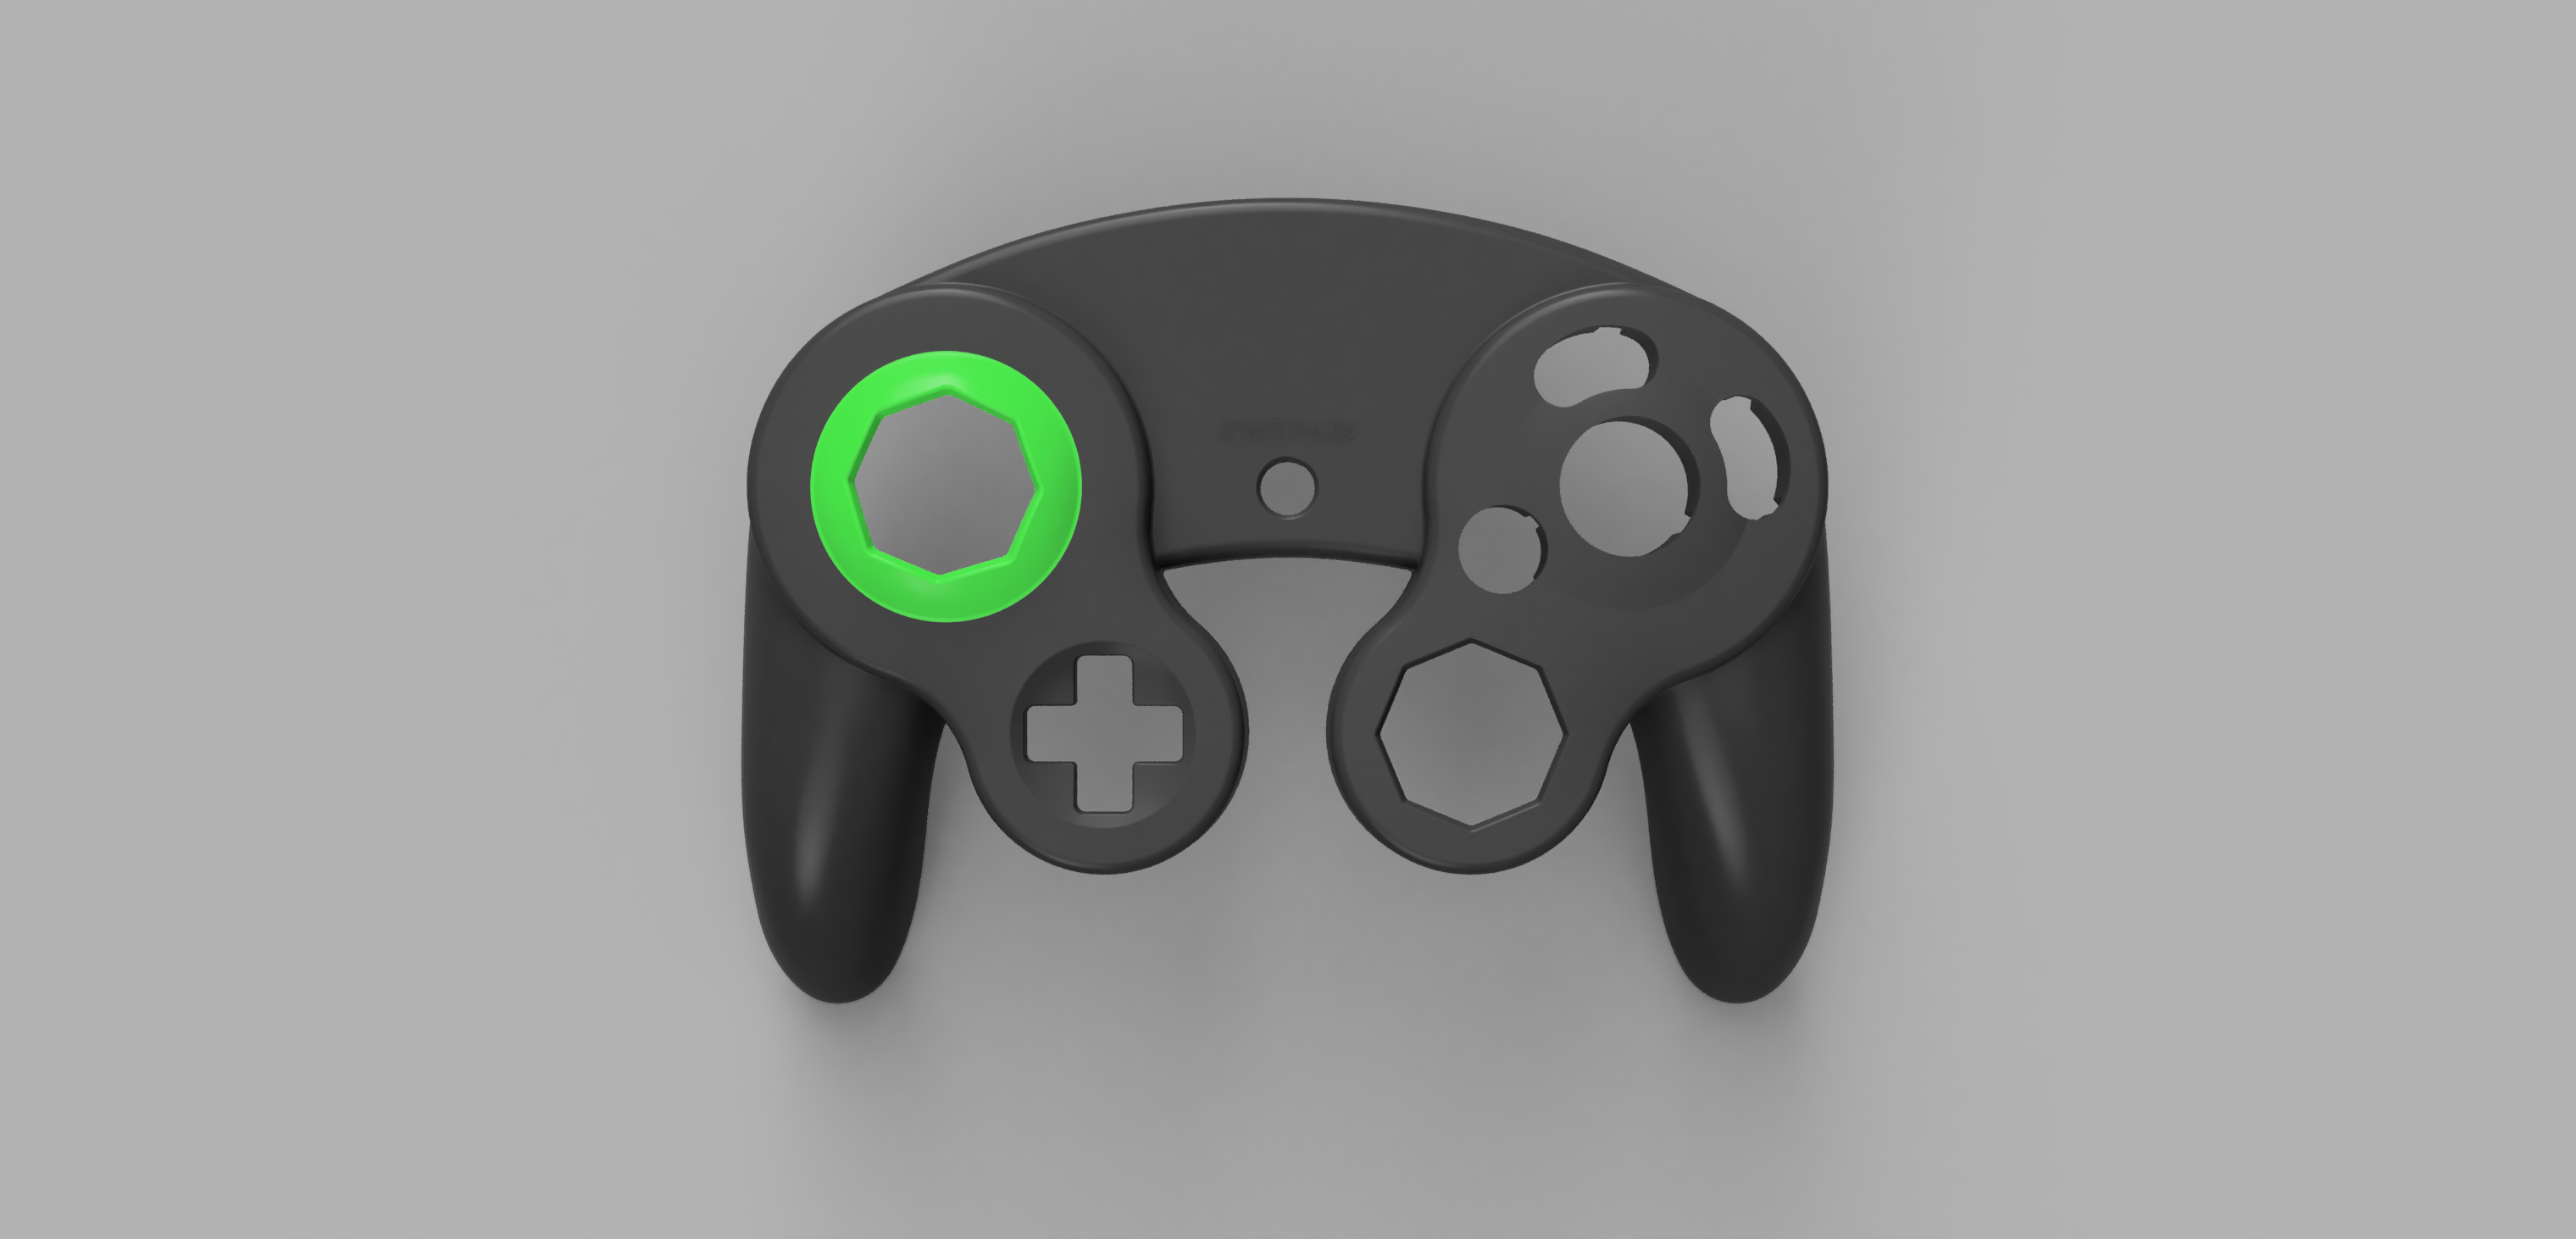
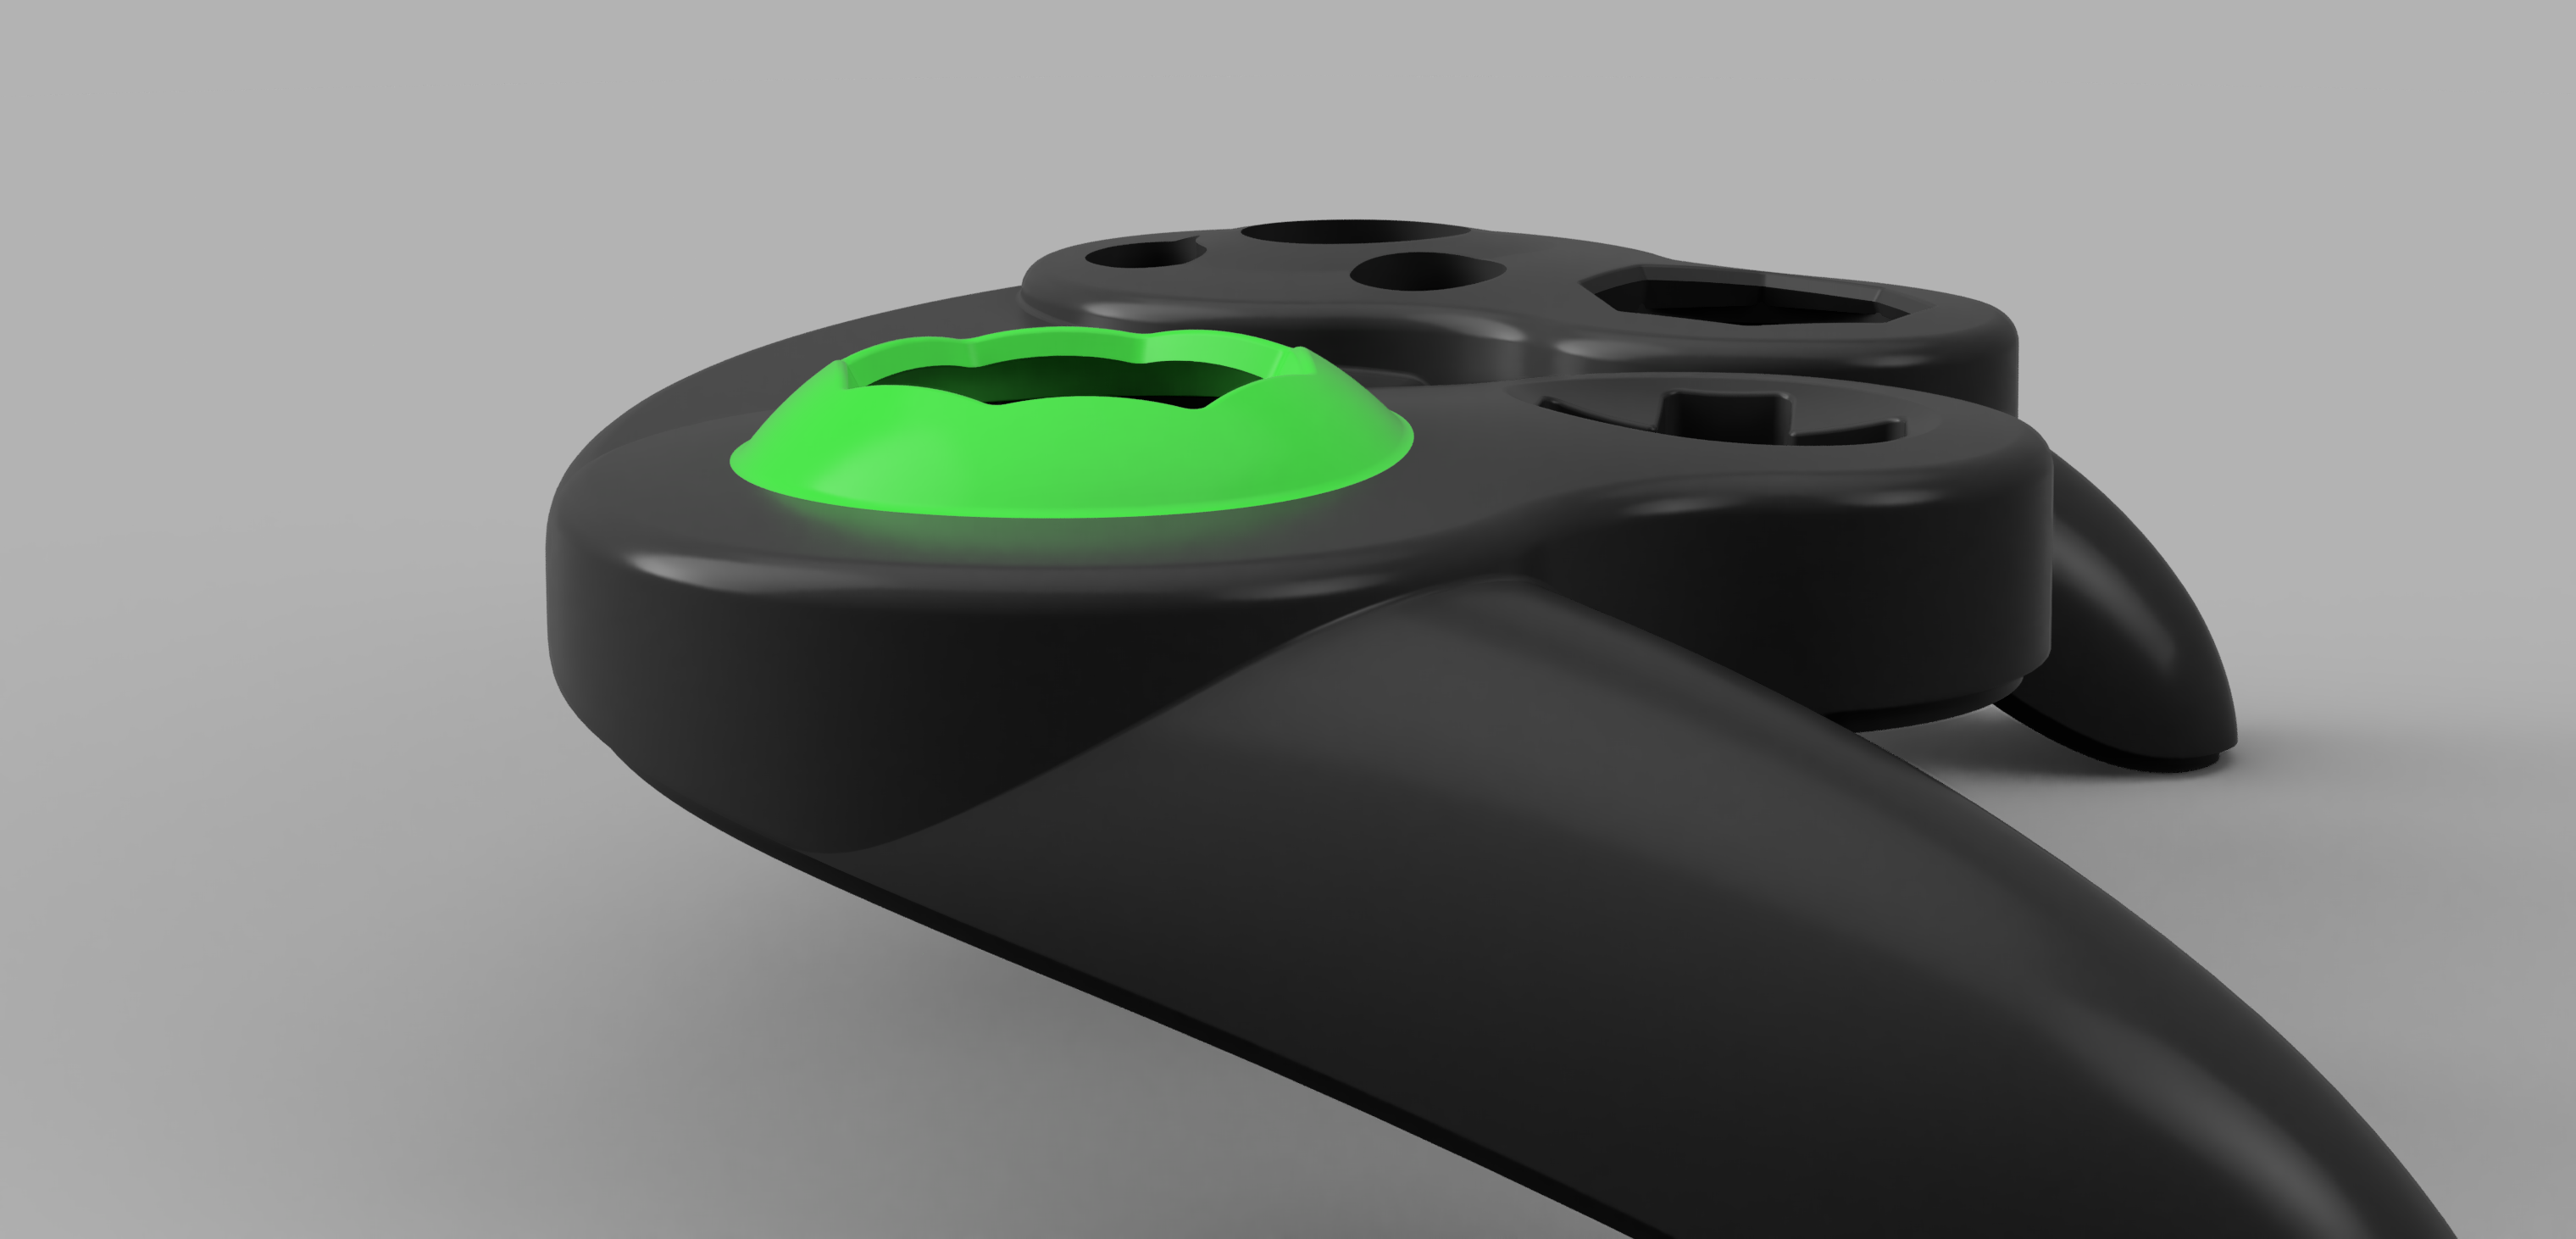
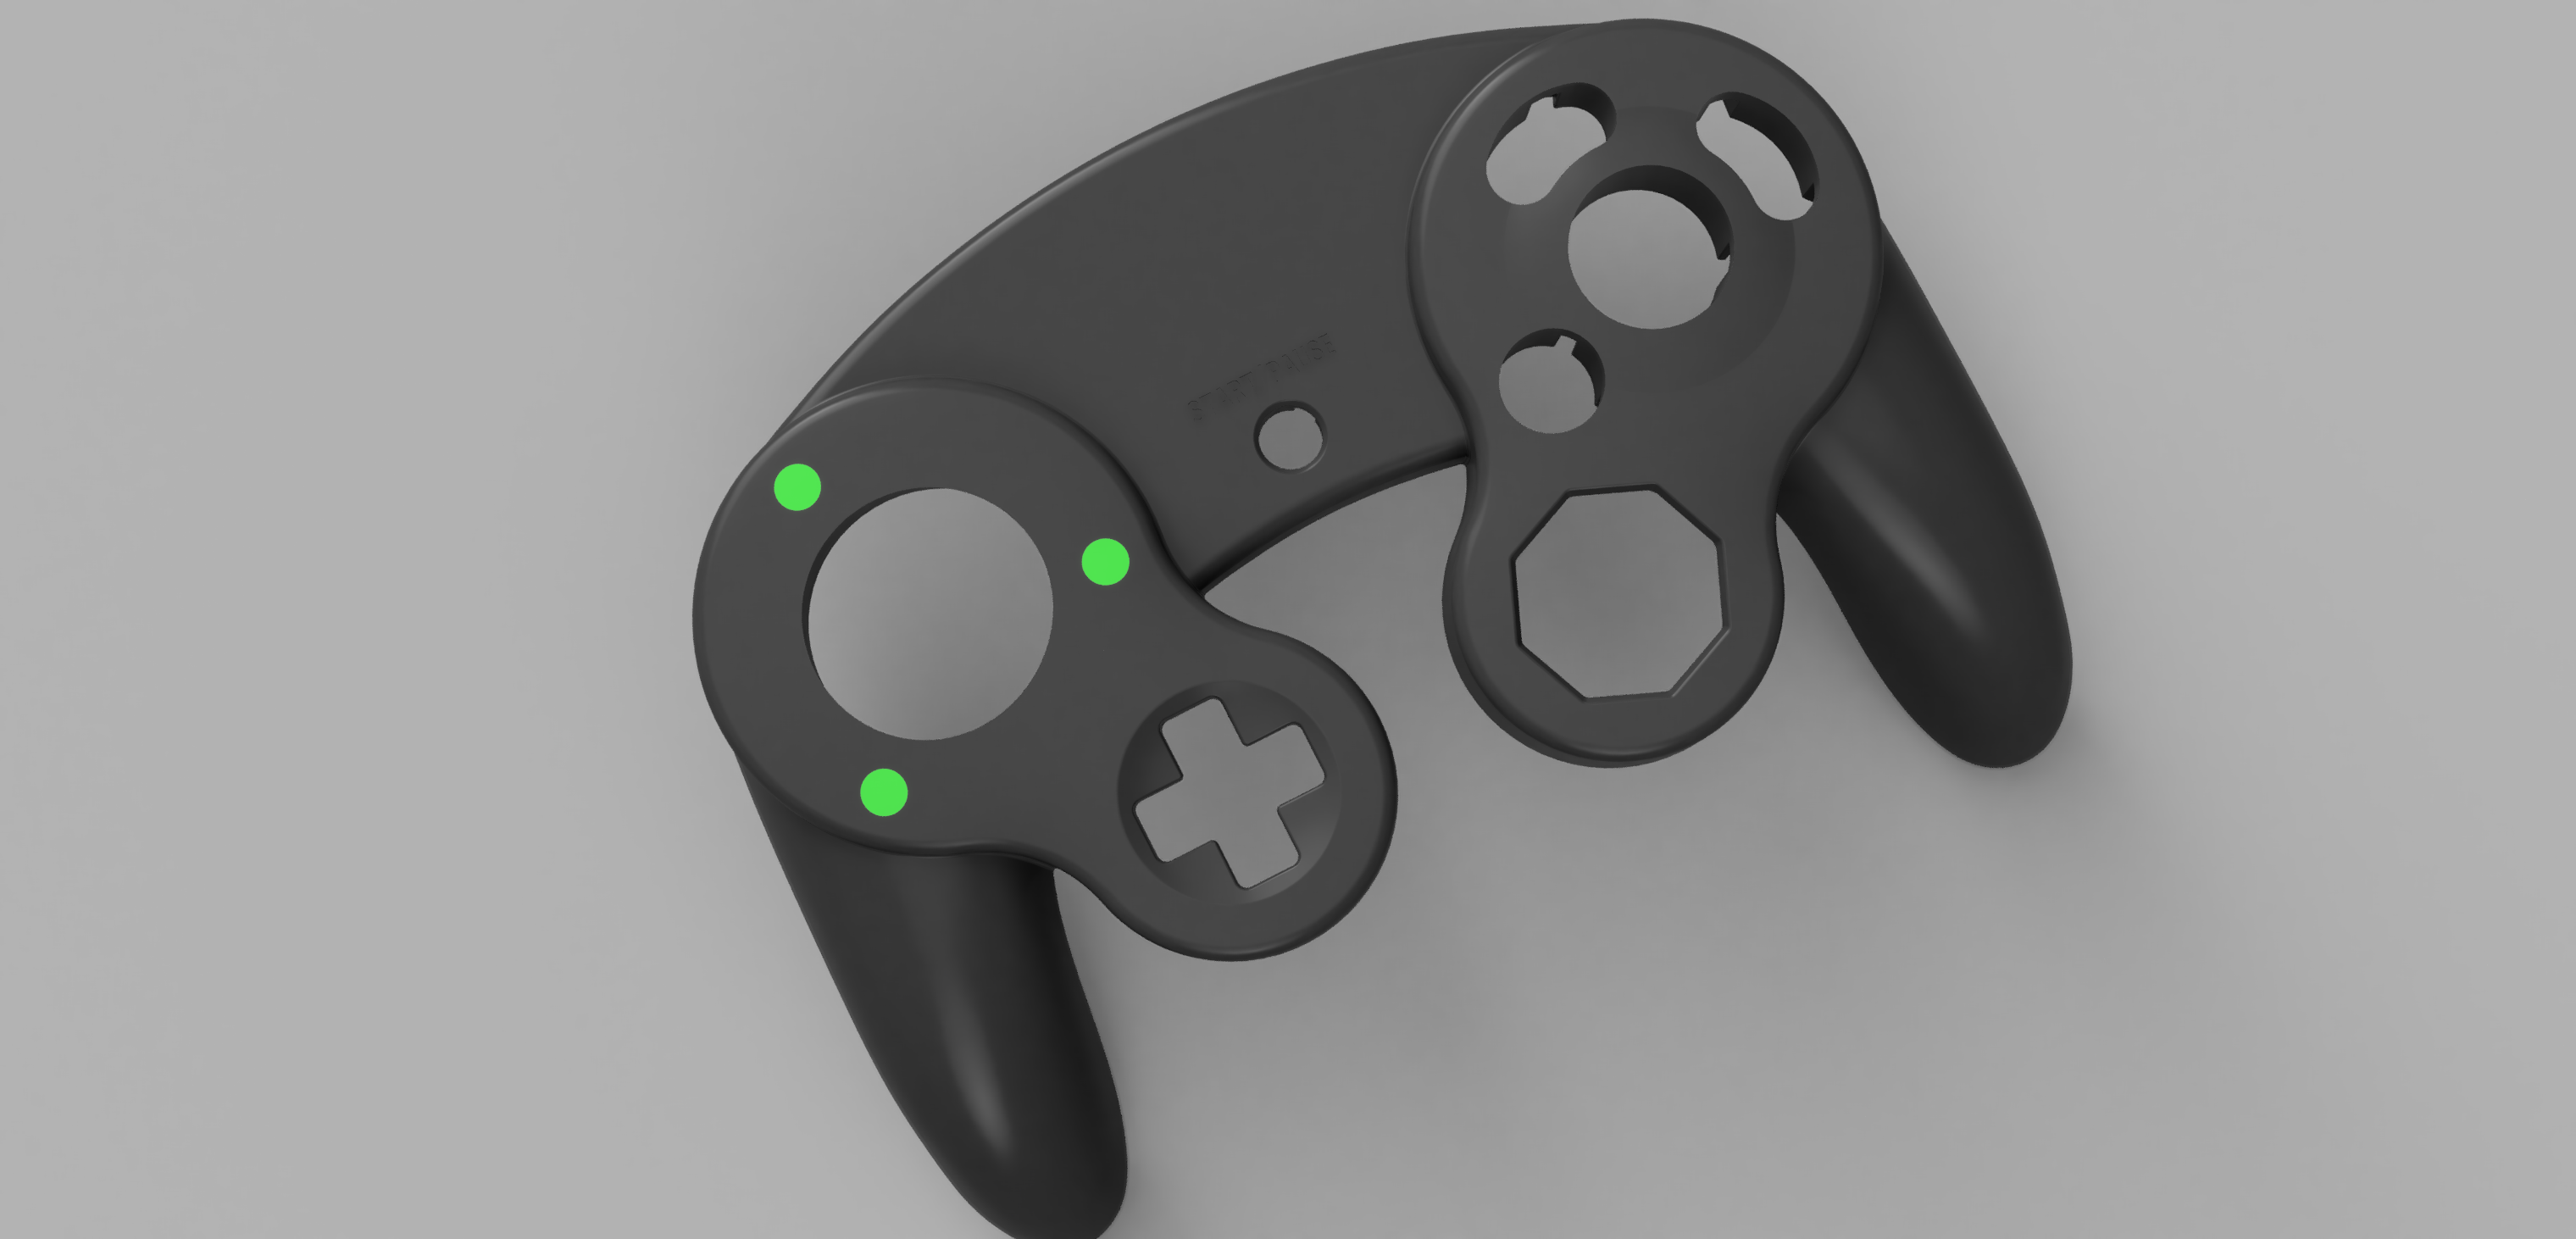
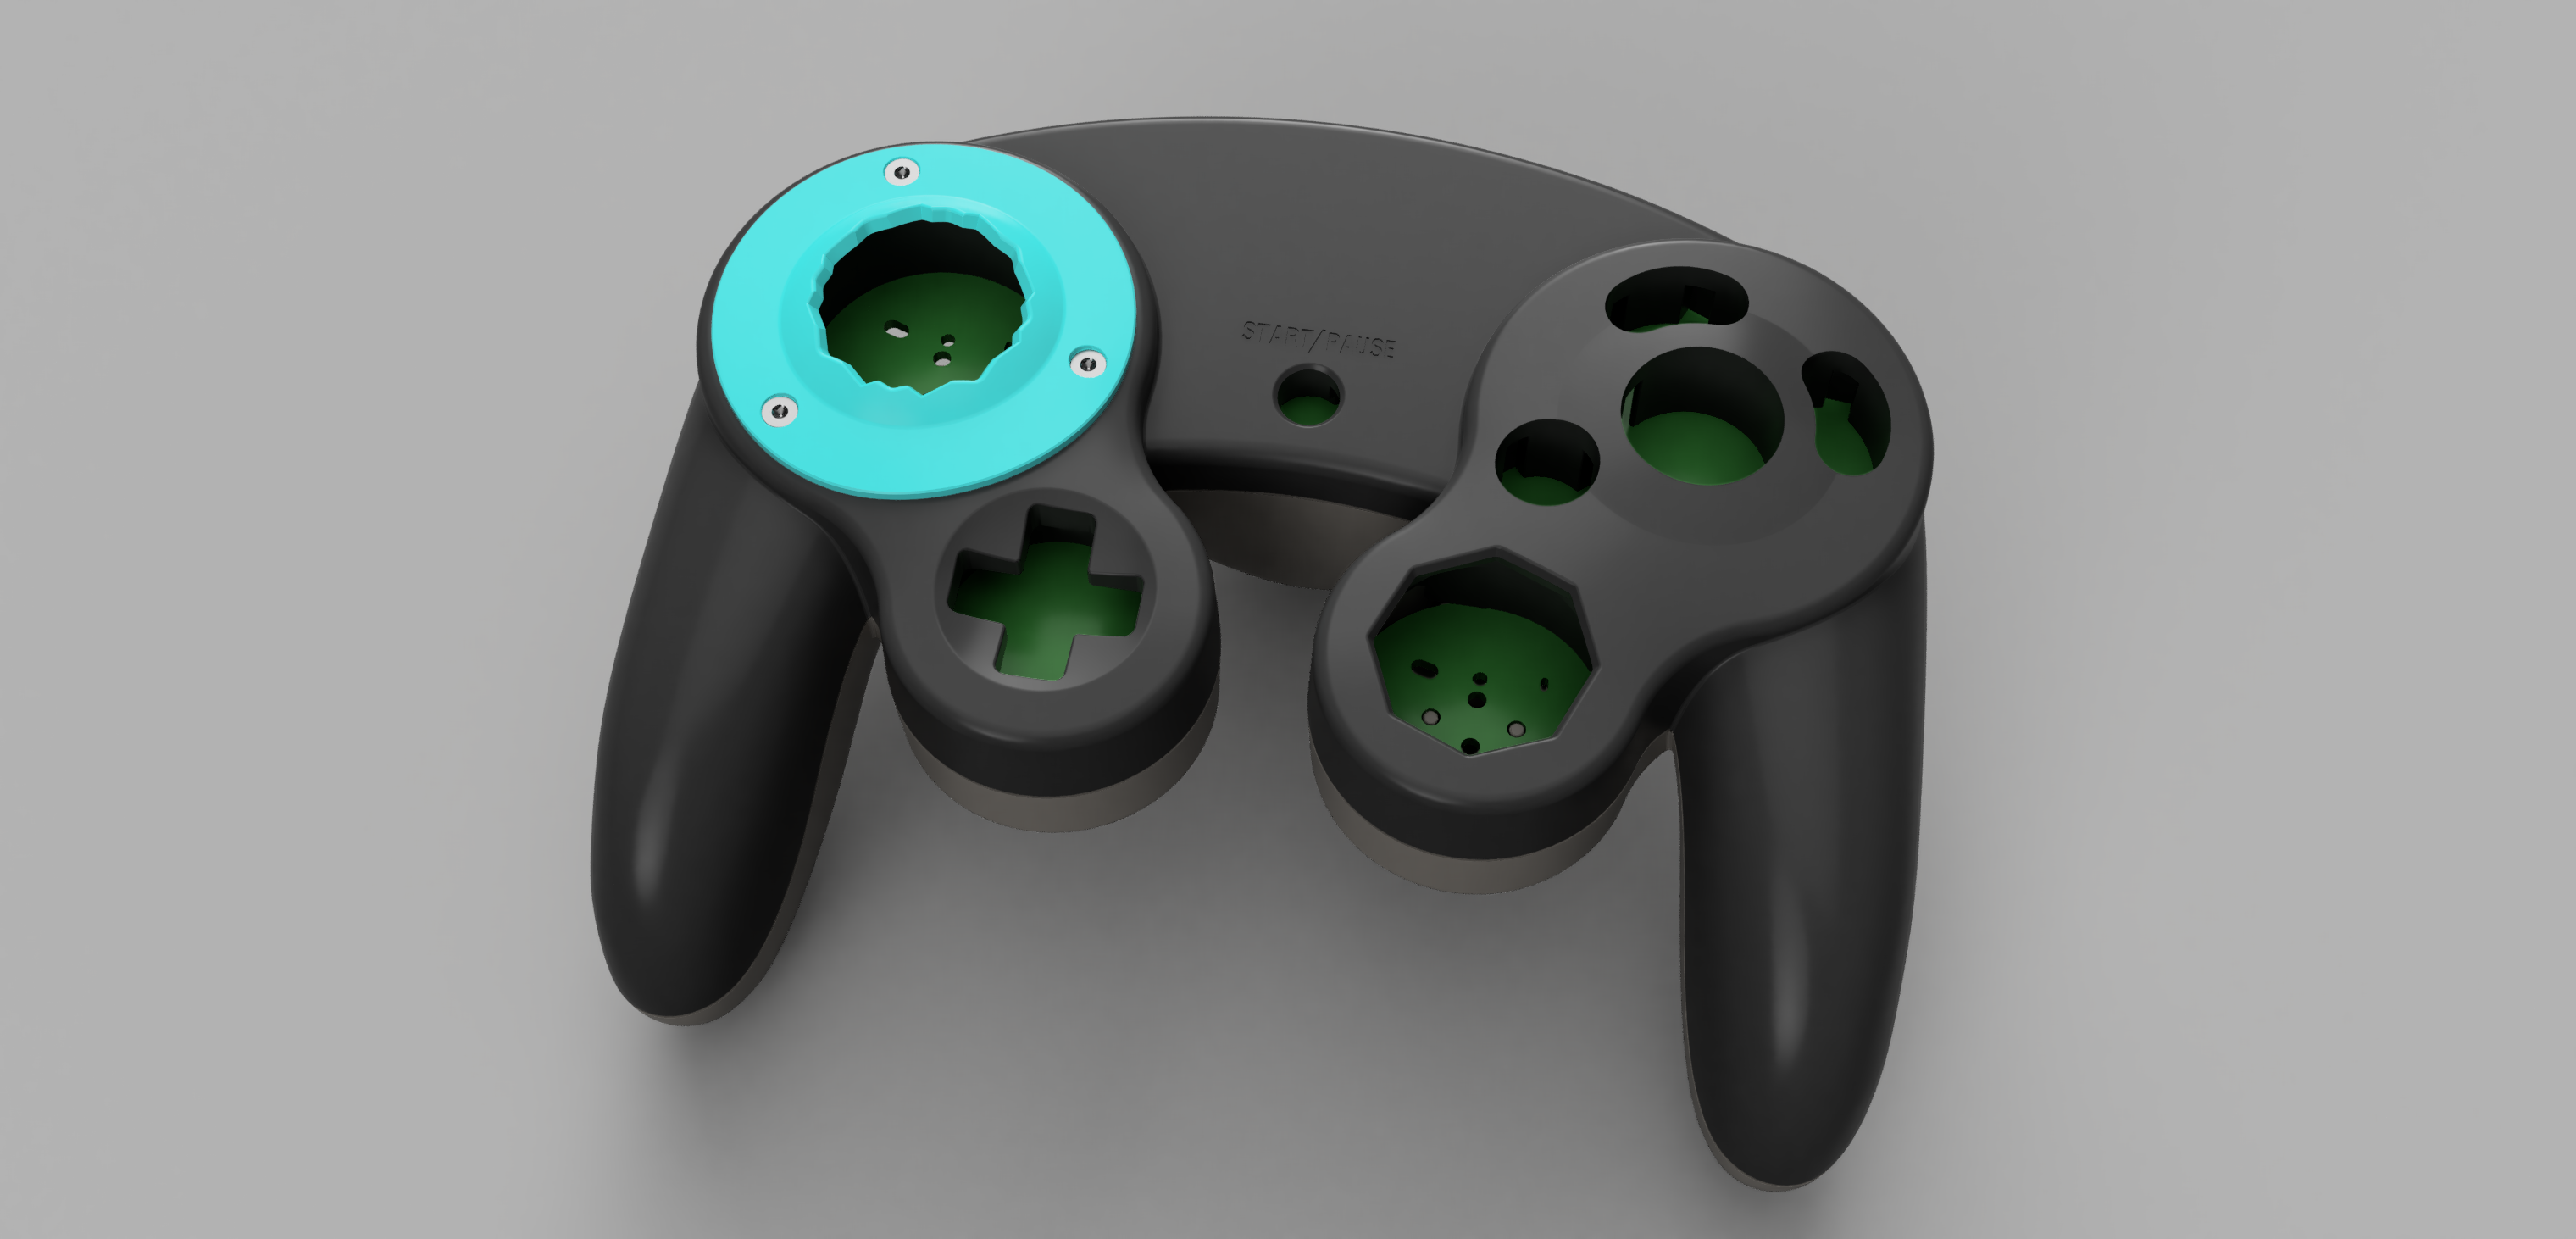
The first thing you need to do is remove the gate material from the front shell. Remove the entire lifted circular section of the control stick gate, shown here in green. Cut off the entire lifted dome until it is flat with the rest of the front shell's surface. You can use a dremel to cut it off and then sand down the excess. Do not go deep into the shell, remove any of the inside, or take out the cylinder that extends down into the shell. Here is a front and side profile of what is to be removed:
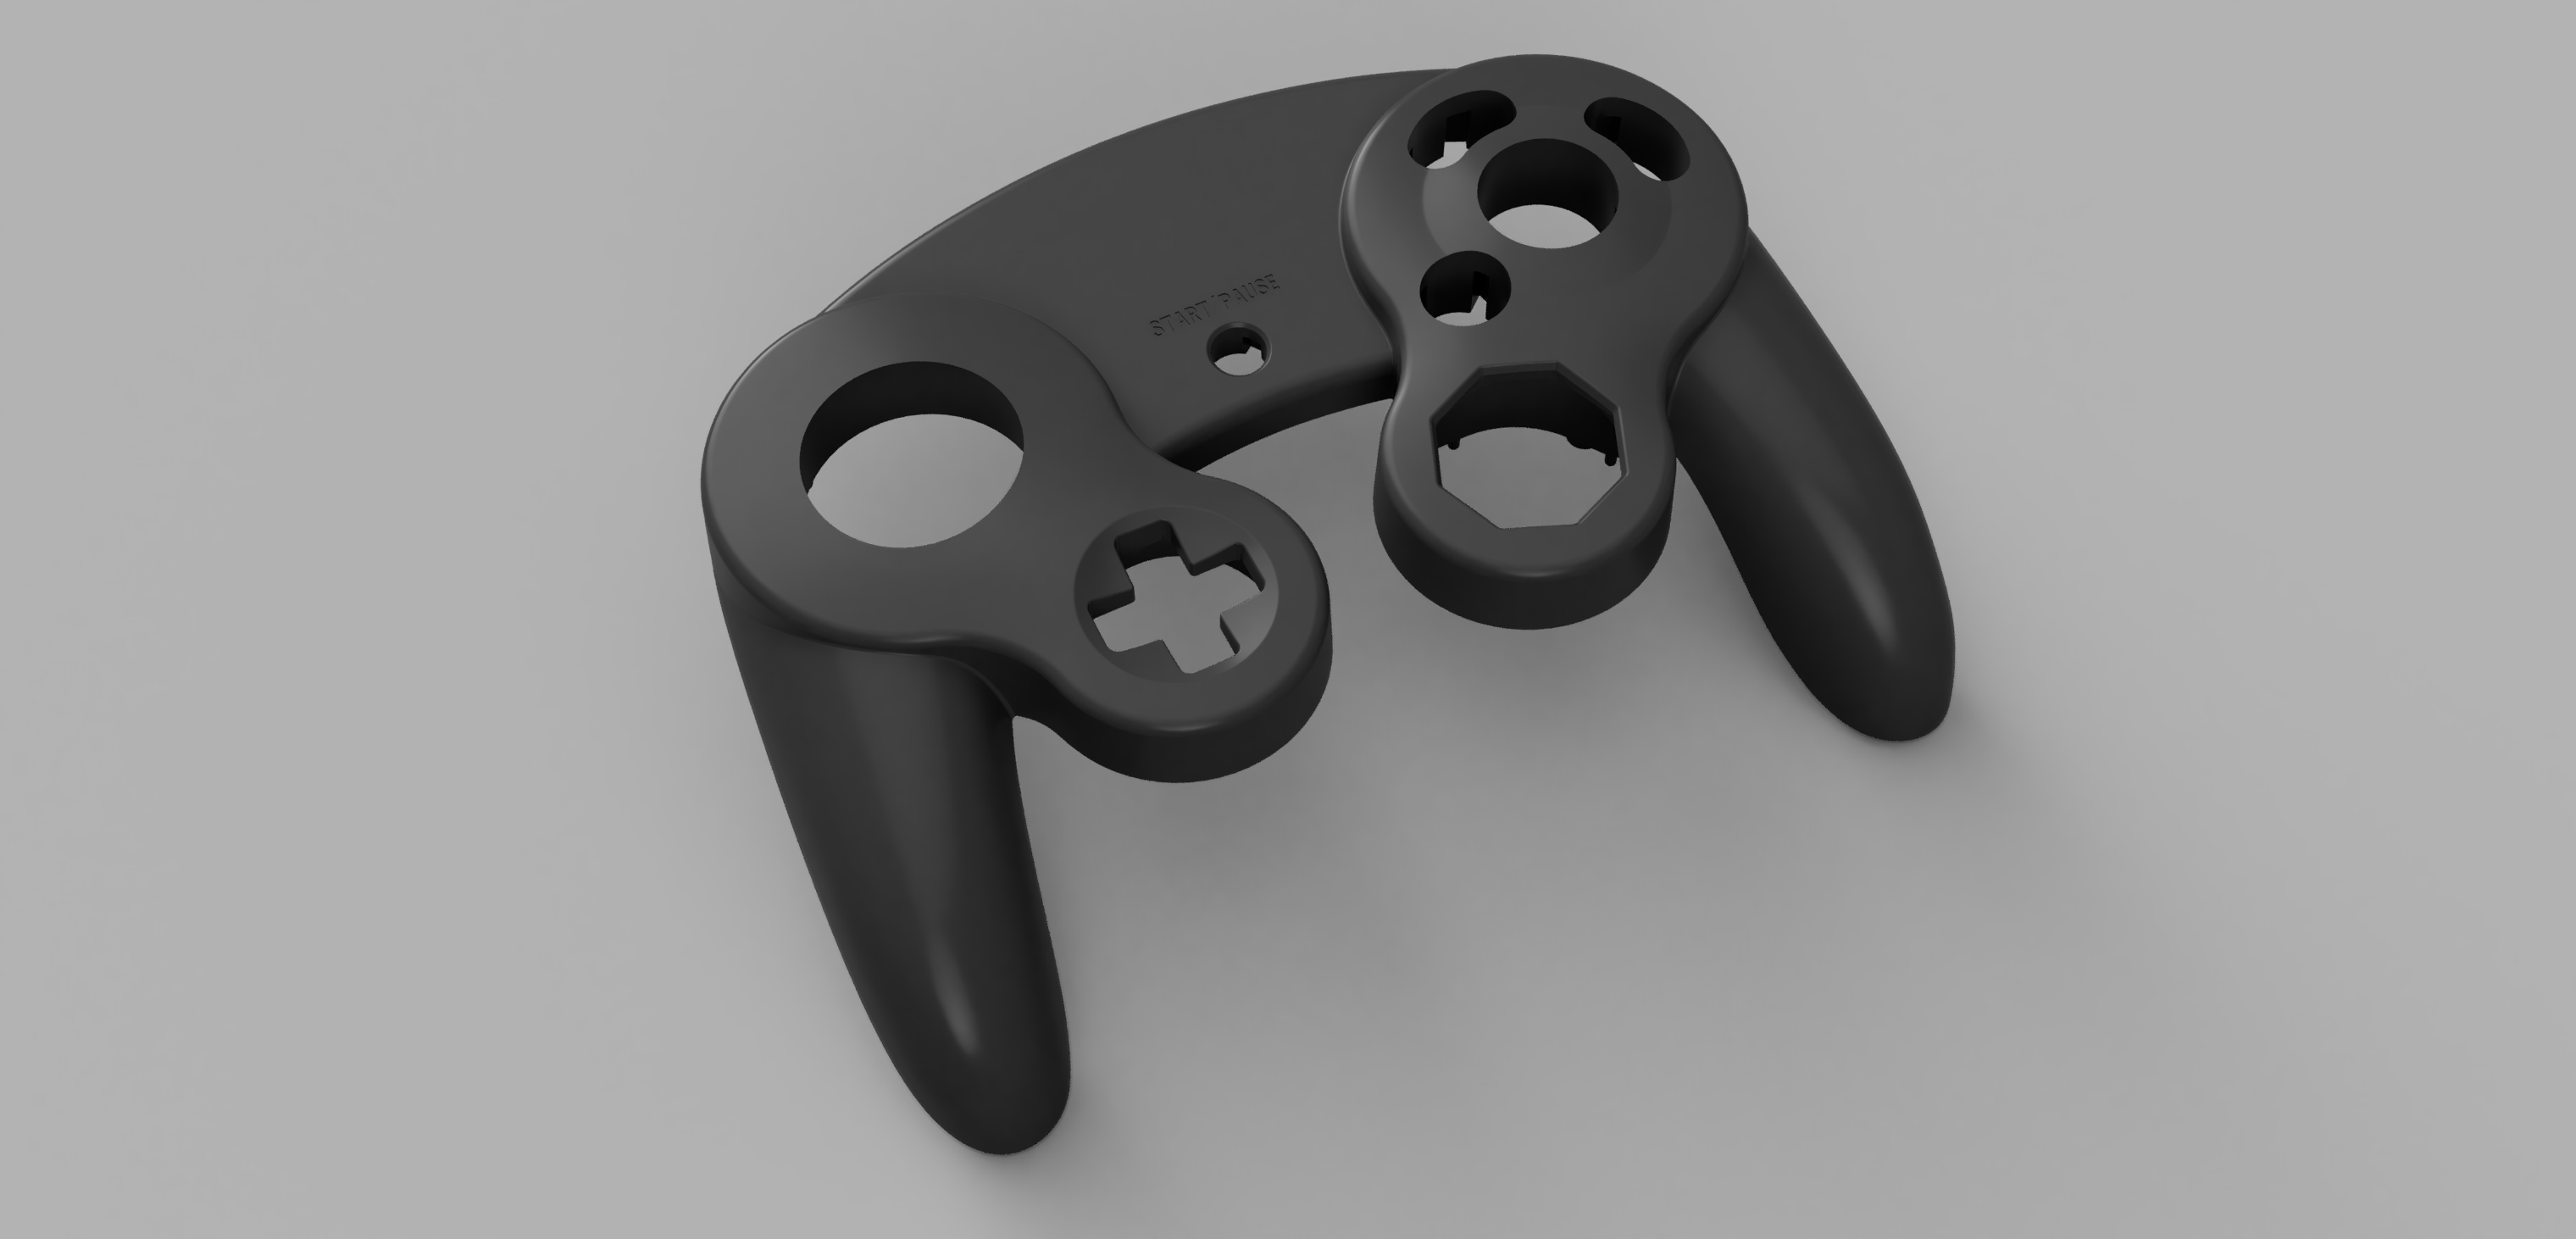
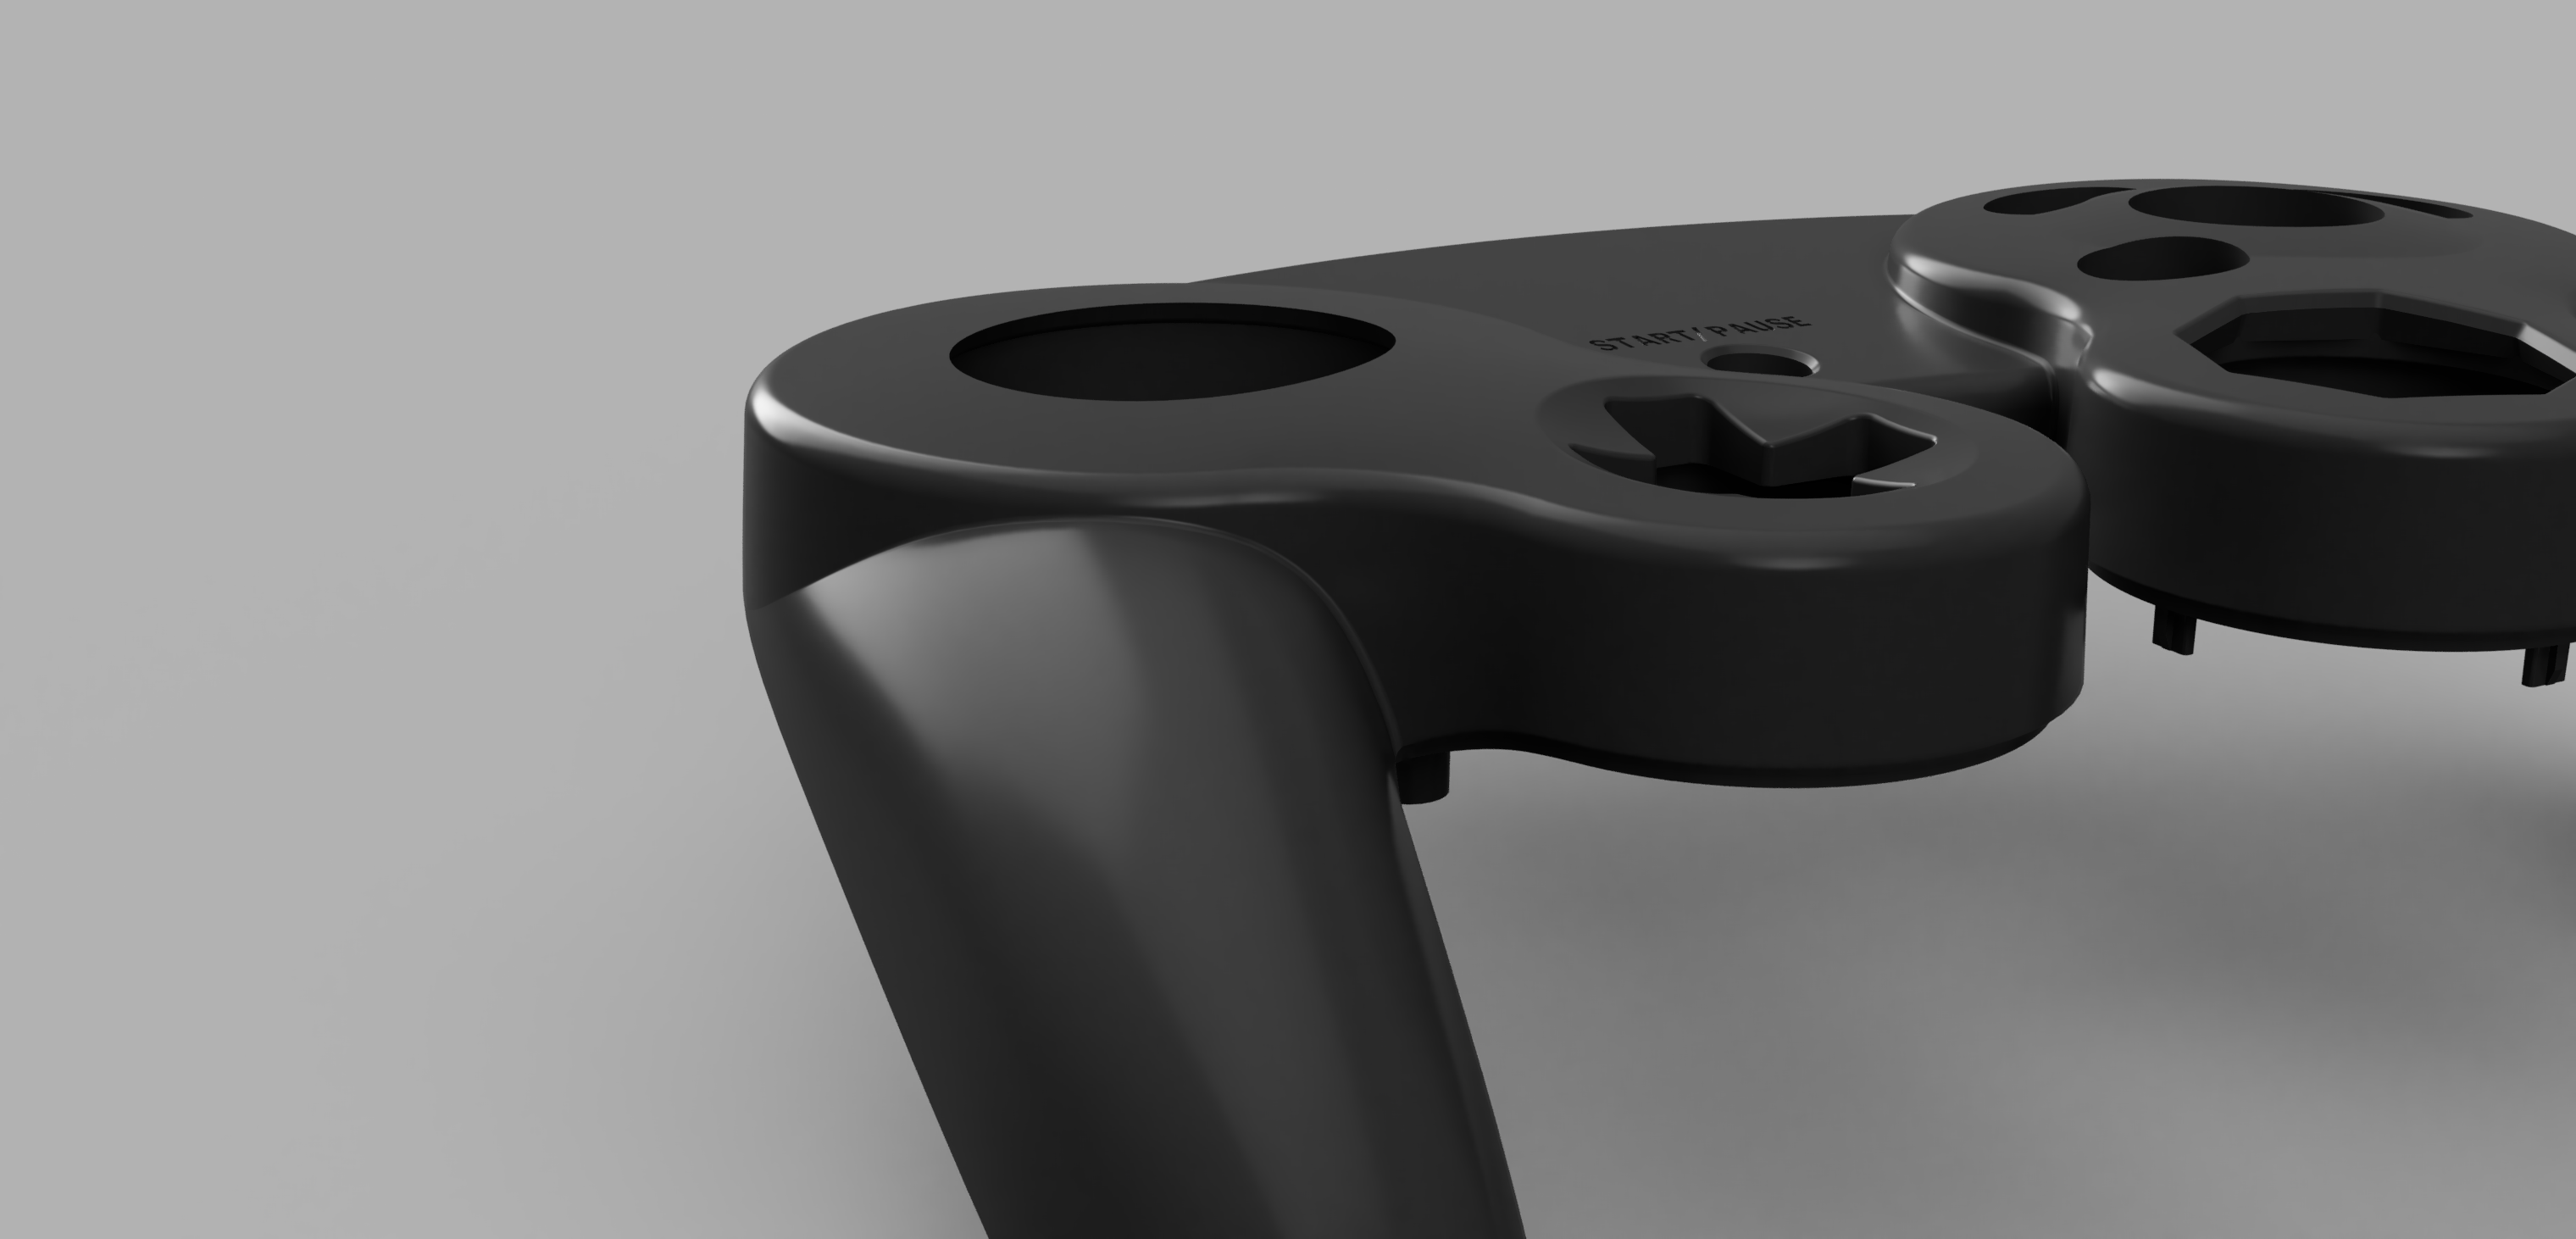
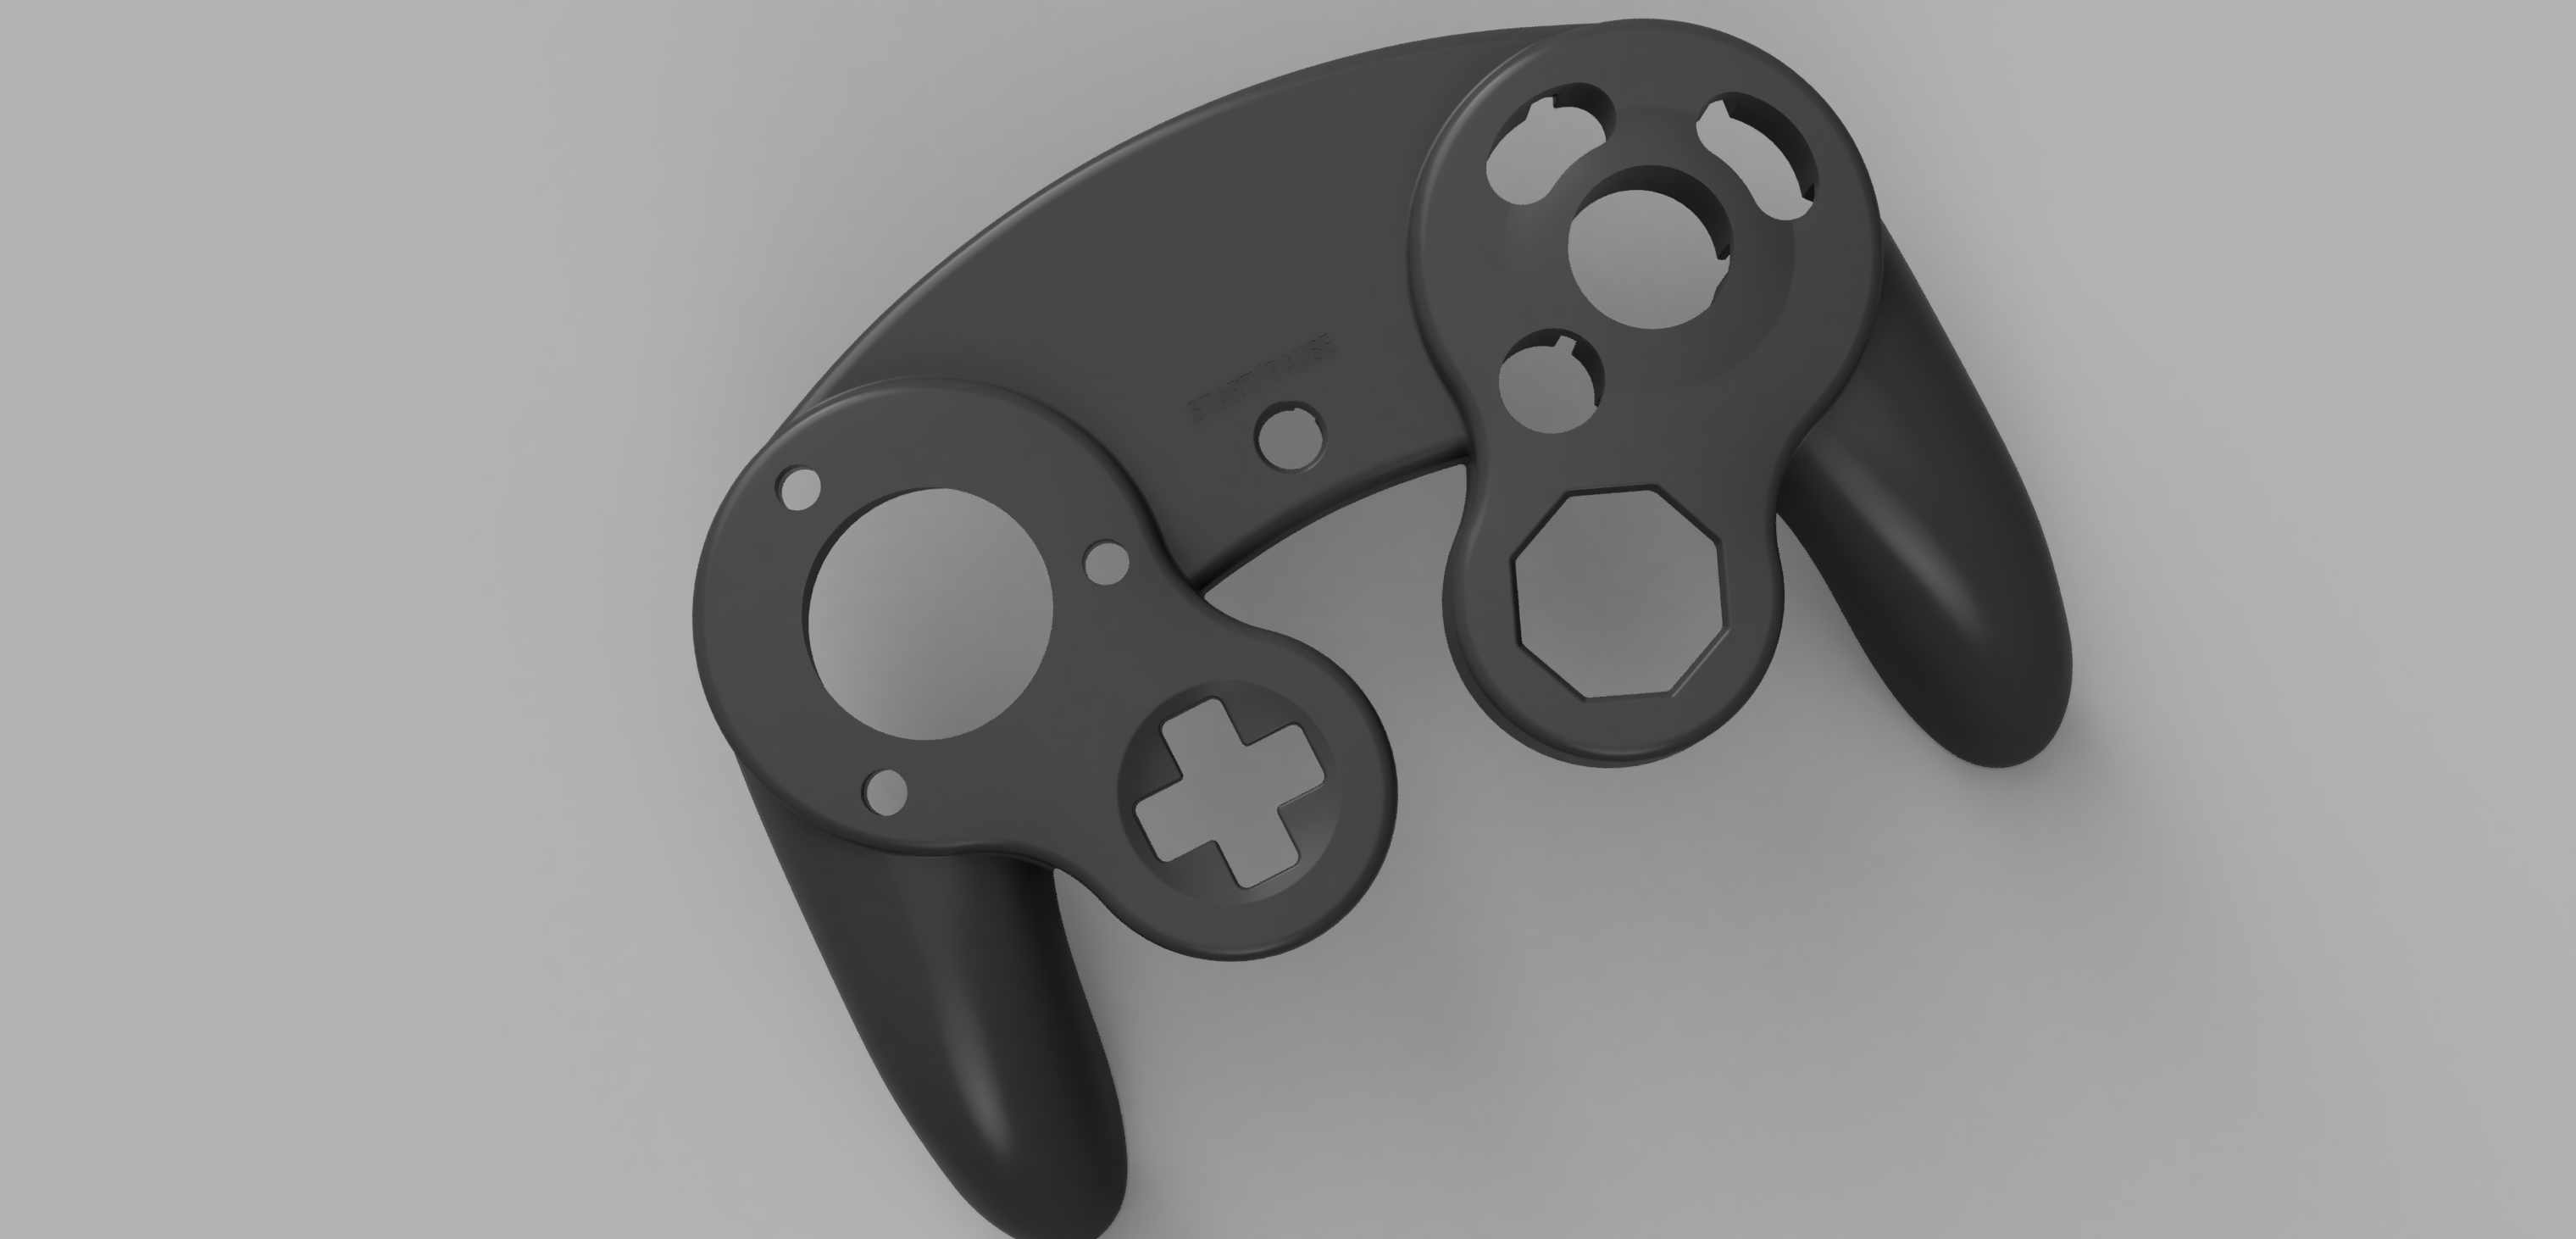
Your shell should look like this after you are finished
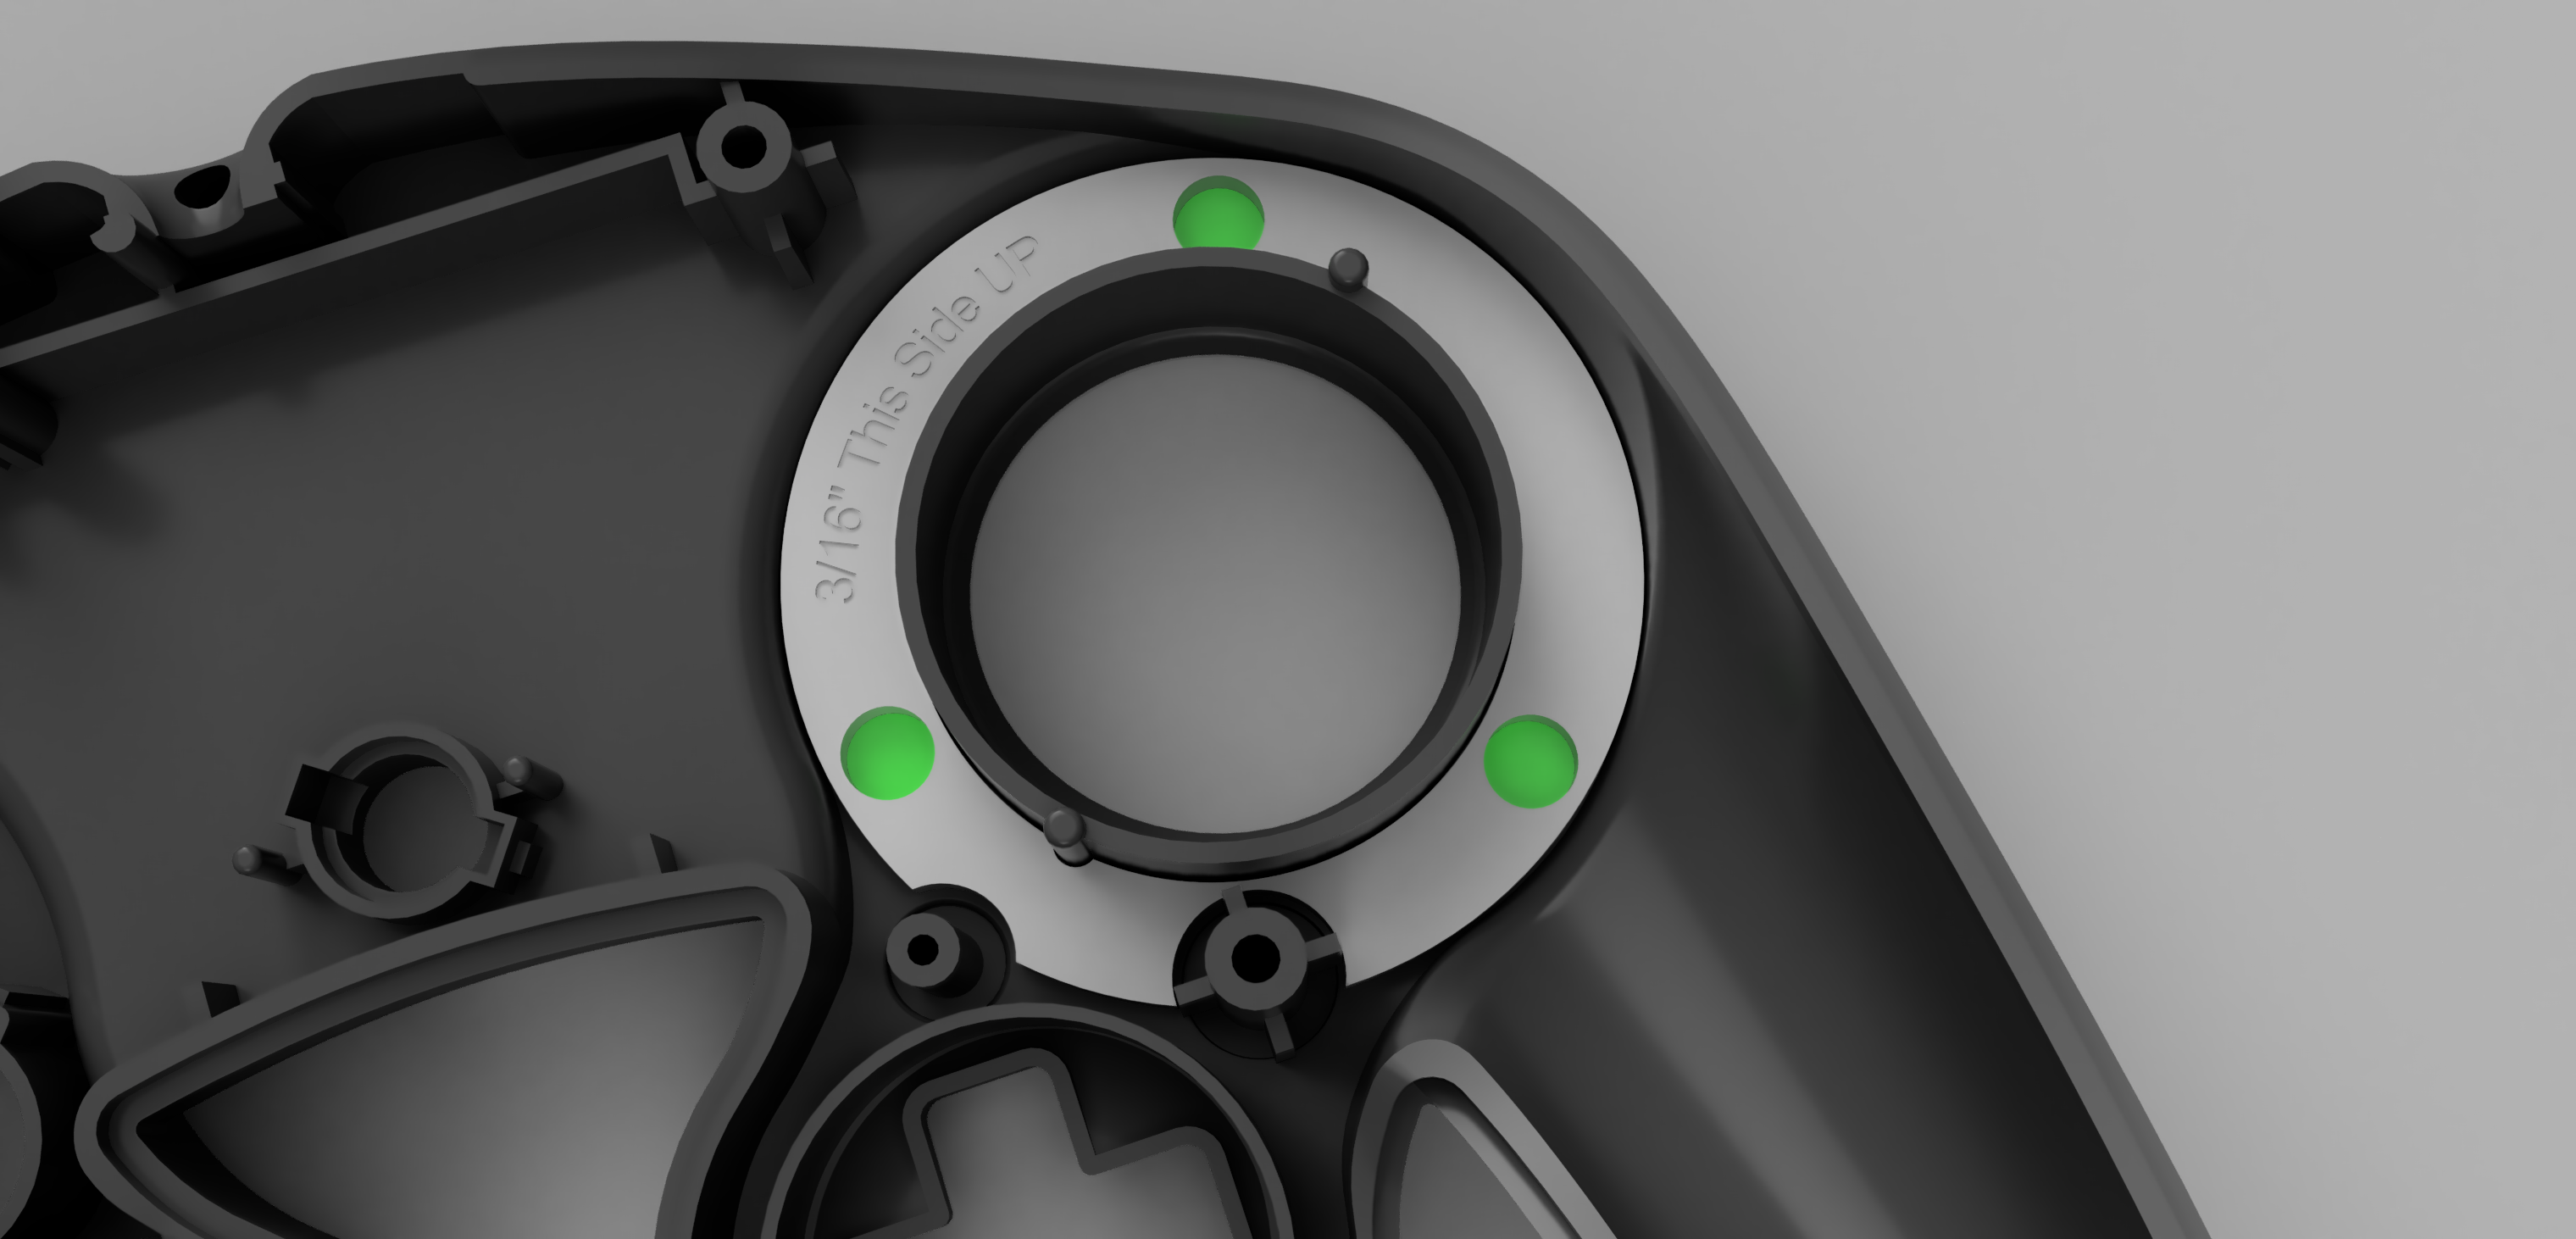
Next, you are going to use the DrillJig. Slide the jig into the back of the front shell so that the curved side is going down into the controller and the flat side is facing up as shown. Now, use a 3/16 inch drill bit to remove the material shown here in green:
Once you are finished drilling it should look like this:


Here is a view from the other side:
Now, you are going to install the ThreadHolder. Remove the DrillJig from the controller shell and apply a small amount of glue to the flat top surface of the ThreadHolder. Then, you are going to slide it into the back of the front shell, just like the DrillJig, shown here:
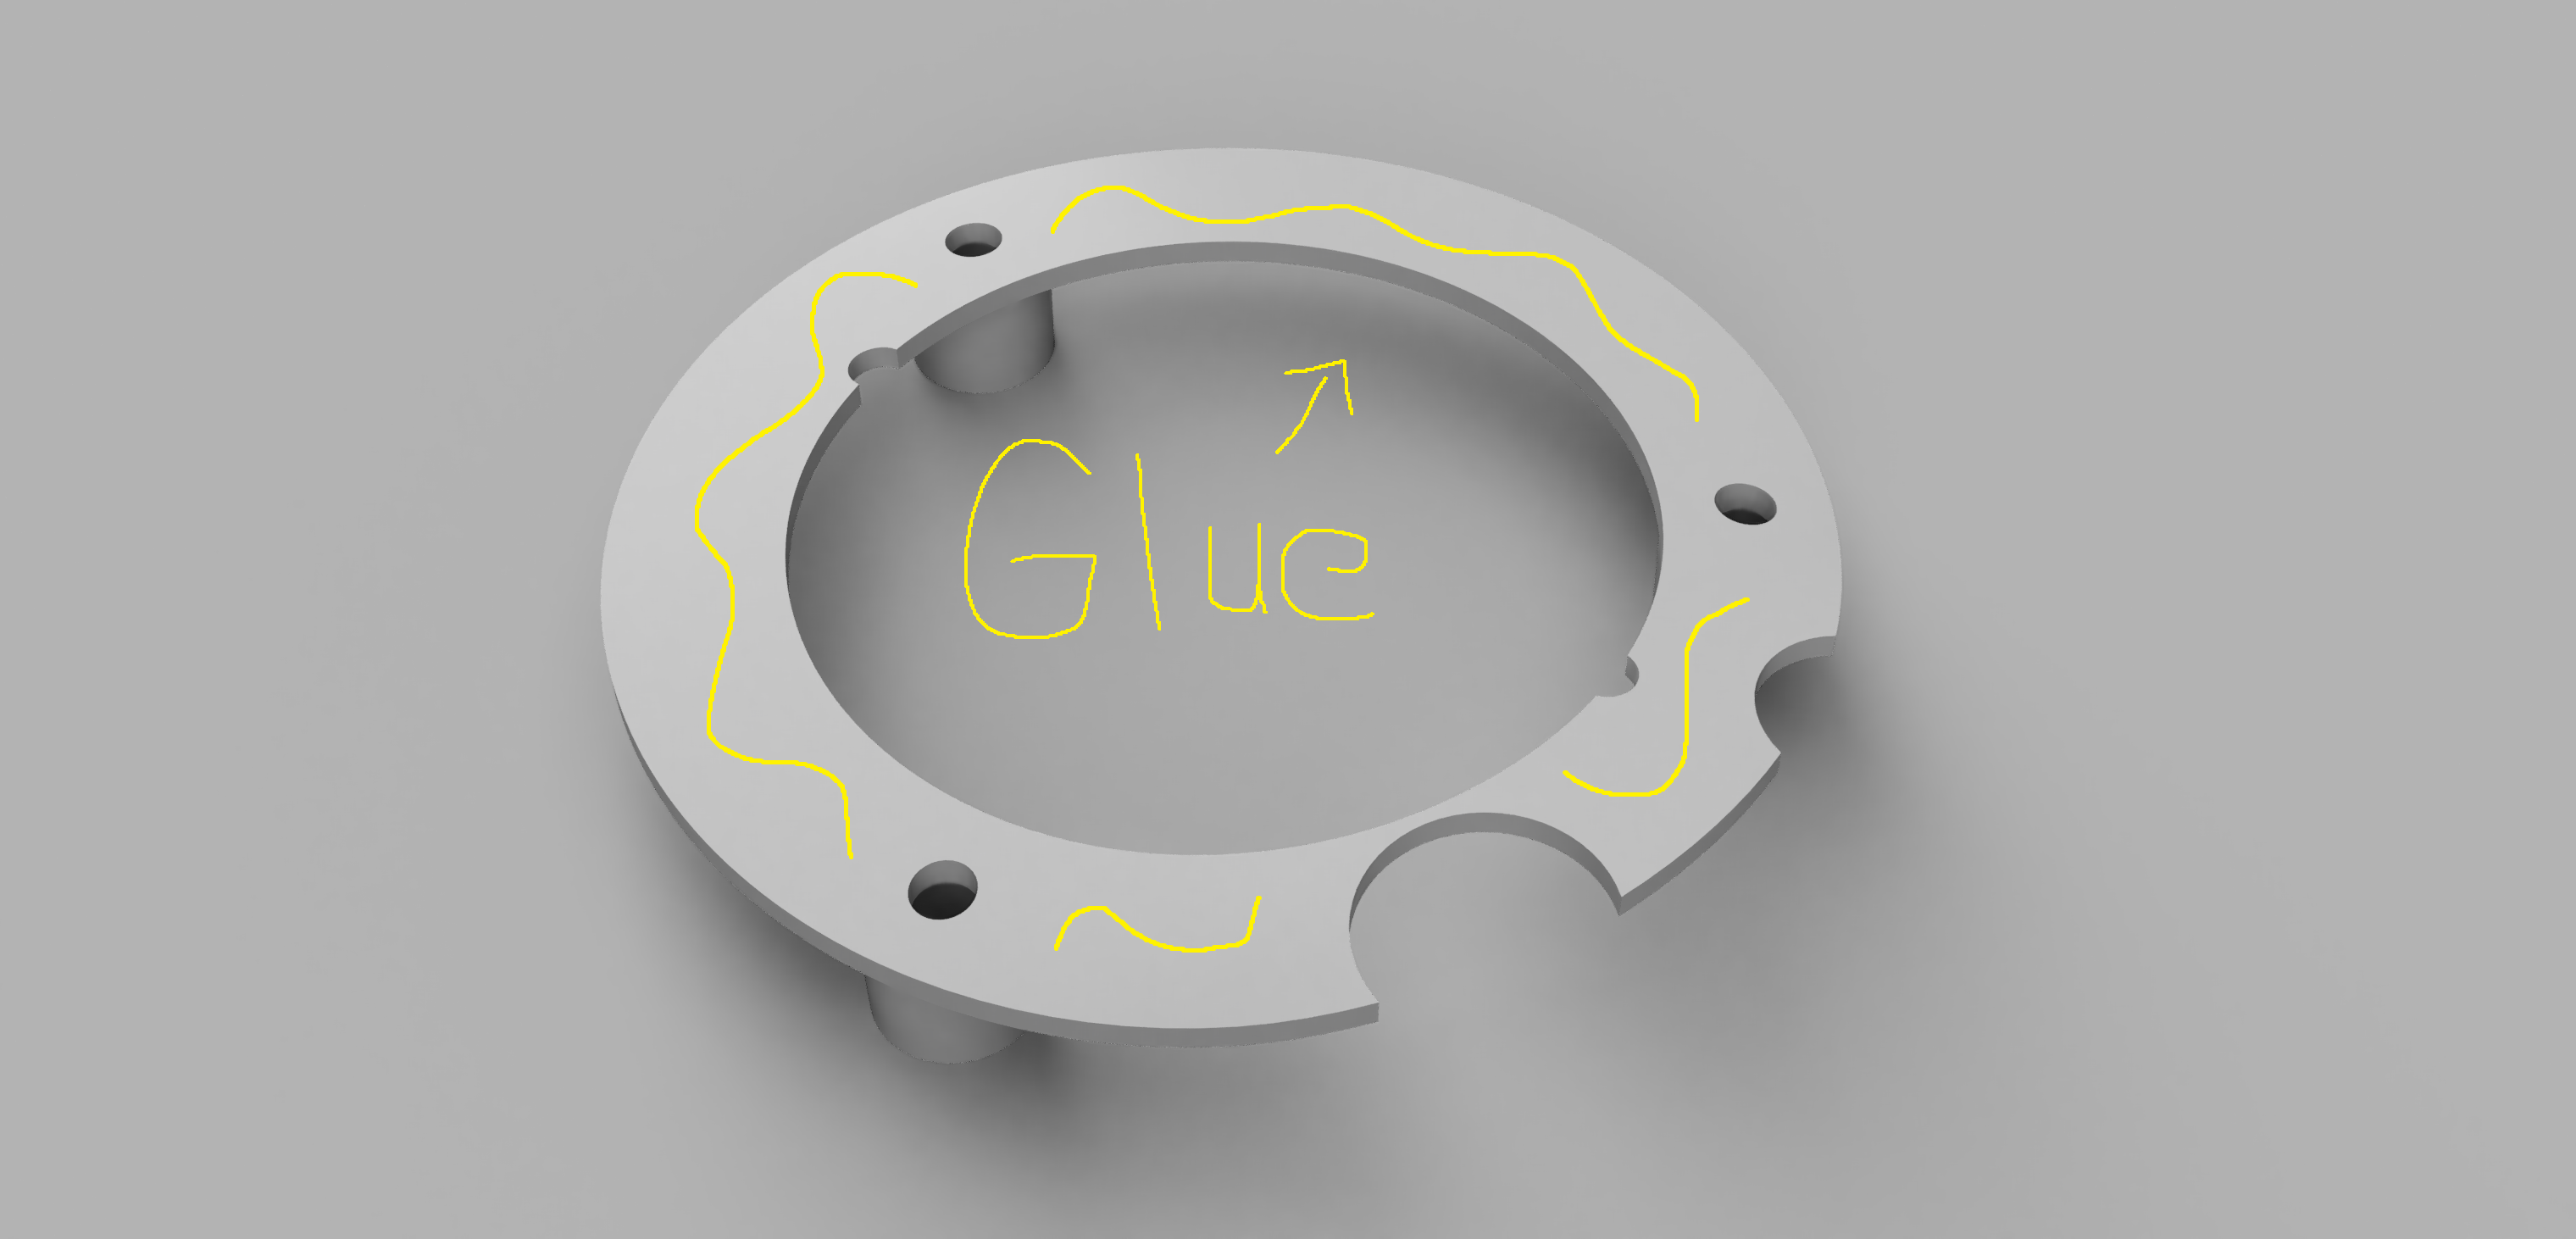
Make sure to firmly press the ThreadHolder in and push it down so that the entire piece makes good contact with the back of the controller front shell
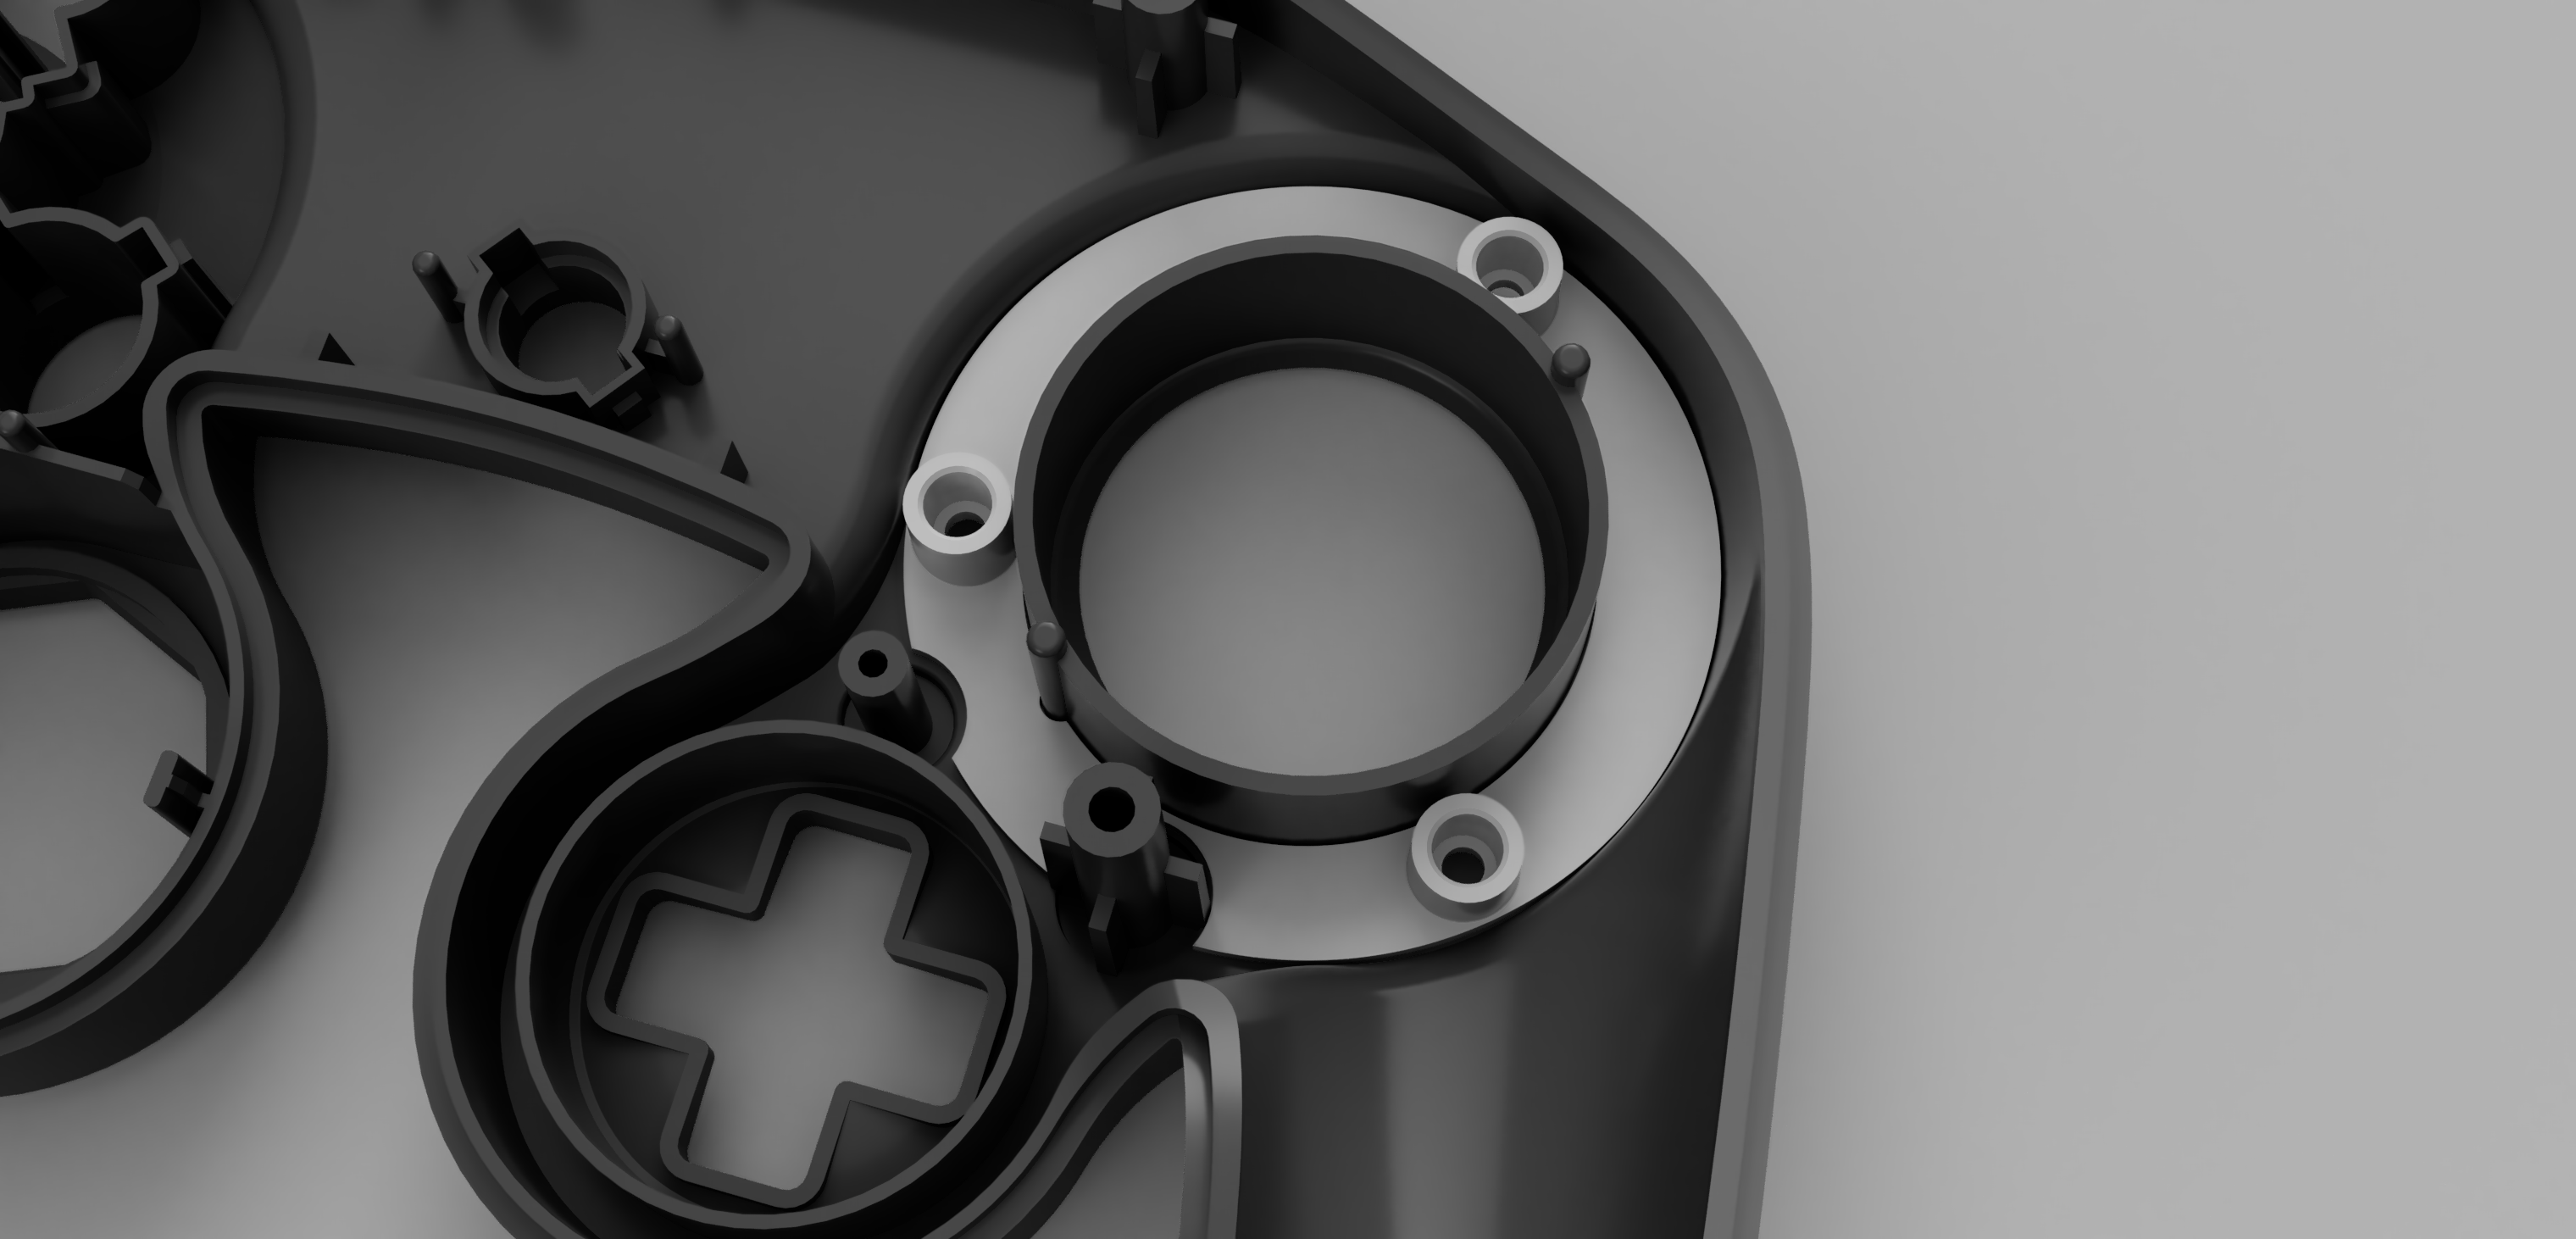
Take your thread pieces and push them into the containers of the ThreadHolder until they are all the way in, as shown. This may be a tight friction fit, so you can use a screwdriver to push them in by applying pressure to the center of the thread piece.
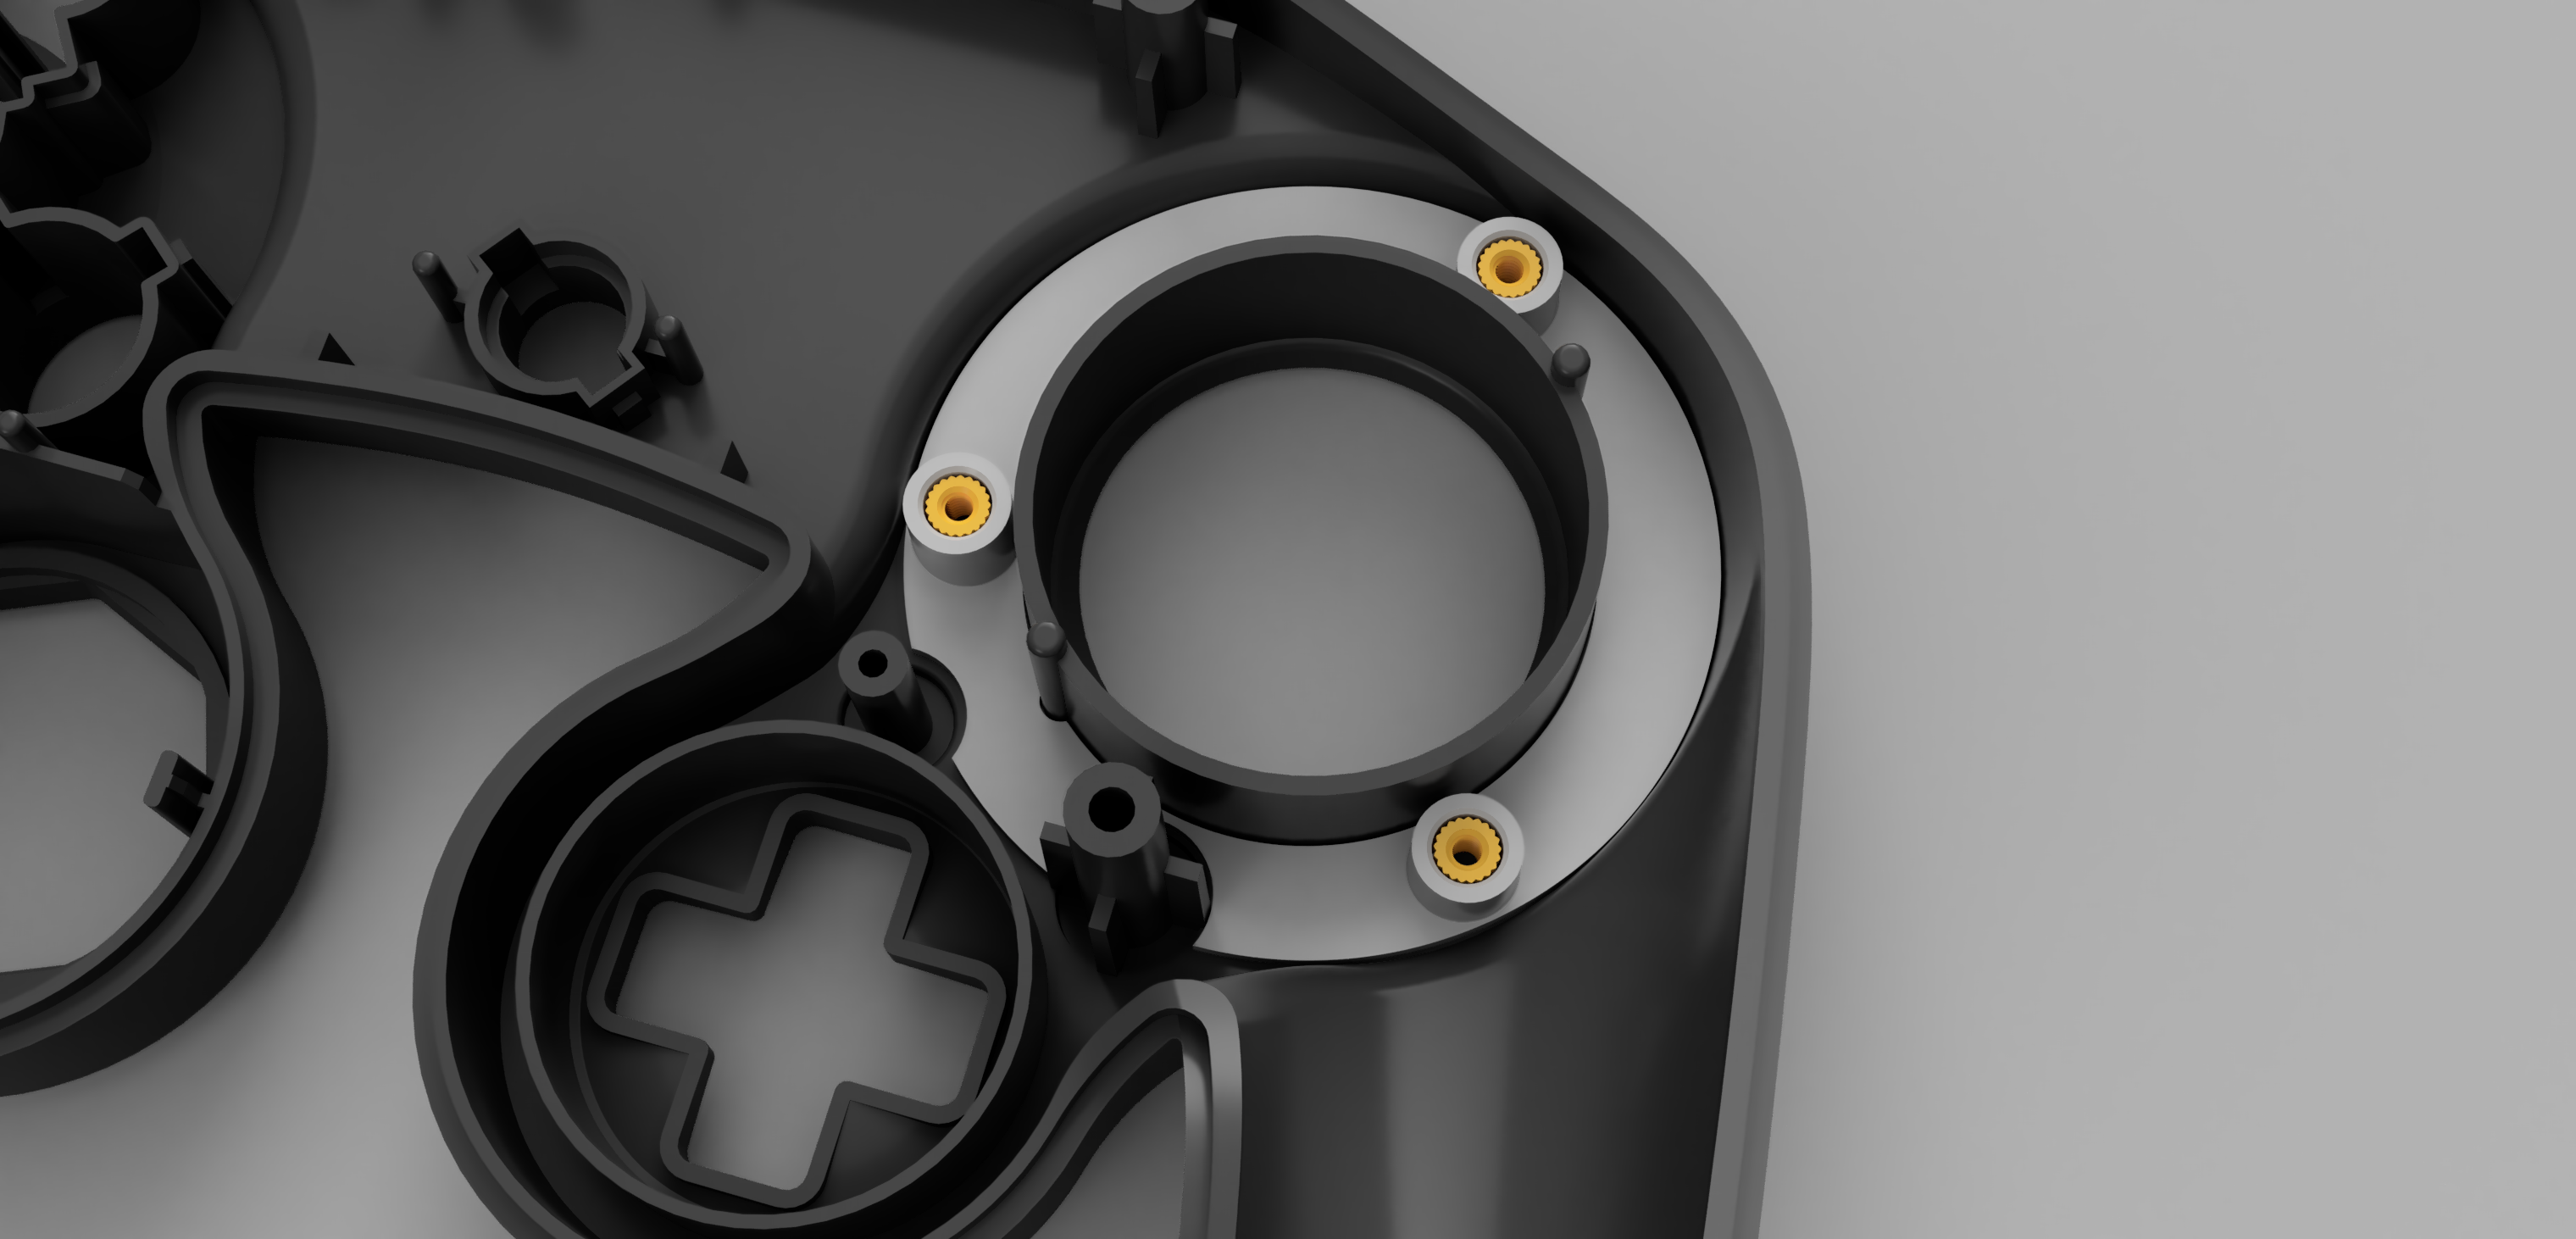
These thread pieces are designed to expand out when the screw is threaded inside of them, embedding themselves into the ThreadHolder and locking them inside of there permanently. I recommend that for the first time, you put the screws in upside-down like so. This way the threads can be expanded securely and will not fall out.
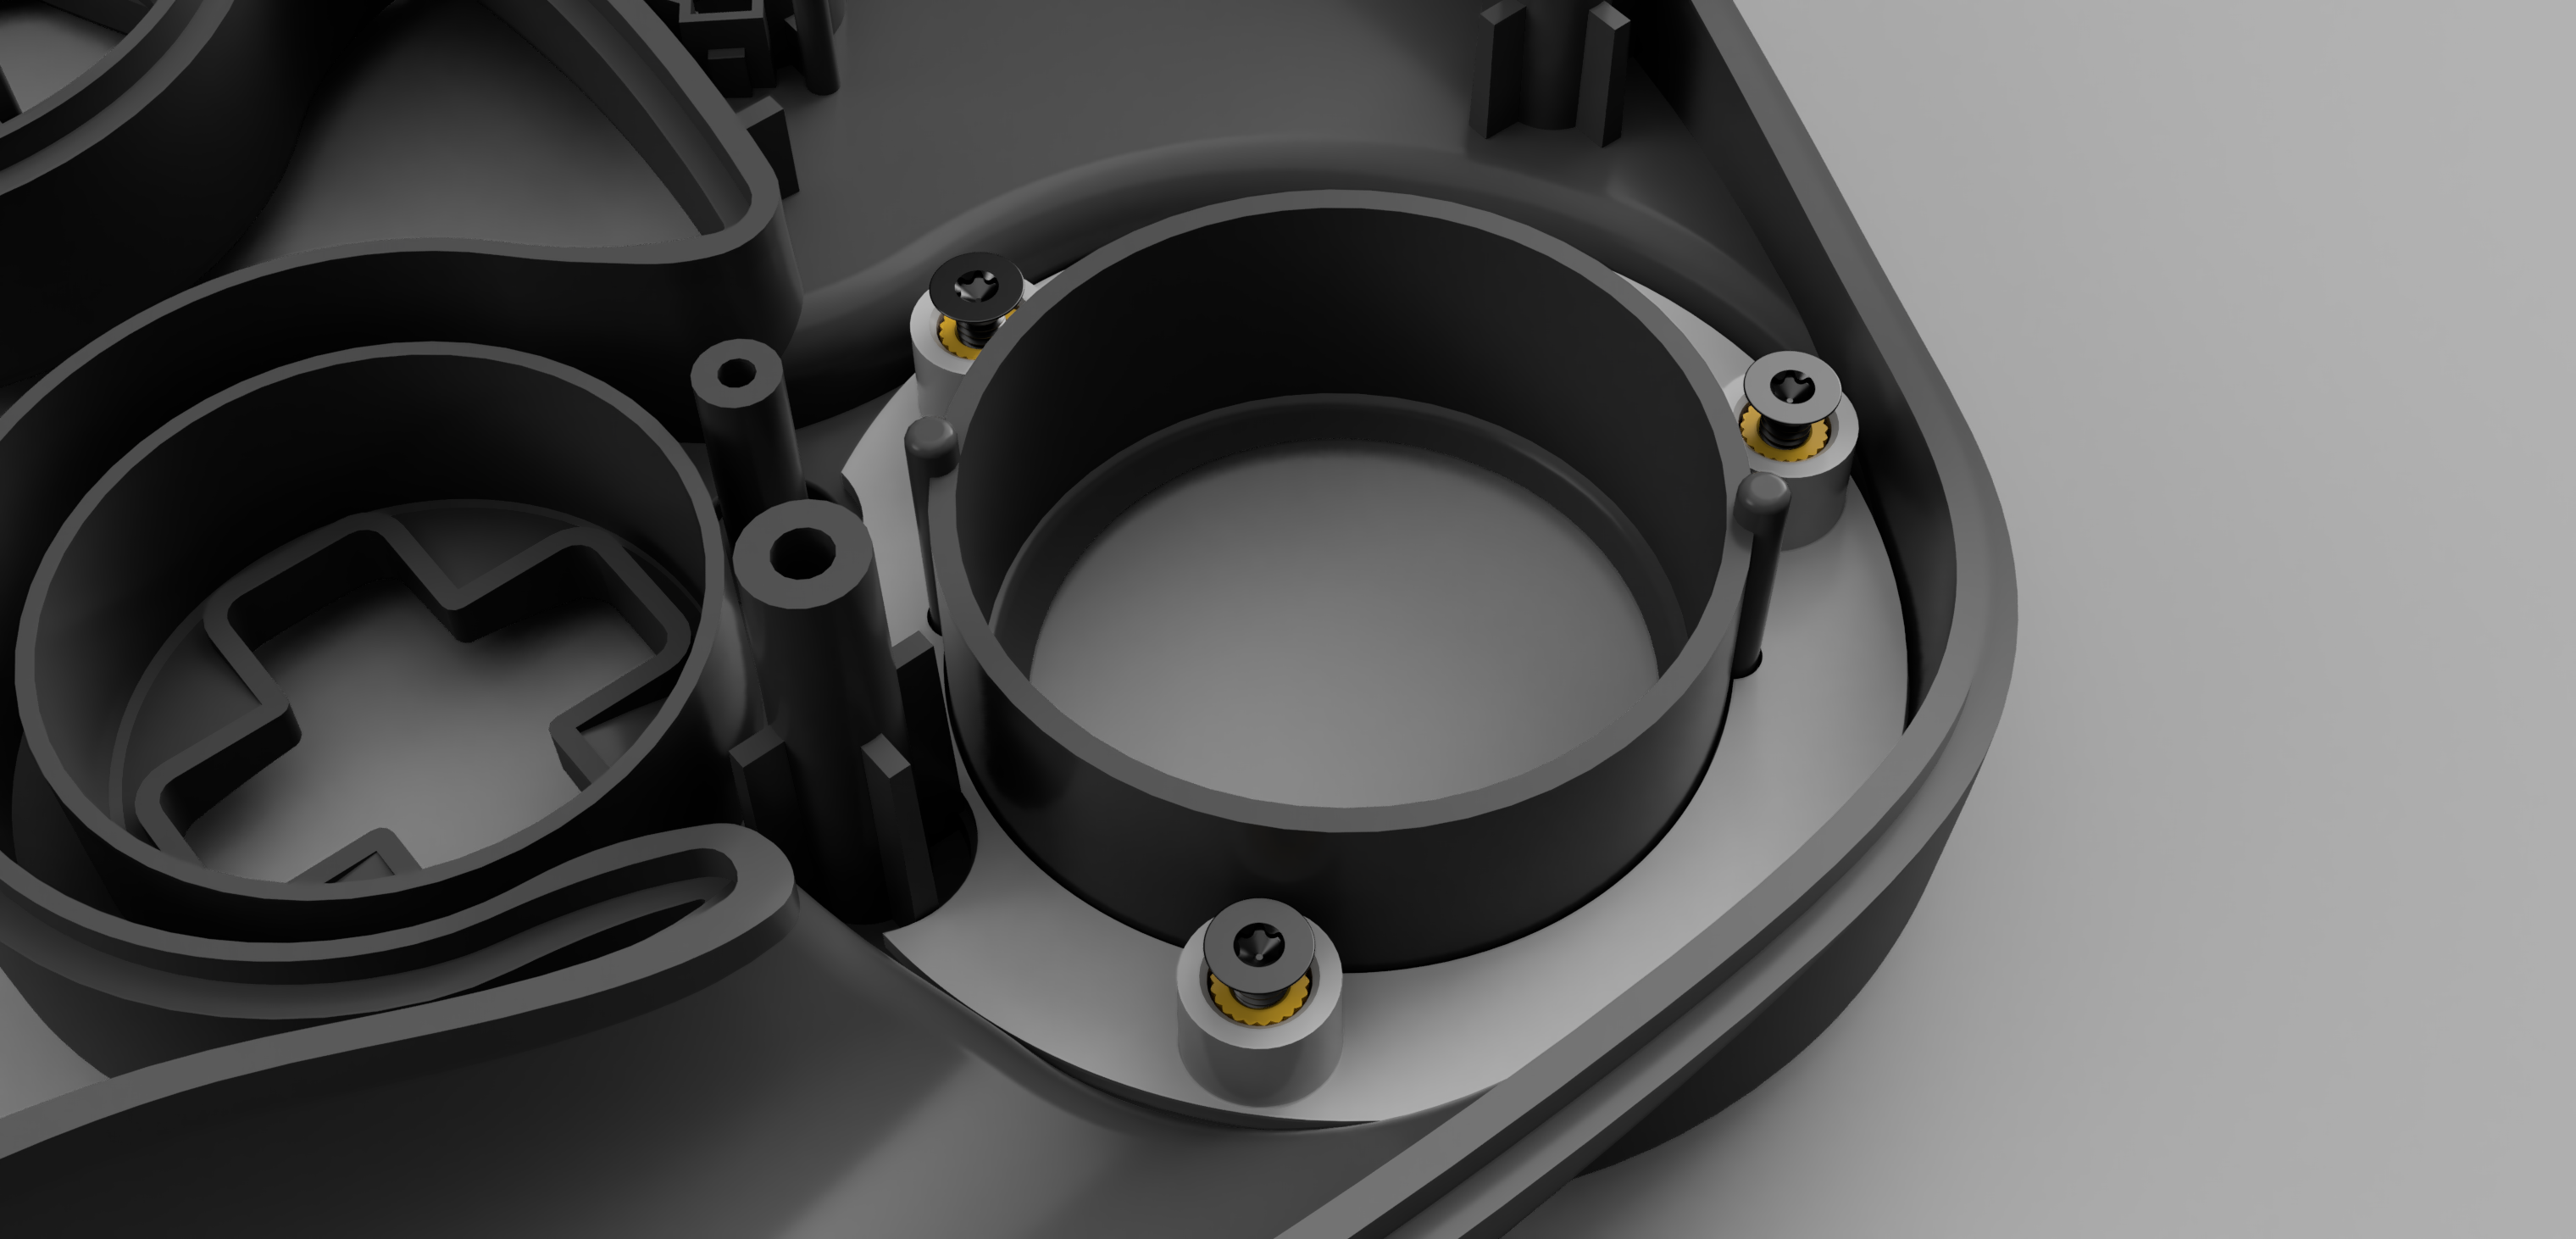
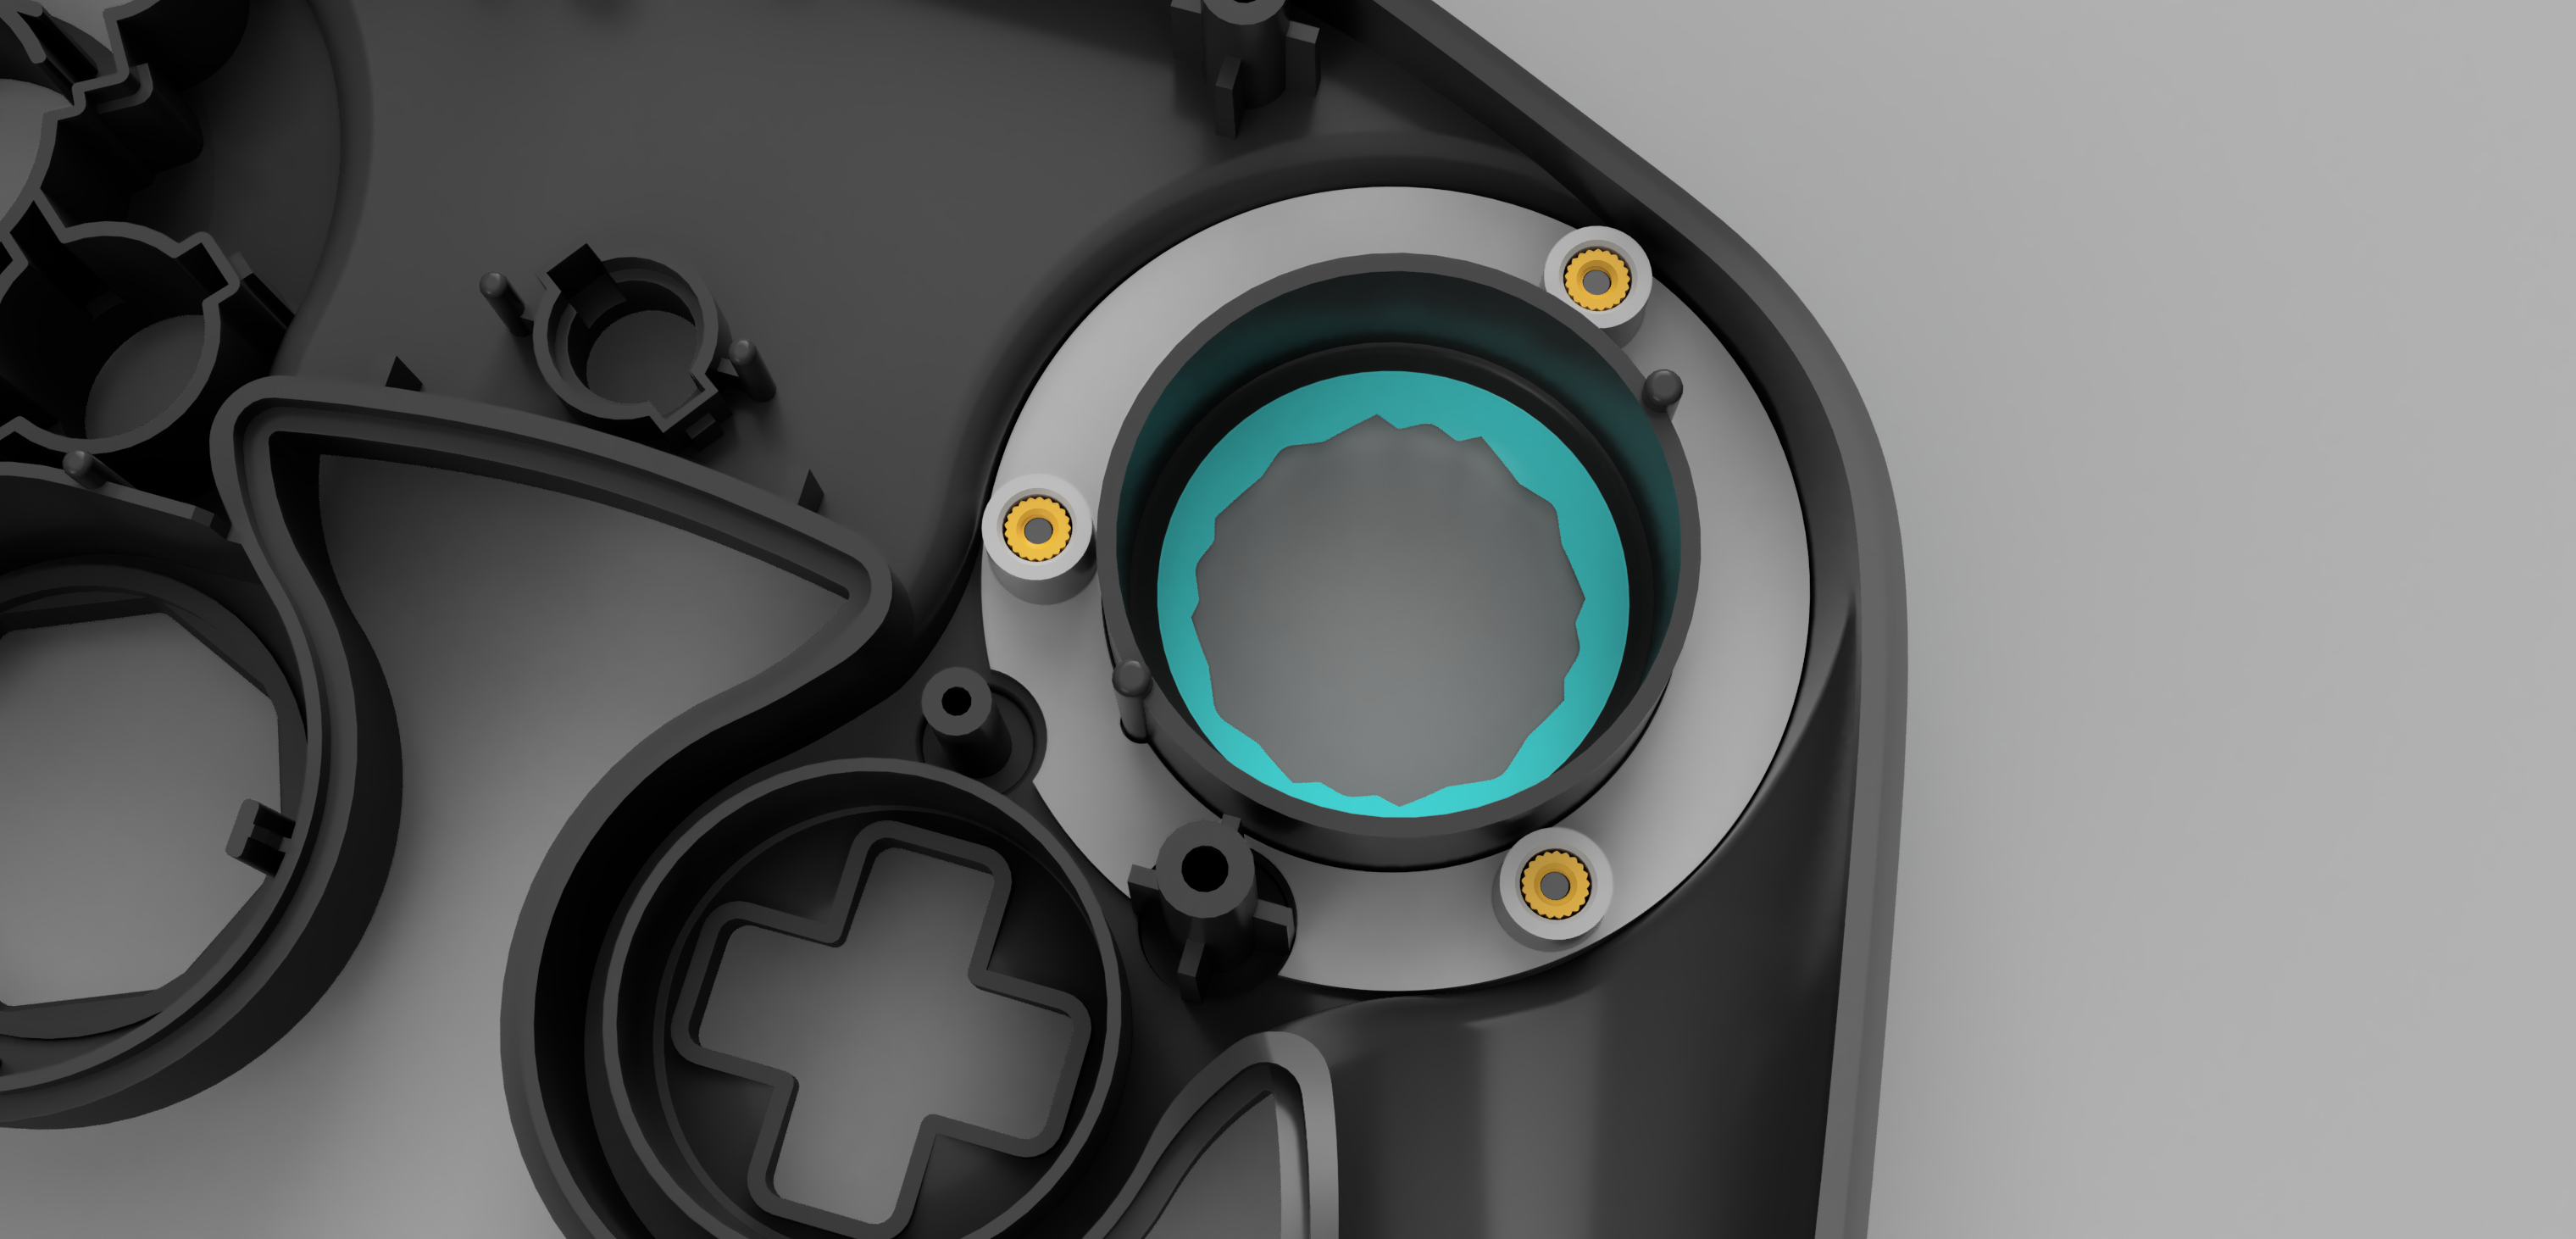
You are basically done now! Remove the upside-down screws from their thread pieces. The front shell is complete. You can now take a Gateplate and place it onto the front face of your Gamecube Controller front shell. It has three pegs underneath it, which will slot nicely into the holes that you drilled. Now, just insert a screw into each of the three holes on the gateplate surface and they will go through the gateplate, through the front shell, and thread into the metal inserts inside of the ThreadHolder. It will look like this when you are done and everything is fully installed:
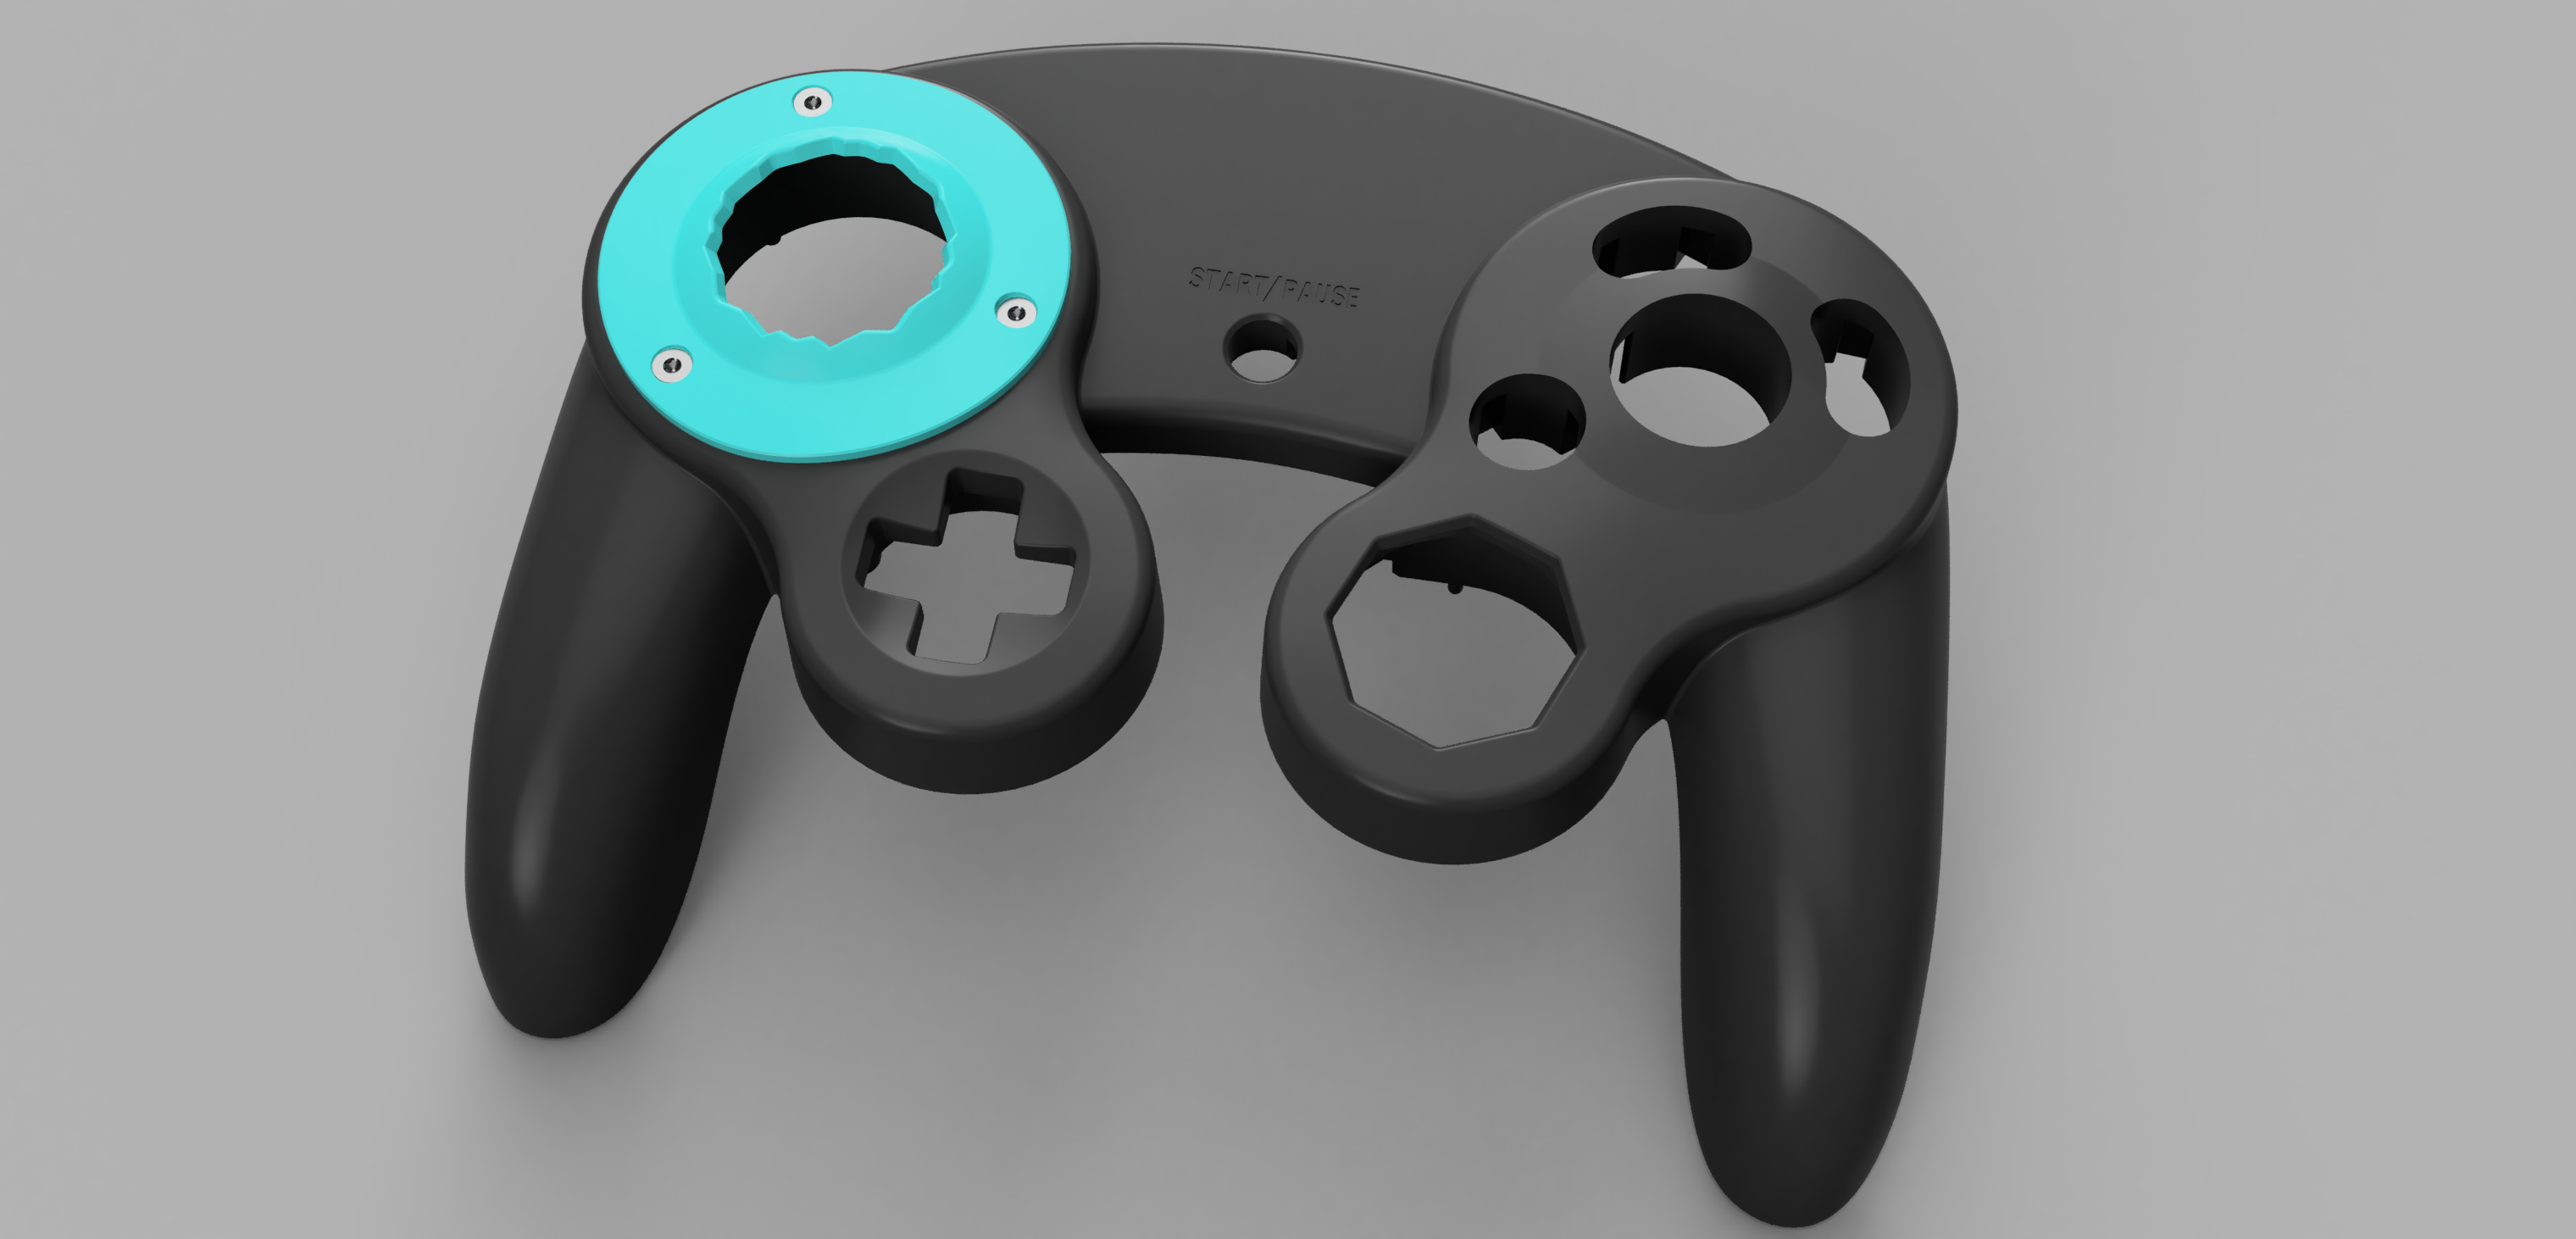
Now, you can assemble your controller. You will be able to remove and attach gateplates onto your controller while it is fully assembled. You do not have to take the controller apart whatsoever to remove or swap out a gateplate. Simply unscrew the Gateplate, remove the screws, and pull the Gateplate out.
The internal parts will stay in place and not fall out. Happy Modding!
Click to expand
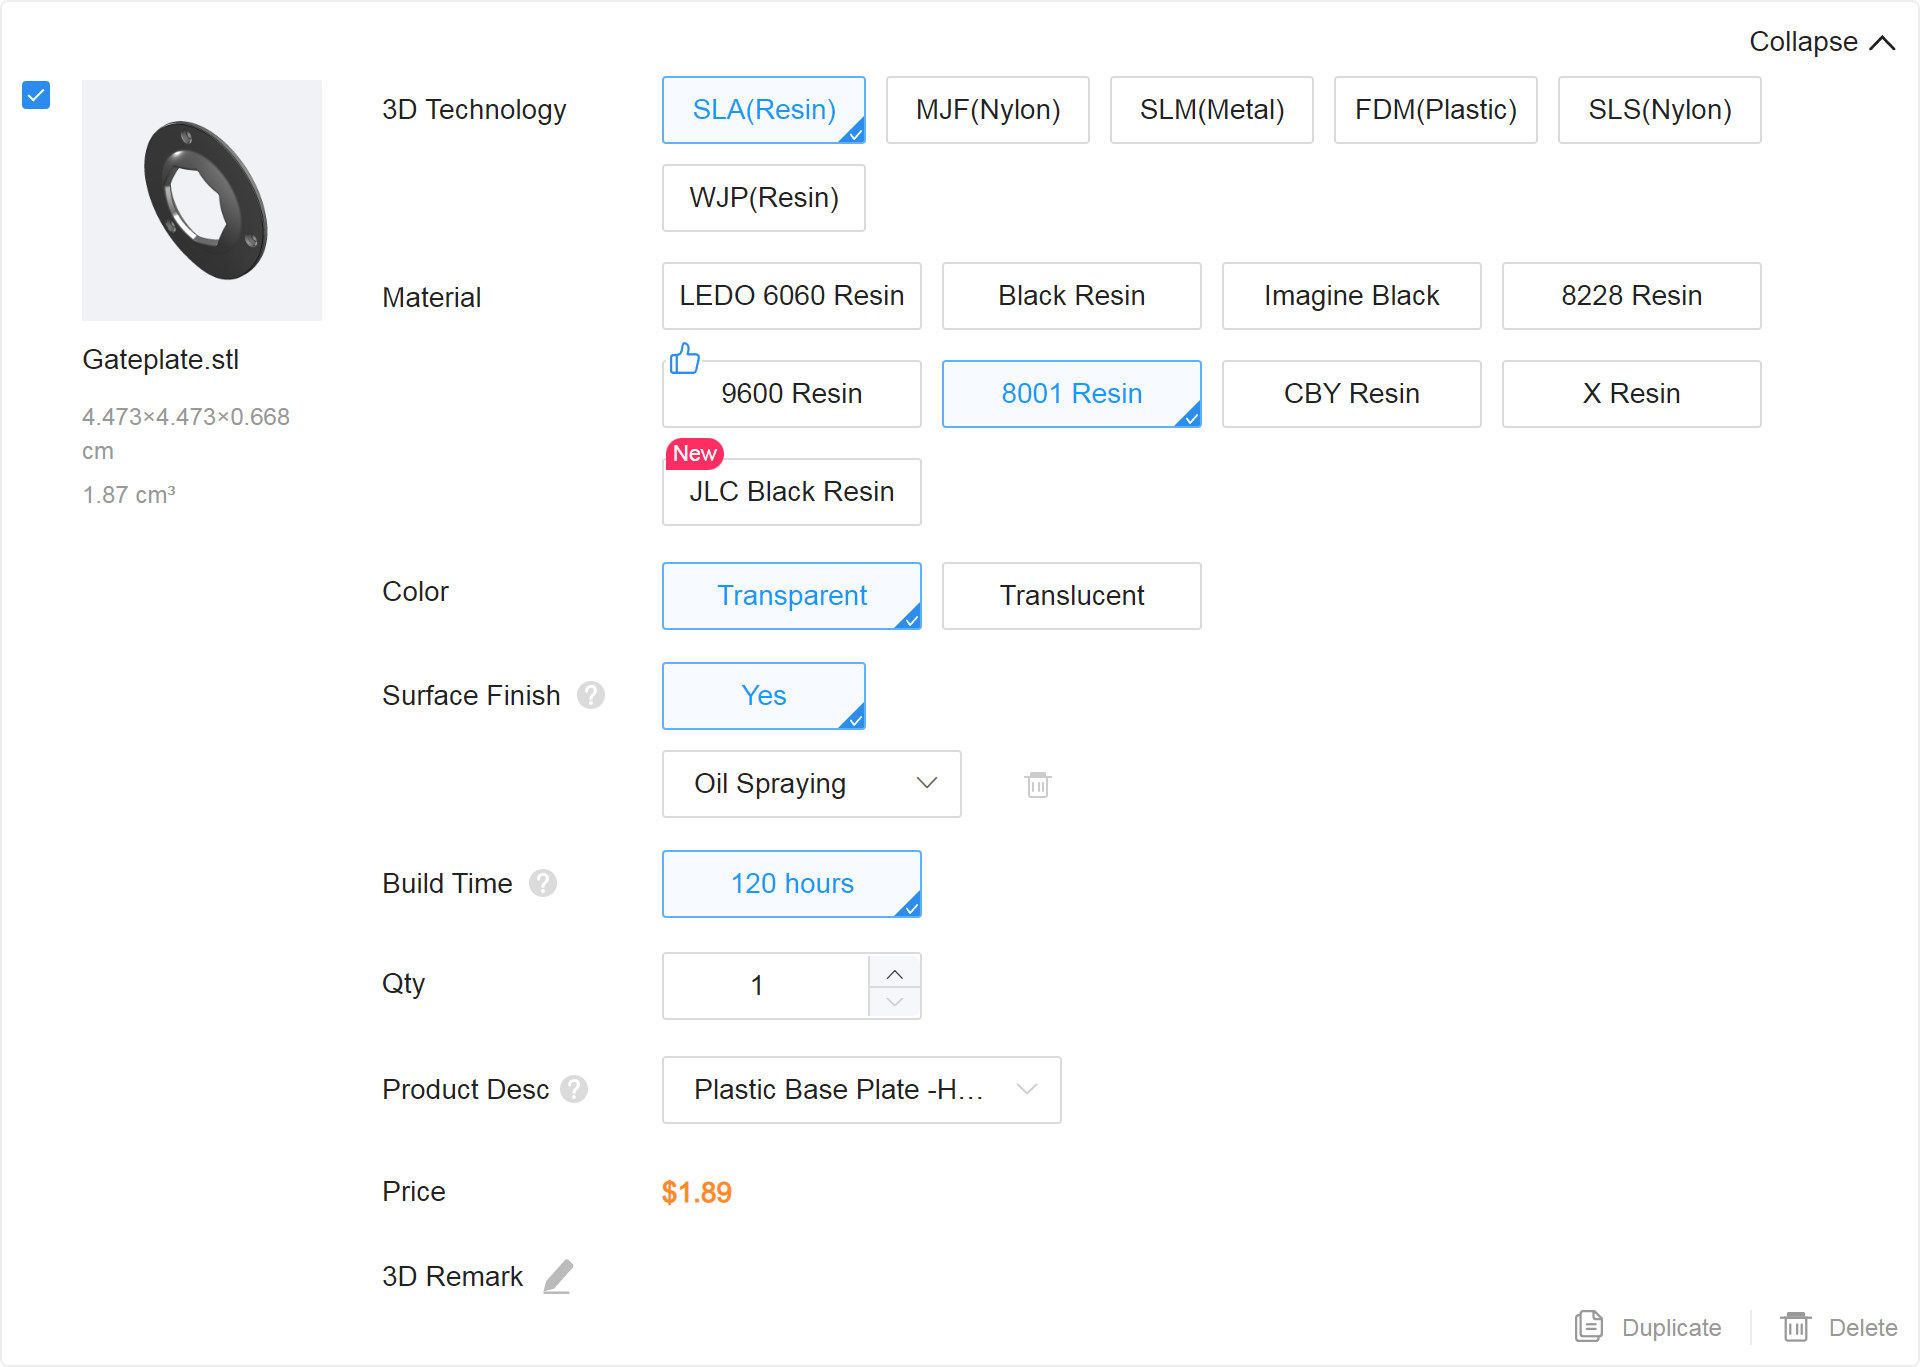
8001 Transparent Oil Spray is the best material for the Gateplate because of its high hardness, low friction, and good dimensional stability. A Gateplate made of this material will feel the smoothest when it touches your control stick and most OEM ABS Plastic-like. It will be more consistent and have a more perfect shape than something like Black Resin. 8001 Transparent Oil Spray Resin does have an issue where it is slightly thicker than the rest of the materials. For this reason, I do not recommend it for internal parts where tolerances and clearance are a priority. But for the external Gateplate, its perfect.
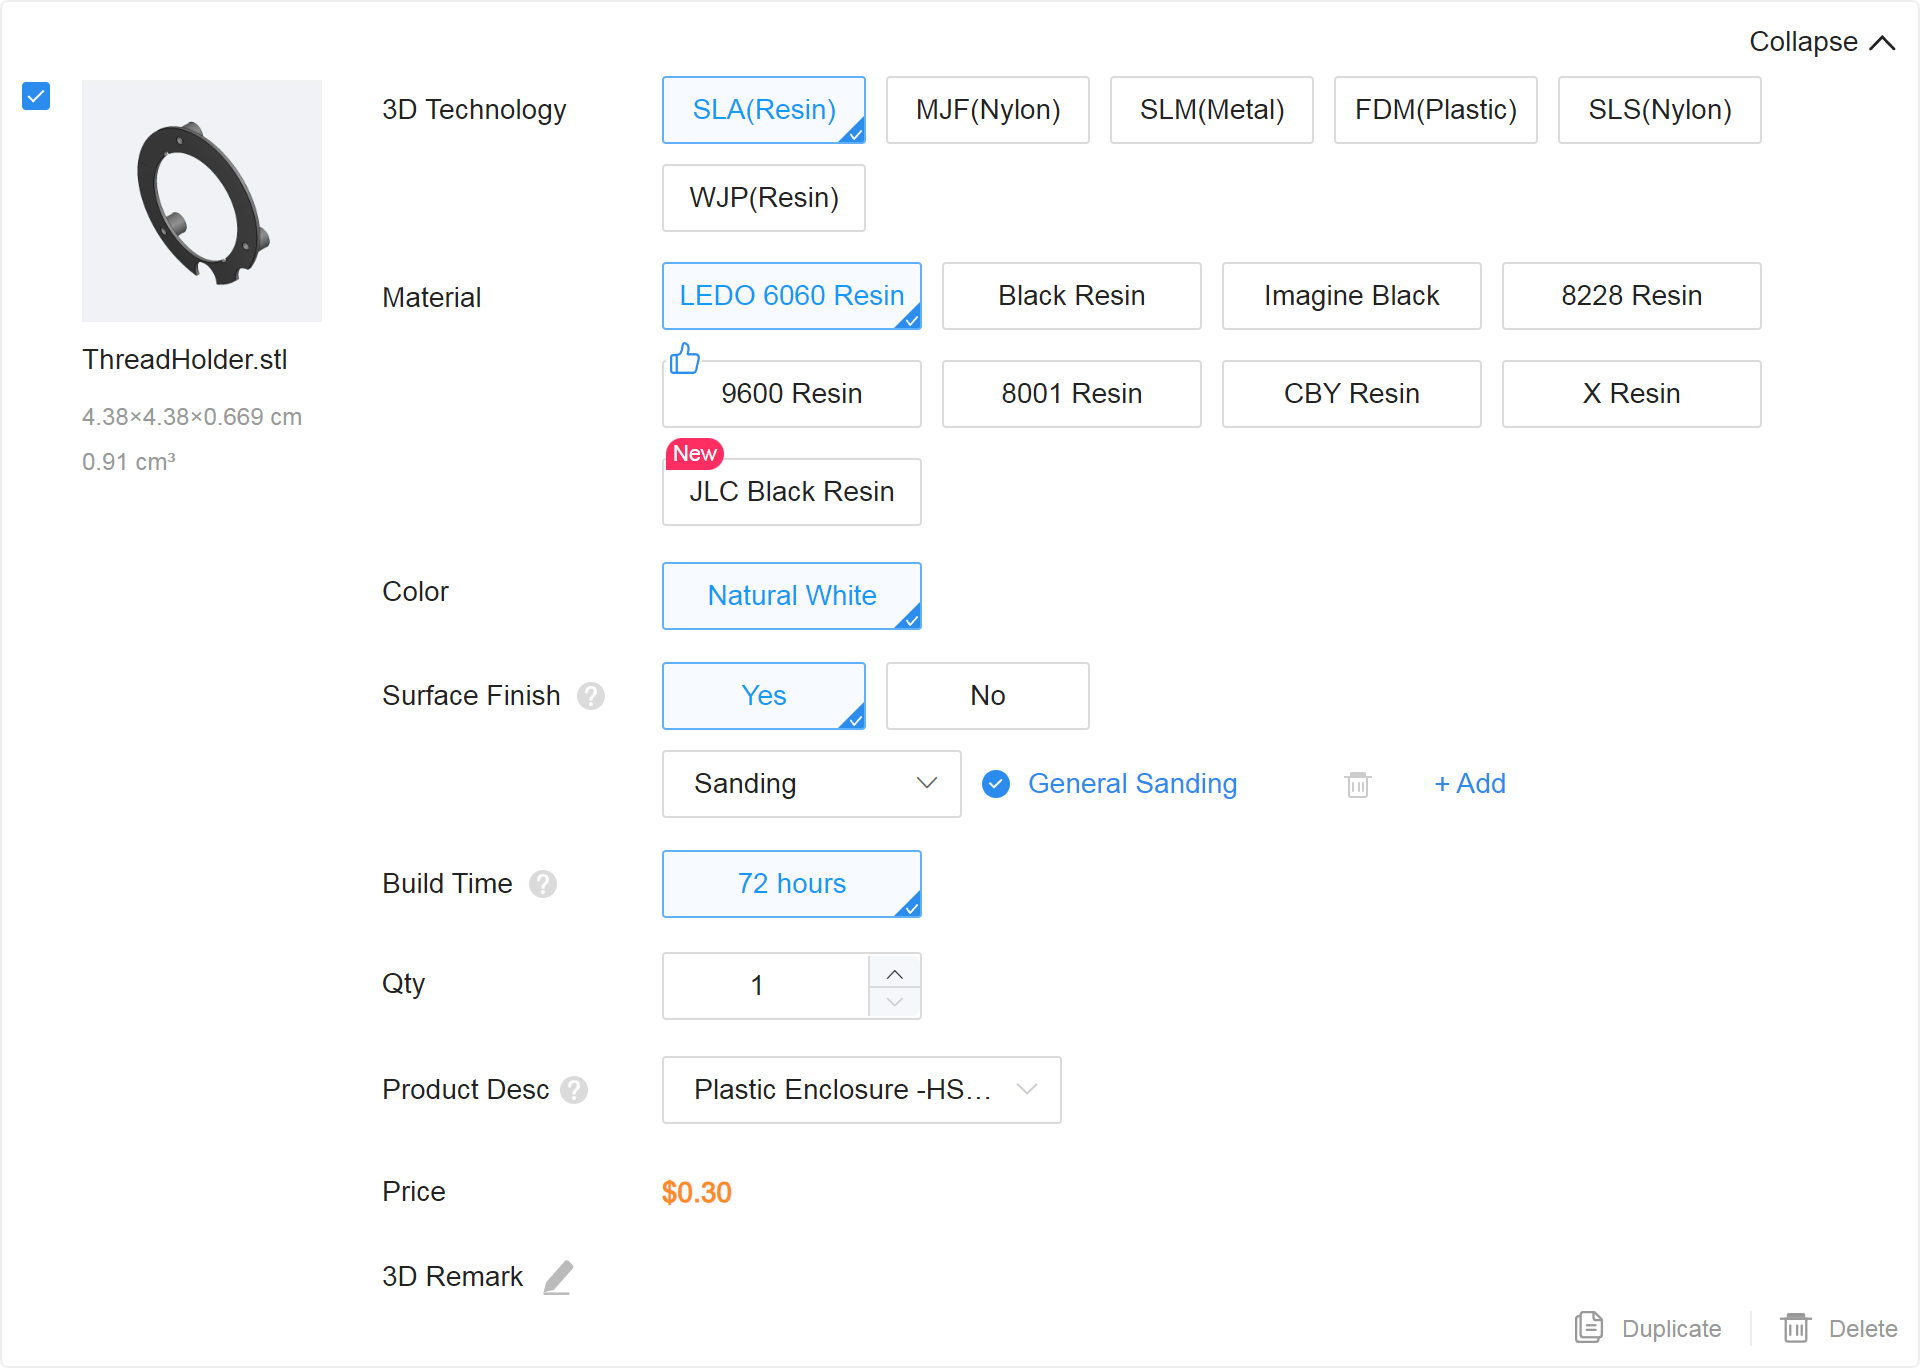
LEDO 6060 is the least expensive resin on the website. It does not have the smoothness of 8001 Transparent Oil Spray or the highly detailed and accurate surface finish of Black Resin, but it is more dimensionally stable than Black Resin and does not have the extra thickness issue that 8001 has. For a precise part like the ThreadHolder, that also wont be seen from the outside very much at all, I believe LEDO 6060 is the best choice.
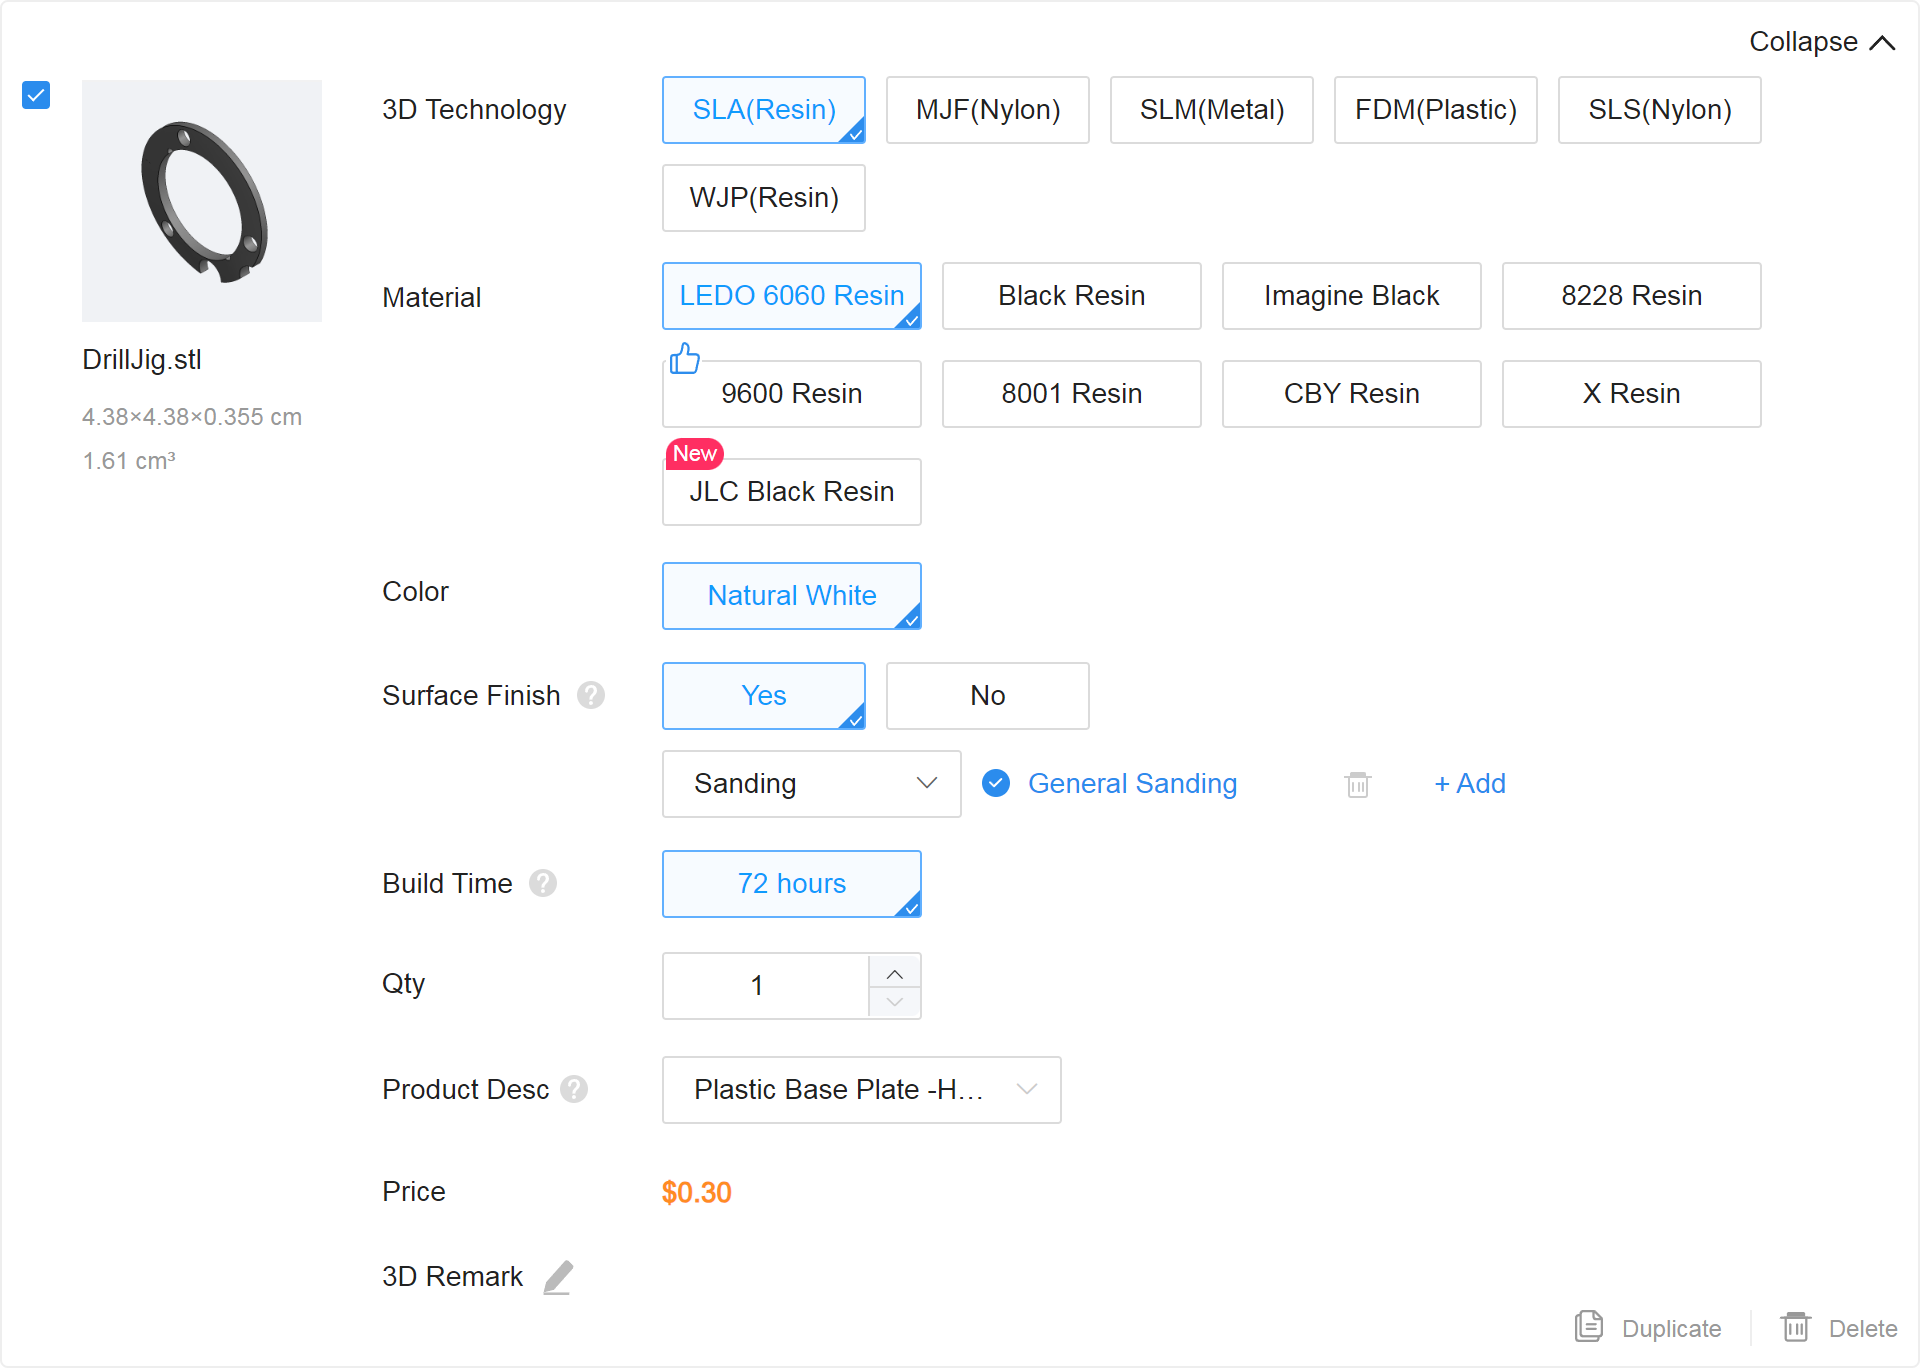
I choose LEDO 6060 resin for the DrillJig for pretty much the same reason as I chose it for the ThreadHolder. The DrillJig is the only temporary piece in this kit. It is used to accurately drill your holes, and then it is either discarded or used again to make multiple shells. Because of this, it's material matters the least. Also, because of the DrillJig's completely flat surface, you could probably FDM print this part as well!
While not explicitly part of this project, I do want to point out that generally the best and safest resin to print something in is actually Black Resin or JLC Black Resin. This resin type is smooth to the touch and has very high "resolution". It has a detailed, smooth, accurate surface that is much better than something like LEDO 6060. For general parts, such as buttons, shells, stick bases, or other small detailed parts, Black Resin is generally the way to go. If you want to guarantee that the part you order is MOST similar to the STL file that you designed and submitted, you should usually order parts in JLC Black Resin.
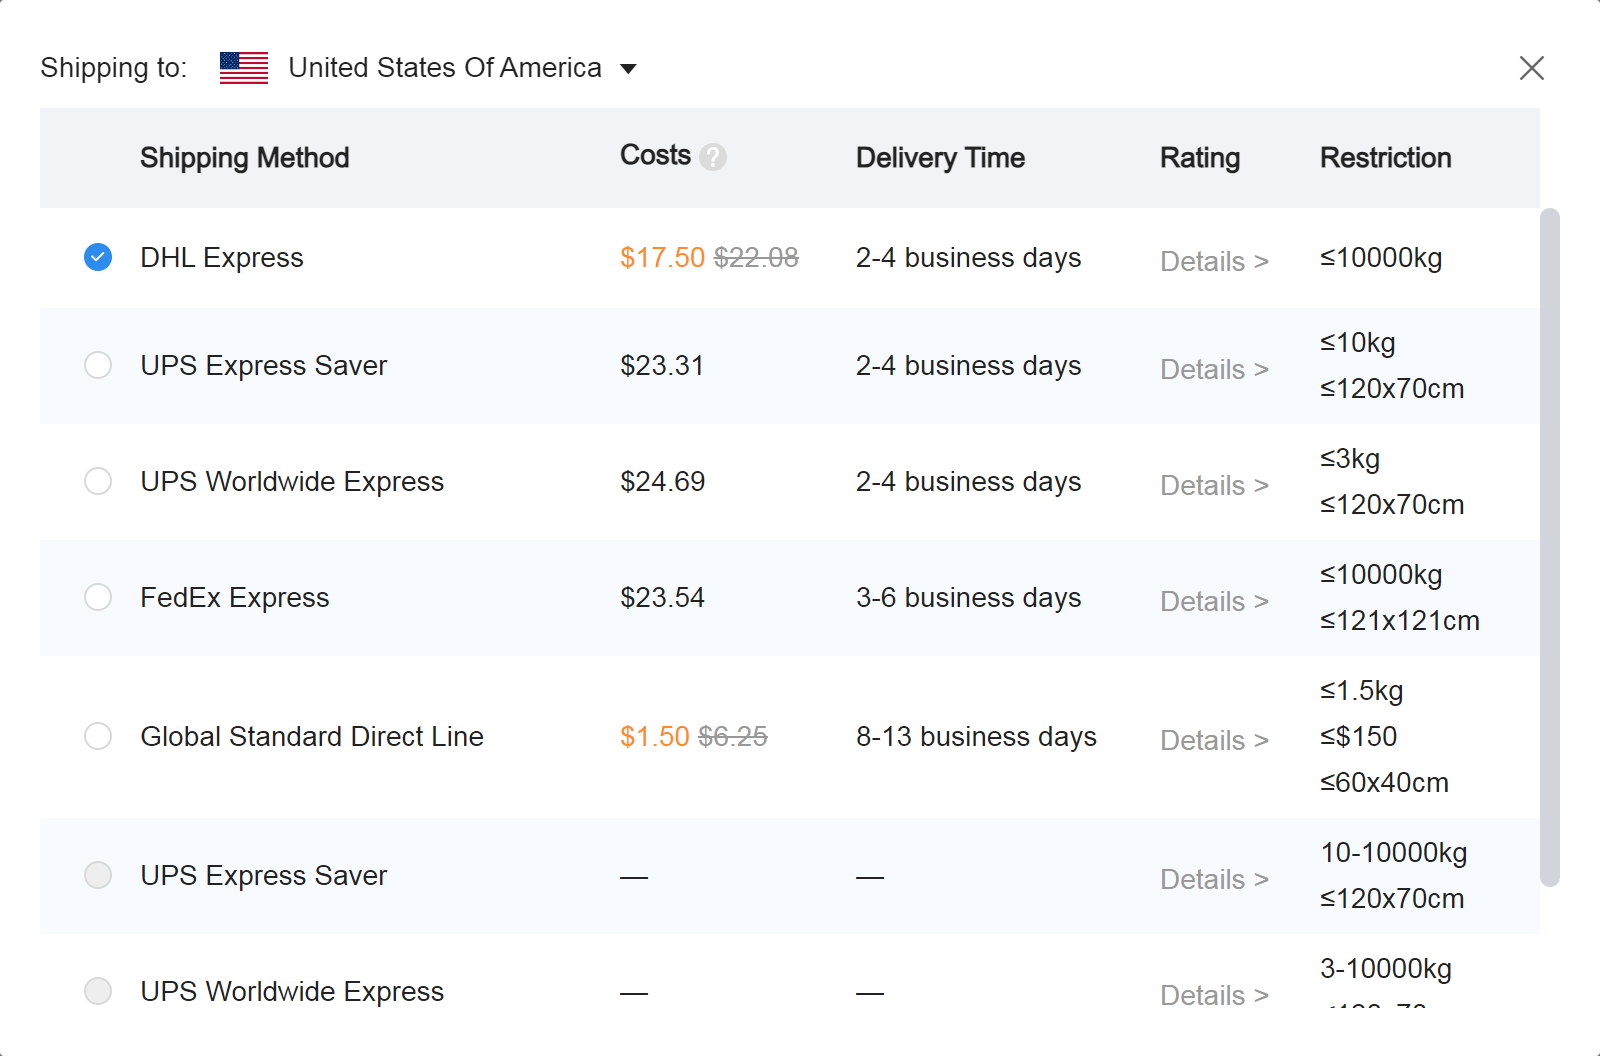
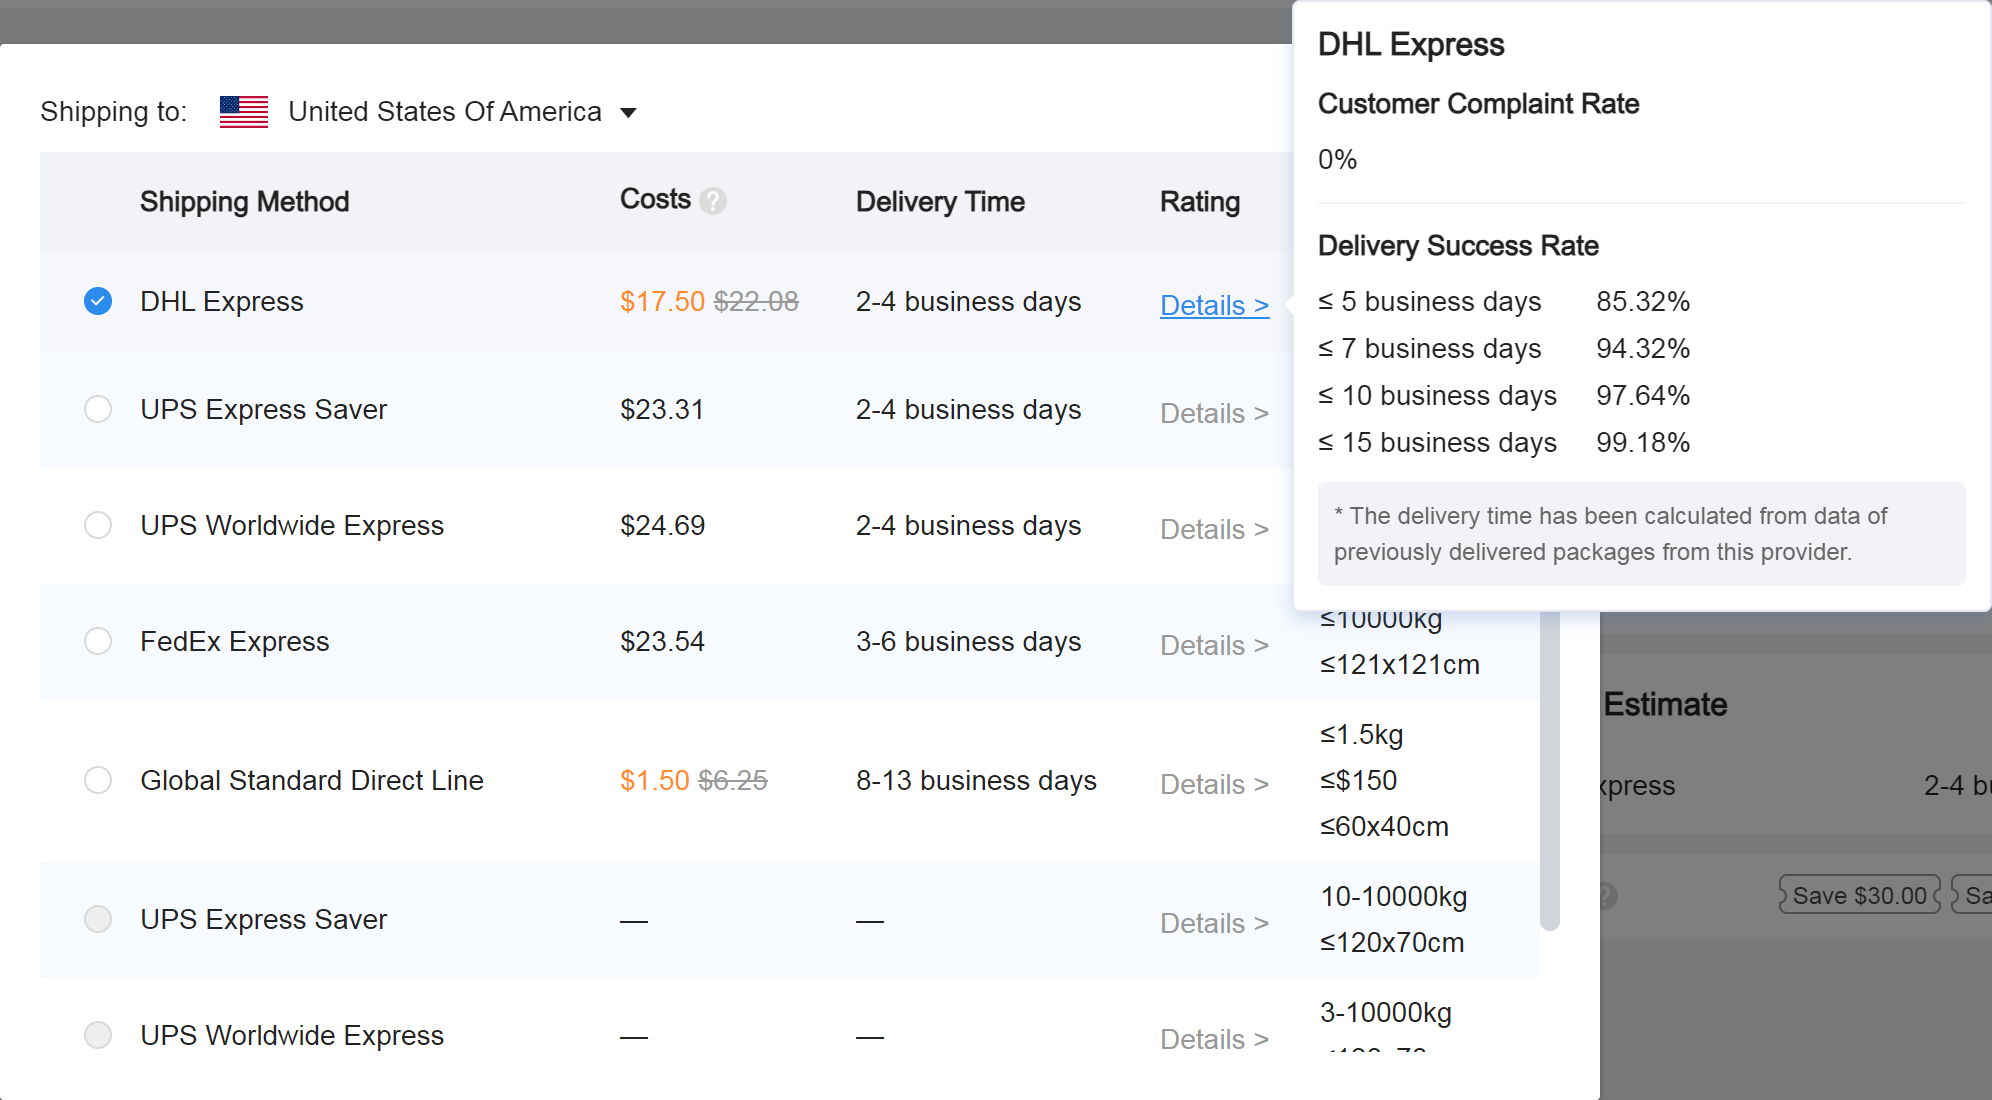
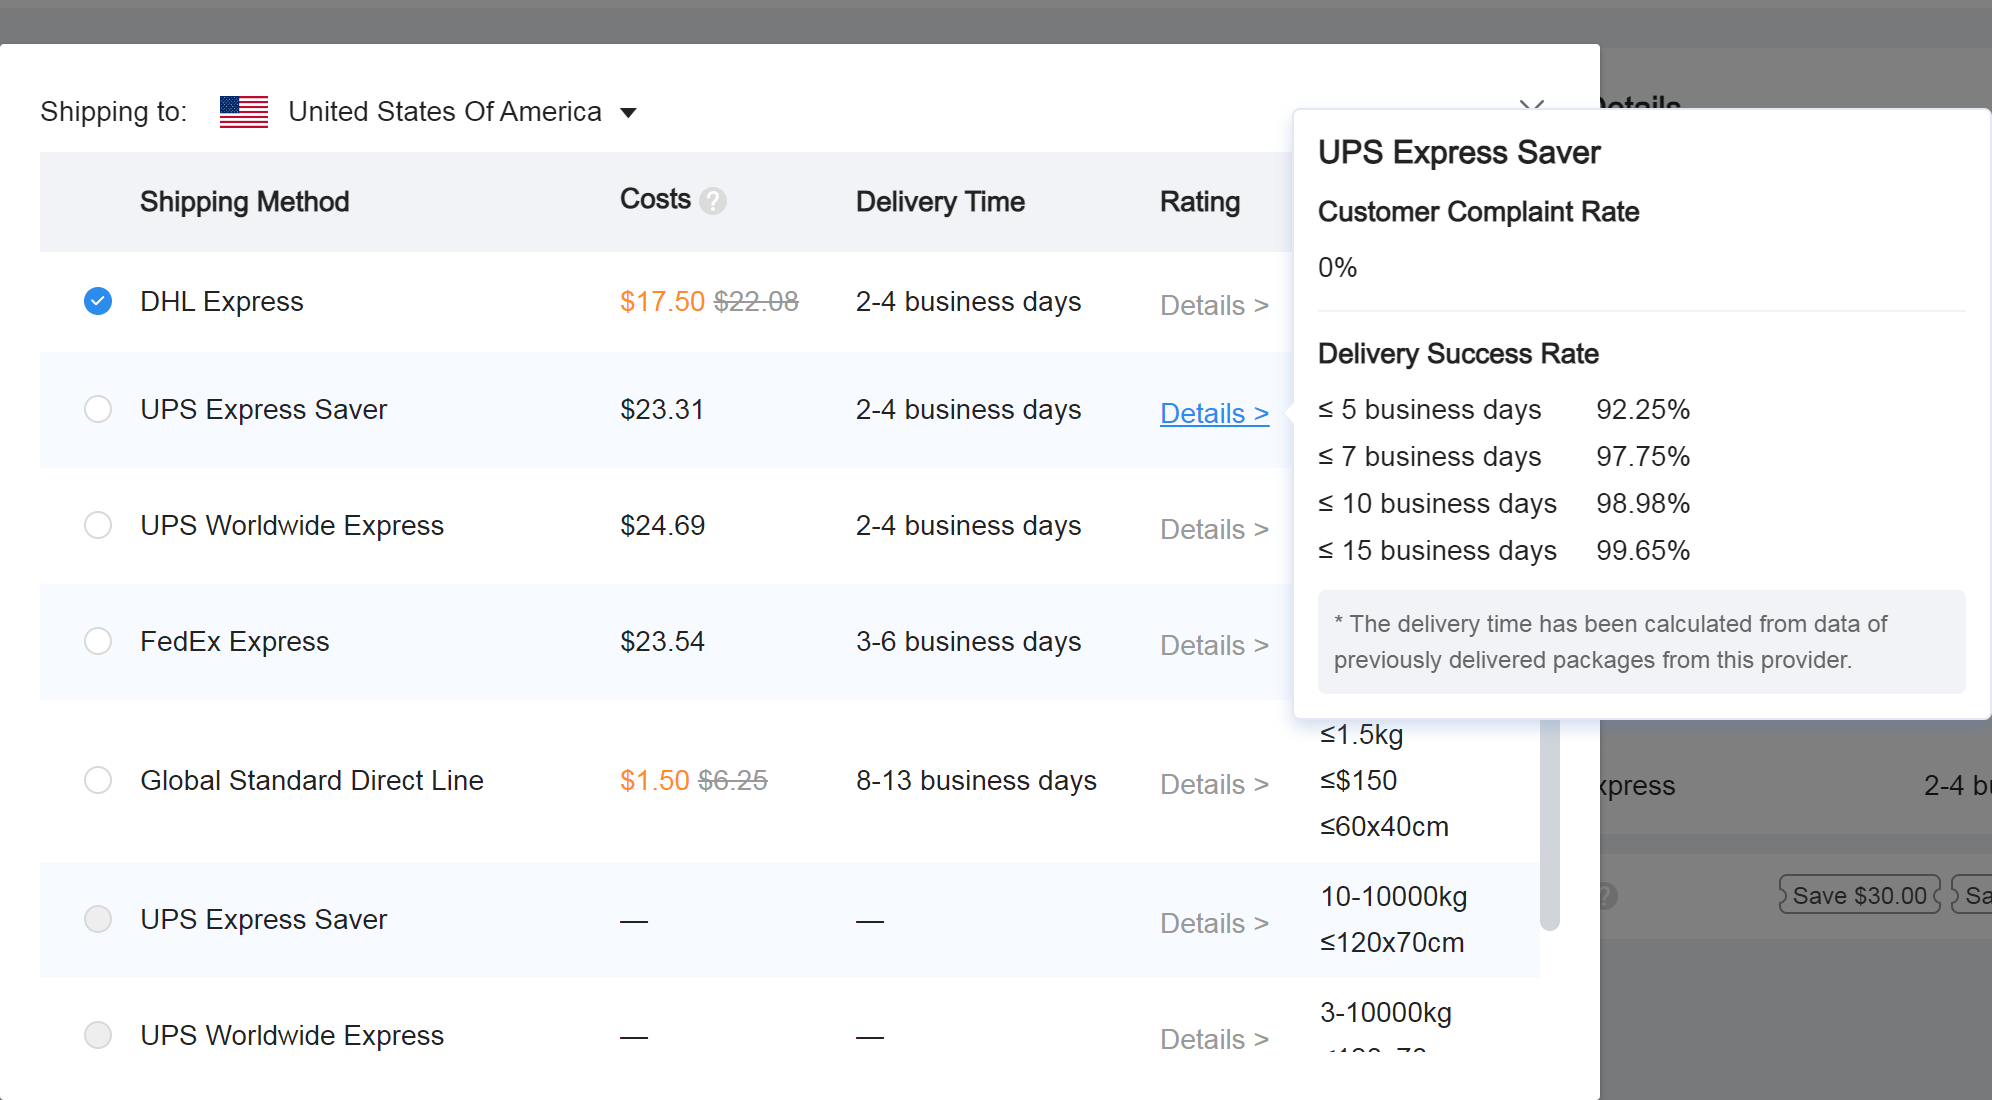
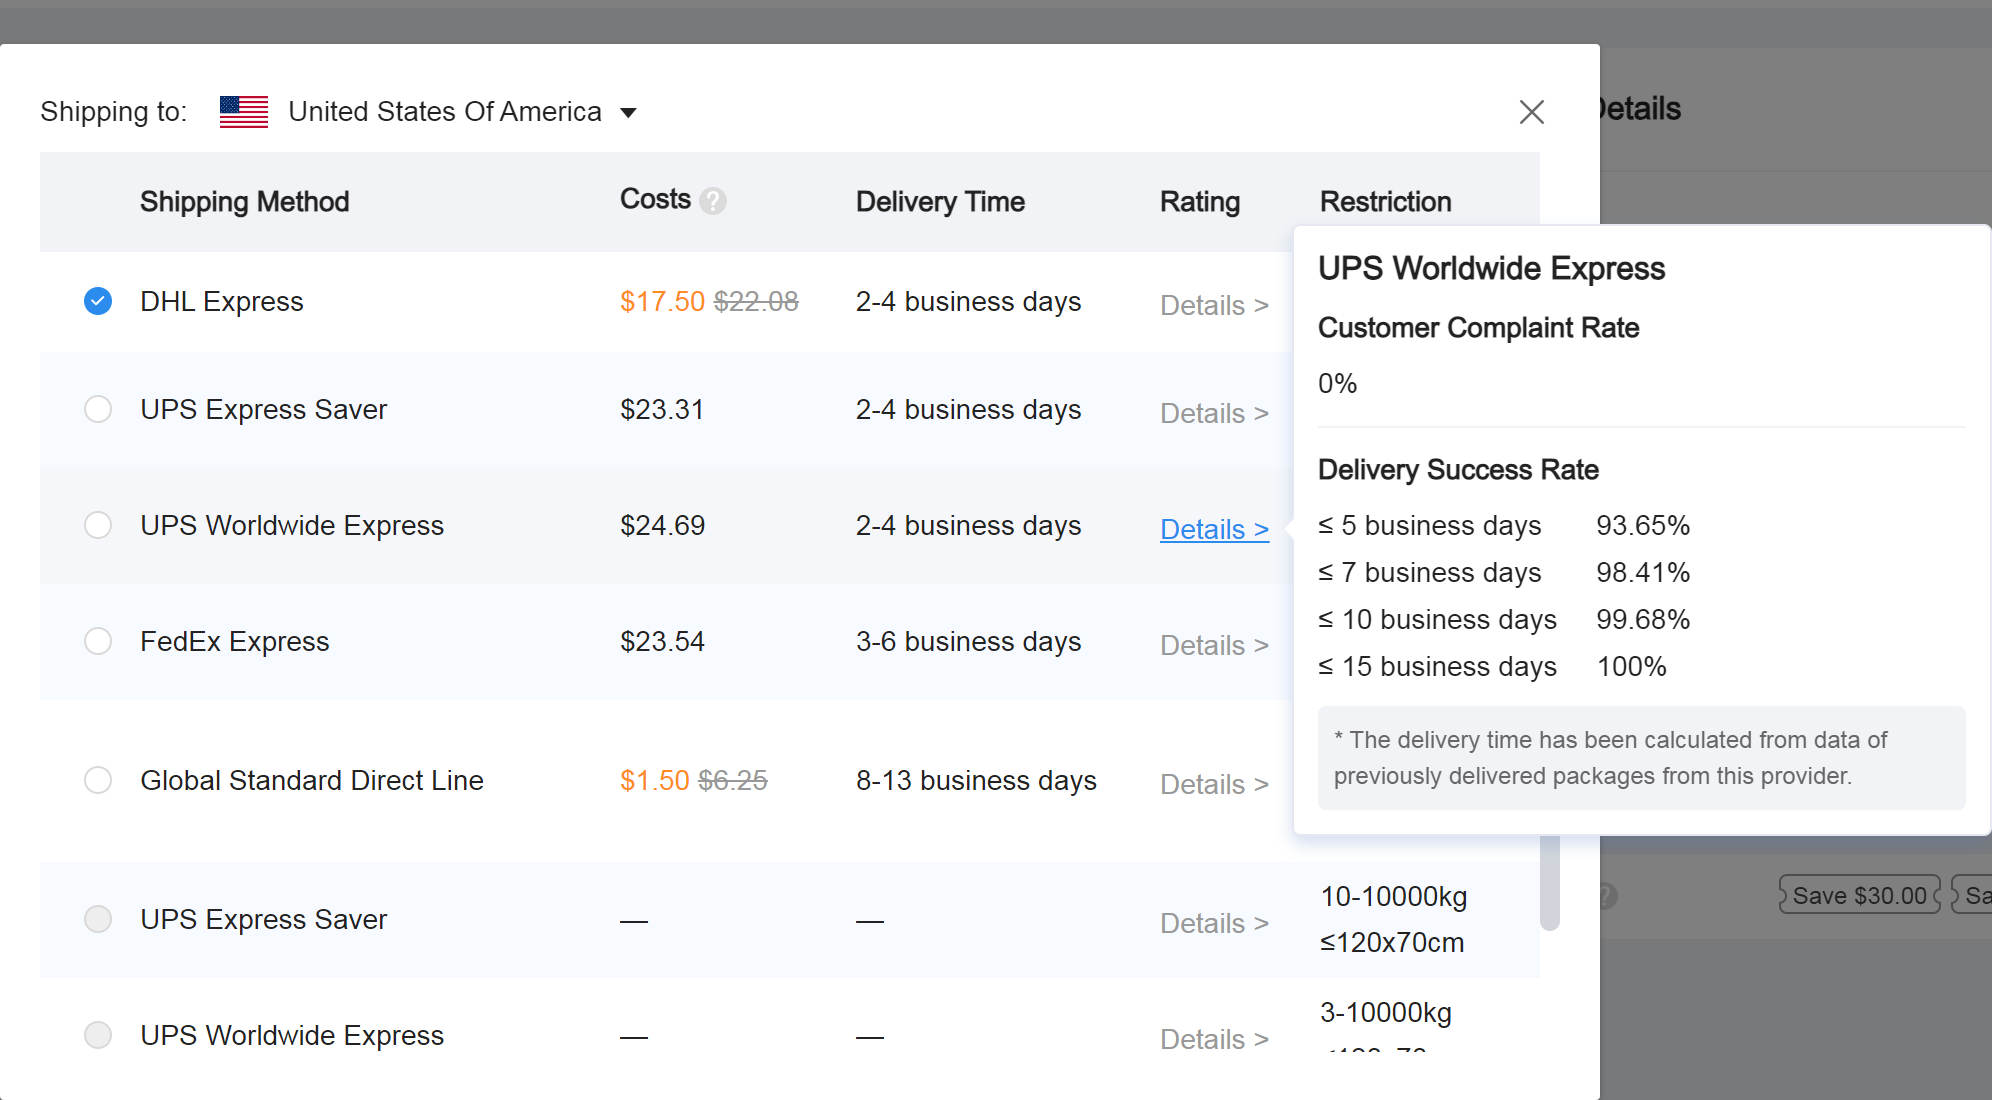
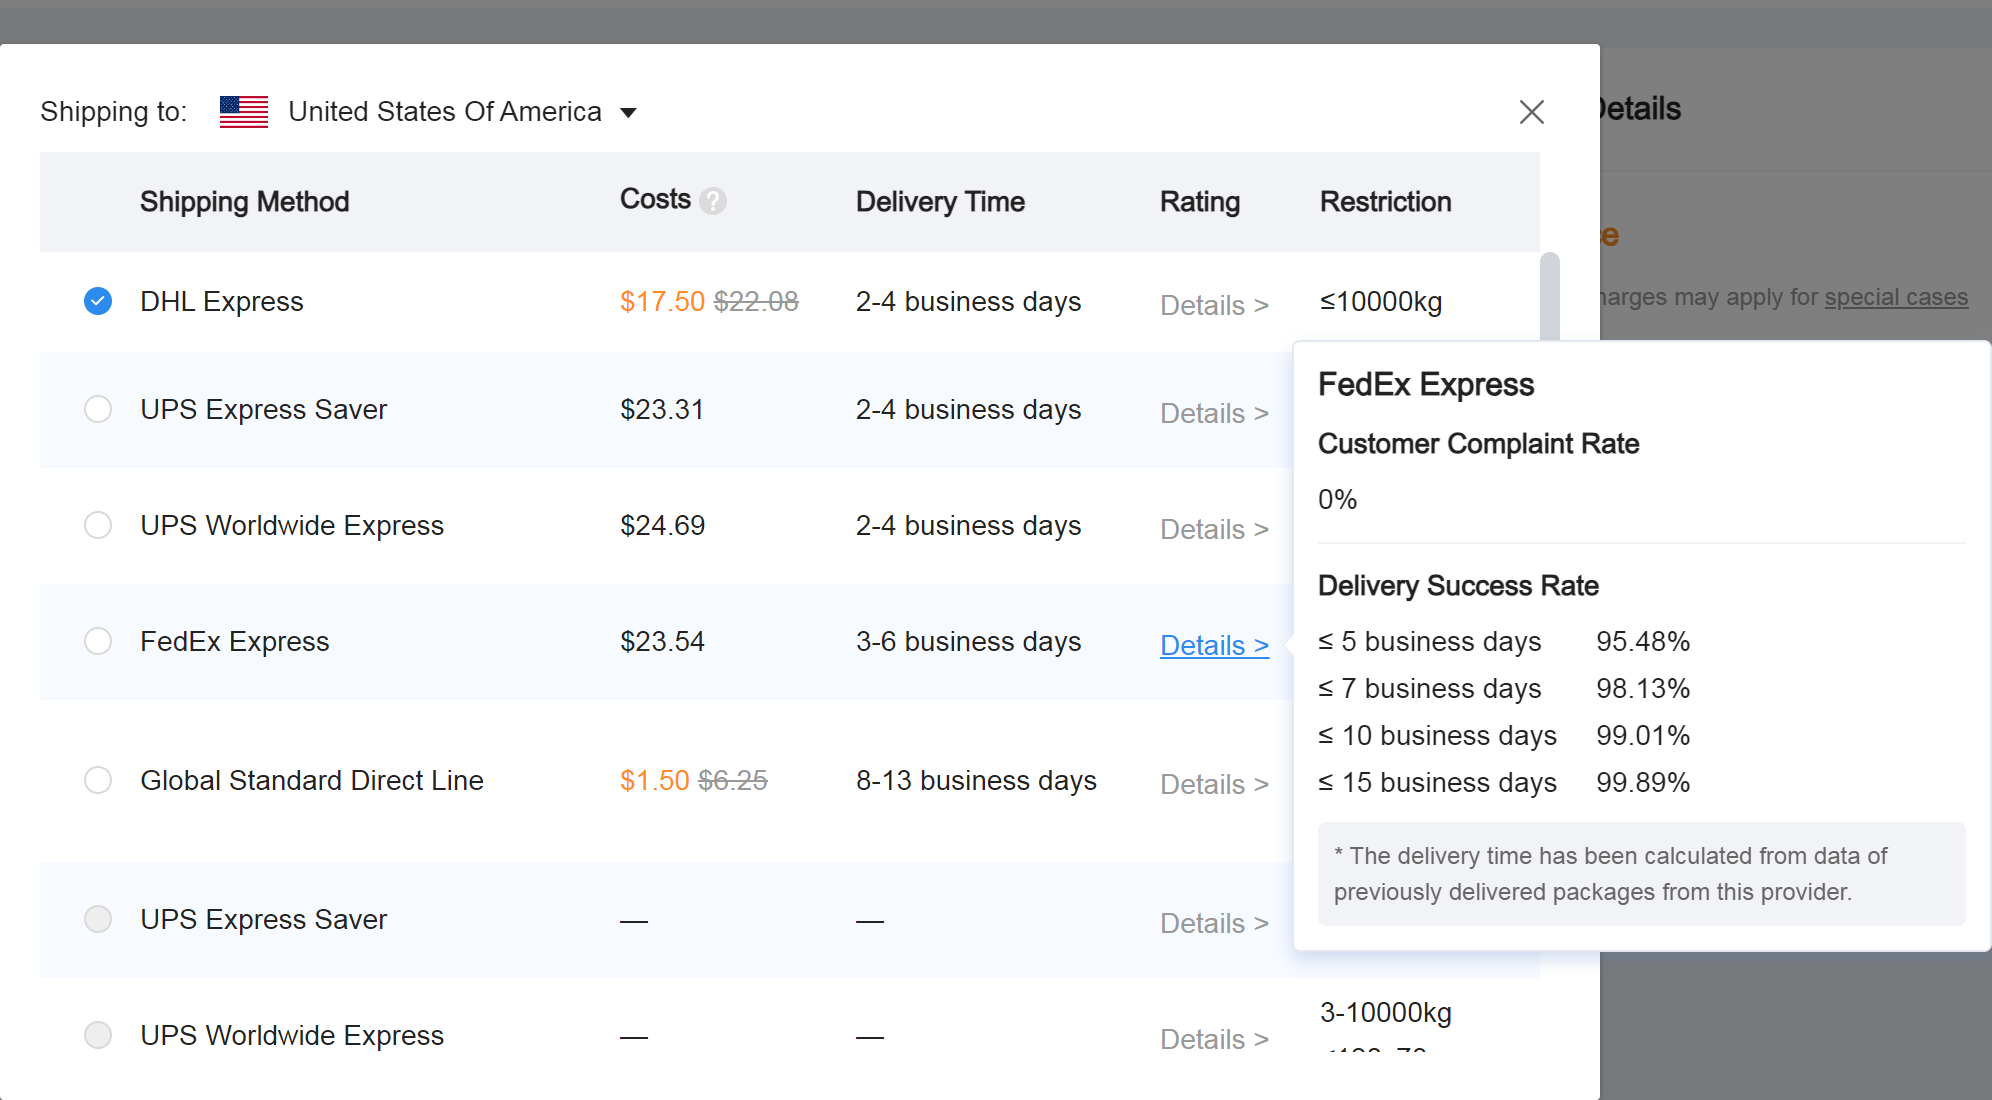
While you may notice that the prices for these individual parts can be very inexpensive, keep in mind that the shipping is usually where the majority of the cost is going to come from. While JLC3DP shipping can be relatively expensive, this does not mean that it is bad or that your parts will take months to get to you. From my experience, it takes about 2-3 weeks for an order to go from shipped to delivered. Usually around 10 days. Below are some prices and shipping estimates from JLC3DP. I would consider their information to be accurate. Even with the shipping cost included, you can obtain all of the 3D printed the parts needed for this kit for only about $20 - $30
Click to expand