OxDM (oxvif Device Manager) is a modern, cross-platform ONVIF IP camera
manager — a contemporary successor to the classic ONVIF Device Manager
(ODM). It is written in Rust with Dioxus and built
on the oxvif ONVIF client library.
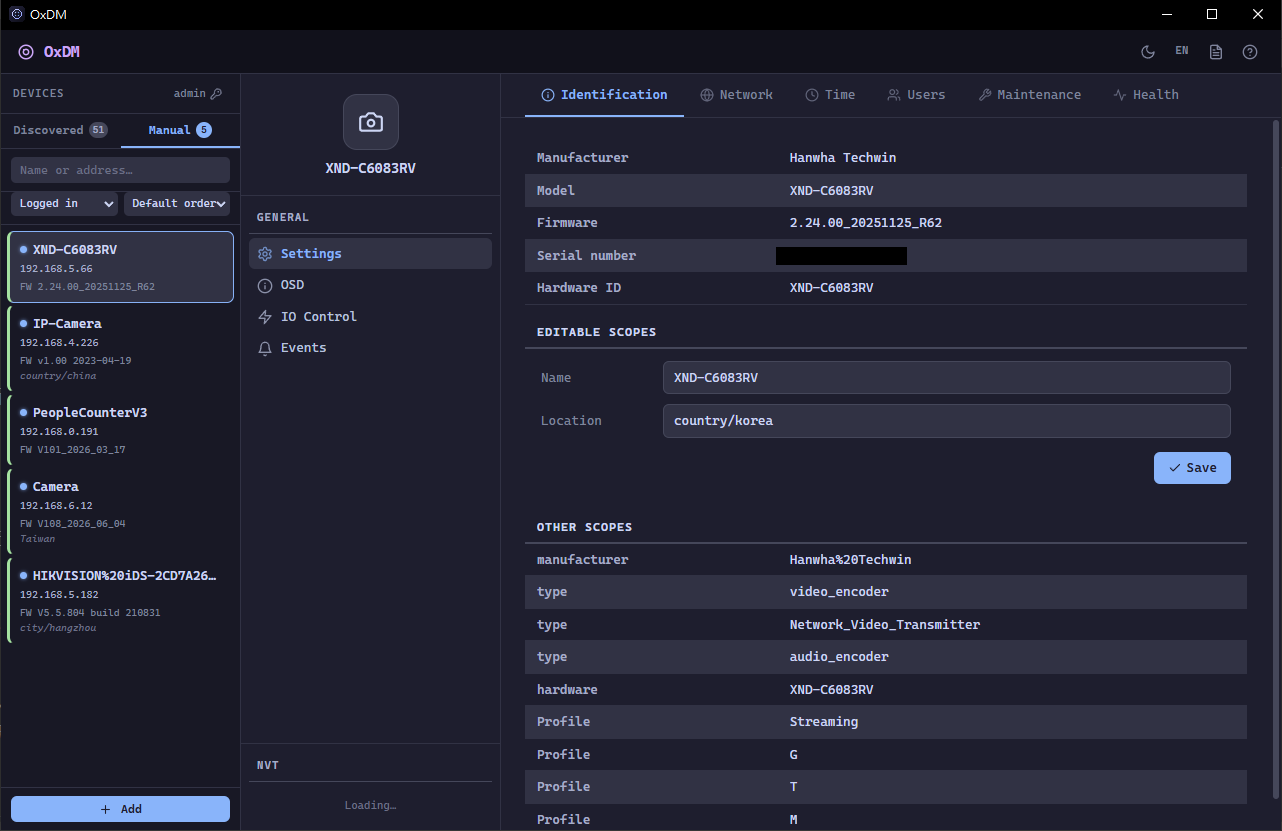
Project status — pre-release (v0.1.4). Core device management works end-to-end against real cameras and the
oxvifmock server. Release bundles are not yet code-signed, so the operating system may warn about an unidentified developer on first launch.
Bundles for each release are attached to the corresponding GitHub Release:
| Platform | Asset | Notes |
|---|---|---|
| macOS (Apple Silicon) | oxdm-<version>-macos-aarch64.dmg |
aarch64 only |
| Windows (x86-64) — installer | oxdm-<version>-windows-x86_64.msi |
Start-menu shortcut |
| Windows (x86-64) — portable | oxdm-<version>-windows-x86_64-portable.zip |
unzip and run oxdm.exe |
| Linux — Ubuntu / Debian (x86-64) | oxdm-<version>-ubuntu-x86_64.deb |
sudo apt install ./<file>.deb |
The bundles are not code-signed, so every OS shows a first-run warning. Notes:
- macOS: "oxdm is damaged and can't be opened". The app is not damaged —
this is Gatekeeper blocking an unsigned, un-notarized app. Drag oxdm to
Applications, then clear the quarantine flag and launch normally:
Apple Silicon (
xattr -dr com.apple.quarantine /Applications/oxdm.app
aarch64) only — the build will not run on an Intel Mac; on Intel, build from source. - Windows: SmartScreen "Windows protected your PC". Click More info → Run anyway. The bundles rely on the WebView2 runtime, preinstalled on Windows 10/11; if the window stays blank on an older or stripped-down system, install the WebView2 runtime from Microsoft.
- Fedora / RHEL-based distributions are not yet supported as a prebuilt
package (a different WebKitGTK layout, no
.deb). Native support is planned via Flatpak. Until then, build from source (below).
OxDM builds with a standard Rust toolchain — no extra tooling is required to
produce a runnable binary (dx is only needed for hot-reload development and
for producing installer bundles). Install from
crates.io:
cargo install oxvif-device-manageror build the latest commit directly from Git:
cargo install --git https://github.com/smiti1642/oxdmEither way the installed command is oxdm (the crate is published as
oxvif-device-manager because the shorter name was already taken).
On Linux, install the WebKitGTK/wry development packages first. For example, on Debian/Ubuntu:
sudo apt-get install -y libwebkit2gtk-4.1-dev libgtk-3-dev \
  libayatana-appindicator3-dev libxdo-dev
The equivalent Fedora packages are webkit2gtk4.1-devel, gtk3-devel,
libayatana-appindicator-gtk3-devel, and libxdo-devel.
- Discovery — WS-Discovery scan of the local network, plus manually-added devices. Discovered devices persist across restarts.
- Live video — always-on MJPEG snapshot stream, or RTSP (H.264/H.265) via a bundled go2rtc bridge with H.265 → H.264 transcode and MSE fallback.
- Snapshots — save a JPEG from any profile thumbnail or the Live Video view.
- Device settings — identification and scopes; network (hostname, IPv4 and IPv6 manual interfaces, MTU, DNS, NTP, gateway, protocols); system time (with PC sync and timezone/DST); user management (create/read/update/delete); and maintenance (reboot and factory reset, both confirmation-gated).
- Media — profile create/delete, video-encoder configuration (H.264 and H.265, with H.265 automatically routed through Media2), imaging controls (brightness/contrast plus manual exposure, white-balance gains, and focus limits), and OSD management.
- PTZ — preset create/read/update/delete, continuous and absolute moves, and home position.
- Events — live PullPoint subscription with a scrolling, filterable log.
- Diagnostics — on-demand ONVIF health check (Pass/Warn/Fail/Skip per service, plus a Profile S/T/G verdict), with a "Save as baseline" action and an automatic diff against the saved baseline on the next run. Regressions to FAIL, added or removed checks, and checks that slowed by 2× or more are all flagged in the per-device baseline diff. The check actively verifies results rather than only confirming the device answered: it opens the RTSP stream, fetches and validates the snapshot as a real image, and exercises Profile G recording search / replay. It also runs a security probe (flags a camera that serves data without authentication) and, optionally, force-verifies services the device does not advertise to catch under-declared capabilities. A batch run can also opt into a non-destructive write round-trip (re-Set the first video-encoder config unchanged) to catch devices that reject our serialized request body — an interop bug read-only probes can't see. Batch results across a fleet can be exported as the rich JSON bundle or as JUnit XML for CI dashboards.
- Localisation and theming — three themes (Dark / Light / Classic); English, 繁體中文, and Русский locales; keyboard shortcuts; an in-app log viewer; and an optional on-disk log file.
Credentials (a global default plus optional per-device overrides) are stored in the operating-system keychain and are never written to disk in plaintext.
Once installed, launch OxDM and use the left sidebar to scan for devices or add one manually. Select a device to access its settings, live video, PTZ, events, and diagnostics.
dx serve --platform desktopdx serve provides hot-reload during development and requires
dioxus-cli
(cargo install dioxus-cli). A plain cargo run also works without it.
Verbose logging:
RUST_LOG=oxdm=debug dx serve --platform desktopRTSP mode additionally requires ffmpeg on PATH for H.265 transcoding;
snapshot (MJPEG) mode needs nothing extra.
OxDM pairs with the oxvif mock server, which implements enough of ONVIF to
exercise most of the UI. The oxvif library is pulled in from
crates.io automatically, but the standalone
mock server ships as an oxvif example, so it requires a local checkout:
# One-time: clone the oxvif repository
git clone https://github.com/smiti1642/oxvif ../oxvif

# Terminal 1: start the mock server (default port 18080)
cd ../oxvif && cargo run --example mock_server --features mock-server

# Terminal 2: start OxDM
dx serve --platform desktop
In OxDM, open the Manual tab → Add → enter 127.0.0.1:18080 (no
credentials required). Snapshot thumbnails and the settings tabs will show live
data from the mock device, and the Diagnostics tab works against it as well.
Released under the MIT License. © 2026 smiti1642