This project deploys a home automation stack using Node-RED and Home Assistant with Docker, designed to automate devices (e.g., WiFi bulb) and control them via Telegram.
To start all services, run in the project root:
docker-compose up -d --buildThis will spin up:
- Home Assistant: http://localhost:8123
- Node-RED: http://localhost:1880
To allow Node-RED to communicate with you via Telegram:
- Open Telegram and search for the @BotFather user.
- Send the
/newbotcommand. - Follow the instructions to give your bot a name and a username.
- Once finished, BotFather will give you an HTTP API Token (e.g.,
123456789:ABCDefGHIjkLmnOPQRstuVWxyz). Save it. - You can now close the session with BotFather and enter the bot you just created at t.me/BotName.

Conversation with the Bot
- Access http://localhost:8123 and create your administrator account.
- Your custom components (in
custom_components) are already loaded automatically (in this case, we include Xiaomi Miot). - Add the devices you want to control in Home Assistant from the Devices section.
- This device will be saved as an entity with a unique ID that will be used in Node-RED to control it.
- IMPORTANT: Create Token for Node-RED:
- Click on your Profile (circle with your initials at the bottom left).
- Scroll to the bottom of the page to the Long-Lived Access Tokens section.
- Click CREATE TOKEN.
- Type "NodeRED" as the name and press OK.
- Copy the token that appears. (Attention! It is only shown once. If you lose it, you will have to create a new one).

Token Generation in Home Assistant
- Access http://localhost:1880.
- If it's the first time, you'll see an empty canvas or the default flow.
- To import your automation:
- Menu (three lines top right) -> Import.
- Select the
flow-node-red.jsonfile from this project (or copy and paste its content).
- Configure Credentials:
- Telegram: Double-click on the Telegram Receiver/Sender node. Click the pencil next to "Bot" and paste your API Token and bot name.
- Home Assistant: Double-click on any Home Assistant node (blue). Click the pencil next to "Server".
- Base URL:
http://homeassistant:8123(Note that we use the container namehomeassistant, notlocalhost). - Access Token: Paste the token you generated in step 2.
- Entity ID: Paste the ID of the device you added in Home Assistant.
- Configure the action you want to perform (turn on/off).
- Base URL:
- Click Deploy (top right).

Home Assistant Server Configuration
This is how the interaction should look:

Automation Flow in Node-RED
This project is modular; you can add more devices and automations following the same steps, and you can also customize the automation flow with new components or Node-RED libraries.
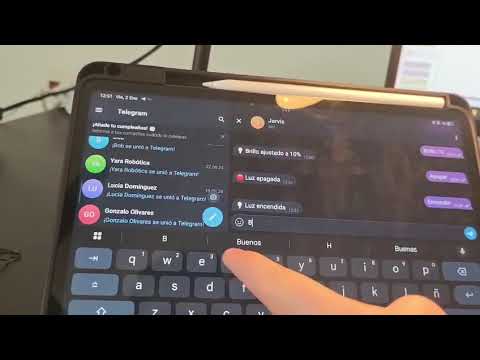
Click on the image to watch the demonstration video on YouTube
docker-compose.yml: Container orchestration.Dockerfile: Custom Node-RED image with extra modules.flows.json/flow-node-red.json: Automation flows.custom_components/: Extra integrations for Home Assistant (e.g., Xiaomi).