Jenkins
In this section we will launch Jenkins using docker-compose and set up all the necessary things in order to create our pipeline.
Jenkins offers a simple way to set up a continuous integration or continuous delivery (CI/CD) environment for almost any combination of languages and source code repositories using pipelines, as well as automating other routine development tasks. While Jenkins does not eliminate the need to create scripts for individual steps, it does give you a faster and more robust way to integrate your entire chain of build, test and deployment tools that you can easily build yourself.
We have one last service in our docker-compose that we have not talked about, this service is the one that launches our Jenkins. Lets look at the code and see what we are doing:
jenkins:
        user: root
        image: jenkins/jenkins
        ports:
            - '8080:8080'
            - '50000:50000'
        container_name: 'jenkins'
        networks:
            - cicd
        volumes:
            - /var/run/docker.sock:/var/run/docker.sock
Here we are creating a container called "jenkins" that is based on the image "jenkins/jenkins", exposing this container in the ports 8080 and 50000. We can see that this service is also connected to the network "cicd", the same as our other services, and we also have added a volume, the volumes are used for the persistence of data generated by and used by Docker containers, in this case we are using the Unix socket were Docker daemon listens in order to use Docker inside our pipeline.
Just like with Nexus, as we already had our docker-compose ready and launched we can directly access the Jenkins dashboard by entering http://localhost:8080 in our web browser. When we enter, a page asking us for credentials will pop up, as it is our first time entering we will need to use the initial administrator password that Jenkins gives us. We can find the password by executing the order: docker exec -it "container ID" cat /var/jenkins_home/secrets/initialAdminPassword (you are able to change the password afterwards inside the configuration, for faster logins in the future), after entering with the initial credentials, Jenkins will ask us to install some plugins, just click on the "Install suggested plugins" and wait until the installation finishes.
Now that we have our Jenkins running lets add the necessary plugins to create our pipeline. We will start by adding the SonarQube and nexus credentials into the Jenkins credential storage.
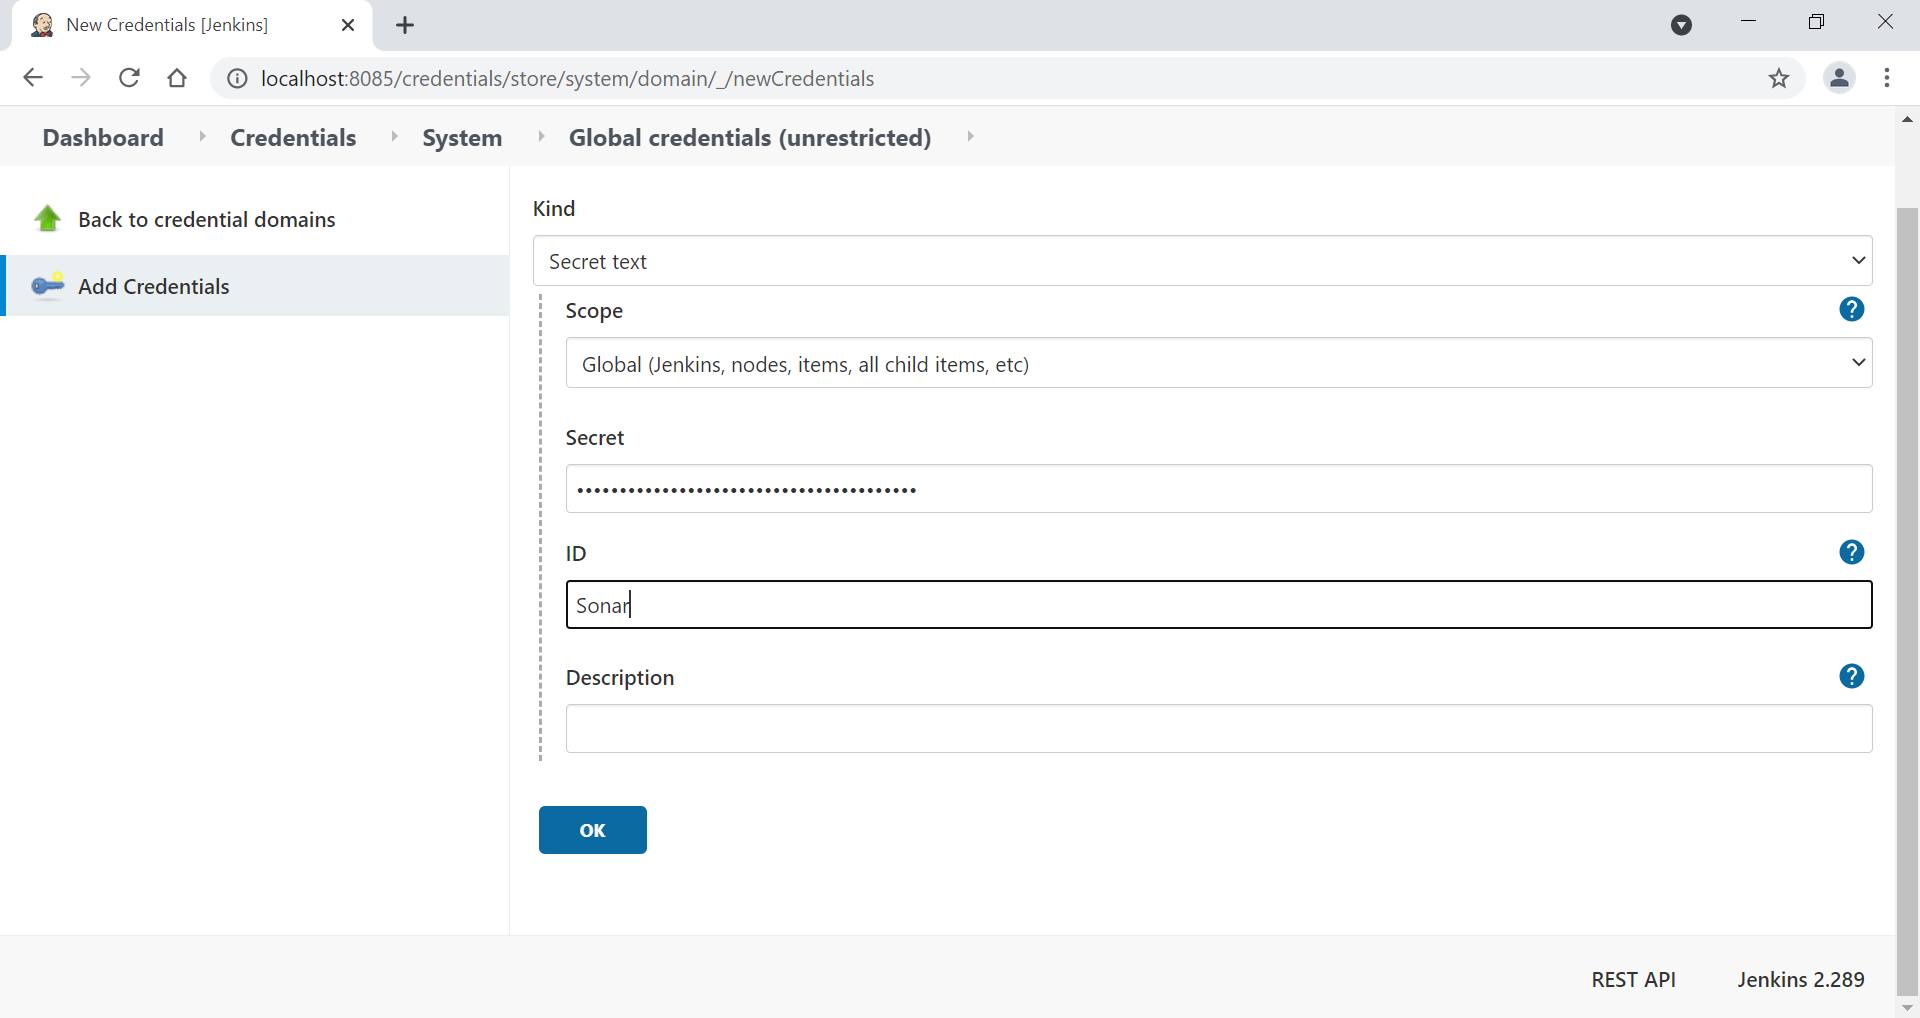
Head into the "Manage Jenkins" tab and click on the "Manage Credentials" section, click on "Jenkins" under "Stores scoped to Jenkins" and then on "Global credentials (unrestricted)", Then click on the "Add Credentials" button. For the SonarQube credentials we will state that the "Kind" is of the Secret Text type, this secret text will be generated by SonarQube, so lets head into our SonarQube and inside our account configuration click on the security section and enter a token name (for example: jenkins-token) and click on the "Generate" button. This will generate us a token which we should copy inside the "Secret" section in the Jenkins credential. Lastly, just add and ID (for example: sonar) in order to know which credentials we are using.
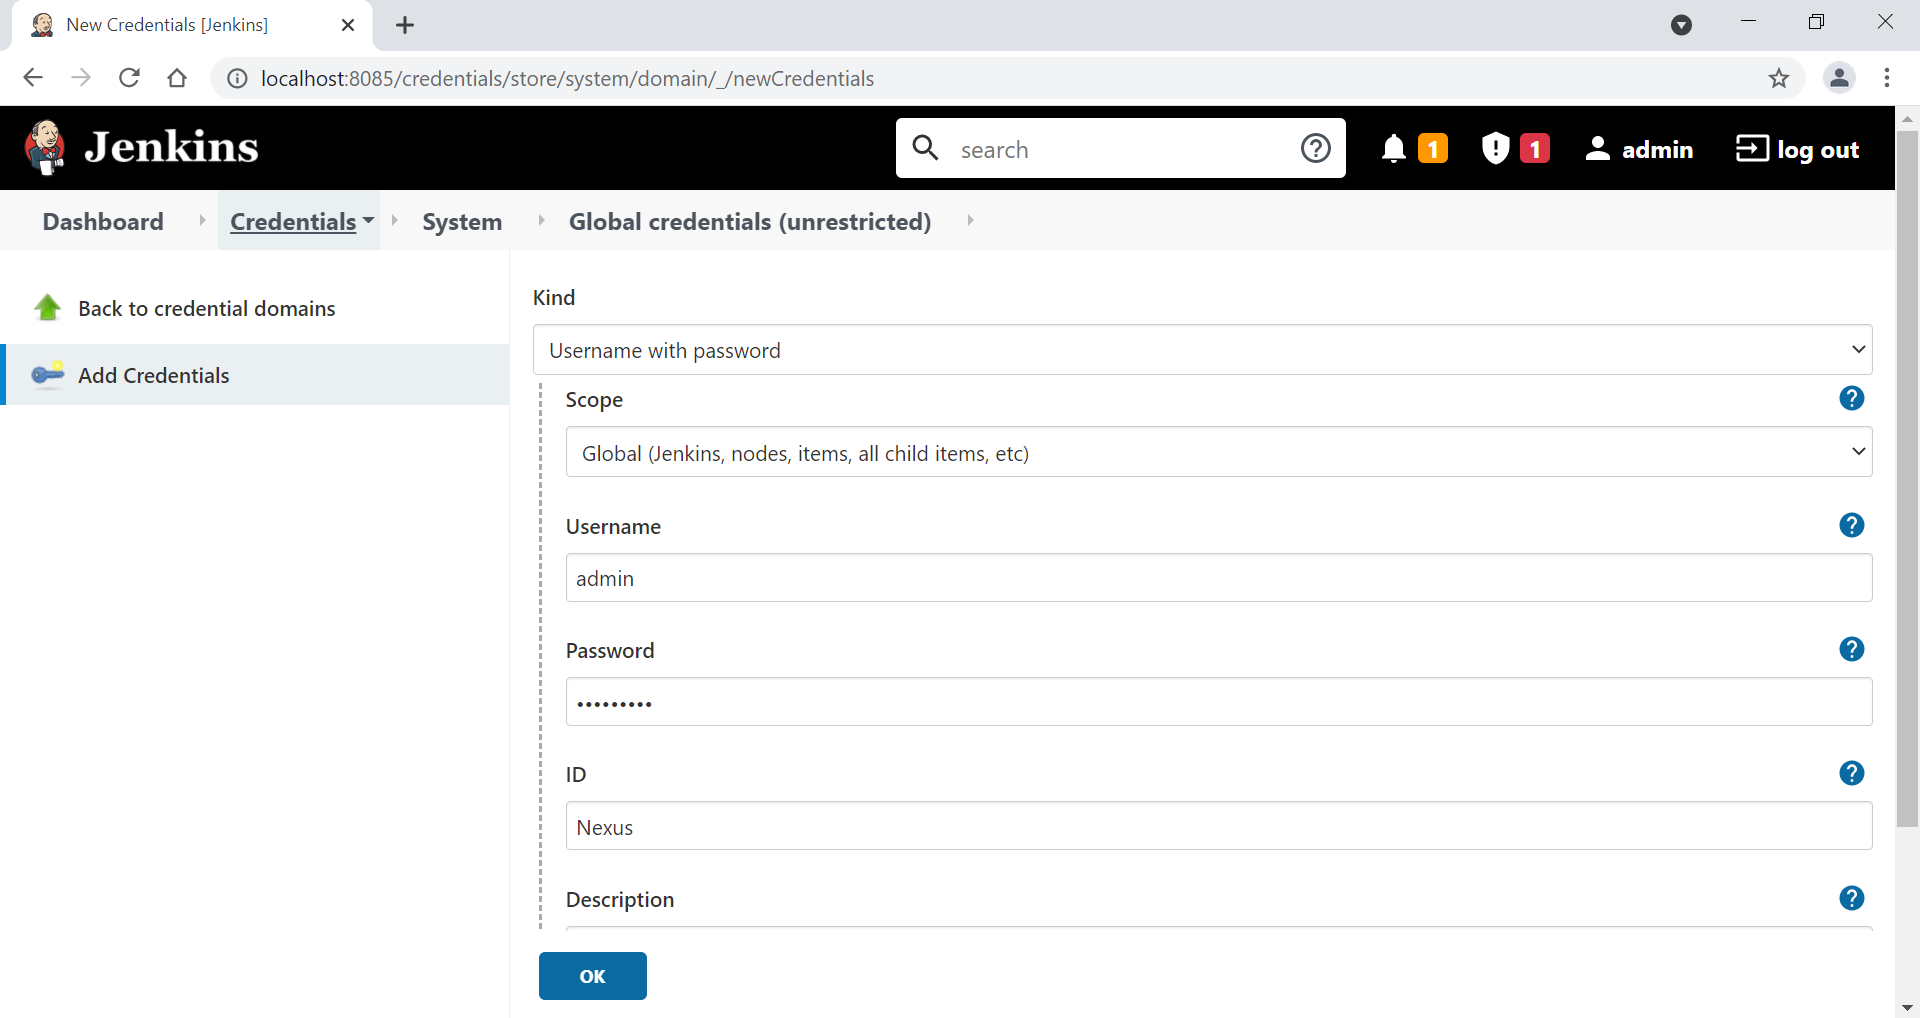
Now we are going to the same as with the SonarQube credentials but for Nexus. This time we will set the "Kind" as a "Username with password" type, just add your Nexus username and password, and add an ID to identify this credentials.
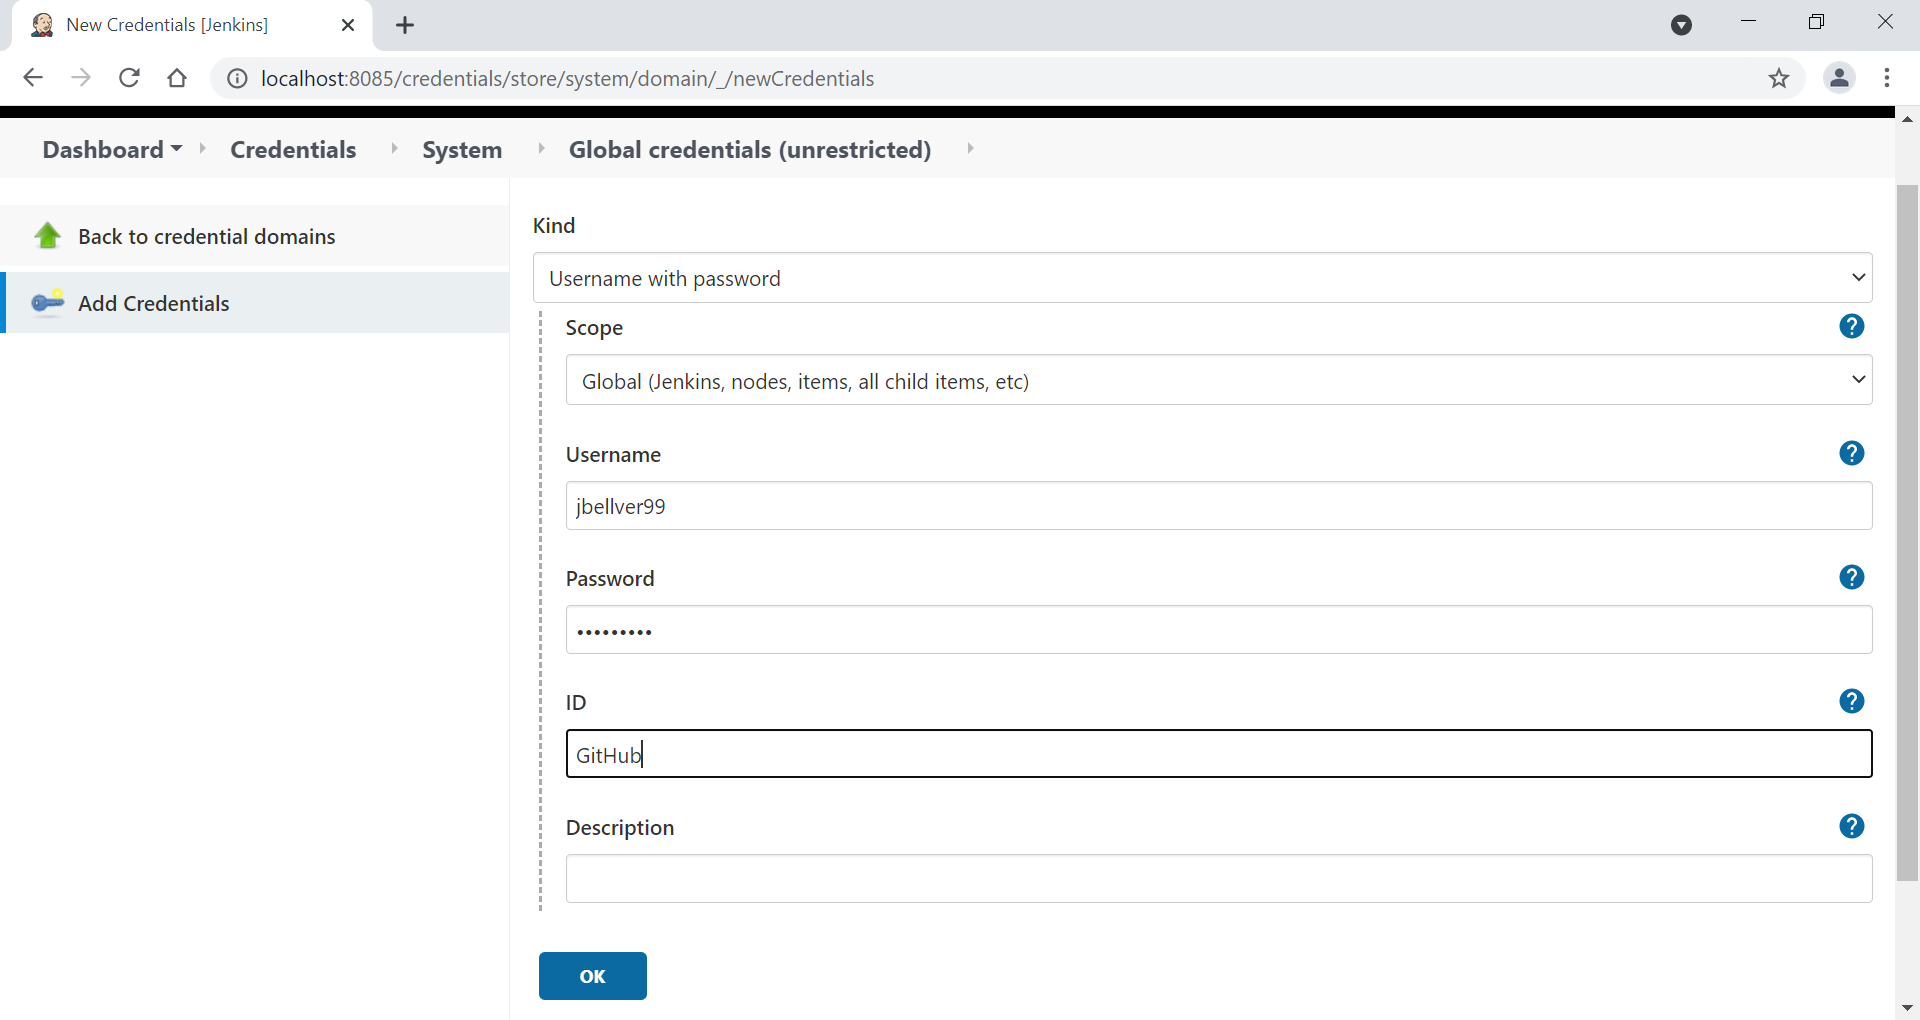
The last credentials that we need to add are the ones of our github account. We will add them to be able to clone the GitHub repository that we are going to work with. These credentials are also of the type "Username with password", just enter your username and password and set an ID.
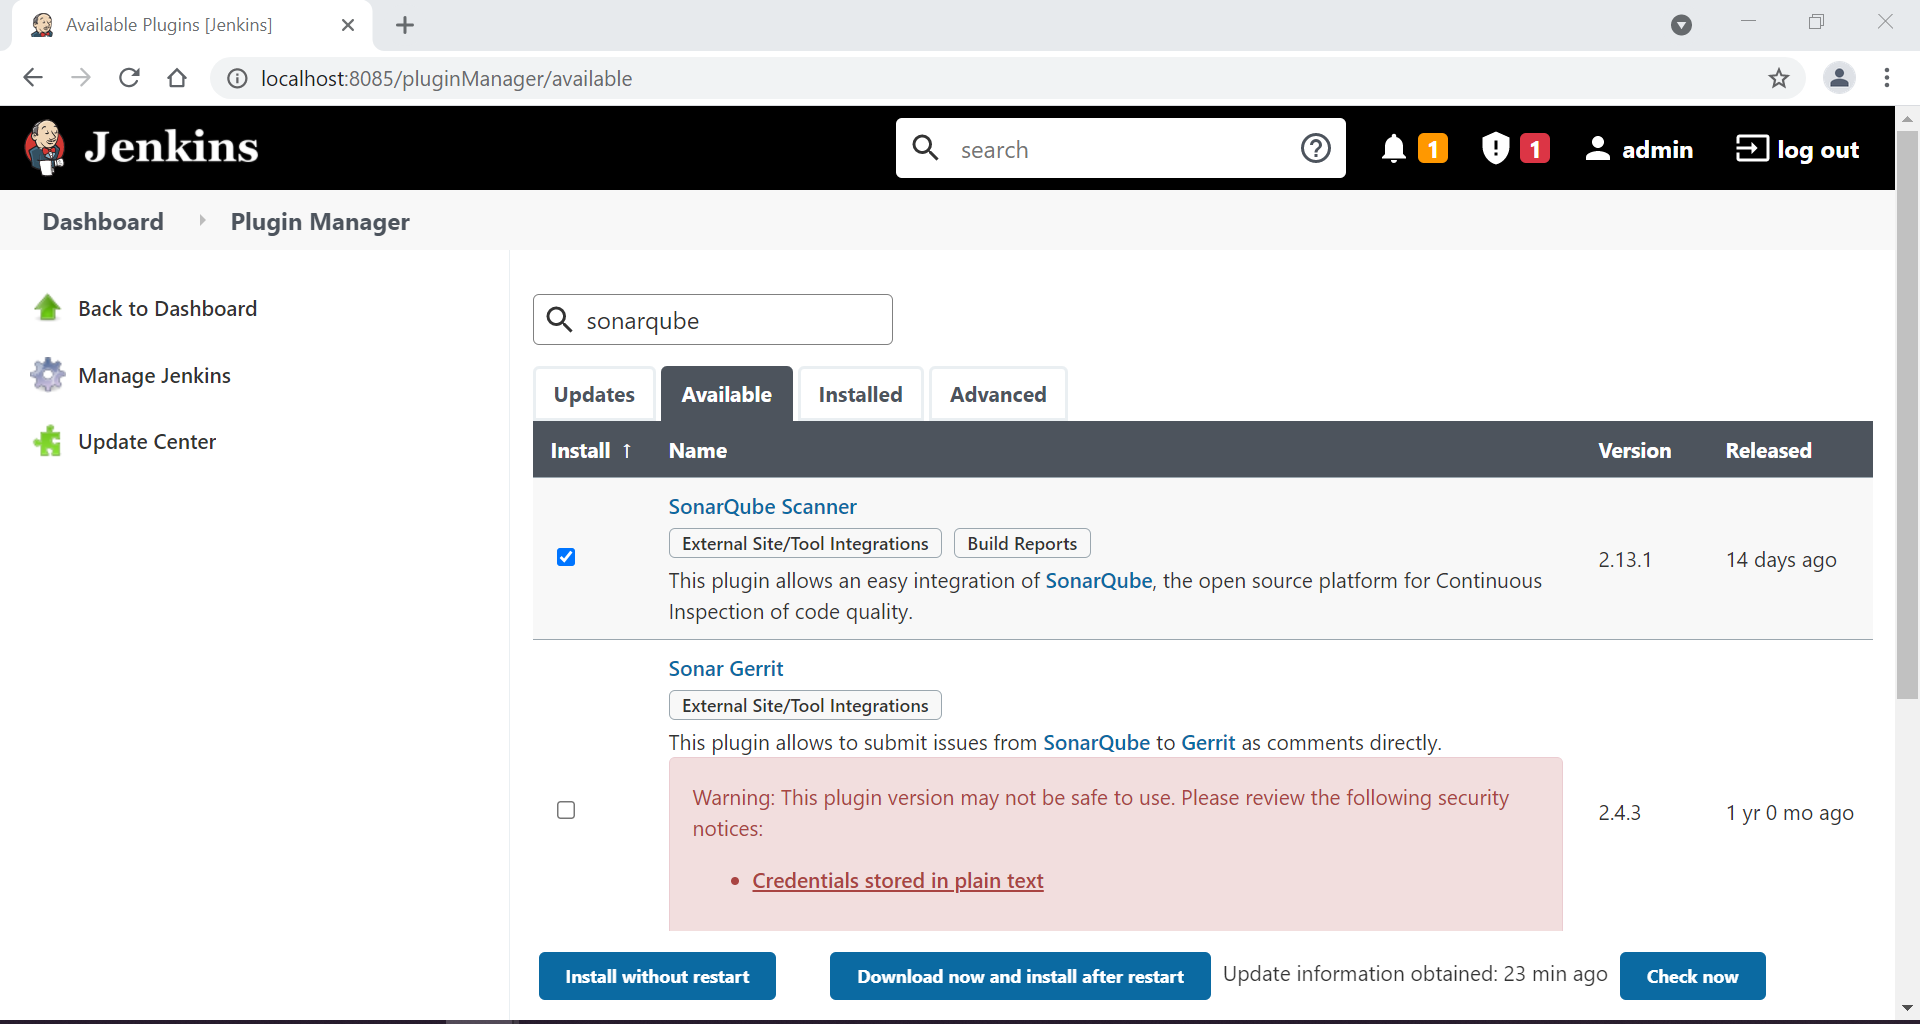
We are now going to add all the plugins that we need in order to execute correctly our pipeline. We will start by adding the SonarScanner plugin. Head into "Manage Jenkins" and into the "Manage Plugins" section. Under the available section search for "SonarQube" and check the "SonarQube Scanner" plugin, then click on the "Install without restart" button.
Once the installation has finished go into "Manage Jenkins" and "Configure System". Inside search for the "SonarQube servers" section, click on the "Add SonarQube" button and enter a name (which we will use for the pipeline), the Server URL and add the credentials that we created before.
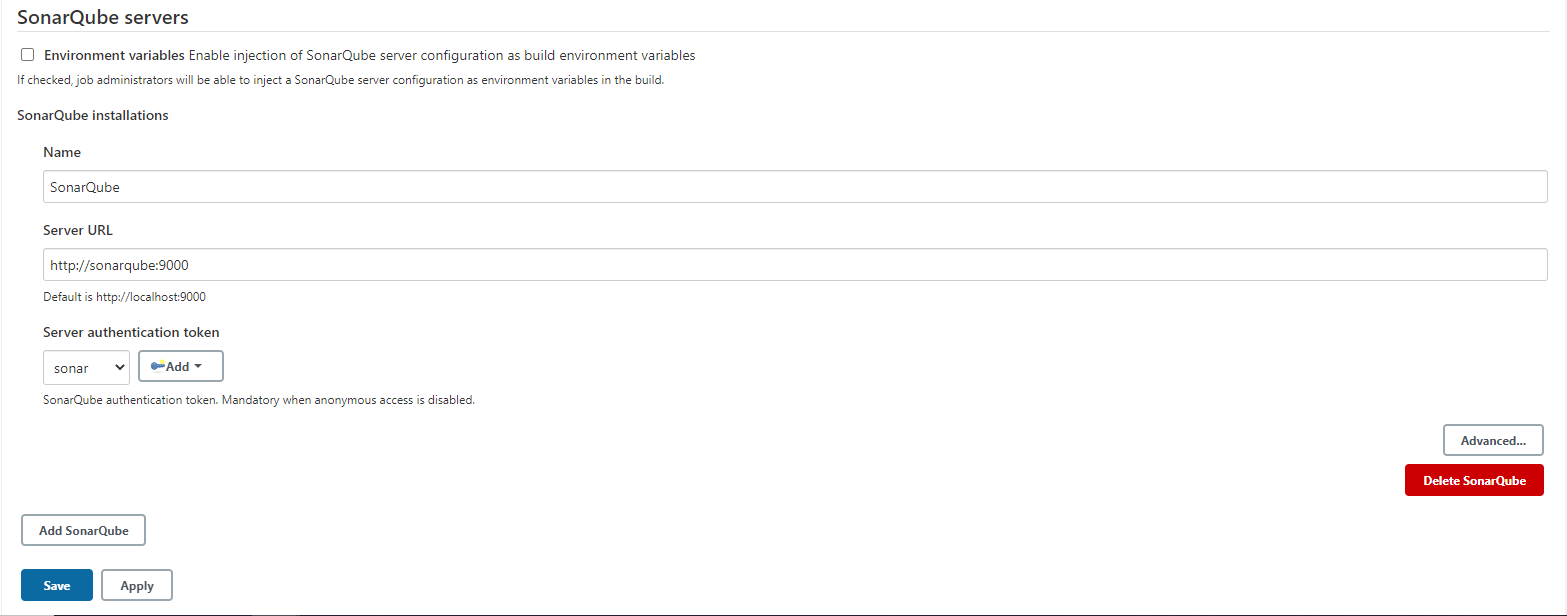
ℹ️ The Server URL is http://sonarqube:9000 because it is how we called our service in the docker-compose file. "SonarQube Scanner installations" and on "Add SonarQube Scanner", here we will just specify a name for the scanner and the version that we want.
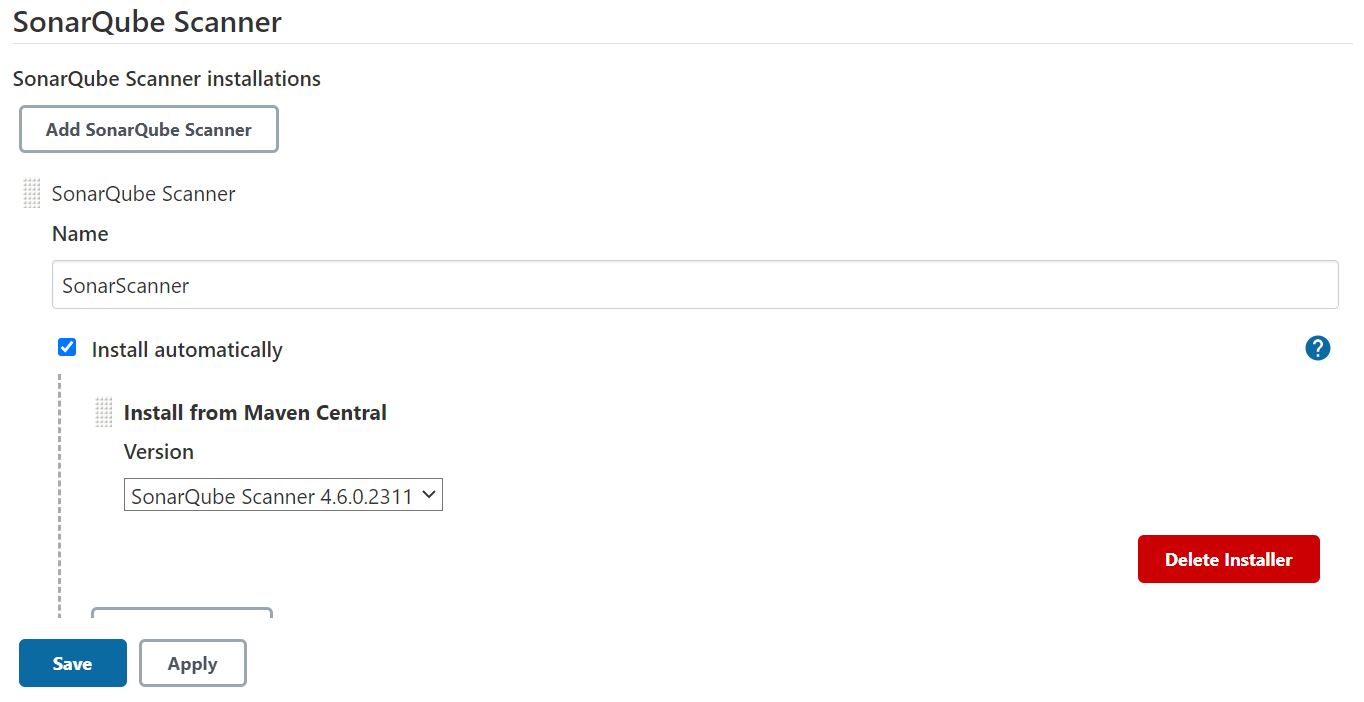
Now head into "Global tool Configuration" inside "Manage Jenkins" and search for the "SonarQube Scanner" section, click on
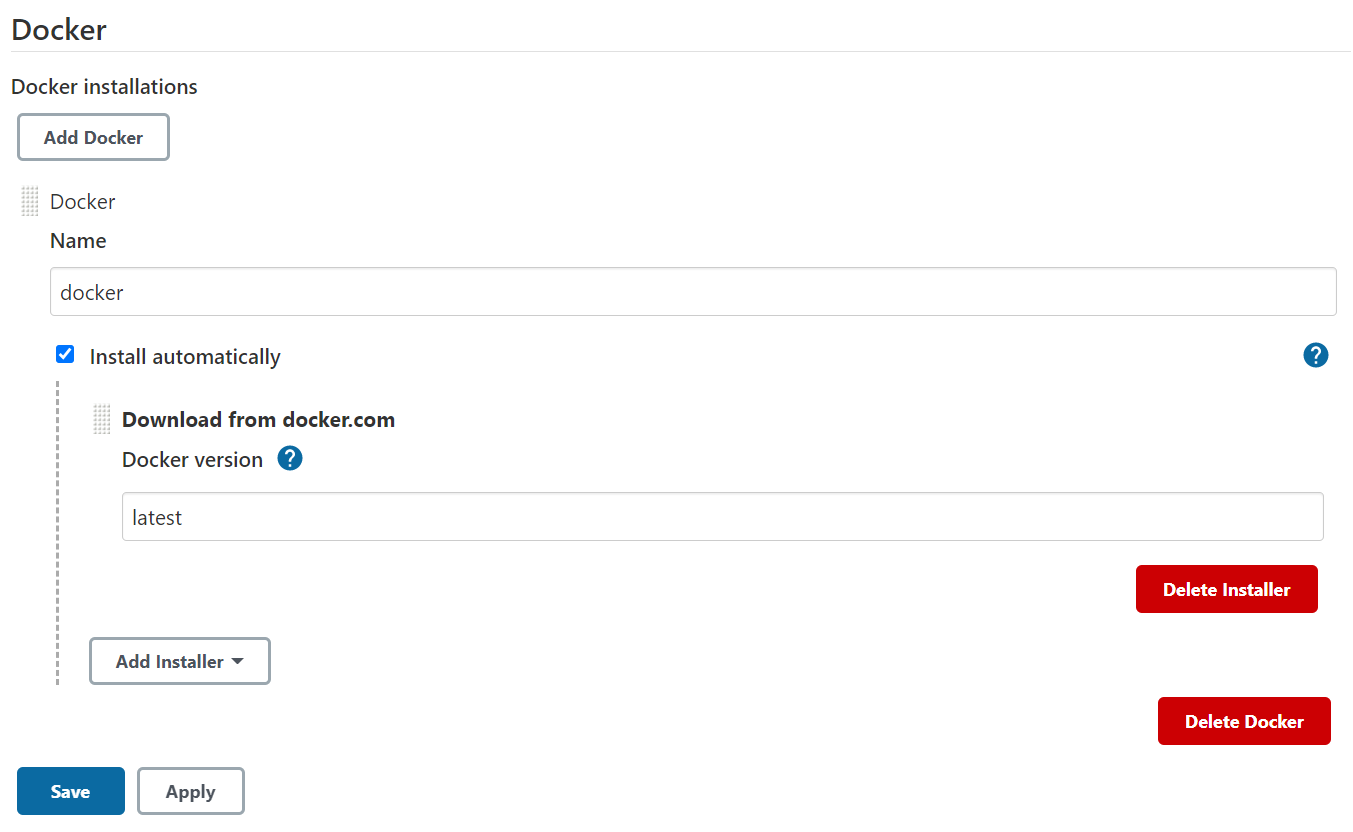
Lets continue with the rest of plugins, go again into the "Manage Plugins" section and search for docker. Install just like we did before the "Docker" plugin. Once the installation has finished, head into "Global Tool Configuration" inside "Manage Jenkins" and search for Docker. Here just click on "Docker installations..." and "Add Docker" button and set a name and specify that we want the latest Docker version.
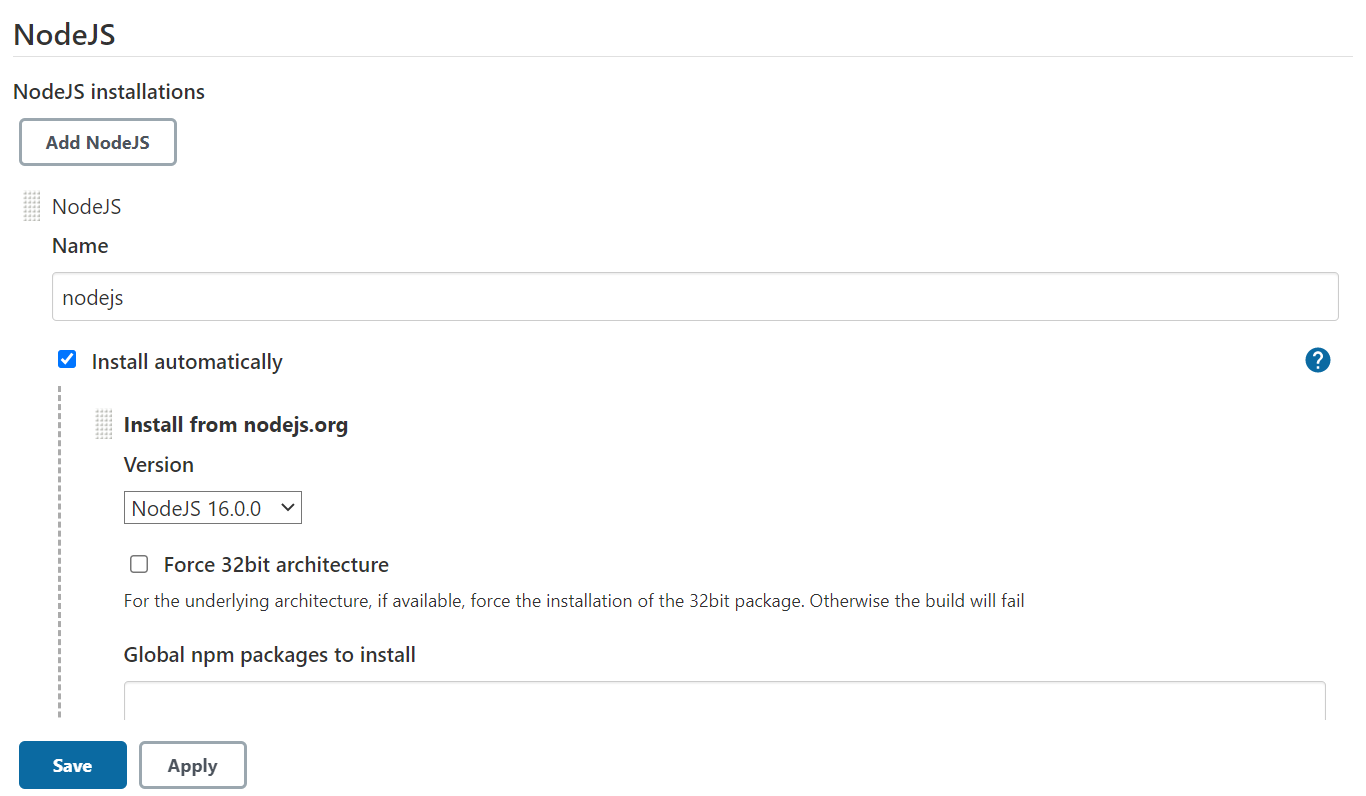
Our next plugin will be the NodeJS, in order to execute instructions related to our angular section. Inside "Manage Plugins" search for "NodeJS", just like we did before install the plugin and when it is finished go into the "Global Tool Configuration" section and search for the "NodeJS" section. Here click on "NodeJS installations..." and "Add NodeJS", just specify a name and the version that we will be using.
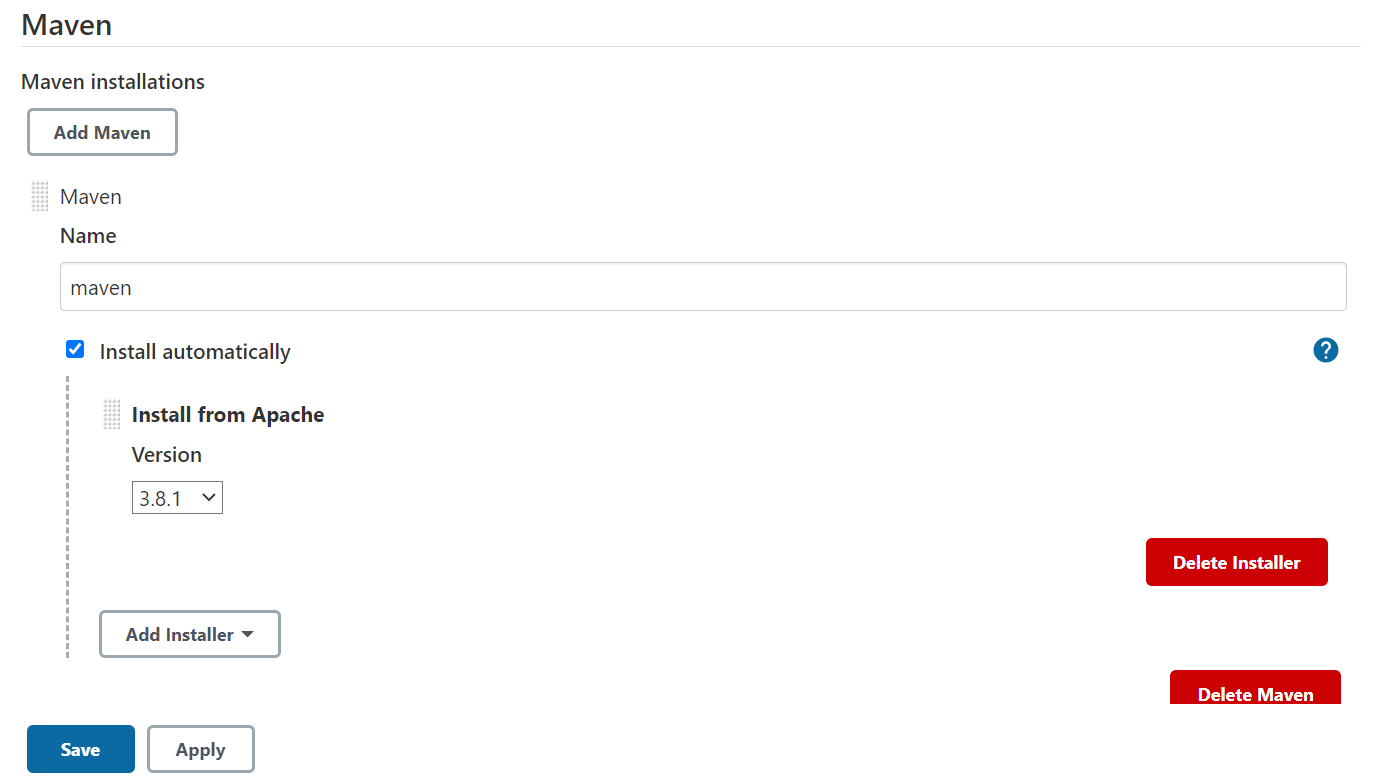
Now lets add our last plugin. Search for "Pipeline Maven Integration" and install the plugin just like with the others. Afterwards head into "Global Tool Configuration" and search for the "Maven" section, and like we did with other plugins just specify a name and the version that we want to use.
ℹ️ Note that we did not install a Nexus plugin, this is because we will be using docker instructions to push the images into our repository, but if what we wanted to add are just files we will need to add this plugin.
Now we have everything set up and ready to start with our pipelines, go into the next chapter to see how we create them.
Next Chapter: Jenkins Pipeline