Nexus
In this part we will talk about how to launch Nexus and create a repository which we will use in a future chapter.
Nexus Repository OSS is an open source repository that supports many artifact formats, including Docker, Java™, and npm. With the Nexus tool integration, pipelines in your toolchain can publish and retrieve versioned apps and their dependencies by using central repositories that are accessible from other environments.

We will be using Nexus to store the Docker images which we will create on a repository.
The Nexus container is also created on one of the services that we have on the docker-compose file which we did before, specifically:
nexus:
        image: sonatype/nexus3
        container_name: 'nexus'
        ports:
            - '8085:8081'
            - '8090:8082'
        networks:
            - cicd
        volumes:
            - /nexus-data:/nexus-data
we can see here that we are creating a container named "nexus" based on the image "sonatype/nexus", which is going to be exposed in the ports: 8085 and 8090 (the port 8090 will be explained afterwards, when making the Jenkins pipeline) and it is connected to the same network as our SonarQube service, to cicd.
As we already executed the order docker-compose up -d before and the nexus service was already in our docker-compose file we are able to access the Nexus repository page by entering http://localhost:8085 in our web browser.
As we access the Nexus repository page we can see in the top right corner a button saying "Sing In". If it is the first time entering Nexus the username will be: admin and the password can be find inside a folder of the our Nexus container files. To see this password first execute the order: docker container ls to know the containers ID, then type the following order with the corresponding container ID: docker exec -it "container ID" cat /nexus-data/admin.password.
Once you have entered you will be asked to change the password for future logins.
Now we are going to create a repository which we will use to store the Docker image that our Jenkins pipeline will create.
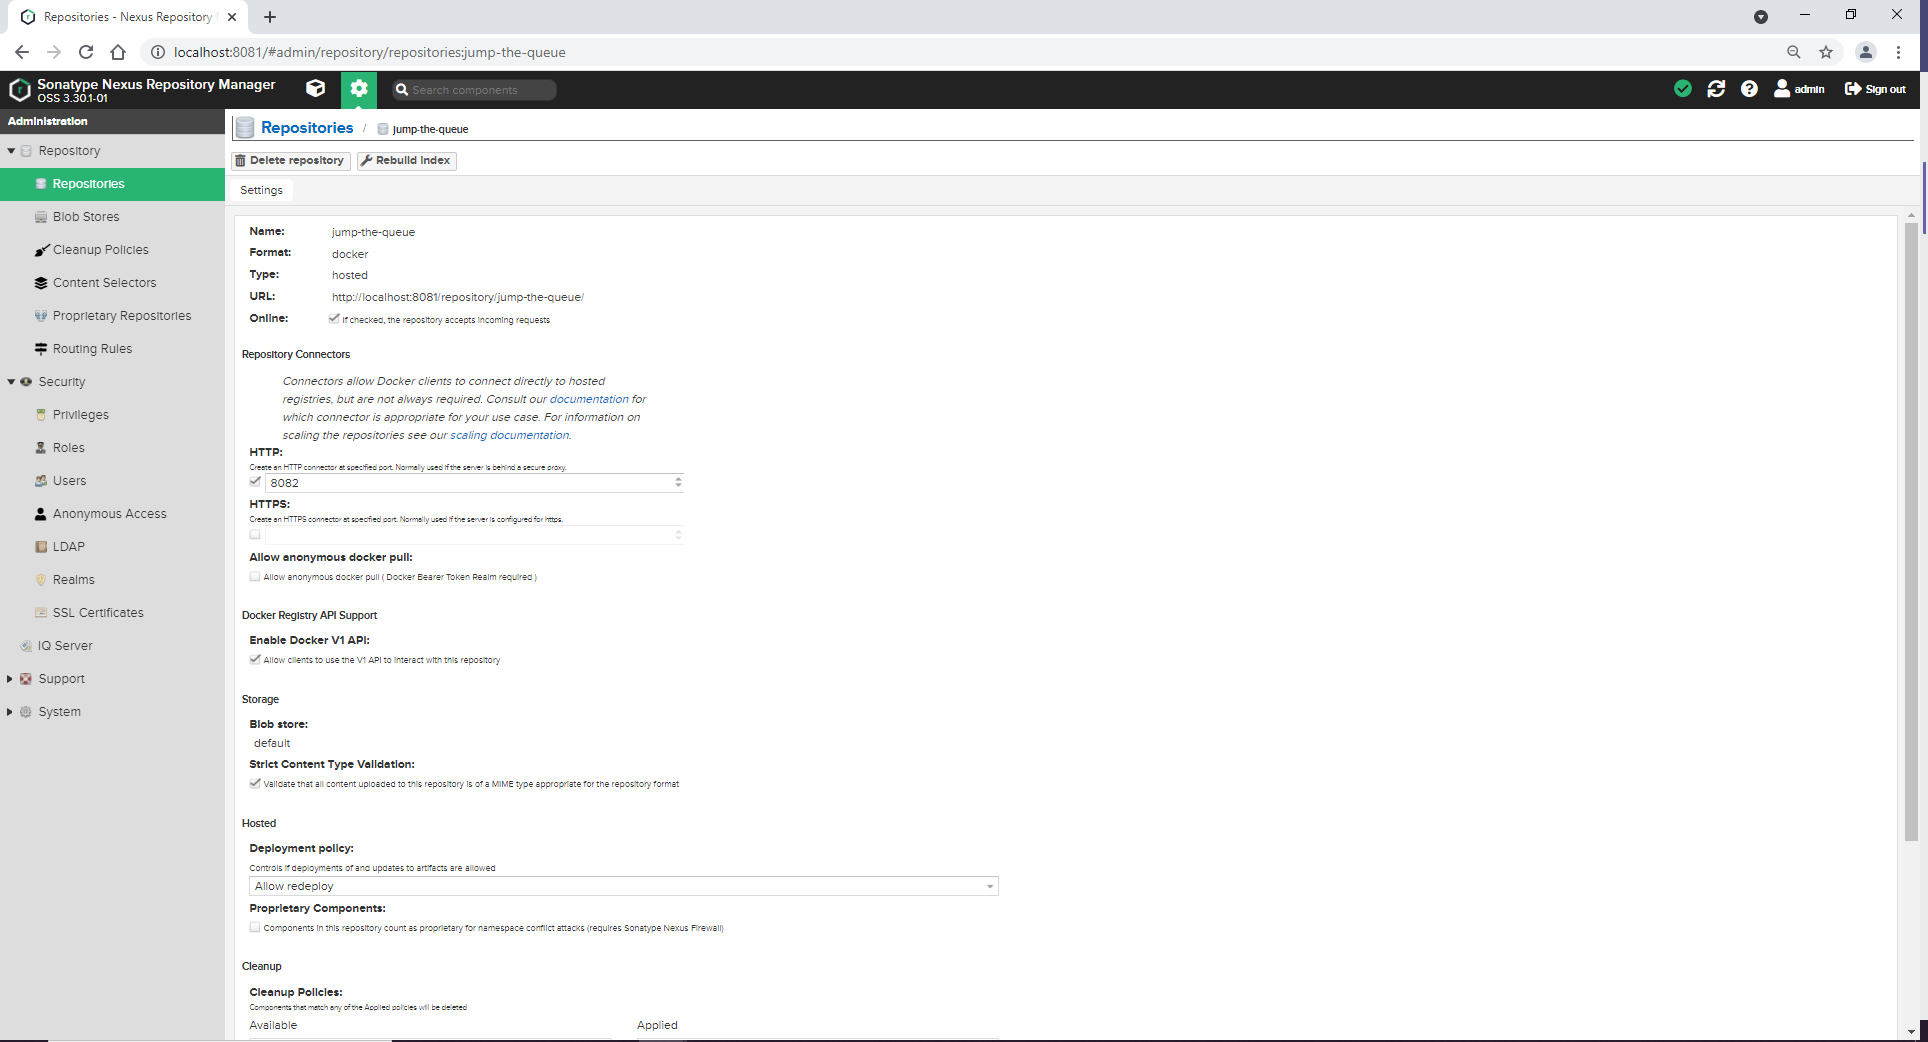
First head into the server and administrator tab in Nexus, then click on "Repositories" and in "Create repository". Select the type docker (hosted) (as we are going to store Docker images) and add the following information:
-
Name: jump-the-queue -
HTTP: Check the box and add the port 8082 -
Enable Docker V1 API: Check the box -
Deployment policy: Allow redeploy
Leave the rest as it is.
We are done for now, in the next chapter we will start our Jenkins configuration.
Next Chapter: Jenkins