Home
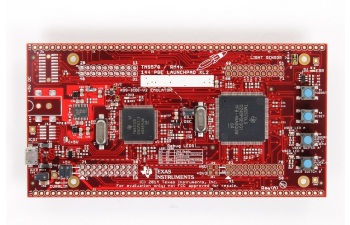
Team Phantom writes embedded C firmware on a TI Hercules microcontroller. We use a TMS570LS12, currently in the LAUNCHPADXL2 format. The launchpad can be seen below and here: LAUNCHXL2-TMS57012
Send a message to Jarod on slack if you don't have a launchpad
Start here to set up your dev environments, and compile code for the first time on the launchpad.
-
Project 0! This is how you first start up once you have your launchpad, and write your first blinky code.
-
If the above Project 0 link does not take you to a wiki, view the real archived version here.
- It will go through how to download Code Composer Studio and Halcogen. Halcogen generates the lower level drivers for us to use on the microcontroller. Make sure you download Code Composer Studio version 9.
- Also, in general, when using Halcogen, use 2k resolution at 100% display in case buttons/check box are not in place
-
When you've finished Project 0, browse through the TMS570 information below. Then move on to the Next Steps in Learning section to continue with more tutorials.
The following info can be found here: TI TMS570LS12 WIKI
Launchpad info:
-
Jumper settings - different jumpers will provide connections between different parts of the board
-
User Guide - good overview and intro to the launchpad, shows/describes the pinout of the pins on the board and other external peripherals (light sensor, regulators, connectors, etc..)
-
Schematics - useful when you need to see which pins map to what outputs
-
Board design and parts - if you are curious about the pcb design of the launchpad
Microcontroller info:
- Datasheet - explains overview of the MCU, footprint, pin count, pin mux/IO
- Technical Reference Manual - huge document, use as a reference when needed, has every single thing about the microcontroller
HET pins as GIO:
- Forum post - Although the TMS570 has two GPIO ports (A and B), only a few are exposed in our package (144LQFP). Turns out we can make use of the HET pins as general purpose I/O luckily.
Code Composer Studio:
- Download Code Composer Studio here.
HALCoGen (Hardware Abstraction Layer Code Generator):
- Download HALCoGen here.
Once you have set up your launchpad and mastered Project 0, you're ready for the next steps! Below you will find a series of videos on different peripherals of our microcontroller. You'll learn how to communicate using different serial protocols, how to read sensors using analog to digital converters, output pulse-width modulated waves and a lot more..
-
If you would like another quick overview of Creating a project and using Halcogen
-
Using the SCI for UART Communication - Check out this file to see the code more clearly
-
Using the 12-bit ADC for analog inputs - (hint: you may need to look in the schematics to find out what pin our ambient light sensor is)
-
MibSPI Overview - Multi-input buffered SPI, basically a faster version of SPI (for bonus points: figure out how many different SPI and MibSPI buses are on our microcontroller - TMS570LS1224/1227)
-
CAN Communication - This is vital to be able to communicate in the automotive industry (can be a bit tricky, might be helpful to take a look at the examples folder as well)
After becoming comfortable with some of the peripherals on the TMS570, you're ready to enter the world of real time operating systems! Follow the links below to learn more about how freeRTOS works and the details behind its operation. It's highly encouraged to create your own mini projects that build upon these fundamentals.
-
What is freeRTOS? - Intro to the functions and basics of freeRTOS. Read through the document and watch the Youtube videos linked inside.
-
freeRTOS Blinky LEDs with 2 Tasks - Create two tasks, each one to blink an LED at a different frequency.
-
freeRTOS Intro & VCU Initial Code - Elvis' presentation on a high level intro to freeRTOS. Also explains the two main tasks in the initial VCU code.
-
freeRTOS Project 0 - Setting up freeRTOS in Halcogen with the TMS570. Creates two tasks and sends data between them with a queue.
-
freeRTOS Notes from Soroush - Read these reports, they explain a lot about freeRTOS!
NOTE: If using a Launchpad or VCU REV0, make sure to select TMS570LS1224PGE_FREERTOS in Halcogen. If using a VCU REV1 or above, the MCU is a TMS570LS1227PGE which does NOT have a freeRTOS version in Halcogen. This document needs to be followed to create the right Halcogen setup.